SpringBoot01—入门篇
SpringBoot(1)-入门
第一篇---依赖篇
一、SpringBoot项目创建时候选择:
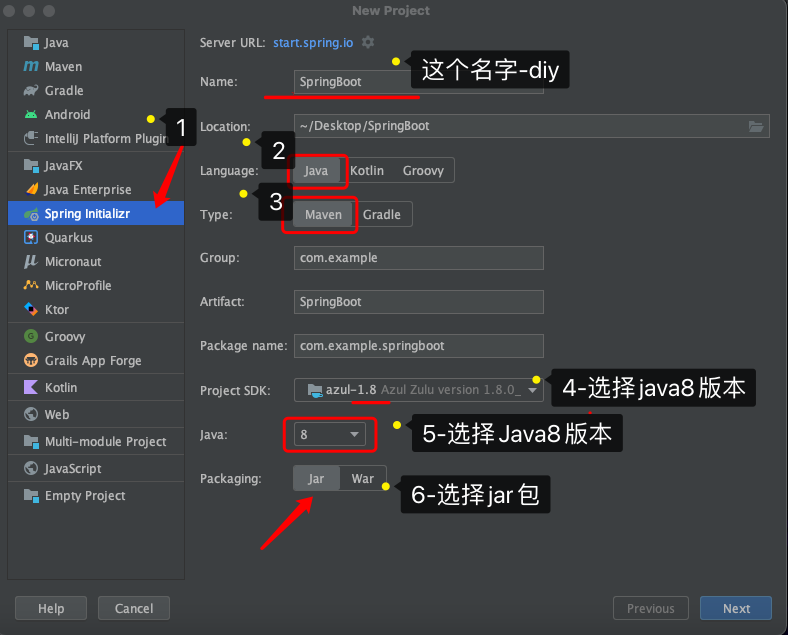
Next后
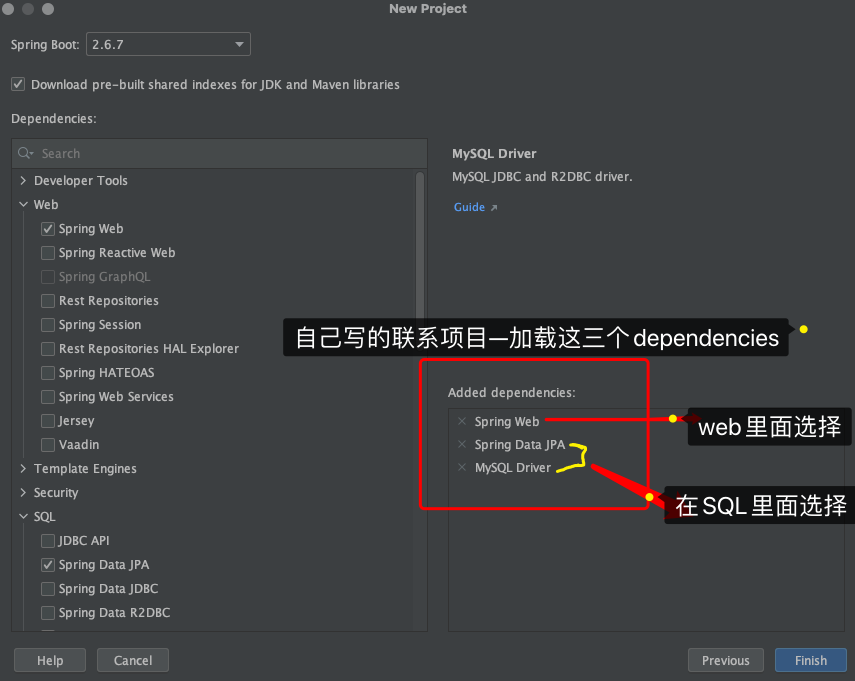
Finish后项目就创建好了-->注意:创建这些前提是已经下载好Maven,如果还没下载Maven可以先看我的Maven解析
二、下载依赖--在SpringBoot中,只要配置1.pom.xml文件和2.applicat.properties
1.pom.xml配置:可以直接选择复制我的,这里面都配置好了
主要配置内容:
<?xml version="1.0" encoding="UTF-8"?>
<project xmlns="http://maven.apache.org/POM/4.0.0" xmlns:xsi="http://www.w3.org/2001/XMLSchema-instance"
         xsi:schemaLocation="http://maven.apache.org/POM/4.0.0 https://maven.apache.org/xsd/maven-4.0.0.xsd">
    <modelVersion>4.0.0</modelVersion>
    <parent>
        <groupId>org.springframework.boot</groupId>
        <artifactId>spring-boot-starter-parent</artifactId>
        <version>2.6.7</version>
        <relativePath/> <!-- lookup parent from repository -->
    </parent>
    <groupId>com.example</groupId>
    <artifactId>SpringBootProtect</artifactId>
    <version>0.0.1-SNAPSHOT</version>
    <name>SpringBootProtect</name>
    <description>SpringBootProtect</description>
    <properties>
        <java.version>1.8</java.version>
    </properties>
    <dependencies>
        <dependency>
            <groupId>org.springframework.boot</groupId>
            <artifactId>spring-boot-starter-data-jpa</artifactId>
        </dependency>
        <dependency>
            <groupId>org.springframework.boot</groupId>
            <artifactId>spring-boot-starter-web</artifactId>
        </dependency>

        <dependency>
            <groupId>mysql</groupId>
            <artifactId>mysql-connector-java</artifactId>
            <scope>runtime</scope>
        </dependency>
        <dependency>
            <groupId>org.springframework.boot</groupId>
            <artifactId>spring-boot-starter-test</artifactId>
            <scope>test</scope>
        </dependency>
    </dependencies>

    <build>
        <plugins>
            <plugin>
                <groupId>org.springframework.boot</groupId>
                <artifactId>spring-boot-maven-plugin</artifactId>
            </plugin>
        </plugins>
    </build>

</project>
2.applicat.properties配置
(着里看自己,只要配置好pom.xml就可以直接启动了)
三、入门案例
1.先给大家看一下目录配置:
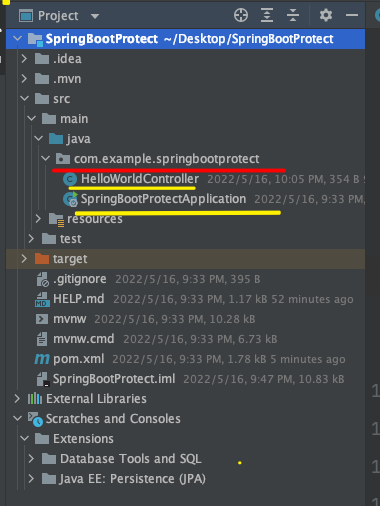
目录结构:main---
java---
con.example.springbootprotect--->
HelloWorld(文件)\SpringBootProtectApplication(文件)
解释:1.SpringBootProtectApplication(只要执行时候点,就可以---
代码在下面)
2.HelloWorld(主要内容--这里我就用简单的HelloWorld入门演示--代码在下面)
1.SpringBootProtectApplication---代码
package com.example.springbootprotect;

import org.springframework.boot.SpringApplication;
import org.springframework.boot.autoconfigure.SpringBootApplication;

@SpringBootApplication
public class SpringBootProtectApplication {

    public static void main(String[] args) {
        SpringApplication.run(SpringBootProtectApplication.class, args);
    }

}2.HelloWorld---代码
package com.example.springbootprotect;

import org.springframework.web.bind.annotation.RequestMapping;
import org.springframework.web.bind.annotation.RestController;

//这个是一个controller
@RestController
public class HelloWorldController {
    @RequestMapping("/hello")
    public String Hello(){
        return "HelloWorld--SpringBoot";
    }
}
3.在-->1.SpringBootProtectApplication中运行就可以了
入门告一段落了,后续会更新很多SpringBoot分享,GitHub后也会分享出来


 浙公网安备 33010602011771号