Cesium案例解析(六)——3DTilesInspector监视器
1. 概述
3D Tiles作为传输和渲染大规模3D地理空间数据的格式,应对的都是大规模数据的场景,Cesium提供了一个监视3D Tiles数据的监视器,可以通过这个监视器观察3D Tiles数据的效果。
2. 案例
HTML页面3DTilesInspector.html代码如下:
<!DOCTYPE html>
<html lang="en">

<head>
    <meta charset="utf-8">
    <meta http-equiv="X-UA-Compatible" content="IE=edge">
    <meta name="viewport"
        content="width=device-width, initial-scale=1, maximum-scale=1, minimum-scale=1, user-scalable=no">
    <meta name="description" content="Use the 3D Tiles inspector as a debugging tool for different tilesets.">
    <meta name="cesium-sandcastle-labels" content="Beginner, Tutorials, Showcases">
    <title>Cesium Demo</title>
    <script type="text/javascript" src="../Build/Cesium/Cesium.js"></script>
    <style>
        @import url(../Build/Cesium/Widgets/widgets.css);

        html,
        body {
            width: 100%;
            height: 100%;
            margin: 0;
            padding: 0;
            overflow: hidden;
            font-family: sans-serif;
            background: #000;
        }

        .fullSize {
            display: block;
            position: absolute;
            top: 0;
            left: 0;
            border: none;
            width: 100%;
            height: 100%;
        }
    </style>
</head>

<body>
    <div id="cesiumContainer" class="fullSize"></div>
    <script src="3DTilesInspector.js"></script>
</body>

</html>
主要的javascript代码3DTilesInspector.js如下:
'use strict';

var viewer = new Cesium.Viewer('cesiumContainer', {
    terrainProvider: Cesium.createWorldTerrain()
});

viewer.scene.globe.depthTestAgainstTerrain = true;

viewer.extend(Cesium.viewerCesium3DTilesInspectorMixin);
var inspectorViewModel = viewer.cesium3DTilesInspector.viewModel;

var tileset = new Cesium.Cesium3DTileset({
    url: "../dayanta/tileset.json"
});
viewer.scene.primitives.add(tileset);

tileset.readyPromise.then(function () {
    viewer.zoomTo(tileset);
});
可以看到添加3DTiles监视器的代码比较简单,将Cesium.viewerCesium3DTilesInspectorMixin对象传入拓展函数viewer.extend()即可。最终显示的效果如下:
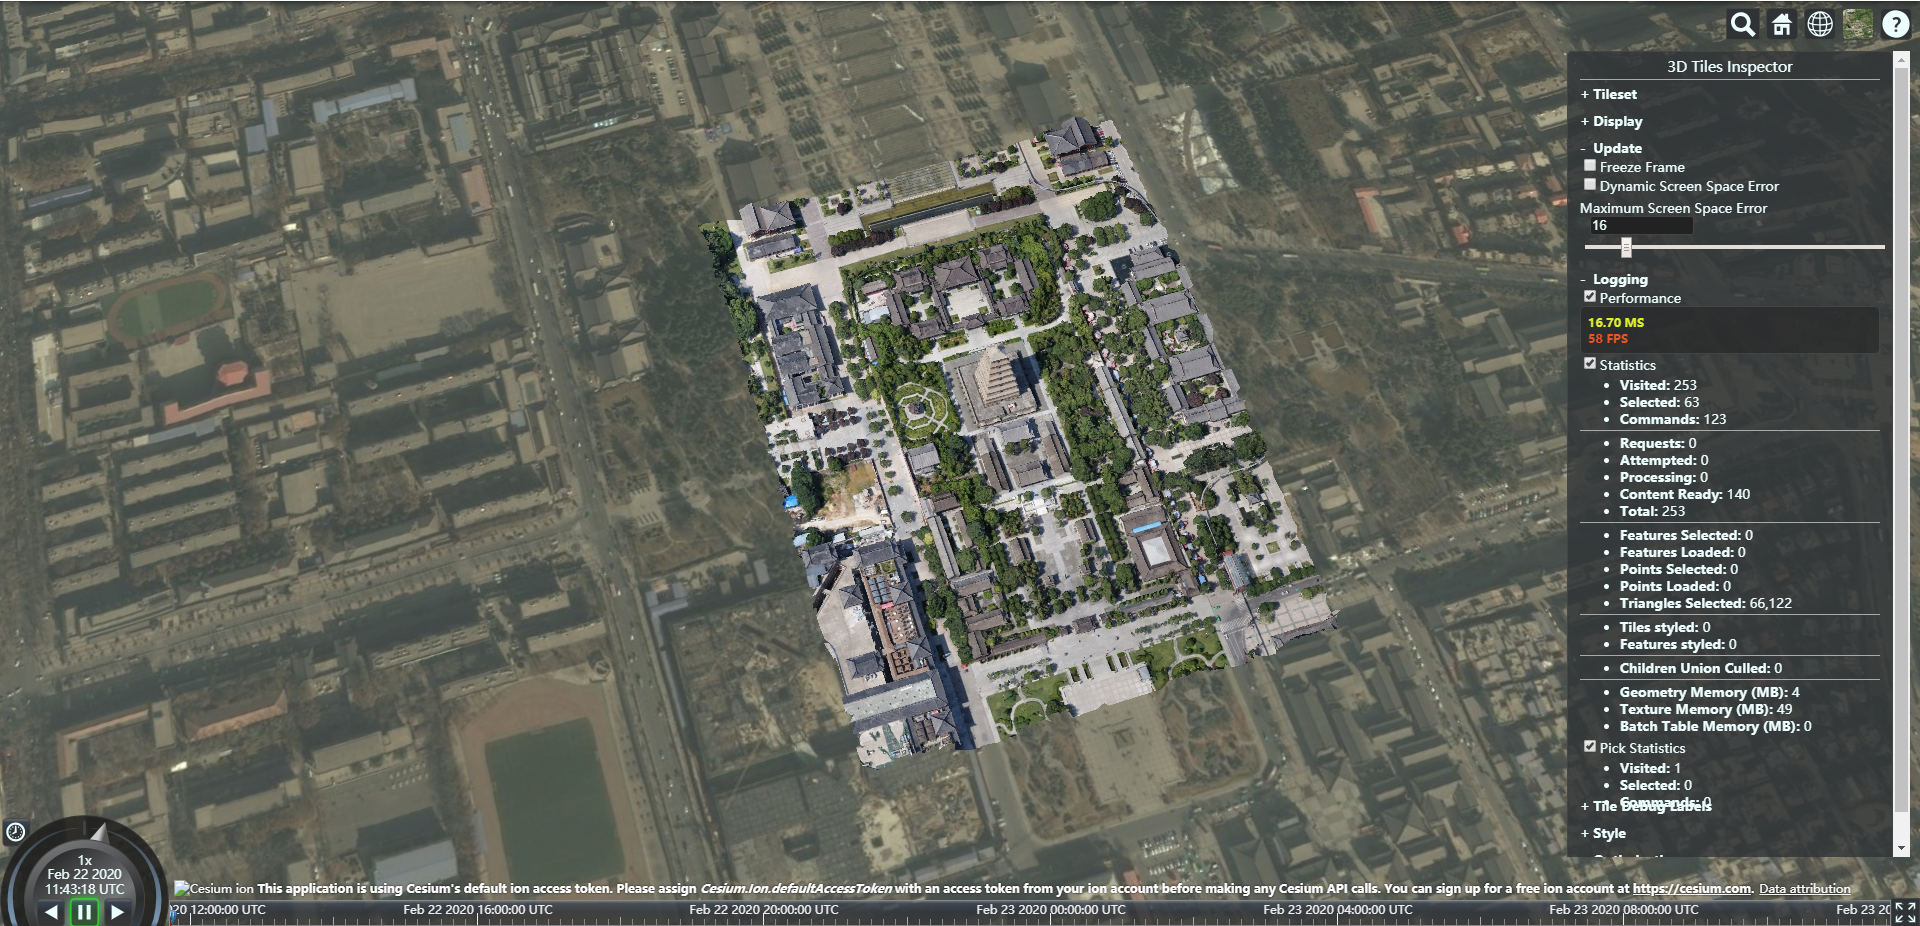
可以看到右边出现了一个3D Tiles Inspector窗体,里面包含了与3D Tiles格式相关的状态参数:
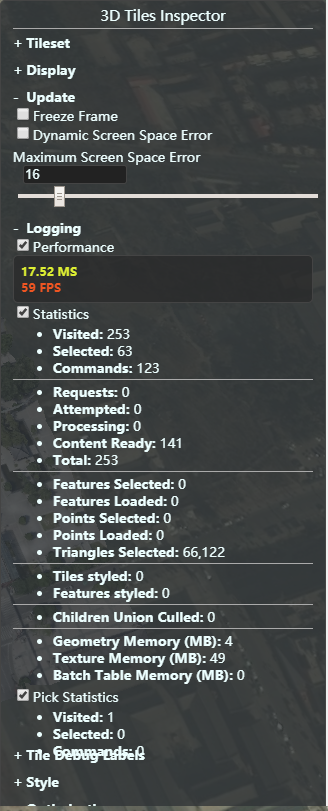
其中勾选Performance,就可以显示当前的具体帧数;Screen Space Error也是个很重要的参数,决定了当前模型细分的层级。参数设置的越小,细分的层度就会越高,相应的也会耗费更多的性能。

 浙公网安备 33010602011771号