第一个SpringBoot程序、案例、Demo
本文章不介绍如何在Eclipse中安装SpringBoot,只介绍如何创建第一个SpringBoot项目,以及添加JSP依赖,并且测试通过
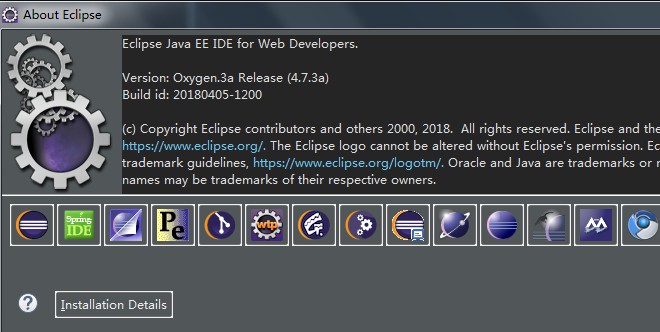
本文使用的Eclipse版本
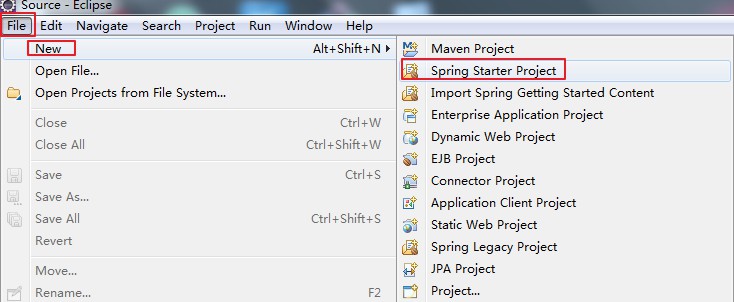
1. 创建SpringBoot项目
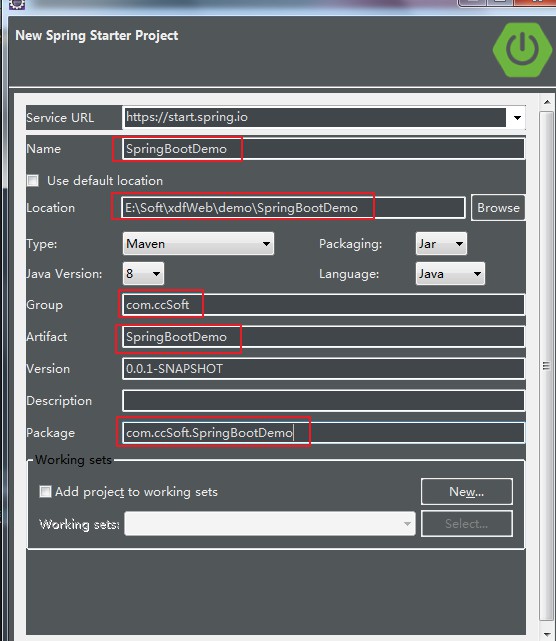
2. SpringBoot项目的命名
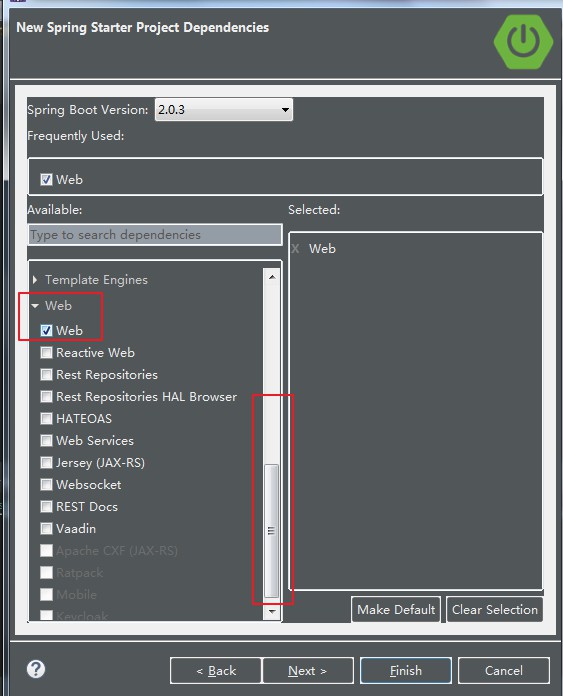
3. 设置项目为WEB项目
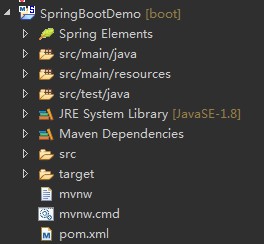
4. 成功创建SpringBoot项目后的目录:
-----------------------------------------------------------------------------------------------
下面介绍添加JSP依赖以及测试过程
1. 在pom.xml中添加JSP依赖

 1 <!-- 下面都是JSP依赖 start -->
 2 <!-- Spring Boot 内嵌的tomcat对jsp的解析包 -->
 3 <dependency>
 4     <groupId>org.apache.tomcat.embed</groupId>
 5     <artifactId>tomcat-embed-jasper</artifactId>
 6 </dependency>
 7
 8 <!-- Servlet 依赖的jar包 -->
 9 <dependency>
10     <groupId>javax.servlet</groupId>
11     <artifactId>javax.servlet-api</artifactId>
12 </dependency>
13
14 <!-- jsp依赖jar包 -->
15 <dependency>
16     <groupId>javax.servlet.jsp</groupId>
17     <artifactId>javax.servlet.jsp-api</artifactId>
18     <version>2.3.1</version>
19 </dependency>
20
21 <!-- jstl 依赖的jar包 -->
22 <dependency>
23     <groupId>javax.servlet</groupId>
24     <artifactId>jstl</artifactId>
25 </dependency>
26 <!-- 下面都是JSP依赖 end -->
2. 创建控制器,控制器所在的包必须和项目自动创建的XxxApplication.java同目录,或者下级目录
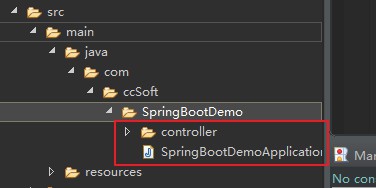
如上图,即将创建的Hello.java控制器放在controller,而controller与SpringBootDemoApplication.java同目录
SpringBootDemo是我的项目名称
3. 制作Hello控制器:代码如下

 1 package com.ccSoft.SpringBootDemo.controller;
 2
 3 import org.springframework.stereotype.Controller;
 4 import org.springframework.web.bind.annotation.RequestMapping;
 5
 6 @Controller
 7 public class Hello {
 8     @RequestMapping("/hello")
 9     public String toHello() {
10         return "hello";
11     }
12 }
4. SpringBoot项目需要手动创建webapp文件夹
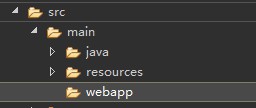
webapp目录要在:src/main下面,保证和java、resources同级别
5. 在webapp下面创建jsp文件:

 1 <%@ page language="java" contentType="text/html; charset=UTF-8"
 2     pageEncoding="UTF-8"%>
 3 <!DOCTYPE html PUBLIC "-//W3C//DTD HTML 4.01 Transitional//EN" "http://www.w3.org/TR/html4/loose.dtd">
 4 <html>
 5 <head>
 6 <meta http-equiv="Content-Type" content="text/html; charset=UTF-8">
 7 <title>Insert title here</title>
 8 </head>
 9 <body>
10     this is your first SpringBoot !
11 </body>
12 </html>
6. 在SpringBoot项目的核心配置文件:application.properties中配置服务器端口号以及解析JSP的前后缀
该文件在src/main/resources下,设置的参数为:
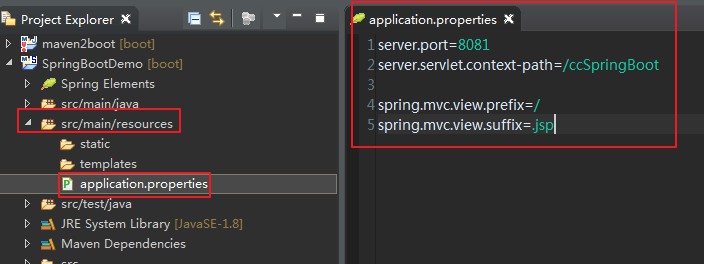
那么在浏览器中访问为:
localhost:8081/ccSpringBoot/hello
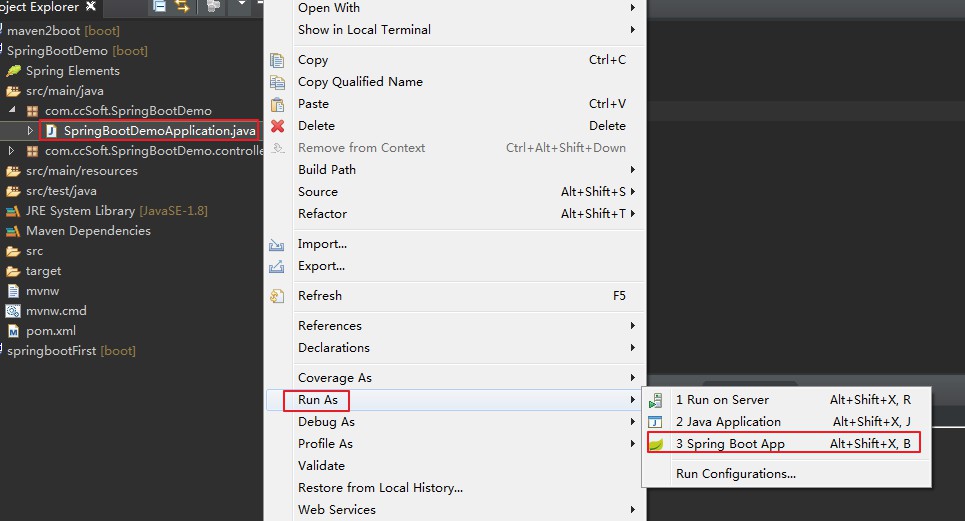
7. 启动项目:按照下图在入口类上右键启动SpringBoot项目
8. 启动成功的标志

看到上面的8081 和项目名称就可以到浏览器中测试了。
9. 测试成功

本文章是边做项目边写的,测试通过,放心使用


