ReactiveCocoa 指导2
前言
书接上文,这是第二篇,今天开始逐步翻译,先转帖在下面。这次翻译的原则,是不准备全文都翻译,内容较简单的整体含义翻译,核心细节,再逐字翻译。
原帖地址:https://www.raywenderlich.com/2490-reactivecocoa-tutorial-the-definitive-introduction-part-2-2。
(2018年12月26日,最近事情有点多,没有时间做这个,估计要在一月初继续了)
正文
ReactiveCocoa is a framework that allows you to use Functional Reactive Programming (FRP) techniques within your iOS applications. With the first installment of this two-part ReactiveCocoa tutorial series you learned how to replace standard actions and event handling logic with signals that emit streams of events. You also learned how to transform, split and combine these signals.
In this, the second part of the series, you’re going to learn about the more advanced features of ReactiveCocoa. Including:
- The two other event types: error and completed
- Throttling
- Threading
- Continuations
- …and more!
It’s time to dive in!
这第二部分要讲讲一些高级的内容,包括
- 两种事件类型:error and completed
- 节流
- 线程
- Continuations(不知道怎么翻译)
- …and more!
Twitter Instant
Twitter 实例
The application you’re going to develop throughout this tutorial is called Twitter Instant (modeled on the Google Instant concept), a Twitter search application that updates search results in real-time as you type.
The starter project for this application includes the basic user interface and some of the more mundane code you’ll need to get you started. As with part 1, you’ll need to use CocoaPods to obtain the ReactiveCocoa framework and integrate it with your project. The starter project already includes the necessary Podfile, so open up a terminal window and execute the following command:
从上面链接处(starter project )下载代码,然后执行下面的pod安装。
pod installIf it executes correctly, you should see output similar to the following:
Analyzing dependencies
Downloading dependencies
Using ReactiveCocoa (2.1.8)
Generating Pods project
Integrating client project
This should have generated a Xcode workspace, TwitterInstant.xcworkspace. Open this up in Xcode and confirm that it contains two projects:
- TwitterInstant: which is where your application logic will live
- Pods: which is where the external dependencies reside. Currently it just contains ReactiveCocoa
Build and run. The following interface will greet you: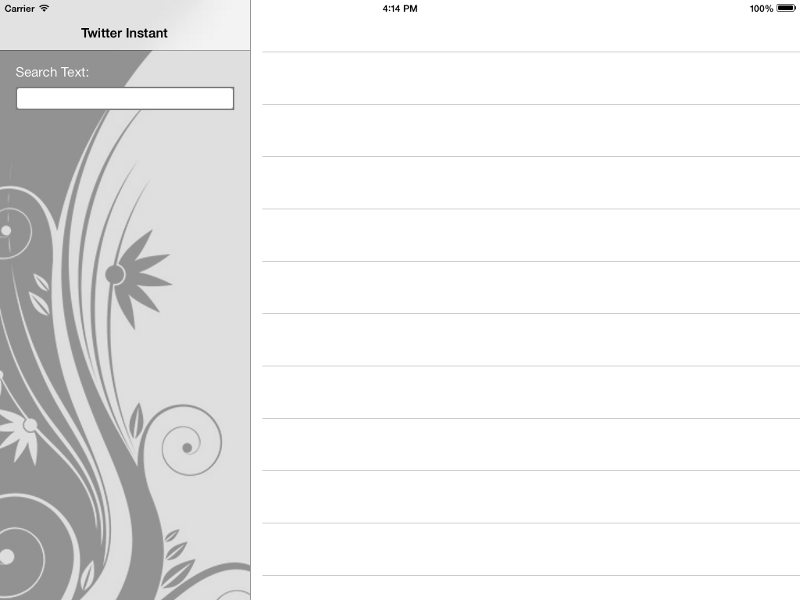
运行起来,大概是上图这个样子。
Take a moment to familiarize yourself with the application code. It is a very simple split view controller-based app. The left-hand panel is the RWSearchFormViewController, which has a few UI controls added via the storyboard, and the search text field connected to an outlet. The right-hand panel is the RWSearchResultsViewController, which is a currently just a UITableViewController subclass.
If you open up RWSearchFormViewController.m you can see the viewDidLoadmethod locates the results view controller and assigns it to the resultsViewController private property. The majority of your application logic is going to live within RWSearchFormViewController, and this property will supply search results to RWSearchResultsViewController.
可以花一点时间去熟悉一下这个代码,它其实非常简单。
Validating the Search Text
The first thing you’re going to do is validate the search text to ensure it’s length is greater than two characters. This should be a pleasant refresher if you completed part 1 of this series.
Within RWSearchFormViewController.m add the following method just below viewDidLoad:
- (BOOL)isValidSearchText:(NSString *)text {
  return text.length > 2;
}
This simply ensures the supplied search string is longer than two characters. With such simple logic you might be asking “Why is this a separate method in the project file?”
The current logic is simple. But what if it needed to be more complex in future? With the above example, you would only make changes in one place. Furthermore, the above makes your code more expressive and it indicates why you’re checking the length of the string. We all follow good coding practices, right?
At the top of the same file, import ReactiveCocoa:
#import <ReactiveCocoa.h>Within the same file add the following to the end of viewDidLoad:
[[self.searchText.rac_textSignal
  map:^id(NSString *text) {
    return [self isValidSearchText:text] ?
      [UIColor whiteColor] : [UIColor yellowColor];
  }]
  subscribeNext:^(UIColor *color) {
    self.searchText.backgroundColor = color;
  }];
Wondering what that’s all about? The above code:
- Takes the search text field’s text signal
- Transforms it into a background color that indicates whether it is valid or not
- Then applies this to the text field’s
backgroundColorproperty in thesubscribeNext:block.
Build and run to observe how the text field now indicates an invalid entry with a yellow background if the current search string is too short.

Illustrated graphically, this simple reactive pipeline looks a bit like this:

The rac_textSignal emits next events containing the current text field’s text each time a change occurs. The map step transforms the text value into a color, while the subscribeNext: step takes this value and applies it to the text field background.
rac_textSignal在每次改变发生的时候,发射了next事件,带着当前的text域的文本。
map把文本值改变成了一个颜色。
然后subscribeNext:接受这个值,并且把它应用到当前的文本域的背景色上。
Of course, you do remember this from the first article, right? If not, you might want to stop right here and at least read through the exercises.
Before adding the Twitter search logic, there are a few more interesting topics to cover.
Formatting of Pipelines
When you’re delving into formatting ReactiveCocoa code, the generally accepted convention is to have each operation on a new line, and align all of the steps vertically.
In this next image, you can see the alignment of a more complex example, taken from the previous tutorial:
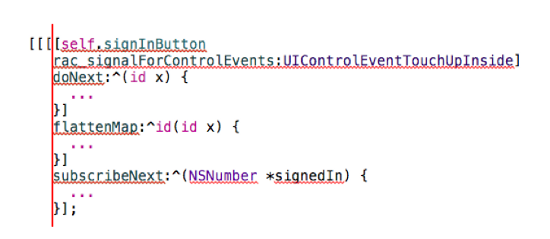
This allows you to see the operations that make up the pipeline very easily. Also, minimize the amount of code in each block; anything more than a couple of lines should be broken out into a private method.
Unfortunately, Xcode doesn’t really like this style of formatting, so you might find yourself battling with its automatic indentation logic!
Memory Management
Considering the code you added to the TwitterInstant app, are you wondering how the pipeline you just created is retained? Surely, as it is not assigned to a variable or property it will not have its reference count incremented and is doomed to destruction?
One of the design goals of ReactiveCocoa was to allow this style of programming, where pipelines can form anonymously. In all of the reactive code you’ve written so far, this should seem quite intuitive.
In order to support this model, ReactiveCocoa maintains and retains its own global set of signals. If it has one or more subscribers, then the signal is active. If all subscribers are removed, the signal can be de-allocated. For more information on how ReactiveCocoa manages this process see the Memory Managementdocumentation.
That leaves on final question: How do you unsubscribe from a signal? After a completed or error event, a subscription removes itself automatically (you’ll learn more about this shortly). Manual removal may be accomplished via RACDisposable.
The subscription methods on RACSignal all return an instance of RACDisposablethat allows you to manually remove the subscription via the dispose method. Here is a quick example using the current pipeline:
RACSignal *backgroundColorSignal =
  [self.searchText.rac_textSignal
    map:^id(NSString *text) {
      return [self isValidSearchText:text] ?
        [UIColor whiteColor] : [UIColor yellowColor];
    }];

RACDisposable *subscription =
  [backgroundColorSignal
    subscribeNext:^(UIColor *color) {
      self.searchText.backgroundColor = color;
    }];

// at some point in the future ...
[subscription dispose];
It is unlikely you’ll find yourself doing this very often, but it is worth knowing the possibility exists.
Note: As a corollary to this, if you create a pipeline but do not subscribe to it, the pipeline never executes, this includes any side-effects such as doNext: blocks.
Avoiding Retain Cycles
While ReactiveCocoa does a lot of clever stuff behind the scenes — which means you don’t have to worry too much about the memory management of signals — there is one important memory-related issue you do need to consider.
If you look at the reactive code you just added:
[[self.searchText.rac_textSignal
  map:^id(NSString *text) {
    return [self isValidSearchText:text] ?
      [UIColor whiteColor] : [UIColor yellowColor];
  }]
  subscribeNext:^(UIColor *color) {
    self.searchText.backgroundColor = color;
  }];
The subscribeNext: block uses self in order to obtain a reference to the text field. Blocks capture and retain values from the enclosing scope, therefore if a strong reference exists between self and this signal, it will result in a retain cycle. Whether this matters or not depends on the lifecycle of the self object. If its lifetime is the duration of the application, as is the case here, it doesn’t really matter. But in more complex applications, this is rarely the case.
In order to avoid this potential retain cycle, the Apple documentation for Working With Blocks recommends capturing a weak reference to self. With the current code you can achieve this as follows:
__weak RWSearchFormViewController *bself = self; // Capture the weak reference

[[self.searchText.rac_textSignal
  map:^id(NSString *text) {
    return [self isValidSearchText:text] ?
      [UIColor whiteColor] : [UIColor yellowColor];
  }]
  subscribeNext:^(UIColor *color) {
    bself.searchText.backgroundColor = color;
  }];
In the above code bself is a reference to self that has been marked as __weak in order to make it a weak reference. Notice that the subscribeNext: block now uses the bself variable. This doesn’t look terribly elegant!
The ReactiveCocoa framework inlcudes a little trick you can use in place of the above code. Add the following import to the top of the file:
#import "RACEXTScope.h"Then replace the above code with the following:
@weakify(self)
[[self.searchText.rac_textSignal
  map:^id(NSString *text) {
    return [self isValidSearchText:text] ?
      [UIColor whiteColor] : [UIColor yellowColor];
  }]
  subscribeNext:^(UIColor *color) {
    @strongify(self)
    self.searchText.backgroundColor = color;
  }];
The @weakify and @strongify statements above are macros defined in the Extended Objective-C library, and they are also included in ReactiveCocoa. The @weakify macro allows you to create shadow variables which are weak references (you can pass multiple variables if you require multiple weak references), the @strongify macro allows you to create strong references to variables that were previously passed to @weakify.
Note: If you’re interested in finding out what @weakify and @strongify actually do, within Xcode select Product -> Perform Action -> Preprocess “RWSearchForViewController”. This will preprocess the view controller, expand all the macros and allow you to see the final output.
One final note of caution, take care when using instance variables within blocks. These will also result in the block capturing a strong reference to self. You can turn on a compiler warning to alert you if your code results in this problem. Search for retain within the project’s build settings to find the options indicated below:

Okay, you survived the theory, congrats! Now you’re much wiser and ready to move on to the fun part: adding some real functionality to your application!
Note: The keen-eyed readers among you who paid attention in the previous tutorial will have no doubt notice that you can remove the need for the subscribeNext: block in the current pipeline by making use of the RAC macro. If you spotted this, make that change and award yourself a shiny gold star!
Requesting Access to Twitter
You’re going to use the Social Framework in order to allow the TwitterInstant application to search for Tweets, and the Accounts Framework in order to grant access to Twitter. For a more detailed overview of the Social Framework, check out the chapter dedicated to this framework in iOS 6 by Tutorials.
Before you add this code, you need to input your Twitter credentials into the simulator or the iPad you’re running this app on. Open the Settings app and select the Twitter menu option, then add your credentials on the right hand side of the screen:
The starter project already has the required frameworks added, so you just need to import the headers. Within RWSearchFormViewController.m, add the following imports to the top of the file:
#import <Accounts/Accounts.h>
#import <Social/Social.h>
Just beneath the imports add the following enumeration and constant:
typedef NS_ENUM(NSInteger, RWTwitterInstantError) {
    RWTwitterInstantErrorAccessDenied,
    RWTwitterInstantErrorNoTwitterAccounts,
    RWTwitterInstantErrorInvalidResponse
};

static NSString * const RWTwitterInstantDomain = @"TwitterInstant";
You’re going to be using these shortly to identify errors.
Further down the same file, just beneath the existing property declarations, add the following:
@property (strong, nonatomic) ACAccountStore *accountStore;
@property (strong, nonatomic) ACAccountType *twitterAccountType;
The ACAccountsStore class provides access to the various social media accounts your device can connect to, and the ACAccountType class represents a specific type of account.
Further down the same file, add the following to the end of viewDidLoad:
self.accountStore = [[ACAccountStore alloc] init];
self.twitterAccountType = [self.accountStore
  accountTypeWithAccountTypeIdentifier:ACAccountTypeIdentifierTwitter];
This creates the accounts store and Twitter account identifier.
When an app requests access to a social media account, the user sees a pop-up. This is an asynchronous operation, hence it is a good candidate for wrapping in a signal in order to use it reactively!
Further down the same file, add the following method:
- (RACSignal *)requestAccessToTwitterSignal {

  // 1 - define an error
  NSError *accessError = [NSError errorWithDomain:RWTwitterInstantDomain
                                             code:RWTwitterInstantErrorAccessDenied
                                         userInfo:nil];

  // 2 - create the signal
  @weakify(self)
  return [RACSignal createSignal:^RACDisposable *(id<RACSubscriber> subscriber) {
    // 3 - request access to twitter
    @strongify(self)
    [self.accountStore
       requestAccessToAccountsWithType:self.twitterAccountType
         options:nil
      completion:^(BOOL granted, NSError *error) {
          // 4 - handle the response
          if (!granted) {
            [subscriber sendError:accessError];
          } else {
            [subscriber sendNext:nil];
            [subscriber sendCompleted];
          }
        }];
    return nil;
  }];
}
This method does the following:
- An error is defined, which is sent if the user refuses access.
- As per the first article, the class method
createSignalreturns an instance ofRACSignal. - Access to Twitter is requested via the account store. At this point, the user will see a prompt asking them to grant this app access to their Twitter accounts.
- After the user grants or denies access, the signal events are emitted. If the user grants access, a next event followed by a completed are sent. If the user denies access, an error event is emitted.
If you recall from the first tutorial, a signal can emit three different event types:
- Next
- Completed
- Error
Over a signal’s lifetime, it may emit no events, one or more next events followed by either a completed event or an error event.
Finally, in order to make use of this signal, add the following to the end of viewDidLoad:
[[self requestAccessToTwitterSignal]
  subscribeNext:^(id x) {
    NSLog(@"Access granted");
  } error:^(NSError *error) {
    NSLog(@"An error occurred: %@", error);
  }];
If you build and run, the following prompt should greet you::
If you tap OK, the log message in the subscribeNext: block should appear in the console, whereas, if you tap Don’t Allow, the error block executes and logs the respective message.
The Accounts Framework remembers the decision you made. Therefore to test both paths you need to reset the simulator via the iOS Simulator -> Reset Contents and Settings … menu option. This is a bit of a pain because you also have to re-enter your Twitter credentials!
Chaining Signals
Once the user has (hopefully!) granted access to their Twitter accounts, the application needs to continuously monitor the changes to the search text field, in order to query twitter.
The application needs to wait for the signal that requests access to Twitter to emit its completed event, and then subscribe to the text field’s signal. The sequential chaining of different signals is a common problem, but one that ReactiveCocoa handles very gracefully.
Replace your current pipeline at the end of viewDidLoad with the following:
[[[self requestAccessToTwitterSignal]
  then:^RACSignal *{
    @strongify(self)
    return self.searchText.rac_textSignal;
  }]
  subscribeNext:^(id x) {
    NSLog(@"%@", x);
  } error:^(NSError *error) {
    NSLog(@"An error occurred: %@", error);
  }];
The then method waits until a completed event is emitted, then subscribes to the signal returned by its block parameter. This effectively passes control from one signal to the next.
Note: You’ve already weakified self for the pipeline that sits just above this one, so there is no need to precede this pipeline with a @weakify(self).
The then method passes error events through. Therefore the final subscribeNext:error: block still receives errors emitted by the initial access-requesting step.
When you build and run, then grant access, you should see the text you input into the search field logged in the console:
2014-01-04 08:16:11.444 TwitterInstant[39118:a0b] m
2014-01-04 08:16:12.276 TwitterInstant[39118:a0b] ma
2014-01-04 08:16:12.413 TwitterInstant[39118:a0b] mag
2014-01-04 08:16:12.548 TwitterInstant[39118:a0b] magi
2014-01-04 08:16:12.628 TwitterInstant[39118:a0b] magic
2014-01-04 08:16:13.172 TwitterInstant[39118:a0b] magic!
Next, add a filter operation to the pipeline to remove any invalid search strings. In this instance, they are strings comprised of less than three characters:
[[[[self requestAccessToTwitterSignal]
  then:^RACSignal *{
    @strongify(self)
    return self.searchText.rac_textSignal;
  }]
  filter:^BOOL(NSString *text) {
    @strongify(self)
    return [self isValidSearchText:text];
  }]
  subscribeNext:^(id x) {
    NSLog(@"%@", x);
  } error:^(NSError *error) {
    NSLog(@"An error occurred: %@", error);
  }];
Build and run again to observe the filtering in action:
2014-01-04 08:16:12.548 TwitterInstant[39118:a0b] magi
2014-01-04 08:16:12.628 TwitterInstant[39118:a0b] magic
2014-01-04 08:16:13.172 TwitterInstant[39118:a0b] magic!
Illustrating the current application pipeline graphically, it looks like this:
The application pipeline starts with the requestAccessToTwitterSignal then switches to the rac_textSignal. Meanwhile, next events pass through a filter and finally onto the subscription block. You can also see any error events emitted by the first step are consumed by the same subscribeNext:error: block.
Now that you have a signal that emits the search text, it is time to use this to search Twitter! Are you having fun yet? You should be because now you’re really getting somewhere.
Searching Twitter
The Social Framework is an option to access the Twitter Search API. However, as you might expect, the Social Framework is not reactive! The next step is to wrapthe required API method calls in a signal. You should be getting the hang of this process by now!
Within RWSearchFormViewController.m, add the following method:
- (SLRequest *)requestforTwitterSearchWithText:(NSString *)text {
  NSURL *url = [NSURL URLWithString:@"https://api.twitter.com/1.1/search/tweets.json"];
  NSDictionary *params = @{@"q" : text};

  SLRequest *request =  [SLRequest requestForServiceType:SLServiceTypeTwitter
                                           requestMethod:SLRequestMethodGET
                                                     URL:url
                                              parameters:params];
  return request;
}
This creates a request that searches Twitter via the v1.1 REST API. The above code uses the q search parameter to search for tweets that contain the given search string. You can read more about this search API, and other parameters that you can pass, in the Twitter API docs.
The next step is to create a signal based on this request. Within the same file, add the following method:
- (RACSignal *)signalForSearchWithText:(NSString *)text {

  // 1 - define the errors
  NSError *noAccountsError = [NSError errorWithDomain:RWTwitterInstantDomain
                                                 code:RWTwitterInstantErrorNoTwitterAccounts
                                             userInfo:nil];

  NSError *invalidResponseError = [NSError errorWithDomain:RWTwitterInstantDomain
                                                      code:RWTwitterInstantErrorInvalidResponse
                                                  userInfo:nil];

  // 2 - create the signal block
  @weakify(self)
  return [RACSignal createSignal:^RACDisposable *(id<RACSubscriber> subscriber) {
    @strongify(self);

    // 3 - create the request
    SLRequest *request = [self requestforTwitterSearchWithText:text];

    // 4 - supply a twitter account
    NSArray *twitterAccounts = [self.accountStore
      accountsWithAccountType:self.twitterAccountType];
    if (twitterAccounts.count == 0) {
      [subscriber sendError:noAccountsError];
    } else {
      [request setAccount:[twitterAccounts lastObject]];

      // 5 - perform the request
      [request performRequestWithHandler: ^(NSData *responseData,
                                          NSHTTPURLResponse *urlResponse, NSError *error) {
        if (urlResponse.statusCode == 200) {

          // 6 - on success, parse the response
          NSDictionary *timelineData =
             [NSJSONSerialization JSONObjectWithData:responseData
                                             options:NSJSONReadingAllowFragments
                                               error:nil];
          [subscriber sendNext:timelineData];
          [subscriber sendCompleted];
        }
        else {
          // 7 - send an error on failure
          [subscriber sendError:invalidResponseError];
        }
      }];
    }

    return nil;
  }];
}
Taking each step in turn:
- Initially, you need to define a couple of different errors, one to indicate the user hasn’t added any Twitter accounts to their device, and the other to indicate an error when performing the query itself.
- As before, a signal is created.
- Create a request for the given search string using the method you added in the previous step.
- Query the account store to find the first available Twitter account. If no accounts are given, an error is emitted.
- The request executes.
- In the event of a successful response (HTTP response code 200), the returned JSON data is parsed and emitted along as a next event, followed by a completed event.
- In the event of an unsuccessful response, an error event is emitted.
Now to put this new signal to use!
In the first part of this tutorial you learnt how to use flattenMap to map each next event to a new signal that is then subscribed to. It’s time to put this to use once again. At the end of viewDidLoad update your application pipeline by adding a flattenMap step at the end:
[[[[[self requestAccessToTwitterSignal]
  then:^RACSignal *{
    @strongify(self)
    return self.searchText.rac_textSignal;
  }]
  filter:^BOOL(NSString *text) {
    @strongify(self)
    return [self isValidSearchText:text];
  }]
  flattenMap:^RACStream *(NSString *text) {
    @strongify(self)
    return [self signalForSearchWithText:text];
  }]
  subscribeNext:^(id x) {
    NSLog(@"%@", x);
  } error:^(NSError *error) {
    NSLog(@"An error occurred: %@", error);
  }];
Build and run, then type some text into the search text field. Once the text is at least three characters or more in length, you should see the results of the Twitter search in the console window.
The following shows just a snippet of the kind of data you’ll see:
2014-01-05 07:42:27.697 TwitterInstant[40308:5403] {
    "search_metadata" =     {
        "completed_in" = "0.019";
        count = 15;
        "max_id" = 419735546840117248;
        "max_id_str" = 419735546840117248;
        "next_results" = "?max_id=419734921599787007&q=asd&include_entities=1";
        query = asd;
        "refresh_url" = "?since_id=419735546840117248&q=asd&include_entities=1";
        "since_id" = 0;
        "since_id_str" = 0;
    };
    statuses =     (
                {
            contributors = "<null>";
            coordinates = "<null>";
            "created_at" = "Sun Jan 05 07:42:07 +0000 2014";
            entities =             {
                hashtags = ...
The signalForSearchText: method also emits error events which the subscribeNext:error: block consumes. You could take my word for this, but you’d probably like to test it out!
Within the simulator open up the Settings app and select your Twitter account, then delete it by tapping the Delete Account button:
If you re-run the application, it is still granted access to the user’s Twitter accounts, but there are no accounts available. As a result the signalForSearchText method will emit an error, which will be logged:
2014-01-05 07:52:11.705 TwitterInstant[41374:1403] An error occurred: Error
  Domain=TwitterInstant Code=1 "The operation couldn’t be completed. (TwitterInstant error 1.)"
The Code=1 indicates this is the RWTwitterInstantErrorNoTwitterAccounts error. In a production application, you would want to switch on the error code and do something more meaningful than just log the result.
This illustrates an important point about error events; as soon as a signal emits an error, it falls straight-through to the error-handling block. It is an exceptional flow.
Note: Have a go at exercising the other exceptional flow when the Twitter request returns an error. Here’s a quick hint, try changing the request parameters to something invalid!
Threading
I’m sure you’re itching to wire-up the JSON output of the Twitter search to the UI, but before you do that there is one last thing you need to do. To find out what this is, you need to do a bit of exploration!
Add a breakpoint to the subscribeNext:error: step at the location indicated below:
Re-run the application, re-enter your Twitter credentials again if needed, and type some text into the search field. When the breakpoint hits you should see something similar to the image below:
Notice the code where the debugger hit a break is not executed on the main thread, which appears as Thread 1 in the above screenshot. Keep in mind that it’s paramount you only update the UI from the main thread; therefore if you want to display the list of tweets in the UI you’re going to have to switch threads.
This illustrates an important point about the ReactiveCocoa framework. The operations shown above execute on the thread where the signal originally emitted its events. Try adding breakpoints at the other pipeline steps, you might be surprised to find they execute on more than one different thread!
So how do you go about updating the UI? The typical approach is to use operation queues (see the tutorial How To Use NSOperations and NSOperationQueueselsewhere on this site for more details), however ReactiveCocoa has a much simpler solution to this problem.
Update your pipeline by adding a deliverOn: operation just after flattenMap: as shown below:
[[[[[[self requestAccessToTwitterSignal]
  then:^RACSignal *{
    @strongify(self)
    return self.searchText.rac_textSignal;
  }]
  filter:^BOOL(NSString *text) {
    @strongify(self)
    return [self isValidSearchText:text];
  }]
  flattenMap:^RACStream *(NSString *text) {
    @strongify(self)
    return [self signalForSearchWithText:text];
  }]
  deliverOn:[RACScheduler mainThreadScheduler]]
  subscribeNext:^(id x) {
    NSLog(@"%@", x);
  } error:^(NSError *error) {
    NSLog(@"An error occurred: %@", error);
  }];
Now re-run the app and type some text so your app hits the breakpoint. You should see the log statement in your subscribeNext:error: block is now executing on the main thread:
What? There’s just one simple operation for marshalling the flow of events onto a different thread? Just how awesome is that!?
You can safely proceed to update your UI!
NOTE: If you take a look at the RACScheduler class you’ll see that there is quite a range of options for delivering on threads with different priorities, or adding delays into pipelines.
It’s time to see those tweets!
Updating the UI
If you open RWSearchResultsViewController.h you’ll see it already has a displayTweets: method, which will cause the right-hand view controller to render the supplied array of tweets. The implementation is very simple, it’s just a standard UITableView datasource. The single argument for the displayTweets: method expects an NSArray containing RWTweet instances. You’ll also find the RWTweetmodel object was provided as part of the starter project.
The data which arrives at the subscibeNext:error: step is currently an NSDictionary, which was constructed by parsing the JSON response in signalForSearchWithText:. So how do you determine the contents of this dictionary?
If you take a look at the Twitter API documentation you can see a sample response. The NSDictionary mirrors this structure, so you should find that it has a key named statuses that is a NSArray of tweets, which are also NSDictionaryinstances.
If you look at RWTweet it already has a class method tweetWithStatus: which takes an NSDictionary in the given format and extracts the required data. So all you need to do is write a for loop, and iterate over the array, creating an instance of RWTweet for each tweet.
However, you’re not going to do that! Oh no, there’s much better things in store!
This article is about ReactiveCocoa and Functional Programming. The transformation of data from one format to another is more elegant when you use a functional API. You’re going to perform this task with LinqToObjectiveC.
Close the TwitterInstant workspace, and then open the Podfile that you created in the first tutorial, in TextEdit. Update the file to add the new dependency:
platform :ios, '7.0'

pod 'ReactiveCocoa', '2.1.8'
pod 'LinqToObjectiveC', '2.0.0'
Open up a terminal window in the same folder and issue the following command:
pod updateYou should see output similar to the following:
Analyzing dependencies
Downloading dependencies
Installing LinqToObjectiveC (2.0.0)
Using ReactiveCocoa (2.1.8)
Generating Pods project
Integrating client project
Re-open the workspace and verify the new pod is showing as shown in the image below:
Open RWSearchFormViewController.m and add the following imports to the top of the file:
#import "RWTweet.h"
#import "NSArray+LinqExtensions.h"
The NSArray+LinqExtensions.h header is from LinqToObjectiveC, and adds a number of methods to NSArray that allow you to transform, sort, group and filter its data using a fluent API.
Now to put this API to use … update the current pipeline at the end of viewDidLoadas follows:
[[[[[[self requestAccessToTwitterSignal]
  then:^RACSignal *{
    @strongify(self)
    return self.searchText.rac_textSignal;
  }]
  filter:^BOOL(NSString *text) {
    @strongify(self)
    return [self isValidSearchText:text];
  }]
  flattenMap:^RACStream *(NSString *text) {
    @strongify(self)
    return [self signalForSearchWithText:text];
  }]
  deliverOn:[RACScheduler mainThreadScheduler]]
  subscribeNext:^(NSDictionary *jsonSearchResult) {
    NSArray *statuses = jsonSearchResult[@"statuses"];
    NSArray *tweets = [statuses linq_select:^id(id tweet) {
      return [RWTweet tweetWithStatus:tweet];
    }];
    [self.resultsViewController displayTweets:tweets];
  } error:^(NSError *error) {
    NSLog(@"An error occurred: %@", error);
  }];
As you can see above, the subscribeNext: block first obtains the NSArray of tweets. The linq_select method transforms the array of NSDictionary instances by executing the supplied block on each array element, resulting in an array of RWTweet instances.
Once transformed, the tweets get sent to the results view controller.
Build and run to finally see the tweets appearing in the UI:
Note: ReactiveCocoa and LinqToObjectiveC have similar sources of inspiration. Whilst ReactiveCocoa was modelled on Microsoft’s Reactive Extensions library, LinqToObjectiveC was modelled on their Language Integrated Query APIs, or LINQ, specifically Linq to Objects.
Asynchronous Loading of Images
You’ve probably noticed there is a gap to the left of each tweet. That space is there to show the Twitter user’s avatar.
The RWTweet class already has a profileImageUrl property that is populated with a suitable URL for fetching this image. In order for the table view to scroll smoothly, you need to ensure the code that fetches this image from the given URL is not executed on the main thread. This can be achieved using Grand Central Dispatch or NSOperationQueue. But why not use ReactiveCocoa?
Open RWSearchResultsViewController.m and add the following method to the end of the file:
-(RACSignal *)signalForLoadingImage:(NSString *)imageUrl {

  RACScheduler *scheduler = [RACScheduler
                         schedulerWithPriority:RACSchedulerPriorityBackground];

  return [[RACSignal createSignal:^RACDisposable *(id<RACSubscriber> subscriber) {
    NSData *data = [NSData dataWithContentsOfURL:[NSURL URLWithString:imageUrl]];
    UIImage *image = [UIImage imageWithData:data];
    [subscriber sendNext:image];
    [subscriber sendCompleted];
    return nil;
  }] subscribeOn:scheduler];

}
You should be pretty familiar with this pattern by now!
The above method first obtains a background scheduler as you want this signal to execute on a thread other than the main one. Next, it creates a signal that downloads the image data and creates a UIImage when it has a subscriber. The final piece of magic is subscribeOn:, which ensures that the signal executes on the given scheduler.
Magic!
Now, within the same file update the tableView:cellForRowAtIndex: method by adding the following just before the return statement:
cell.twitterAvatarView.image = nil;

[[[self signalForLoadingImage:tweet.profileImageUrl]
  deliverOn:[RACScheduler mainThreadScheduler]]
  subscribeNext:^(UIImage *image) {
   cell.twitterAvatarView.image = image;
  }];
The above first resets the image since these cells are reused and could therefore contain stale data. Then it creates the required signal to fetch the image data. The deliverOn: pipeline step, you encountered previously, marshals the next event onto the main thread so that the subscribeNext: block can be safely executed.
Nice and simple!
Build and run to see that the avatars now display correctly:
Throttling
You might have noticed that every time you type a new character, a Twitter search executes immediately. If you’re a fast typer (or simply hold down the delete key), this can result in the application performing several searches a second. This is not ideal for a couple of reasons: firstly, you’re hammering the Twitter search API and simultaneously throwing away most of the results. Secondly, you’re constantly updating the results which is rather distracting for the user!
A better approach would be to perform a search only if the search text is unchanged for a short amount of time, say 500 milliseconds.
As you’ve probably guessed, ReactiveCocoa makes this task incredibly simple!
Open RWSearchFormViewController.m and update the pipeline at the end of viewDidLoad by adding a throttle step just after the filter:
[[[[[[[self requestAccessToTwitterSignal]
  then:^RACSignal *{
    @strongify(self)
    return self.searchText.rac_textSignal;
  }]
  filter:^BOOL(NSString *text) {
    @strongify(self)
    return [self isValidSearchText:text];
  }]
  throttle:0.5]
  flattenMap:^RACStream *(NSString *text) {
    @strongify(self)
    return [self signalForSearchWithText:text];
  }]
  deliverOn:[RACScheduler mainThreadScheduler]]
  subscribeNext:^(NSDictionary *jsonSearchResult) {
    NSArray *statuses = jsonSearchResult[@"statuses"];
    NSArray *tweets = [statuses linq_select:^id(id tweet) {
      return [RWTweet tweetWithStatus:tweet];
    }];
    [self.resultsViewController displayTweets:tweets];
  } error:^(NSError *error) {
    NSLog(@"An error occurred: %@", error);
  }];
The throttle operation will only send a next event if another next event isn’t received within the given time period. It’s really that simple!
Build and run to confirm that the search results only update if you stop typing for 500 milliseconds. Feels much better doesn’t it? Your users will think so too.
And…with that final step your Twitter Instant application is complete. Give yourself a pat on the back and do a happy dance.
If you got lost somewhere in the tutorial you can download the final project (Don’t forget to run pod install from the project’s directory before opening), or you can obtain the code from GitHub where there is a commit for each Build & Run step in this tutorial.
Wrap Up
Before heading off and treating yourself to a victory cup of coffee, it’s worth admiring the final application pipeline:
That’s quite a complicated data flow, all expressed concisely as a single reactive pipeline. It’s a beautiful sight to see! Can you imagine how much more complex this application would be using non-reactive techniques? And how much harder it would be to see the data flows in such an application? Sounds very cumbersome, and now you don’t have to go down that road ever again!
Now you know that ReactiveCocoa is really quite awesome!
One final point, ReactiveCocoa makes it possible to use the Model View ViewModel, or the MVVM design pattern, which provides better separation of application logic and view logic. If anyone is interested in a follow-up article on MVVM with ReactiveCocoa, please let me know in the comments. I’d love to hear your thoughts and experiences!
posted on 2019-12-15 17:06 chaiyu2002 阅读(139) 评论(0) 收藏 举报


 浙公网安备 33010602011771号