https申请+部署
1.申请参考:https://developer.aliyun.com/article/1635083 自动就行。
2.成功后会下载到两个文件。一个.poe 一个.key
部署
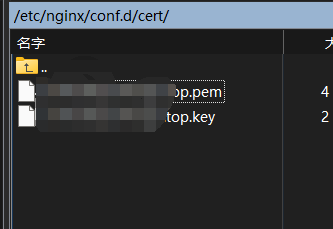
1.在/etc/nginx/conf.d里面新建一个文件夹cert,然后把这两个文件放进去。
2.返回到nginx.conf里面配置,
这是原来的
server
    {
        listen       80;
        server_name  localhost XXXXs.top;

        location / {
            root   /myproject/XXXs;
            index  index.html index.htm;
        }

        error_page 404 /404.html;
        location = /404.html {
        }

        error_page   500 502 503 504  /50x.html;
        location = /50x.html {
            #root   /www/wwwroot/default; 这个是apache才有的 可以删除
        }
    }
这是https的

   server {
       listen       443 ssl ;
       server_name  localhost XXXXs.top;

       root   /myproject/XXX;
       index  index.html index.htm;

       ssl_certificate "conf.d/cert/XXXXs.top.pem";
       ssl_certificate_key "conf.d/cert/XXXXs.top.key";
       ssl_session_cache shared:SSL:1m;
       ssl_session_timeout  10m;
       ssl_ciphers HIGH:!aNULL:!MD5;
       ssl_prefer_server_ciphers on;

       # Load configuration files for the default server block.
       include /etc/nginx/default.d/*.conf;

       error_page 404 /404.html;
           location = /40x.html {
       }

       error_page 500 502 503 504 /50x.html;
           location = /50x.html {
       }
   }
3.重启nginx
4.打开防火墙443 重启防火墙
5.打开安全组443
完成啦。


【推荐】国内首个AI IDE,深度理解中文开发场景,立即下载体验Trae
【推荐】编程新体验,更懂你的AI,立即体验豆包MarsCode编程助手
【推荐】抖音旗下AI助手豆包,你的智能百科全书,全免费不限次数
【推荐】轻量又高性能的 SSH 工具 IShell:AI 加持,快人一步
· 周边上新:园子的第一款马克杯温暖上架
· Open-Sora 2.0 重磅开源!
· .NET周刊【3月第1期 2025-03-02】
· 分享 3 个 .NET 开源的文件压缩处理库,助力快速实现文件压缩解压功能!
· [AI/GPT/综述] AI Agent的设计模式综述