servlet 介绍
servlet 介绍
> 一般jsp 之负责展现,把数据传给后台
> 这种思想就是mvc
> jsp 只管视图 view
> servlet 后台控制 controller 控制(HTTP)
> m 数据传递对象 model (处理逻辑)
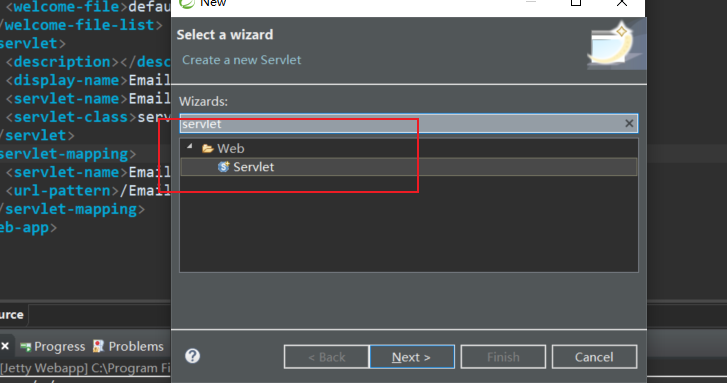
创建模板

自动创建后的脚本
默认继承了HttpServlet
package servlet;

import java.io.IOException;
import javax.servlet.ServletException;
import javax.servlet.http.HttpServlet;
import javax.servlet.http.HttpServletRequest;
import javax.servlet.http.HttpServletResponse;

/**
 * Servlet implementation class EmailServlet
 */
public class EmailServlet extends HttpServlet {
	private static final long serialVersionUID = 1L;

    /**
     * @see HttpServlet#HttpServlet()
     */
    public EmailServlet() {
        super();
        // TODO Auto-generated constructor stub
    }

	/**
	 * @see HttpServlet#doGet(HttpServletRequest request, HttpServletResponse response)
	 */
	protected void doGet(HttpServletRequest request, HttpServletResponse response) throws ServletException, IOException {
		// TODO Auto-generated method stub
		response.getWriter().append("Served at: ").append(request.getContextPath());
	}

	/**
	 * @see HttpServlet#doPost(HttpServletRequest request, HttpServletResponse response)
	 */
	protected void doPost(HttpServletRequest request, HttpServletResponse response) throws ServletException, IOException {
		// TODO Auto-generated method stub
		doGet(request, response);
	}

}
访问路径的设置
一、创建模板后默认会在web.xml中添加访问路径如下:
<?xml version="1.0" encoding="UTF-8"?>
<web-app xmlns:xsi="http://www.w3.org/2001/XMLSchema-instance" xmlns="http://java.sun.com/xml/ns/javaee" xsi:schemaLocation="http://java.sun.com/xml/ns/javaee http://java.sun.com/xml/ns/javaee/web-app_2_5.xsd" version="2.5">
  <display-name>mavenweb</display-name>
  <welcome-file-list>
    <welcome-file>index.html</welcome-file>
    <welcome-file>index.htm</welcome-file>
    <welcome-file>index.jsp</welcome-file>
    <welcome-file>default.html</welcome-file>
    <welcome-file>default.htm</welcome-file>
    <welcome-file>default.jsp</welcome-file>
  </welcome-file-list>
  <servlet>
    <description></description>
    <display-name>EmailServlet</display-name> #Servlet的名称
    <servlet-name>EmailServlet</servlet-name>#Servlet的类路径
    <servlet-class>servlet.EmailServlet</servlet-class>
  </servlet>
  <servlet-mapping>
    <servlet-name>EmailServlet</servlet-name> #Servlet的名称
    <url-pattern>/EmailServlet</url-pattern>#/url名字(自己起的,不要重复,注意/,不能丢)
  </servlet-mapping>
</web-app>
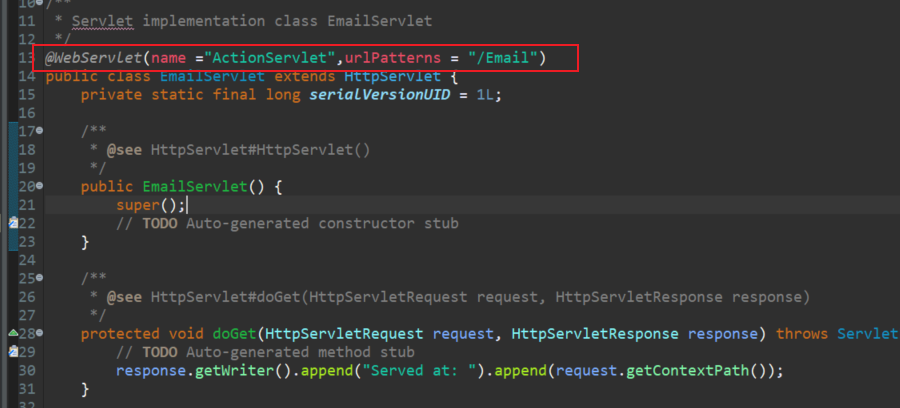
二、注解方式
@WebServlet(name ="ActionServlet",urlPatterns = "/Email")

注意:
两种访问路径可以同时存在,同时访问
接收请求的参数
请求:
浏览器访问传递参数test
http://localhost:8081/EmailServlet?test=1
对应代码如下:
	protected void doGet(HttpServletRequest request, HttpServletResponse response) throws ServletException, IOException {
		// TODO Auto-generated method stub
		//接收请求的参数
		String nameString =request.getParameter("test");
		response.getWriter().append("Served at: ").append(request.getContextPath()).append("TestValue:"+nameString);
	}
页面跳转
请求后跳转到对应的界面
1.将对应的message.jsp拷贝到webapp目录下
2.代码加入
request.getRequestDispatcher("/message.jsp").forward(request, response);
3.访问后即可完成跳转
结果如下:

给跳转界面设置对应的值
如跳转message.jsp
message.jsp内容如下:
我们可以看到需要传的值为message
<%@ page language="java" contentType="text/html; charset=UTF-8"
    pageEncoding="UTF-8"%>
<!DOCTYPE html PUBLIC "-//W3C//DTD HTML 4.01 Transitional//EN" "http://www.w3.org/TR/html4/loose.dtd">
<html>
<head>
<meta http-equiv="Content-Type" content="text/html; charset=UTF-8">
<title>Insert title here</title>
</head>
<body>
发送结果 <font color="red">${message}</font>
</body>
</html>
代码如下:
request.setAttribute("message", nameString);
结果如下:

总体代码:
	protected void doGet(HttpServletRequest request, HttpServletResponse response) throws ServletException, IOException {
		// TODO Auto-generated method stub
		//接收请求的参数
		String nameString =request.getParameter("test");
		//设置值
		request.setAttribute("message", nameString);
//		response.getWriter().append("Served at: ").append(request.getContextPath()).append("TestValue:"+nameString);
		//跳转
		request.getRequestDispatcher("/message.jsp").forward(request, response);
	}
作者:我是刘先生
地址:https://www.cnblogs.com/cekaigongchengshi/
文章转载请标明出处,如果,您认为阅读这篇博客让您有些收获,不妨点击一下推荐按钮,据说喜欢分享的,后来都成了大神
| 欢迎扫码关注微信公众号 |
 |
