docker安装kubelet
安装kubelet
准备条件 虚拟机、安装centos、安装docker
安装docker (步骤一)
curl -fsSL get.docker.com -o get-docker.sh
vi get-docker.sh
sh get-docker.sh --mirror Aliyun
systemctl daemon-reload
启动、重启 关闭
systemctl start docker

systemctl restart docker

systemctl stop docker
安装kubelet (步骤二)
设置配置文件 跟阿里镜像仓库
cat <<EOF > /etc/yum.repos.d/kubernetes.repo
[kubernetes]
name=Kubernetes
baseurl=https://mirrors.aliyun.com/kubernetes/yum/repos/kubernetes-el7-x86_64/
enabled=1
gpgcheck=1
repo_gpgcheck=1
gpgkey=https://mirrors.aliyun.com/kubernetes/yum/doc/yum-key.gpg https://mirrors.aliyun.com/kubernetes/yum/doc/rpm-package-key.gpg
EOF
配置跟安装
setenforce 0
# 将 SELinux 设置为 permissive 模式(相当于将其禁用)
sudo setenforce 0
sudo sed -i 's/^SELINUX=enforcing$/SELINUX=permissive/' /etc/selinux/config

sudo yum install -y kubelet kubeadm kubectl --disableexcludes=kubernetes
启动
设置开机自启动

sudo systemctl enable --now kubelet

重启
systemctl restart kubelet
关闭分区
临时关闭
swapoff -a
集群搭建
设置主机名称
hostnamectl set-hostname master

查看

hostname
准备步骤 修改master host信息 其他节点 不修改
- 第一步
vim /etc/hosts

192.168.0.138 master
192.168.0.142 node1
192.168.0.143 node2
- 第二步
重启服务器 使hosts生效
reboot now

或者

sysctl --system
同步时间
yum install ntpdate -y

ntpdate time.windows.com
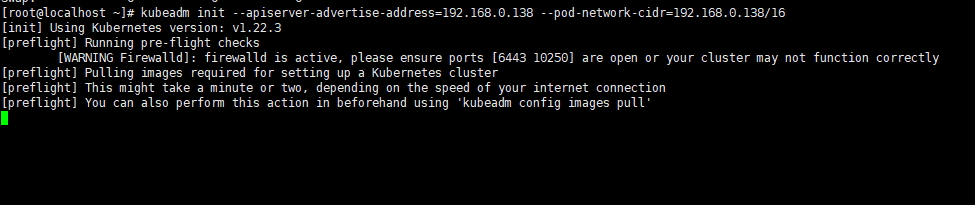
初始化master节点
kubeadm init \
--apiserver-advertise-address=192.168.0.142 \ # 本机ip 只需要修改这一个
--image-repository registry.aliyuncs.com/google_containers \
--pod-network-cidr=10.244.0.0/16
下载镜像
这可能会出现一个问题 Get http://localhost:10248/healthz: dial tcp 127.0.0.1:10248: connect: connection refused.
解决方式
解决方法
[root@k8s-node2 ~]# vim /etc/docker/daemon.json

{
"exec-opts": ["native.cgroupdriver=systemd"],
}


重启docker
[root@k8s-node2 ~]# systemctl restart docker

重置kubelet
[root@k8s-master ~]# kubeadm reset -f
设置后重新 初始化 完成
配置
  mkdir -p $HOME/.kube
  sudo cp -i /etc/kubernetes/admin.conf $HOME/.kube/config
 sudo chown $(id -u):$(id -g) $HOME/.kube/config
kubectl apply -f https://raw.githubusercontent.com/coreos/flannel/master/Documentation/kube-flannel.yml
报错连接不上 修改hosts
vim /etc/hosts

添加
199.232.68.133 raw.githubusercontent.com
其他节点
mater操作完后,其他节点操作步骤一 步骤三 然后 复制 master 执行成功后的join
例子
# master需要执行的
 mkdir -p $HOME/.kube
  sudo cp -i /etc/kubernetes/admin.conf $HOME/.kube/config
  sudo chown $(id -u):$(id -g) $HOME/.kube/config
# master执行结束

Alternatively, if you are the root user, you can run:

  export KUBECONFIG=/etc/kubernetes/admin.conf

You should now deploy a pod network to the cluster.
Run "kubectl apply -f [podnetwork].yaml" with one of the options listed at:
  https://kubernetes.io/docs/concepts/cluster-administration/addons/

Then you can join any number of worker nodes by running the following on each as root:

# 其他节点 执行以下语句
kubeadm join 192.168.0.138:6443 --token gsx0cs.zz0hi3m7dj4kl4rv \
	--discovery-token-ca-cert-hash sha256:5a0caffb4721abe446adebb9b62fd677c0a4923b4fee9fed39df4aacef1516ac
牛刀小试
kubectl apply -f filename

查看pod
kubectl get pod

查看pod详情
kubectl describe pod pod名称

查看缩略信息
kubectl get pod -o wide

列出文件名
kubectl exec  mynginx ls /

登录
kubectl exec -it mynginx /bin/bash

校时
kubectl cp /etc/localtime containerid:/etc/localtime
错误
error: unable to recognize "mynginx-deployment.yml": no matches for kind "Deployment" in version "extensions/v1beta1"
修改apiVersion
扩缩容
kubectl edit deployment mynginx-deployment


修改问价 重新apply -f
其他
重置kubeadm
# 重置kubeadm
kubeadm reset
查案日志
journalctl -fu kubelet
错误 一
firewalld is active, please ensure ports [6443 10250] are open or your cluste r may not function correctly
开放端口
firewall-cmd --zone=public --add-port=6443/tcp --permanent && firewall-cmd --zone=public --add-port=10250/tcp --permanent && firewall-cmd --reload
错误二
running with swap on is not supported. Please disable swap
关闭
swapoff -a
永久设置
编辑/etc/fstab文件,注释掉swap行
vim /etc/fstab
问题三
The connection to the server 192.168.0.138:6443 was refused - did you specify the right host or port?

 浙公网安备 33010602011771号