07-vue-router的使用
vue-router使用
// npm导入
npm install vue-router --save

// cnpm淘宝镜像导入
cnpm install vue-router --save
// 如果没有安装淘宝镜像需要先安装
npm install -g cnpm --registry=https://registry.npm.taobao.org
直接跳转:this.$router
如果获取参数,需要使用this.$route
通过router发送数据带参数
方式1
// 发送
this.$router.push("/?name=小满") // 函数中
$router.push("/?name=小满") //视图中直接使用

// 获取参数
console.log(this.$route.query); // 对象
方式2
// 发送
// 函数中
this.$router.push({
    name: "home",
    query: {name: "小满", age: 3, hobby: "逃课"}
})

// 视图中
// 函数中,这种就不要再视图中使用了,太难看了
router.push({
    name: "home",
    query: {name: "小满", age: 3, hobby: "逃课"}
})

// 获取一样
console.log(this.$route.query); // 对象 {name: '小满', age: 3, hobby: '逃课'}
通过router-link发送数据带参数
方式1
// 发送
<router-link :to="{path: '/?name=阿珂&age=4'}">
    <button>回首页</button>
</router-link>

// 获取
console.log(this.$route.query); // {name: '阿珂', age: '4'}
方式2
// 发送
<router-link :to="{path: '/', query:{name: '阿珂', age:4, hobby: '抢人头'}}">
    <button>回首页</button>
</router-link>

// 获取
console.log(this.$route.query); // {name: '阿珂', age: '4', hobby: '抢人头'}
方式3
// router/index.js
{
    path: '/:name/:age/:hobby',
    name: 'home',
    component: HomeView
  }

// 发送
<router-link :to="{name: 'home', params:{name: '阿珂', age:4, hobby: '抢人头'}}">
    <button>回首页</button>
</router-link>

// 获取
console.log(this.$route.params); //{name: '阿珂', age: 4, hobby: '抢人头'}
相关api
1 指的是:this.$router--->方法
2 常用的
this.$router.push(path): 相当于点击路由链接(可以返回到当前路由界面)
this.$router.replace(path): 用新路由替换当前路由(不可以返回到当前路由界面)
this.$router.back(): 请求(返回)上一个记录路由
this.$router.go(-1): 请求(返回)上一个记录路由
this.$router.go(1): 请求下一个记录路由
多级路由
- 在components下面建立对应的子组件
StoreView.vue
FishView
- 在router/index.js中
- 需要多级路由的视图组件下面,新建一个children,对应一个数组,数组的内部写上path,以及component。
- children内的path不需要添加斜杠。
// 导入
import StoreView from "@/components/StoreView.vue"
import FishView from "@/components/FishView.vue"

// 写多级路由
{
    path: '/',
    name: 'home',
    component: HomeView,
    children:[
      {
        path: 'store',
        component: StoreView,
      },
      {
        path: 'fish',
        component: FishView,
      }
    ]
}
- 组件中使用
<!-- template -->
<div class="content">
<div class="left">
<!-- 这里写路径,直接拼就可以了 -->
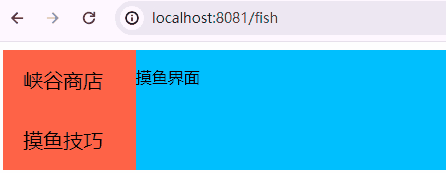
<router-link to="/store"><p>峡谷商店</p></router-link>
<router-link to="/fish"><p>摸鱼技巧</p></router-link>
</div>
<div class="right">
<!-- 这里不需要写别的 -->
<router-view></router-view>
</div>
</div>
别忘记注册组件到components中
import StoreView from "@/components/StoreView.vue"
import FishView from "@/components/FishView.vue"

components: {
    StoreView,
	FishView
}
路由守卫
在路由守卫中,to 参数代表即将要进入的目标路由对象,from 参数代表当前导航正要离开的路由对象,next 参数是一个函数,用于确保导航成功完成。
通过to.path,可以获取到目标路由的路径,通过from.path可以获取到离开的路由地址,比如从登录跳转到首页,那么to.path就是/home,from.path就是/login。
一般定义在router/index.js下面,export default router之前。
const router = new VueRouter({
  routes: [...], // 定义路由规则
});

router.beforeEach((to, from, next) => {
  // 在导航触发时调用
  // 可以进行一些逻辑操作,例如权限验证
  next(); // 必须调用该方法来确保导航成功完成
});

router.afterEach((to, from) => {
  // 在导航完成时调用
  // 可以进行一些清理操作
});

export default router
案例,需要登录后才能正常进入到指定页面,注意这里使用next()完成重定向即可,不需要使用this.$router.push()
router.beforeEach((to, from, next) => {
    // 如果要取的目标是登录页面,那就让他去吧
  if (to.path === '/login'){
    return next()
  }
  // 获取token
  let token = window.localStorage.getItem('token')
  if (!token){
      // 如果没有携带token,那就让他去登录吧
    return next('/login')
  }
  // 包含token正常跳转
  next()
})
路由的两种工作模式
路由的两种工作模式是"hash"模式和"history"模式。它们的主要区别在于URL的表现形式和对浏览器历史记录的影响。
-
Hash 模式:
- 在 hash 模式下,URL 中会带有
#符号,例如:http://www.example.com/#/home。 - 这种模式不会向服务器发送请求,因为
#后面的内容被认为是页面内的锚点。 - 可以兼容更多的浏览器,但在 SEO 优化方面可能存在一些问题。
- 在 hash 模式下,URL 中会带有
-
History 模式:
- 在 history 模式下,URL 是正常的路径形式,例如:
http://www.example.com/home。 - 这种模式会向服务器发送请求,需要后端配置支持,以避免在刷新页面或直接访问 URL 时出现 404 错误。
- 可以更加友好地展示 URL,但需要后端配合。
- 在 history 模式下,URL 是正常的路径形式,例如:
const router = new VueRouter({
  mode: 'history', // 这里设置 history 或者 hash
  base: process.env.BASE_URL,
  routes
})

 浙公网安备 33010602011771号