windows下Ubuntu安装 Lnmp环境
安装 Nginx
- 安装Nginx
sudo apt install nginx -y - 启动并使 Nginx 在启动时自动启动
sudo systemctl start nginx
sudo systemctl enable nginx
安装Mysql5.7
一:先卸载并清理历史的Mysql环境
- 首先,停止Mysql服务
sudo systemctl stop mysql - 然后,通过
apt-get命令移除MySQL包
sudo apt-get remove --purge mysql-server mysql-client mysql-common - 清理残余的配置和数据文件
sudo rm -rf /etc/mysql /var/lib/mysql sudo apt-get autoremove sudo apt-get autoclean - 如果你之前安装了其他非官方的MySQL版本或是MariaDB,也可以一并卸载
sudo apt-get remove --purge mysql-server-core-*
二:安装 Mysql5.7版本的环境
- 更新软件包列表
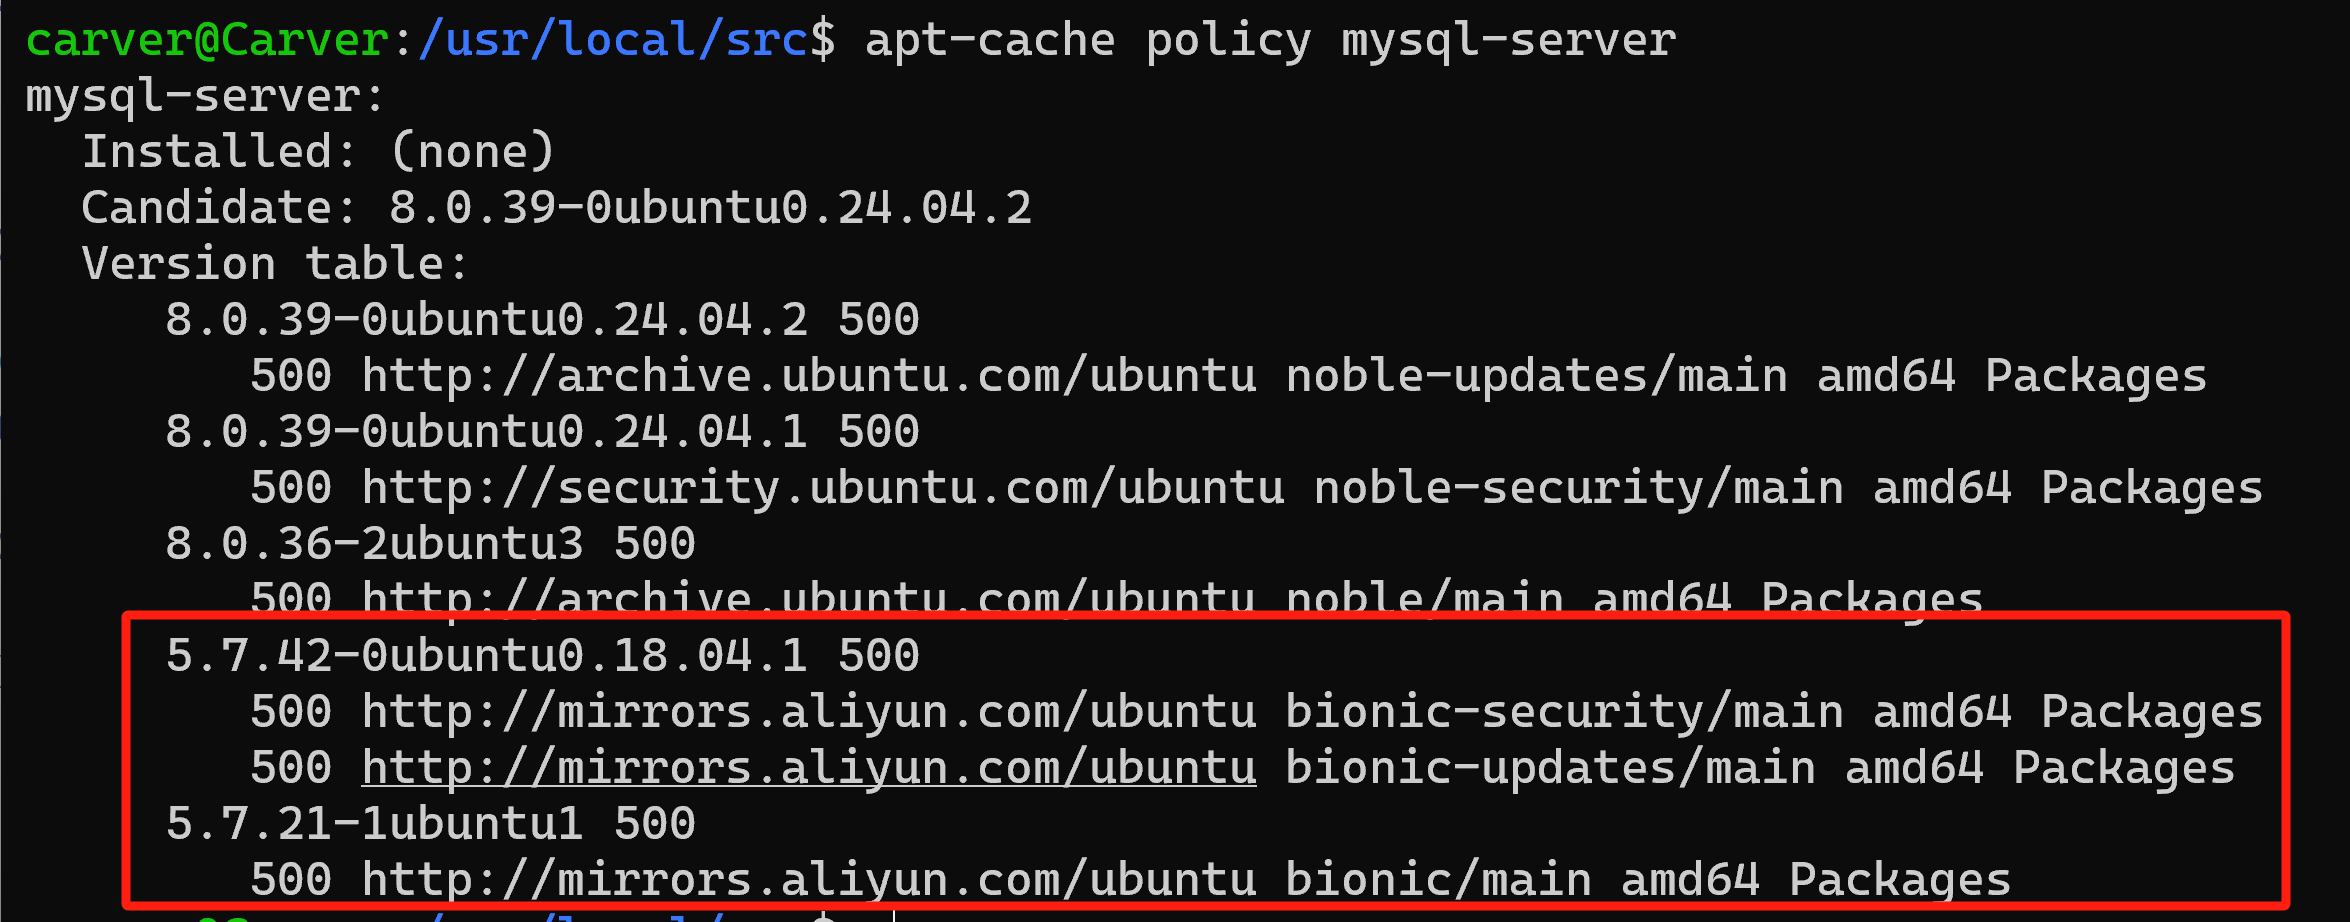
sudo apt-get update - 查看系统默认安装的数据库版本
执行命令:
sudo apt-cache policy mysql-server
- 需要安装mysql5.7的版本就需要换源
先备份文件:
然后更换apt源:修改sources.list文件sudo cp /etc/apt/sources.list /etc/apt/sources.list.back
sudo vim /etc/apt/sources.list# 阿里源 deb http://mirrors.aliyun.com/ubuntu/ bionic main restricted universe multiverse deb http://mirrors.aliyun.com/ubuntu/ bionic-security main restricted universe multiverse deb http://mirrors.aliyun.com/ubuntu/ bionic-updates main restricted universe multiverse deb http://mirrors.aliyun.com/ubuntu/ bionic-proposed main restricted universe multiverse deb http://mirrors.aliyun.com/ubuntu/ bionic-backports main restricted universe multiverse deb-src http://mirrors.aliyun.com/ubuntu/ bionic main restricted universe multiverse deb-src http://mirrors.aliyun.com/ubuntu/ bionic-security main restricted universe multiverse deb-src http://mirrors.aliyun.com/ubuntu/ bionic-updates main restricted universe multiverse deb-src http://mirrors.aliyun.com/ubuntu/ bionic-proposed main restricted universe multiverse deb-src http://mirrors.aliyun.com/ubuntu/ bionic-backports main restricted universe multiverse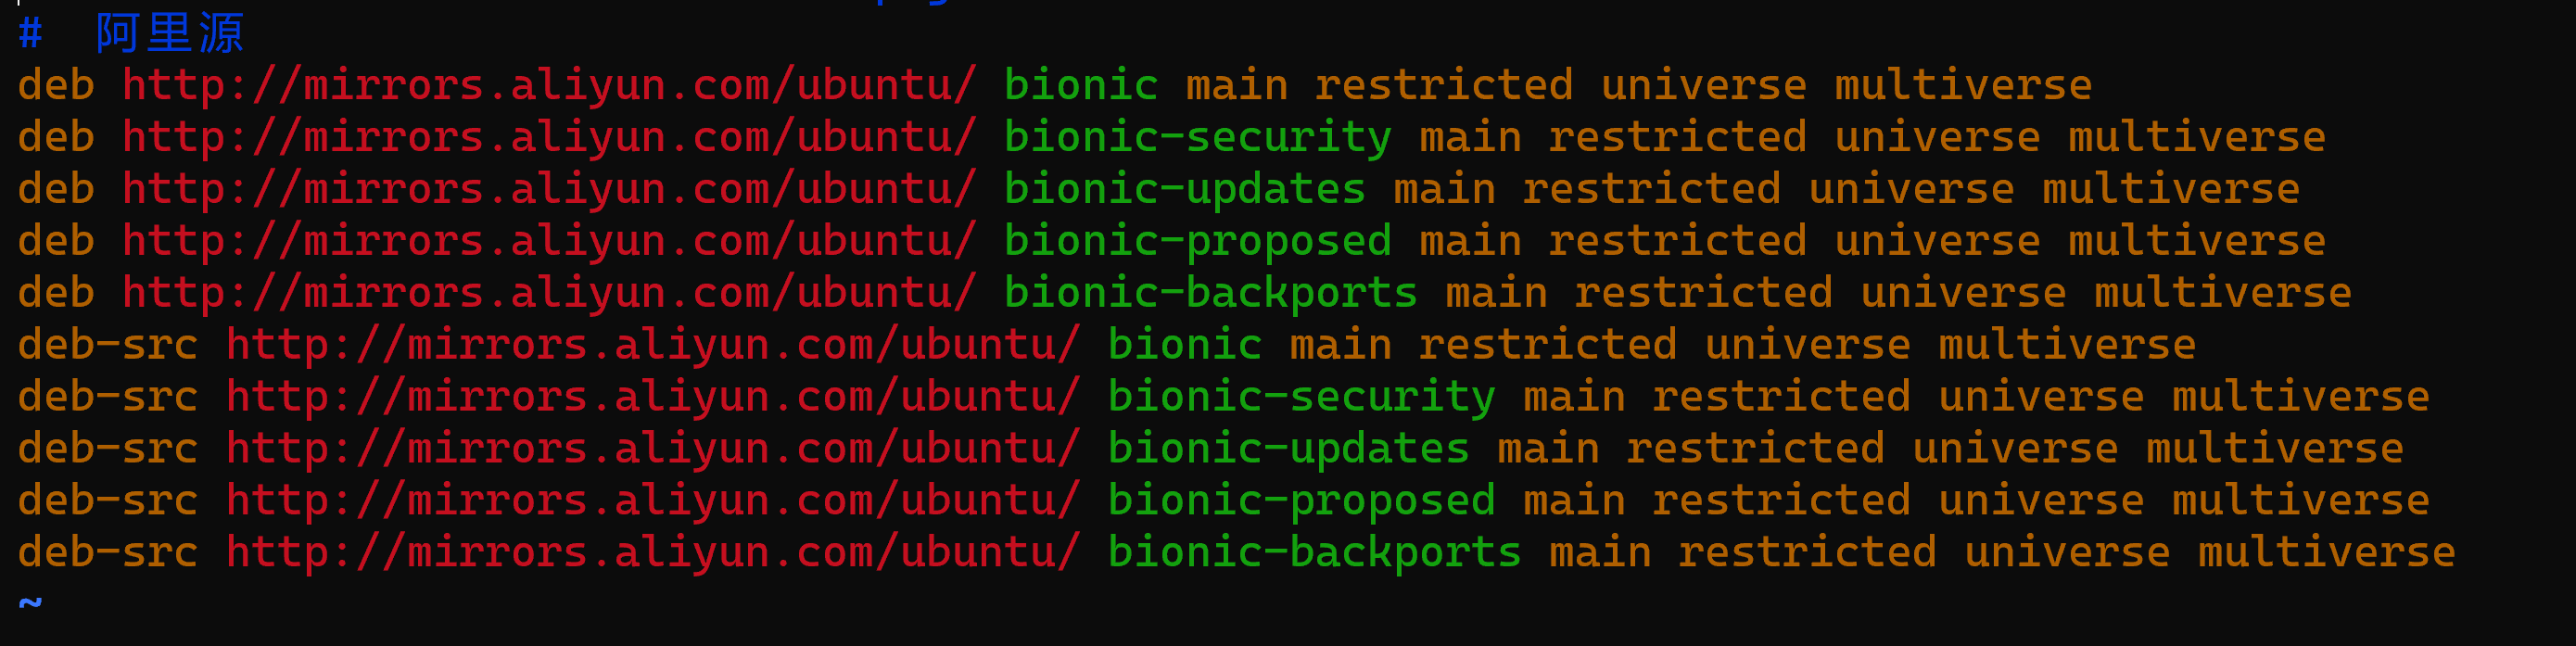
- 更新镜像源
sudo gpg --keyserver keyserver.ubuntu.com --recv 3B4FE6ACC0B21F32 sudo gpg --export --armor 3B4FE6ACC0B21F32 | sudo apt-key add - sudo apt-get update - 查看默认安装的mysql数据库版本,可以看到默认的已经变成了mysql5.7的版本了哦!
- 安装Mysql5.7
sudo apt-get -y install mysql-server-5.7 - 查看mysql是否安装成功
sudo dpkg -l | grep mysql
mysql -V
sudo systemctl status mysql
-
设置开机自启
sudo systemctl enable mysql - 修改服务为全网启动
打开mysql的配置文件:/etc/mysql/mysql.conf.d/mysqld.cnf

- 换回apt源
cd /etc/apt sudo mv sources.list sources.list.old sudo mv sources.list.back sources.list sudo apt-get update - 进入mysql终端
输入sudo mysql回车,默认是没有密码的哦!
- 设置允许远程访问
use mysql;
update user set host='%' where user = 'root' and host='localhost';
grant all privileges on *.* to 'root'@'%' identified by 'root' with grant option;
flush privileges;
安装php7.4
- 为了安装 PHP 7.4,我们可以使用
ondrej/phpPPA:
sudo apt install software-properties-common -y sudo add-apt-repository ppa:ondrej/php sudo apt update - 安装 PHP 7.4 以及与 Nginx 和 MySQL 相关的一些常用扩展
sudo apt install php7.4 php7.4-fpm php7.4-mysql php7.4-cli php7.4-fpm php7.4-json php7.4-common php7.4-mbstring php7.4-zip php7.4-gd php7.4-mysqli -y如果是 PHP8.4的话:
sudo apt install php8.4 php8.4-cli php8.4-common php8.4-mbstring php8.4-xml php8.4-mysql php8.4-curl php8.4-gd -y - 启动并使 PHP 7.4 FPM 在启动时自动启动
sudo systemctl start php7.4-fpm
sudo systemctl enable php7.4-fpm
本文来自博客园,作者:Carvers,转载请注明原文链接:https://www.cnblogs.com/carver/articles/18508645

 浙公网安备 33010602011771号