基于systemback的Ubuntu系统镜像备份和安装方案
问题描述(Problem Statement)
Ubuntu系统安装后,往往我们会花很长时间去配置各种开发环境,这个过程是复杂的,一台机器安装完成之后,如何快速在其他机器上拷贝安装,是一个重要问题。这里给出一个基于systemback的Ubuntu备份安装方案。
解决方案(Solution)
1. Install Systemback on Ubuntu 18.04, 19.10 and 20.04
Ubuntu 16.04 users can install Systemback from PPA by running the following commands in terminal.
1 2 3 4 5 | sudo add-apt-repository ppa:nemh/systembacksudo apt updatesudo apt install systemback |
The author of Systemback stopped its development in 2016, so Ubuntu 18.04, 19.10 and 20.04 are not in the supported list. If you run the above command on Ubuntu 18.04, you will see the following error,
E: The repository 'http://ppa.launchpad.net/nemh/systemback/ubuntu bionic Release' does not have a Release file.
or
E: Unable to locate package systemback
To install systemback on Ubuntu 18.04/19.10, first remove the PPA.
1 | sudo add-apt-repository --remove ppa:nemh/systemback |
The Systemback binary for Ubuntu 16.04 is compatible with Ubuntu 18.04/19.10/20.04, so we can add the Ubuntu 16.04 PPA on 18.04/19.10. Run the following command to import the GPG signing key of this PPA so that the package manager can verify signature. The signing key can be found on launchpad.net.
1 | sudo apt-key adv --keyserver keyserver.ubuntu.com --recv-keys 382003C2C8B7B4AB813E915B14E4942973C62A1B |

If you see the following error:
gpg: keyserver receive failed: no keyserver available
or
gpg: keyserver receive failed: No data
You can fix this error by using a different keyserver. So instead of keyserver.ubuntu.com you can use pgp.mit.edu.
1 | sudo apt-key adv --keyserver pgp.mit.edu --recv-keys 382003C2C8B7B4AB813E915B14E4942973C62A1B |
Then add the PPA on Ubuntu 18.04/19.10/20.04.
1 | sudo add-apt-repository "deb http://ppa.launchpad.net/nemh/systemback/ubuntu xenial main" |

Update package list and install Systemback.
1 2 3 | sudo apt updatesudo apt install systemback |
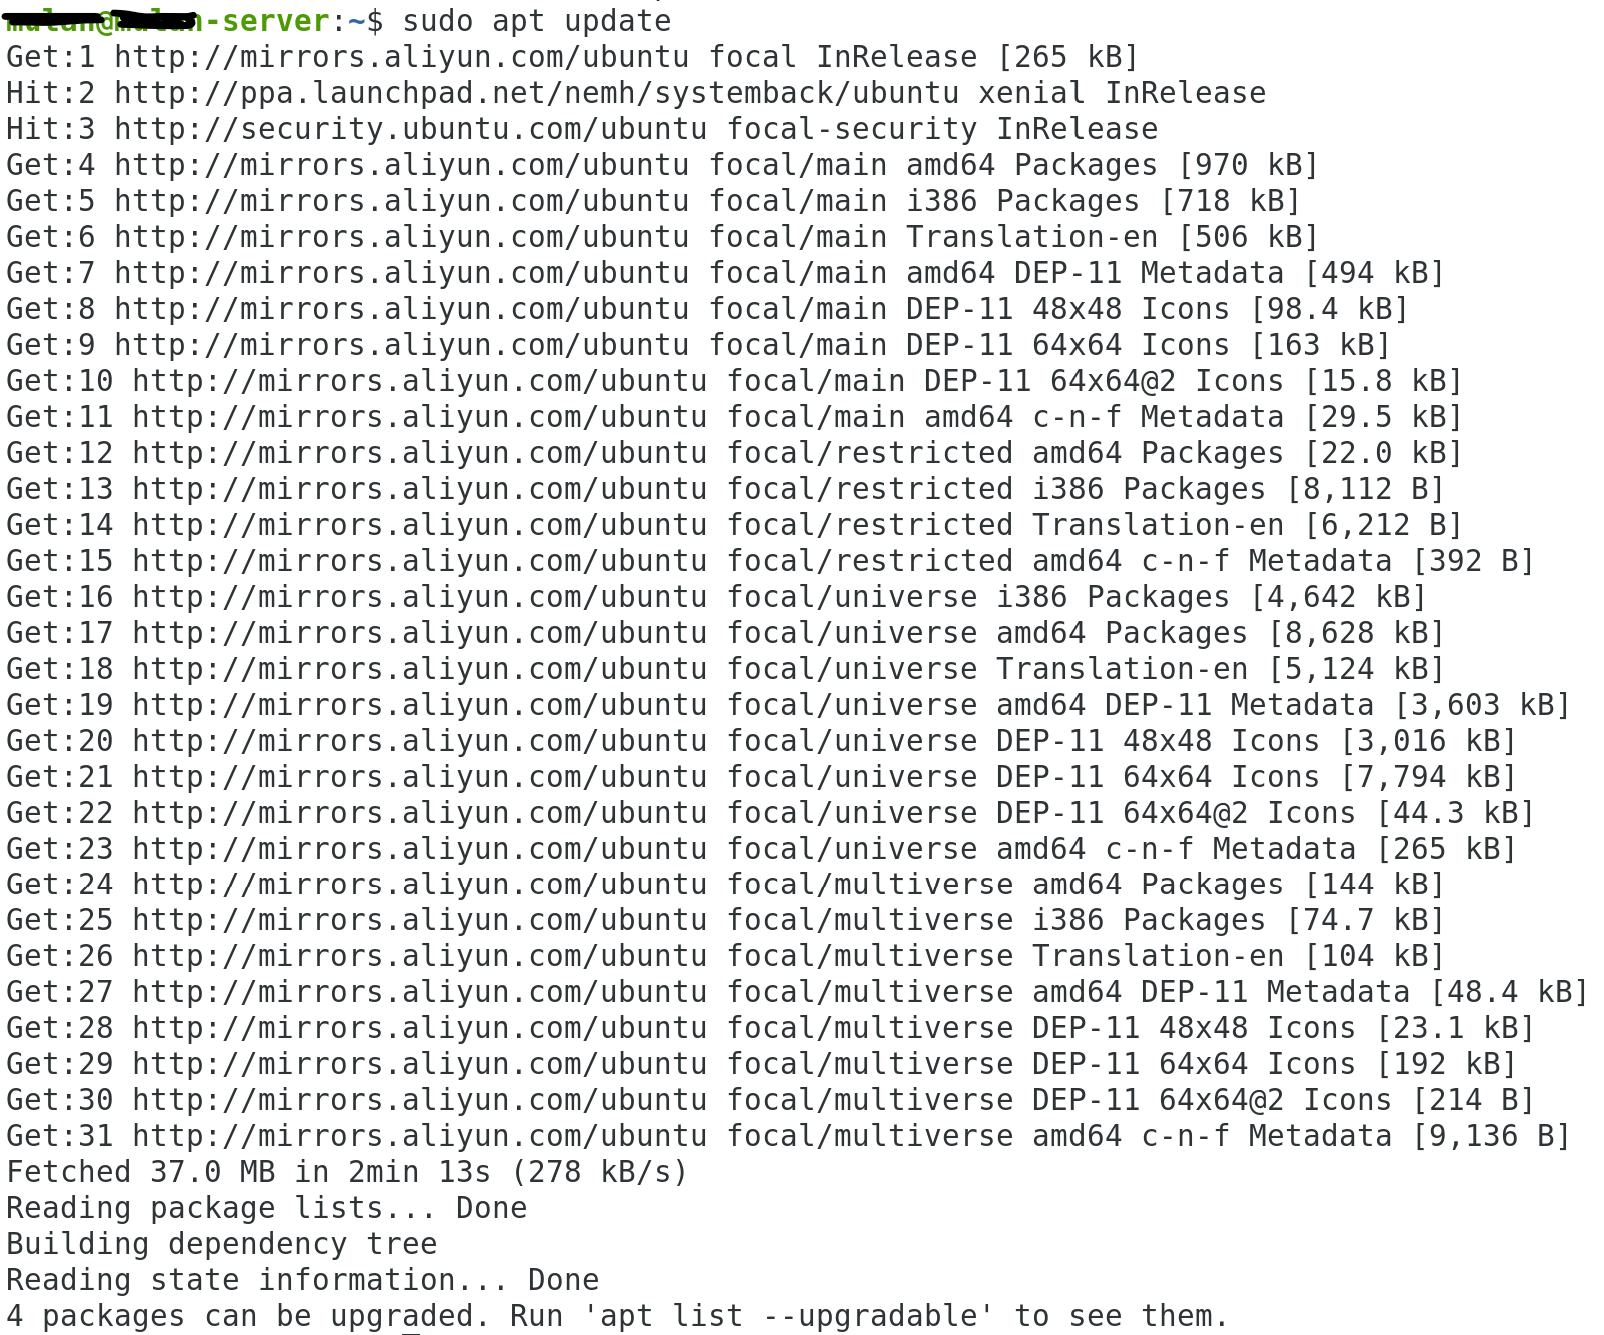
注意:如果你遇到一下错误(不能访问cn.archive.ubuntu.com导致无法完成下载),那么需要更换访问源的网址

解决方案:终端输入
1 | sudo vi /etc/apt/sources.list |
将打开的文件中所有的http://cn.archive.ubuntu.com更换为镜像的网址即可(我这边用的阿里云 http://mirrors.aliyun.com/ubuntu/)
------------------------------------------------------------------
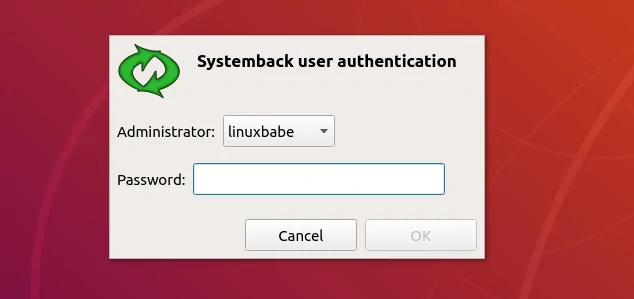
Then you can start Systemback from your application menu. You need to enter your password to use this software. After you enter the password, click OK button.
2. How to Create a Bootable ISO Image From Your Current System
As you can see, you can create restore points of your system, restore to a point, copy the system to another partition, install the system to a new partition, create live system (bootable ISO image), repair the system and upgrade software on the system.
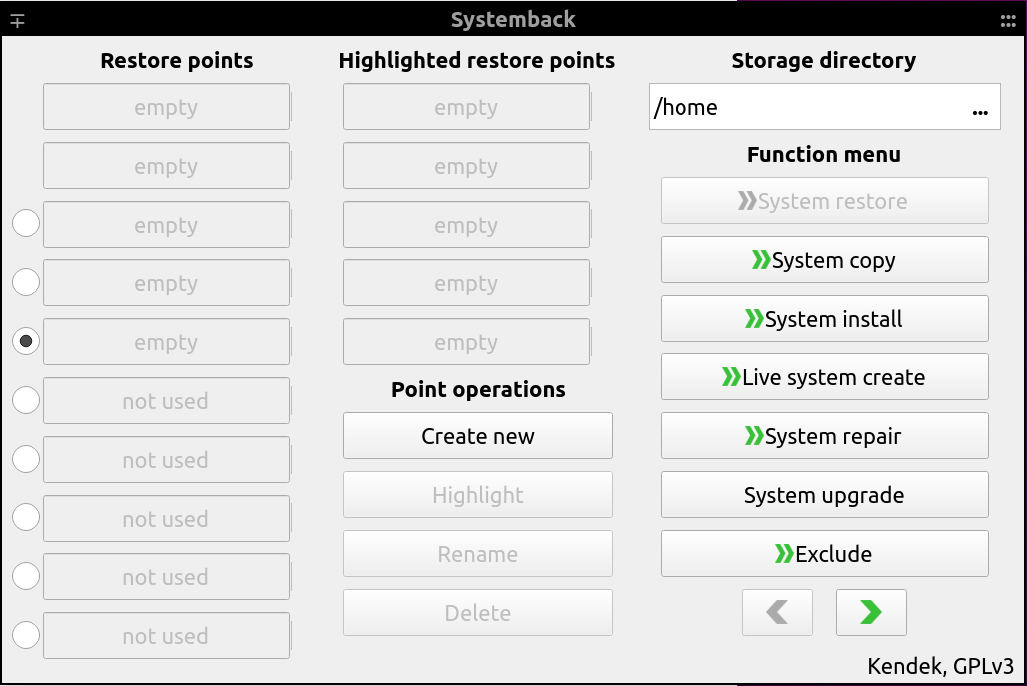
Systemback can create a customized ISO image file from your current system. Every program and file can be included in the ISO.
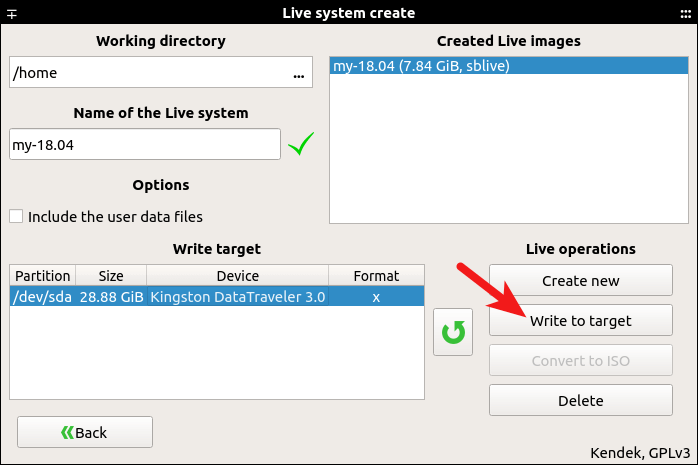
Click the Live System Create button, then give a name to your ISO file. You have the option to include the user data files. Click the Create New button to create live system.
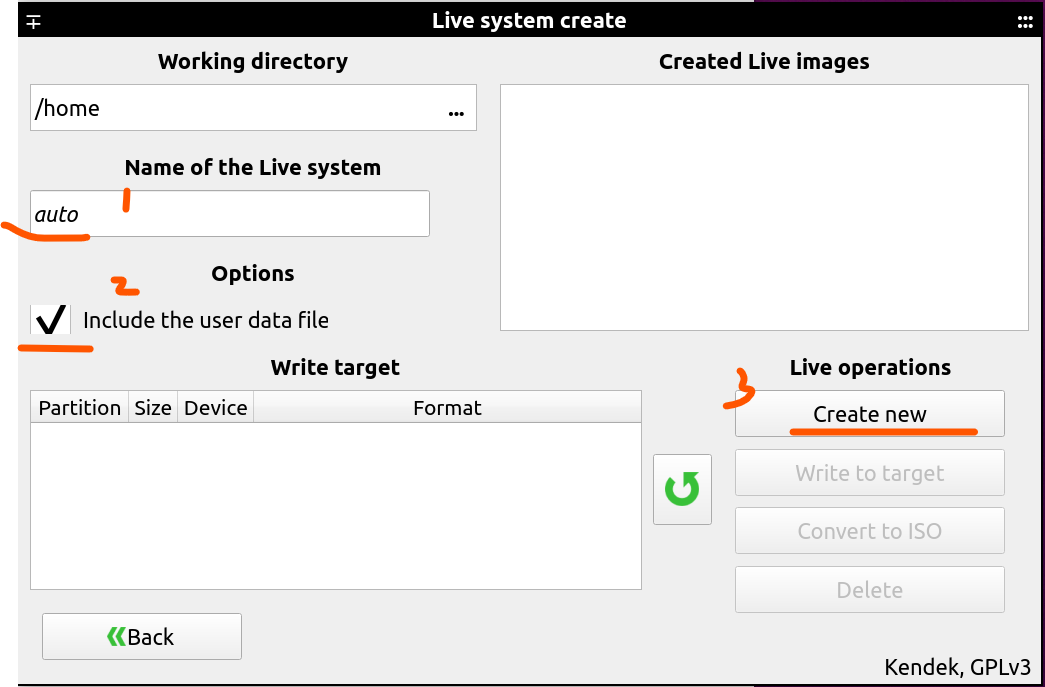
After the live system is created, you can convert the sblive file to ISO file. Note that if the sblive file is too big, you can’t convert it to ISO file. The sblive and ISO file are stored under your home directory by default, but they are not visible.
You can also insert your pen drive to your computer and write the sblive file to pen drive. (Click the reload button to detect USB drives.)
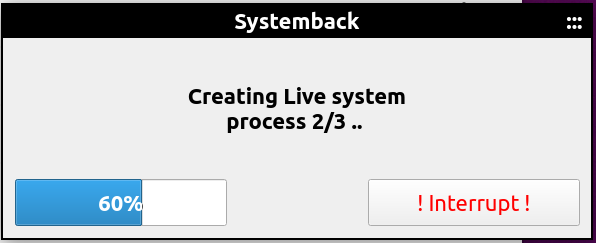
Because my system has many programs and files, this process can take some time.
Once it’s done, you can use the bootable USB to install your customized Ubuntu system on other computers.

写入USB 优盘
上面结束后,会变为下面的界面。这时系统已经备份好了,image的名字出现在红框所示的窗口中。
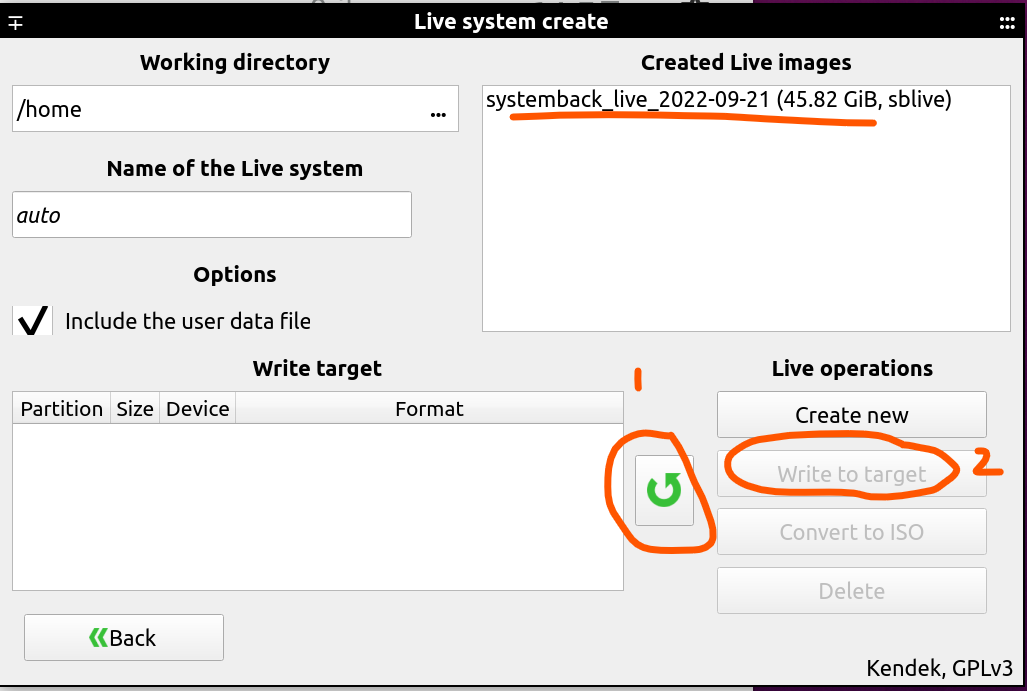
- 这时,插入一个USB优盘,空间要足够大,至少能够放下image的size,并大一点,还要放系统盘启动文件。
- 然后,点击绿色的刷新按钮,如标1的地方,这时会在“write target”窗口中出现插入的优盘的名字。
- 最后,点击“Write to target”按钮,等待写入完成。

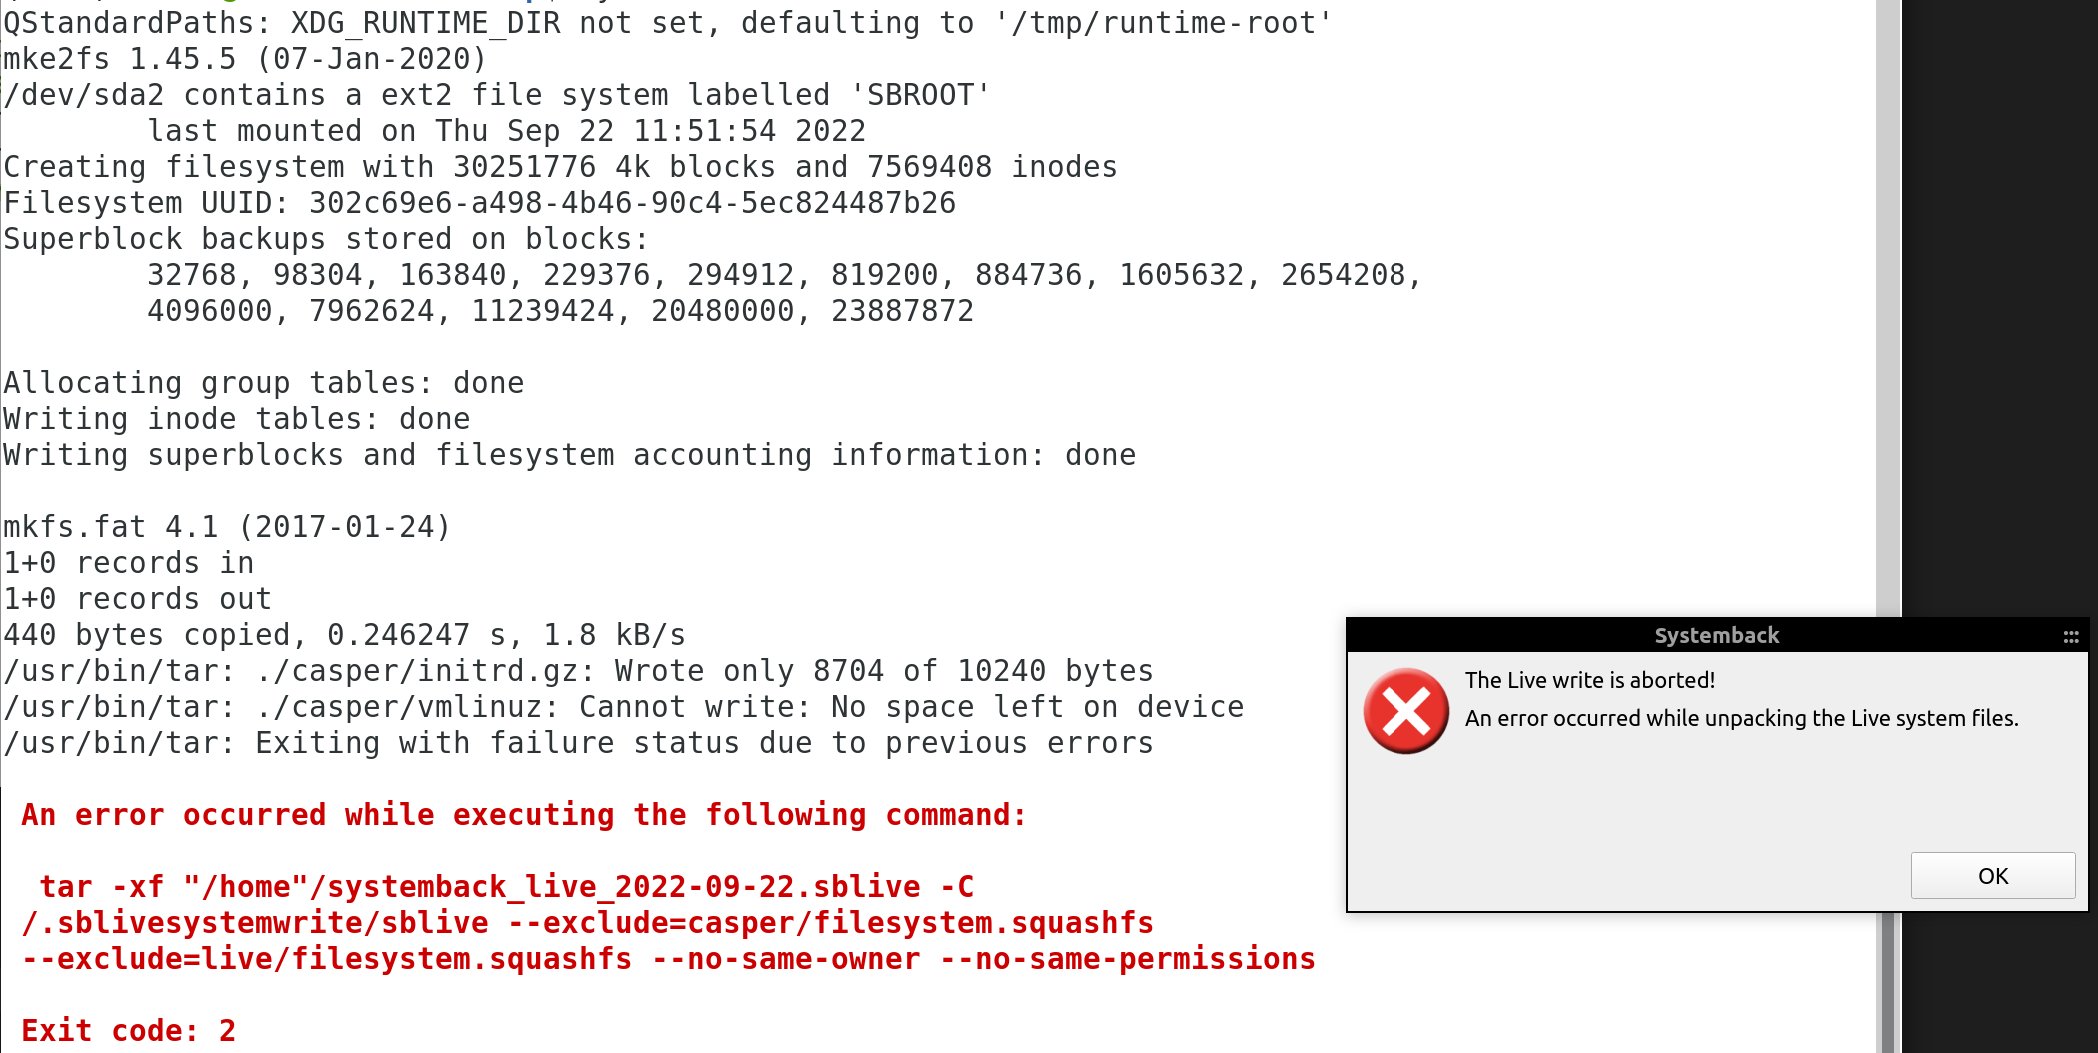
注意:如果在写的过程中,出错了,想要查看详细的错误信息可以通过:
1 | systemback-sustart |
这个指令去调试,看看具体哪一个文件复制出了问题。极有可能的是权限问题。
也可以通过这个指令去调试:
1 | DBGLEV=3 systemback-sustart |
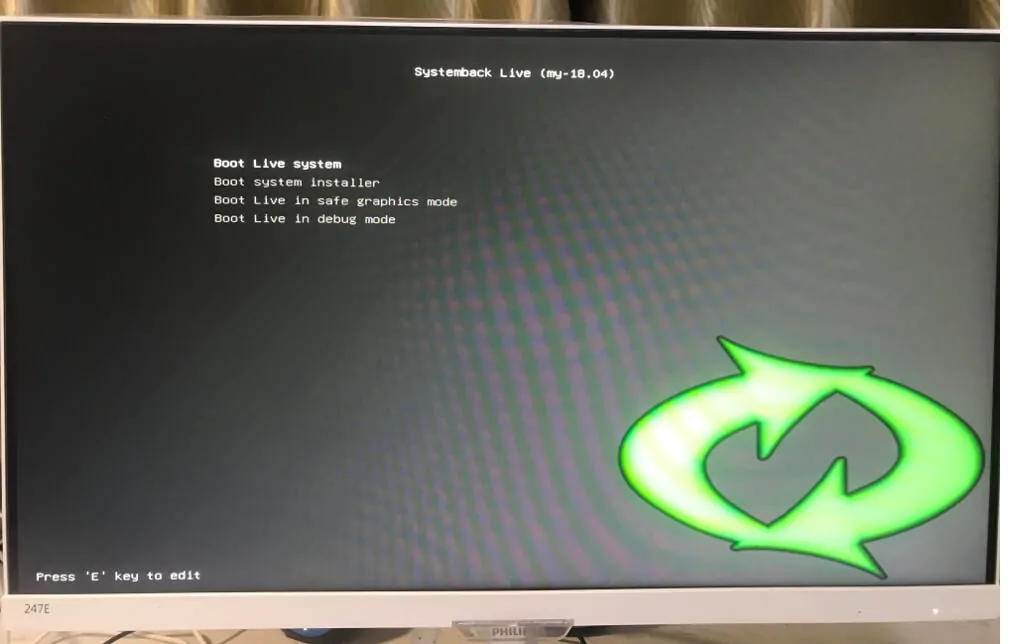
3. 利用制作的安装盘装新机器(Use the bootable USB to install your customized Ubuntu system on other computers)
参考:
How to Install Systemback on Ubuntu 18.04 and Ubuntu 19.10, 20.04


【推荐】国内首个AI IDE,深度理解中文开发场景,立即下载体验Trae
【推荐】编程新体验,更懂你的AI,立即体验豆包MarsCode编程助手
【推荐】抖音旗下AI助手豆包,你的智能百科全书,全免费不限次数
【推荐】轻量又高性能的 SSH 工具 IShell:AI 加持,快人一步
· Manus爆火,是硬核还是营销?
· 终于写完轮子一部分:tcp代理 了,记录一下
· 震惊!C++程序真的从main开始吗?99%的程序员都答错了
· 别再用vector<bool>了!Google高级工程师:这可能是STL最大的设计失误
· 单元测试从入门到精通
2017-09-21 【译】历史上的名人如何利用不同的思维方式成就自己
2017-09-21 【译】Focused and Diffuse Modes(专注与发散模式)