Tomcat源码分析-开篇(Tomcat源码部署运行 Ant方式)
一、安装配置Ant
(1)下载Ant
下载地址:https://ant.apache.org/bindownload.cgi

下载完成后解压即用。
(2)配置Ant环境变量
配置ANT_HOME=F:\java\apache-ant-1.10.7
path中添加:%ANT_HOME%\bin
(3)查看Ant版本
命令:ant -v

到这里Ant已经安装好了。下面就准备开始导入Tomcat源码...
二、导入Tomcat源码
(1)下载tomcat源码
下载地址:https://archive.apache.org/dist/tomcat/
(2)修改build.properties文件
在根目录我们可以看到有一个build.properties.default文件。将其更名为build.properties,打开,找到base.path=….;并将其改为该文件的目录+/output。当然,你也可以随便写什么路径,只要你能找到就行。

(3)下载相关的依赖jar
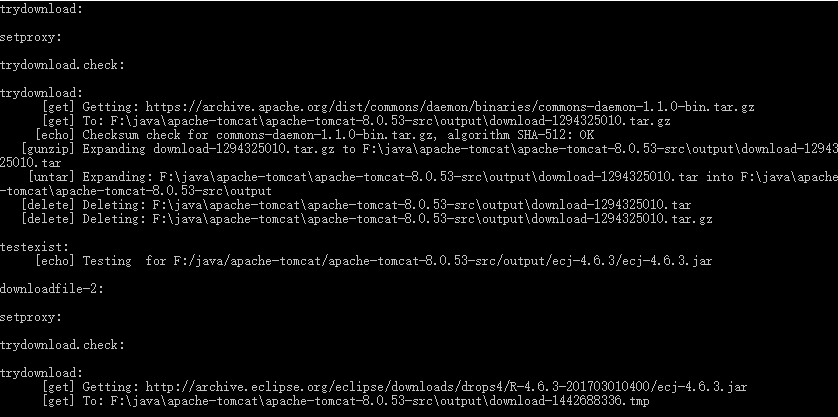
打开cmd,将进入tomcat源码的根目录,输入ant 命令(这个可能会花一点时间),如图:

下载完成后目录如下:

(4)新建java项目
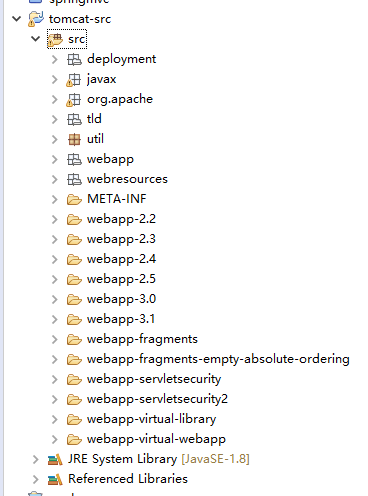
新建一个java Project,我自已把它命名为tomcat-src,然后将tomcat源码下的java和test两个文件夹以File System方式导入项目的根目录。
(5)导入依赖包

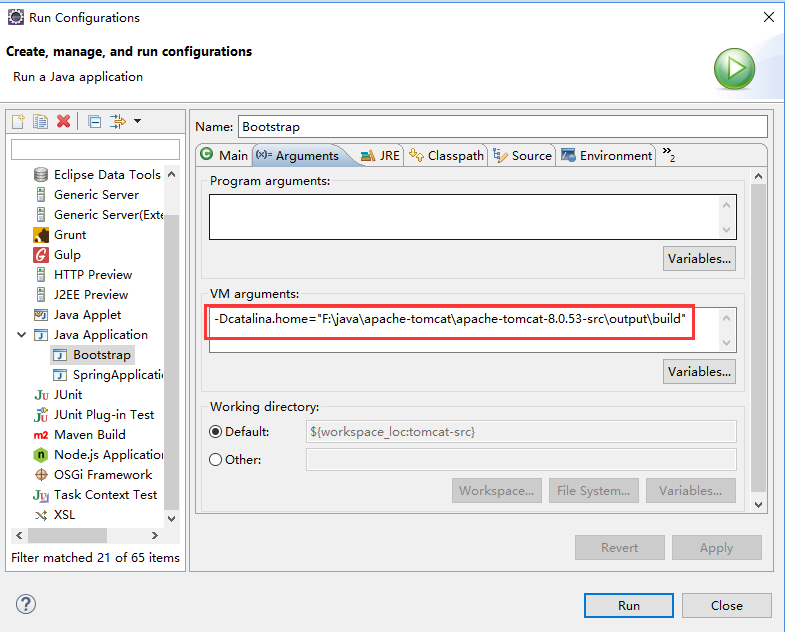
(6)配置启动参数


到此可以直接通过启动 Bootstrap 类中的main 方法启动tomcat服务了。
结束了 !!!
三、这个Tomcat源码项目如何启动其它web应用?(附加内容)
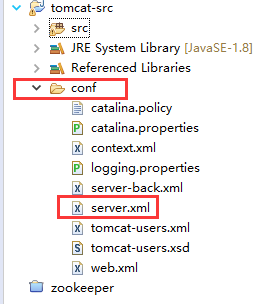
(1)在新建的java项目中创建一个conf 目录,并将源码目录下conf 的server.xml 放进去

(2)打开Bootstrap.java ,找到这个类的main方法,修改args参数(源码启动的时候 args参数为空值)
修改的这个args参数 在启动Bootstrap 时,会去加载这个 server.xml 文件
public static void main(String args[]) {
    // 在这时修改args参数,因为直接启动这个main方法时,args参数为空
    args = new String[]{"-config", System.getProperty("user.dir") + "\\conf\\server.xml", "start"};
    if (daemon == null) {
        // Don't set daemon until init() has completed
        Bootstrap bootstrap = new Bootstrap();
        try {
            bootstrap.init();
        } catch (Throwable t) {
            handleThrowable(t);
            t.printStackTrace();
            return;
        }
        daemon = bootstrap;
    } else {
        // When running as a service the call to stop will be on a new
        // thread so make sure the correct class loader is used to prevent
        // a range of class not found exceptions.
        Thread.currentThread().setContextClassLoader(daemon.catalinaLoader);
    }
    // 省略若干代码...
}
(3)修改刚才加进去的这个 server.xml 文件

代码可以从下面进行拷贝
<Host name="localhost" appBase="webapps" unpackWARs="true" autoDeploy="true"> <!-- SingleSignOn valve, share authentication between web applications Documentation at: /docs/config/valve.html --> <!-- <Valve className="org.apache.catalina.authenticator.SingleSignOn" /> --> <!-- Access log processes all example. Documentation at: /docs/config/valve.html Note: The pattern used is equivalent to using pattern="common" --> <Valve className="org.apache.catalina.valves.AccessLogValve" directory="logs" prefix="localhost_access_log" suffix=".txt" pattern="%h %l %u %t "%r" %s %b" /> <Context path="" reloadable="true" docBase="D:\workspace-neno\springmvc\src\main\webapp" workDir="D:\workspace-neno\springmvc\work"> <Loader className="org.apache.catalina.loader.MyDevLoader" reloadable="true" debug="1" useSystemClassLoaderAsParent="false" /> </Context> </Host>
(4)添加 org.apache.catalina.loader.MyDevLoader 这个类(就是上面截图圈起来的那个类)
在 org.apache.catalina.loader 包下新建一个类,名称为 MyDevLoader (当然可以改成你想要的名字,只要保证和server.xml 中 Loader 中的className一致就行) ;
建完类之后,直接拷贝我下面的代码:(备注:我这里用的是tomcat8,如果是tomcat7/tomcat9 的话可能要修改一些报错的内容)
package org.apache.catalina.loader;

import java.io.File;
import java.io.FileFilter;
import java.io.FileReader;
import java.io.IOException;
import java.io.LineNumberReader;
import java.net.MalformedURLException;
import java.net.URL;
import java.util.ArrayList;
import java.util.Iterator;
import java.util.List;
import java.util.StringTokenizer;
import javax.servlet.ServletContext;
import org.apache.catalina.LifecycleException;
/**
 * 自定义DevLoader类
 * @author Administrator
 *
 */
public class MyDevLoader extends WebappLoader {
    private static final String info = "org.apache.catalina.loader.DevLoader/1.0";
    private String webClassPathFile = ".#webclasspath";
    private String tomcatPluginFile = ".tomcatplugin";

    public MyDevLoader() {
    }

    public MyDevLoader(ClassLoader parent) {
        super(parent);
    }

    public void startInternal() throws LifecycleException {
        log("Starting DevLoader");

        super.startInternal();

        ClassLoader cl = super.getClassLoader();
        if (!(cl instanceof WebappClassLoader)) {
            logError("Unable to install WebappClassLoader !");
            return;
        }
        WebappClassLoader devCl = (WebappClassLoader) cl;

        List webClassPathEntries = readWebClassPathEntries();
        StringBuffer classpath = new StringBuffer();
        for (Iterator it = webClassPathEntries.iterator(); it.hasNext();) {
            String entry = (String) it.next();
            File f = new File(entry);
            if (f.exists()) {
                if ((f.isDirectory()) && (!(entry.endsWith("/"))))
                    f = new File(entry + "/");
                try {
                    URL url = f.toURL();

                    // devCl.addRepository(url.toString());
                    devCl.addURL(url);
                    classpath.append(f.toString() + File.pathSeparatorChar);
                    log("added " + url.toString());
                } catch (MalformedURLException e) {
                    logError(entry + " invalid (MalformedURL)");
                }
            } else {
                logError(entry + " does not exist !");
            }
        }

        String cp = (String) getServletContext().getAttribute("org.apache.catalina.jsp_classpath");
        StringTokenizer tokenizer = new StringTokenizer(cp, File.pathSeparatorChar + "");
        while (tokenizer.hasMoreTokens()) {
            String token = tokenizer.nextToken();

            if ((token.charAt(0) == '/') && (token.charAt(2) == ':')) {
                token = token.substring(1);
            }
            classpath.append(token + File.pathSeparatorChar);
        }

        getServletContext().setAttribute("org.apache.catalina.jsp_classpath", classpath.toString());
        log("JSPCompiler Classpath = " + classpath);
    }

    protected void log(String msg) {
        System.out.println("[DevLoader] " + msg);
    }

    protected void logError(String msg) {
        System.err.println("[DevLoader] Error: " + msg);
    }

    protected List readWebClassPathEntries() {
        List rc = null;

        File prjDir = getProjectRootDir();
        if (prjDir == null)
            return new ArrayList();

        log("projectdir=" + prjDir.getAbsolutePath());

        rc = loadWebClassPathFile(prjDir);

        if (rc == null)
            rc = new ArrayList();
        return rc;
    }

    protected File getProjectRootDir() {
        File rootDir = getWebappDir();
        FileFilter filter = new FileFilter() {
            public boolean accept(File file) {
                return (file.getName().equalsIgnoreCase(webClassPathFile) || file.getName().equalsIgnoreCase(tomcatPluginFile));
            }
        };
        while (rootDir != null) {
            File[] files = rootDir.listFiles(filter);
            if ((files != null) && (files.length >= 1))
                return files[0].getParentFile();

            rootDir = rootDir.getParentFile();
        }
        return null;
    }

    protected List loadWebClassPathFile(File prjDir) {
        File cpFile = new File(prjDir, this.webClassPathFile);
        if (cpFile.exists()) {
            FileReader reader = null;
            try {
                List rc = new ArrayList();
                reader = new FileReader(cpFile);
                LineNumberReader lr = new LineNumberReader(reader);
                String line = null;
                while ((line = lr.readLine()) != null) {
                    line = line.replace('\\', '/');
                    rc.add(line);
                }
                return rc;
            } catch (IOException ioEx) {
                if (reader != null)
                    ;
                return null;
            }
        }
        return null;
    }

    protected ServletContext getServletContext() {
        // return ((Context) getContainer()).getServletContext();
        return this.getContext().getServletContext();
    }

    protected File getWebappDir() {
        File webAppDir = new File(getServletContext().getRealPath("/"));
        return webAppDir;
    }
}
(5)启动 BootStrap 中的main方法
这样你其它的web项目就启动了,这个就相当于eclipse插件中那个猫的图标按钮功能!


 浙公网安备 33010602011771号