SpringCloud项目中使用Nacos作为注册中心
SpringCloud和Nacos的介绍原理在这里就不多说了,百度一大堆,这里就只是记录一下刚开始学习时候项目的使用过程
Nacos-server
我这里是从官网下载的Nacos-server
下载地址: https://github.com/alibaba/nacos/releases
下载解压之后就可以启动使用
修改端口:
用编辑器打开bin目录下的startup.cmd文件 添加一行代码
set "JAVA_OPT=%JAVA_OPT% --server.port=9090
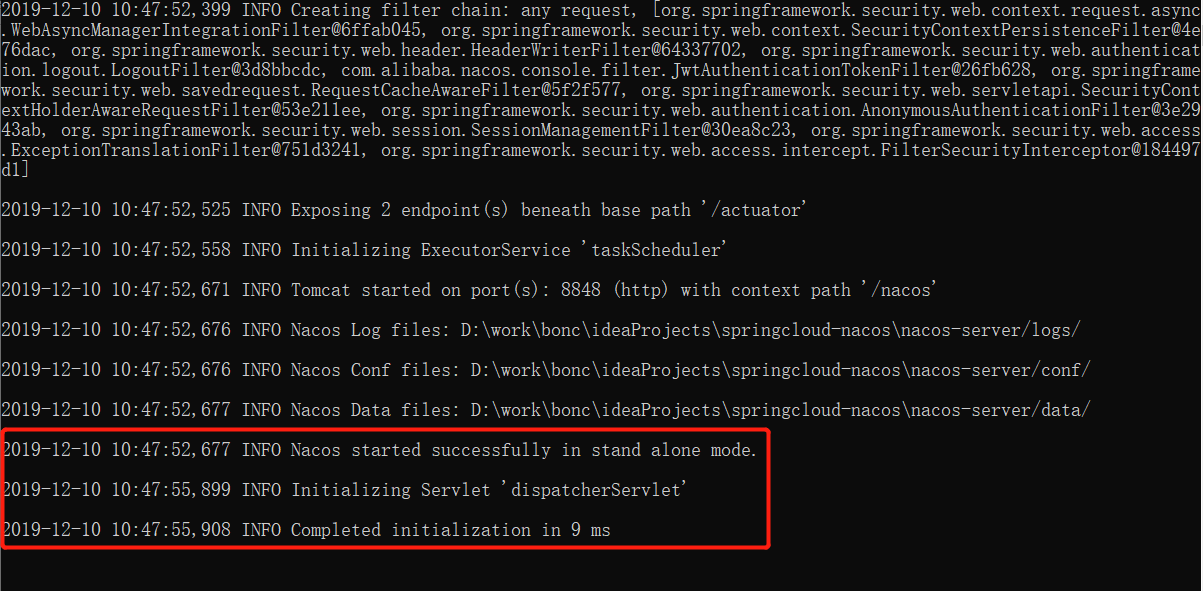
解压后进入bin文件夹,直接双击执行startup.cmd文件,启动成功如下图:
启动成功后,此时Nacos控制台就可以访问了,浏览器访问:http://127.0.0.1:8848/nacos/index.html ,默认的账号密码为nacos/nacos,控制台页面如下:

创建项目父工程
IDEA中创建聚合项目nacos作为父工程,其pom.xml如下
<?xml version="1.0" encoding="UTF-8"?>
<project xmlns="http://maven.apache.org/POM/4.0.0"
         xmlns:xsi="http://www.w3.org/2001/XMLSchema-instance"
         xsi:schemaLocation="http://maven.apache.org/POM/4.0.0 http://maven.apache.org/xsd/maven-4.0.0.xsd">
    <modelVersion>4.0.0</modelVersion>

    <groupId>com.example</groupId>
    <artifactId>nacos</artifactId>
    <packaging>pom</packaging>
    <version>1.0-SNAPSHOT</version>
    <modules>
        <module>nacosprovider</module>
        <module>nacosconsumer</module>
        <module>nacosconfig</module>
    </modules>


    <properties>
        <java.version>1.8</java.version>
        <spring-boot.version>2.0.4.RELEASE</spring-boot.version>
        <spring-cloud.version>Finchley.RELEASE</spring-cloud.version>
        <nacos.version>0.2.2.RELEASE</nacos.version>
    </properties>

    <dependencies>
        <dependency>
            <groupId>org.projectlombok</groupId>
            <artifactId>lombok</artifactId>
            <optional>true</optional>
        </dependency>

        <dependency>
            <groupId>org.springframework.boot</groupId>
            <artifactId>spring-boot-starter-web</artifactId>
        </dependency>

        <dependency>
            <groupId>org.springframework.boot</groupId>
            <artifactId>spring-boot-starter-test</artifactId>
            <scope>test</scope>
        </dependency>
    </dependencies>

    <dependencyManagement>
        <dependencies>
            <dependency>
                <groupId>org.springframework.cloud</groupId>
                <artifactId>spring-cloud-dependencies</artifactId>
                <version>${spring-cloud.version}</version>
                <type>pom</type>
                <scope>import</scope>
            </dependency>
            <dependency>
                <groupId>org.springframework.boot</groupId>
                <artifactId>spring-boot-dependencies</artifactId>
                <version>${spring-boot.version}</version>
                <type>pom</type>
                <scope>import</scope>
            </dependency>
            <dependency>
                <groupId>org.springframework.cloud</groupId>
                <artifactId>spring-cloud-alibaba-dependencies</artifactId>
                <version>${nacos.version}</version>
                <type>pom</type>
                <scope>import</scope>
            </dependency>
        </dependencies>
    </dependencyManagement>
</project>
创建服务提供方
在父工程Nacos下创建springboot子工程nacos-provider,其pom.xml文件为:
<?xml version="1.0" encoding="UTF-8"?>
<project xmlns="http://maven.apache.org/POM/4.0.0"
         xmlns:xsi="http://www.w3.org/2001/XMLSchema-instance"
         xsi:schemaLocation="http://maven.apache.org/POM/4.0.0 http://maven.apache.org/xsd/maven-4.0.0.xsd">
    <parent>
        <artifactId>nacos</artifactId>
        <groupId>com.example</groupId>
        <version>1.0-SNAPSHOT</version>
    </parent>
    <modelVersion>4.0.0</modelVersion>

    <artifactId>nacos-provider</artifactId>

    <properties>
        <java.version>1.8</java.version>
    </properties>

    <dependencies>
        <dependency>
            <groupId>org.springframework.cloud</groupId>
            <artifactId>spring-cloud-starter-alibaba-nacos-discovery</artifactId>
        </dependency>

    </dependencies>

    <build>
        <plugins>
            <plugin>
                <groupId>org.springframework.boot</groupId>
                <artifactId>spring-boot-maven-plugin</artifactId>
            </plugin>
        </plugins>
    </build>

</project>
在启动类NacosProviderApplication.java中增加@EnableDiscoveryClient注解
package com.example.nacosprovider;

import org.springframework.boot.SpringApplication;
import org.springframework.boot.autoconfigure.SpringBootApplication;
import org.springframework.cloud.client.discovery.EnableDiscoveryClient;

@SpringBootApplication
@EnableDiscoveryClient
public class NacosProviderApplication {

    public static void main(String[] args) {
        SpringApplication.run(NacosProviderApplication.class, args);
    }

}
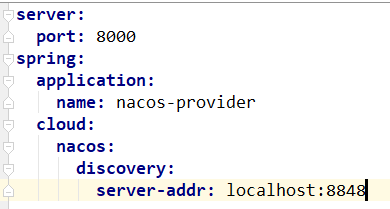
配置文件application.yml进行如下配置
server:
  port: 8000
spring:
  application:
    name: nacos-provider
  cloud:
    nacos:
      discovery:
        server-addr: localhost:8848
在服务提供方创建一个对外接口
package com.example.nacosprovider.controller;

import org.springframework.web.bind.annotation.GetMapping;
import org.springframework.web.bind.annotation.RestController;

@RestController
public class ProviderController {

    @GetMapping("/helloProvider")
    public String helloProvider(){
        return "你好,我是服务提供者";
    }
}
创建服务消费者
仍然在nacos工程下创建一个SpringBoot项目子工程命名为nacos-consumer,其pom文件与nacos-provider相同。
在启动类NacosConsumerApplication.java中增加@EnableDiscoveryClient和@EnableFeignClients注解
package com.example.nacosconsumer;

import org.springframework.boot.SpringApplication;
import org.springframework.boot.autoconfigure.SpringBootApplication;
import org.springframework.cloud.client.discovery.EnableDiscoveryClient;
import org.springframework.cloud.openfeign.EnableFeignClients;

@SpringBootApplication
@EnableDiscoveryClient
@EnableFeignClients
public class NacosConsumerApplication {

    public static void main(String[] args) {
        SpringApplication.run(NacosConsumerApplication.class, args);
    }

}
同样为nacos-consumer增加配置文件,内容如下
server:
  port: 9000
spring:
  application:
    name: nacos-consumer
  cloud:
    nacos:
      discovery:
        server-addr: localhost:8848
feign:
  hystrix:
    enabled: true
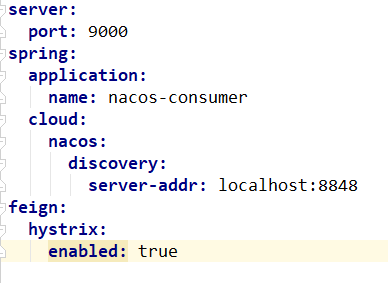
使用feign进行服务调用,hystrix进行熔断
项目目录

在service中进行服务提供者的接口调用
package com.example.nacosconsumer.service;

import com.example.nacosconsumer.service.impl.ConsumerServiceImpl;
import org.springframework.cloud.openfeign.FeignClient;
import org.springframework.web.bind.annotation.GetMapping;

@FeignClient(name = "nacos-provider", fallback = ConsumerServiceImpl.class)
public interface ConsumerService {

    @GetMapping("/helloProvider")
    String getHello();
}
在service的实现类中进行重写
package com.example.nacosconsumer.service.impl;

import com.example.nacosconsumer.service.ConsumerService;
import org.springframework.stereotype.Component;

@Component
public class ConsumerServiceImpl implements ConsumerService{

    @Override
    public String getHello() {
        return "服务出错";
    }
}
在controller中调用service的接口,像一般的接口调用一样
package com.example.nacosconsumer.controller;

import com.example.nacosconsumer.service.ConsumerService;
import org.springframework.web.bind.annotation.GetMapping;
import org.springframework.web.bind.annotation.RestController;

import javax.annotation.Resource;

@RestController
public class ConsumerController {

    @Resource
    private ConsumerService consumerService;

    @GetMapping("/getHello")
    public String getHello(){
        return consumerService.getHello();
    }
}
调用测试
启动完成后,在服务提供者和消费者的日志中应该可以分别看到如下信息
2019-12-10 16:36:37.800 INFO 18452 --- [ main] o.s.c.a.n.registry.NacosServiceRegistry : nacos registry, application 172.16.74.34:9001 register finished
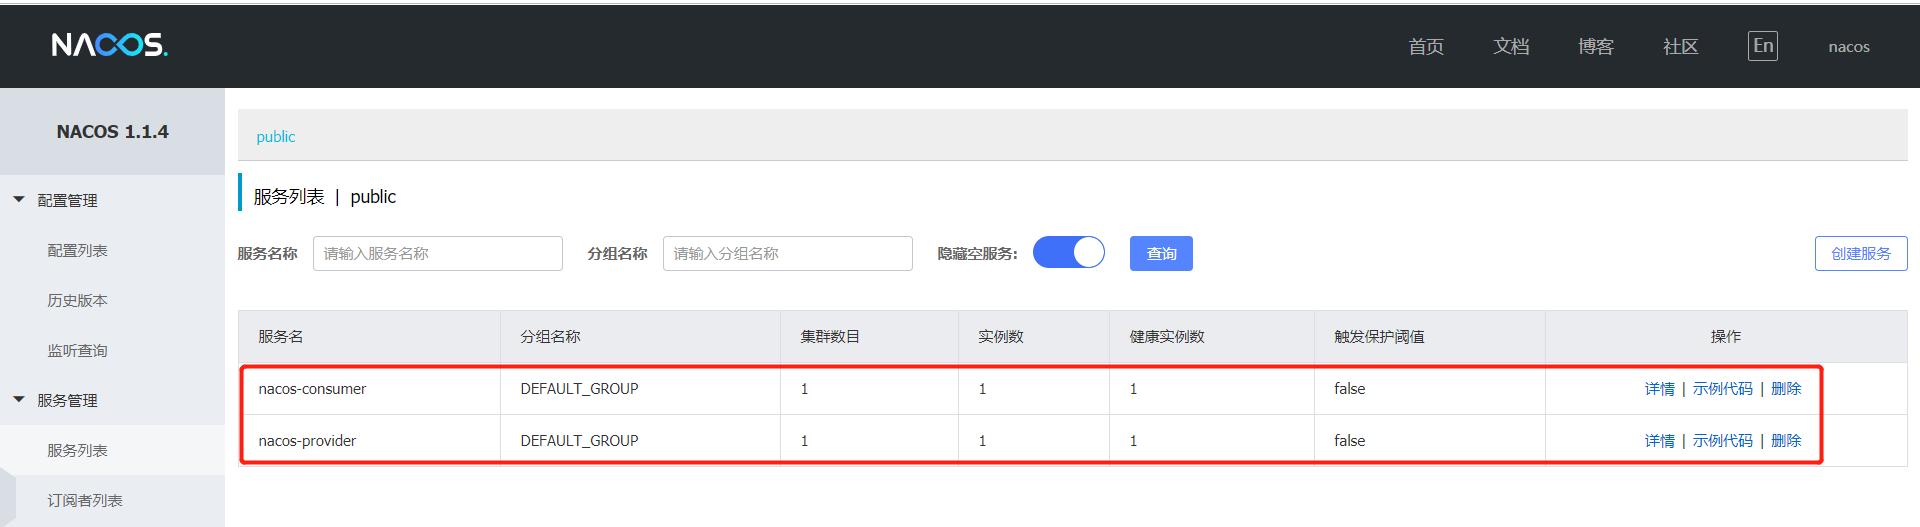
现在登录Nacos控制台,你会发现服务列表中,已经显示了我们刚才创建的两个项目,并可以对其进行简单的监控和管理。
浏览器中访问服务消费者的接口 http://localhost/consumer, 可以看到成功返回结果