LAMP部署Wordpress
注:要将firewalld、SELINUX关闭
systemctl stop firewalld
systemctl disable firewalld
sed -ri '/^SELINUX=/cSELINUX=disabled' /etc/selinux/config
setenforce 0
一、下载安装Nginx
yum -y install nginx
二、创建启动Nginx的用户并修改网站站点目录的属主和属组
(Nginx站点目录默认在/usr/share/nginx/html,
由于我的站点是在/Website,所以修改这个目录的属主)
useradd www -M -s /sbin/nologin
chown www.www /website -R
启动之前修改nginx的配置文件
sed -ri '/^user/cuser www;' /etc/nginx/nginx.conf
systemctl start nginx
systemctl enable nginx
启动nginx之后查看进程是否为www用户启动
ps -ef | grep nginx

在浏览器输入你的主机IP,看到下图则表示成功

三、系统Base源中的php版本太低,所以需要我们另外添加php源并下载php74的模块
yum install epel*
rpm -ivh http://rpms.remirepo.net/enterprise/remi-release-7.rpm
yum install -y php74 lighttpd-fastcgi php74-php-cli php74-php-mysql php74-php-gd
php74-php-imap php74-php-ldap php74-php-odbc php74-php-pear php74-php-xml php74-php-xmlrpc
php74-php-mbstring php74-php-mcrypt php74-php-mssql php74-php-snmp php74-php-soap php74-php-tidy
php74-php-common php74-php-devel php74-php-fpm
安装完就启动php74-php-fpm
systemctl start php74-php-fpm
systemctl enable php74-php-fpm
四、安装mariadb-server
yum -y install mariadb-server
安装完成后,启动mariadb
systemctl start mariadb
systemctl enable mariadb
第一次启动需要初始化数据库
输入mysql_secure_installation回车后再次回车会出现一些选择
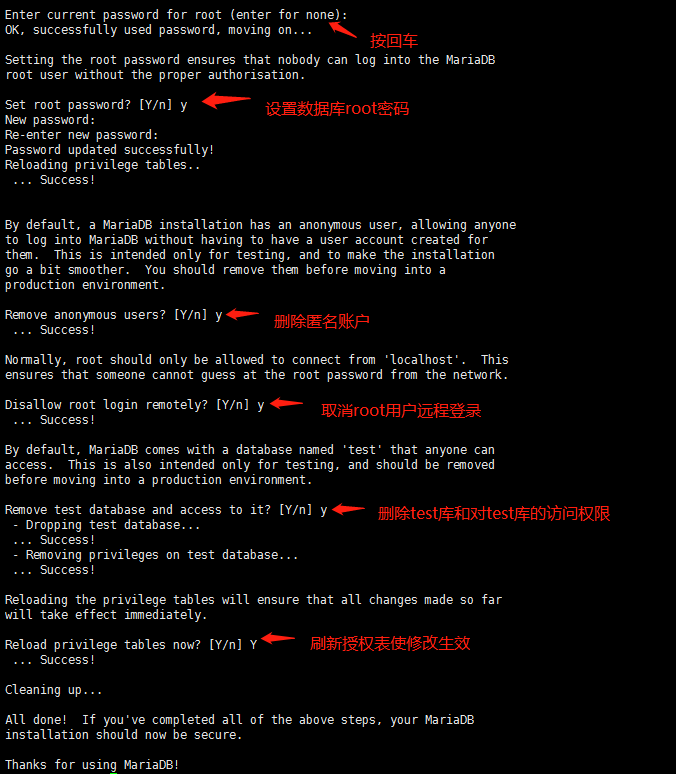
执行mysql -uroot -p回车输入刚才设置的root密码
进入数据库后查看所有数据库
show databases;
然后创建一个wordpress数据库
create database wordpress;
并创建一个wordpress用户管理wordpress数据库
grant all privileges on wordpress.* to 'wordpress'@'localhost' identified by '密码';
注:上面的localhost的意思是这个数据库只限这个账号本地登录,不允许远程连接,改为"%"后就不限于本地连接
设置完权限后刷新权限表使它立即生效
flush privileges;
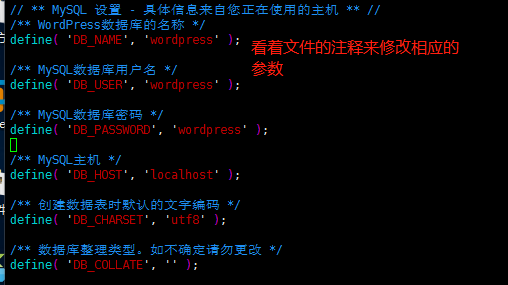
五、下载wordpress解压至站点目录,修改配置文件,使代码与数据库相关联
wget https://cn.wordpress.org/latest-zh_CN.tar.gz
tar -xvf wordpress-5.4.2-zh_CN.tar.gz -C /website
cd /website/wordpress
cp wp-config-sample.php wp-config.php
编辑这个配置文件
vim wp-config.php
六、创建一个wordpress的nginx主机配置文件
cd /etc/nginx/conf.d/
vim wordpress.conf
server {
    listen 80;
    server_name www.wordpress.test;
	charset    utf-8;
	location / {
		root /website/wordpress;
    	        index index.php index.html index.htm;
        }
        location ~ \.php$ {
                root /website/wordpress;
                fastcgi_pass 127.0.0.1:9000;
                fastcgi_index index.php;
                fastcgi_param SCRIPT_FILENAME /website/wordpress$fastcgi_script_name;
                include fastcgi_params;
        }
}
保存之后检测nginx有没有语法错误
nginx -t
出现Syntax OK则表示语法没有错误,然后就需要重新启动nginx和php服务
systemctl restart nginx php74-php-fpm
七、在本地做好解析
windows10的hosts文件在C:\Windows\System32\drivers\etc\hosts
编辑这个文件
192.168.100.101 www.wordpress.test
保存退出
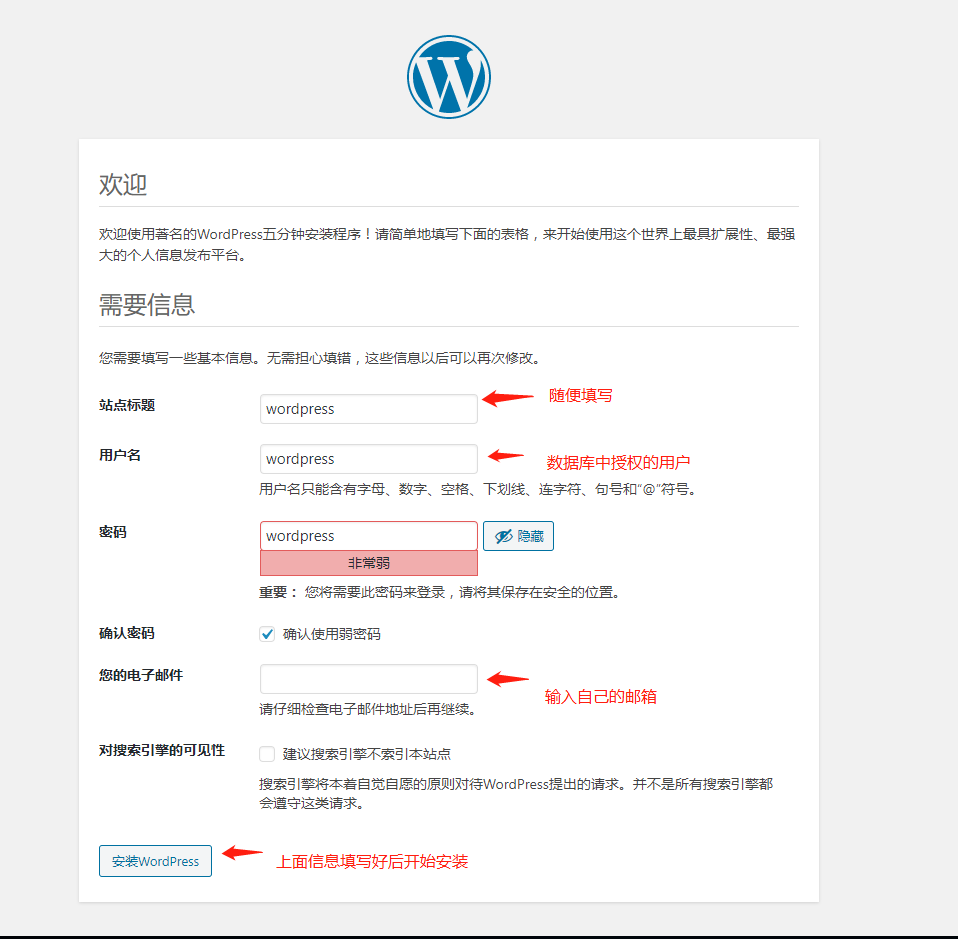
解析好网址后,在浏览器中输入http://www.wordpress.test/wp-admin/install.php就会进入wordpress安装页面
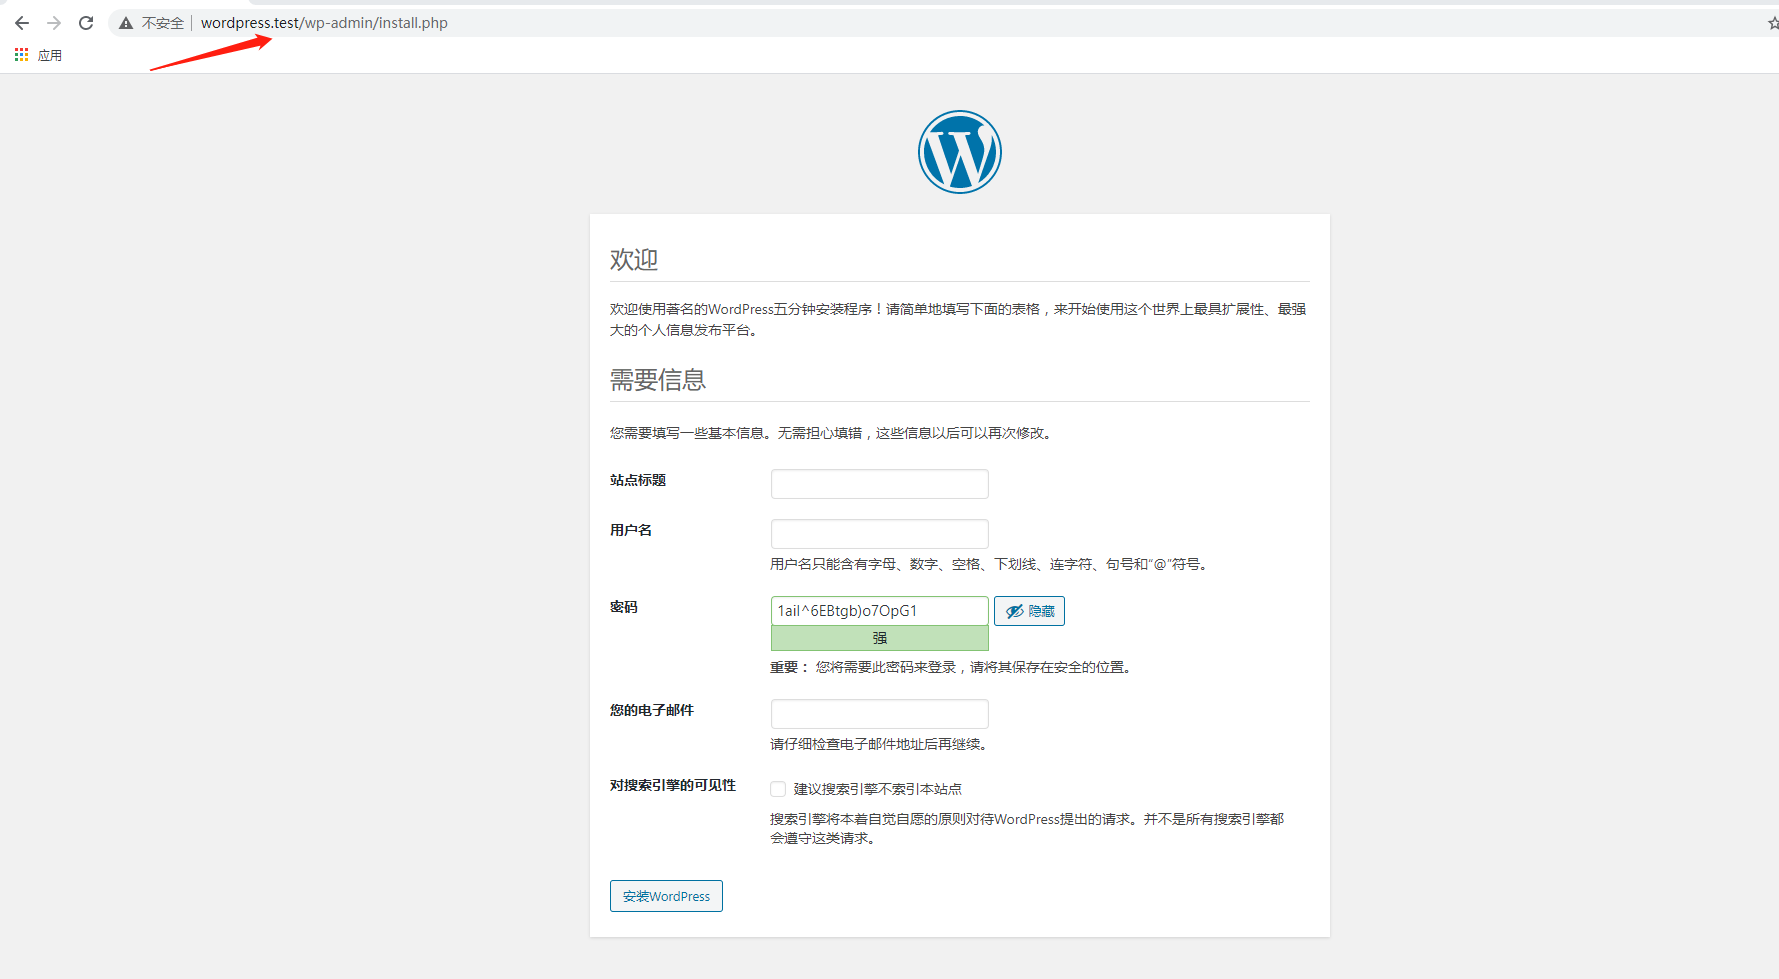
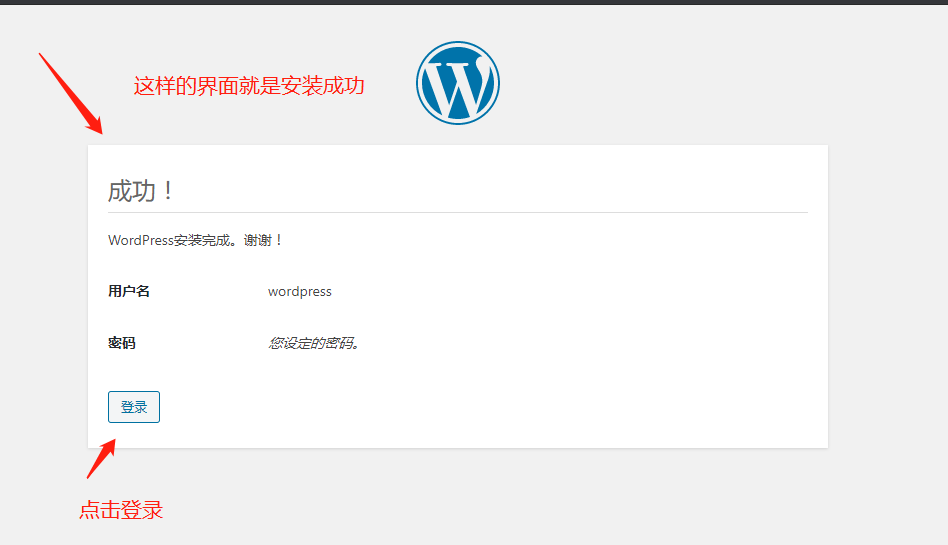
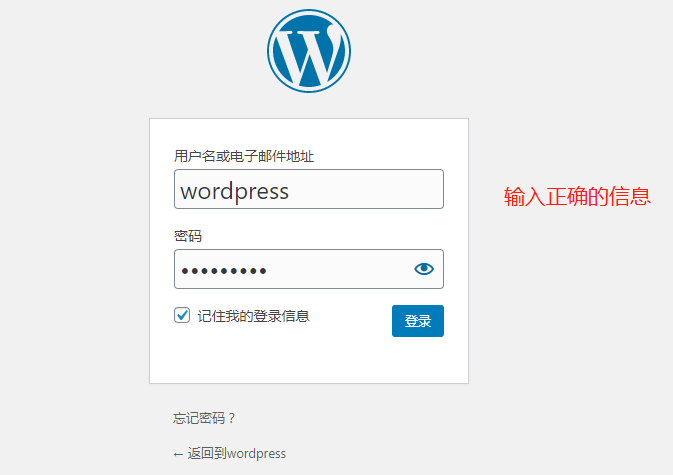
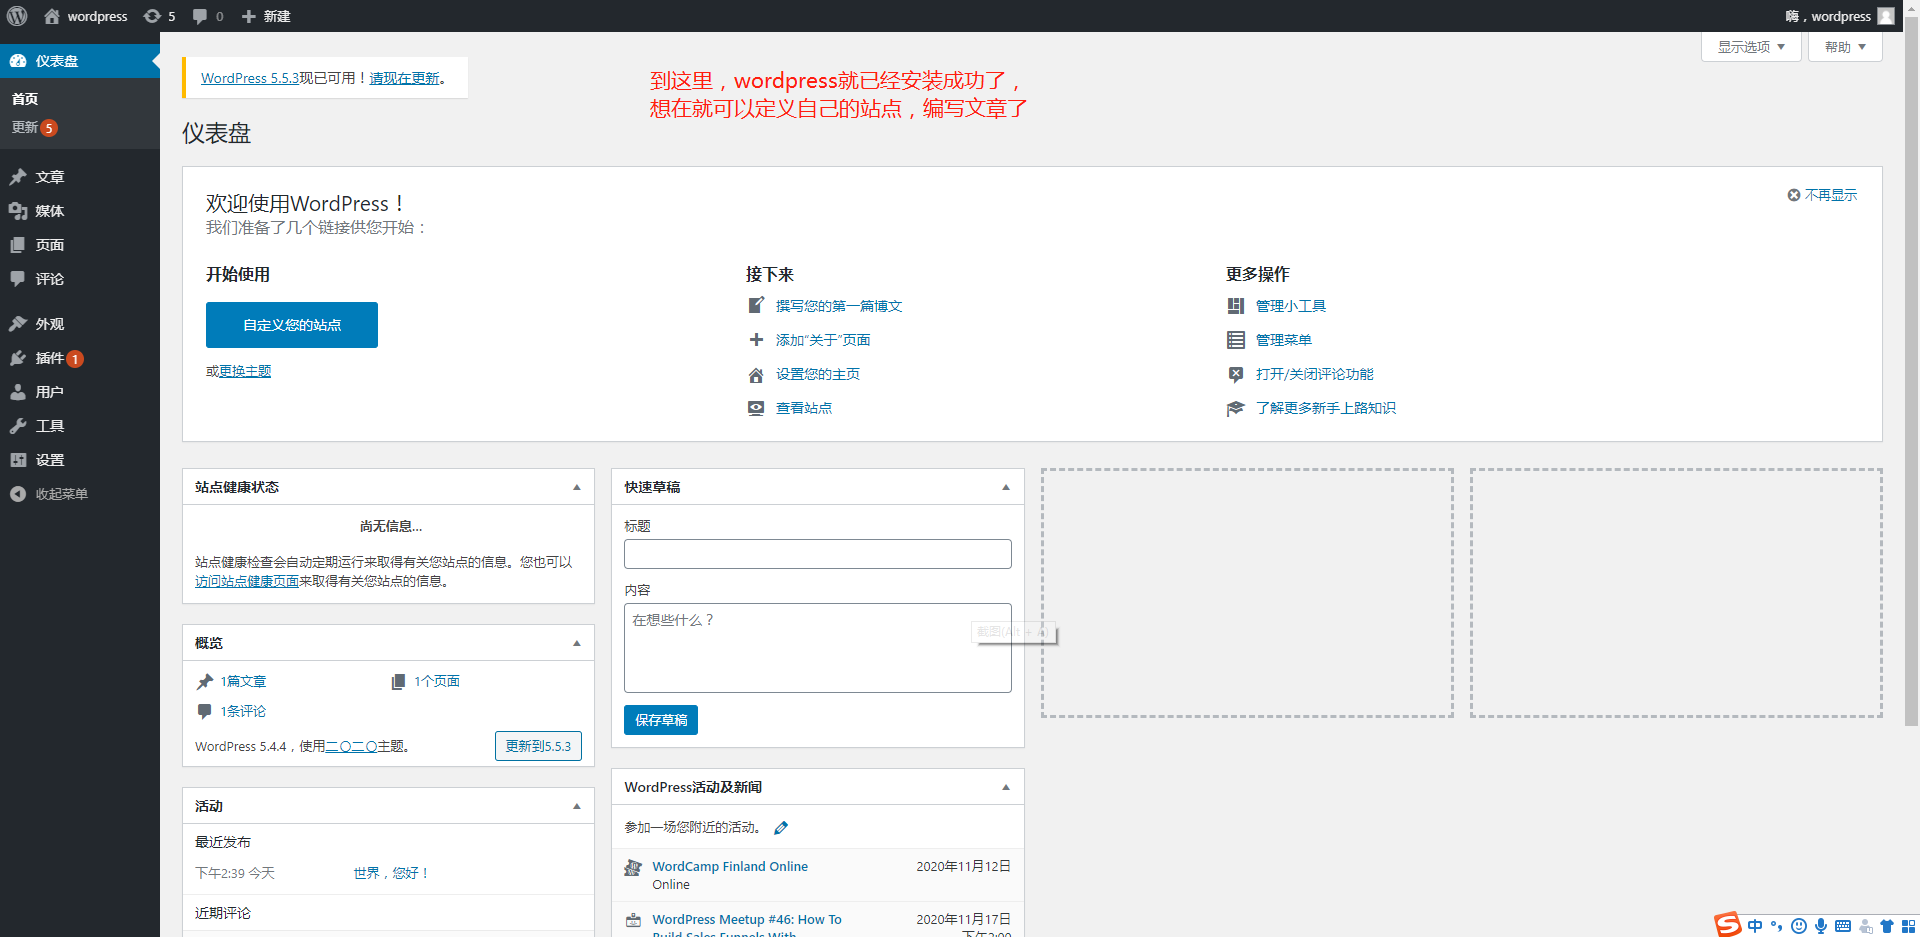
八、开始安装wordpress
