
写在前面
- 在前几次探索中,时不时都会看到Playable的身影,比如在Timeline面板上看到的Playable Track,在写字幕轨脚本时看到的方法参数Playable Graph,我翻了翻关于Playable的相关博文,只是浏览程度的话确实没太理解博文内容。
- 这次探索会围绕这篇官方介绍博文“Playable API:定制你的动画系统”展开,记下我在读的过程中哪些地方没读懂,以及后来看了演示工程,自己另外写了测试,来补足理解的过程。
探索
- 官方介绍博文“Playable API:定制你的动画系统”:总的来说,Playable是一个系统。它支持动画,而且它是除了legacy动画、Mecanim动画外的第三种(更好的)选择。它以后还会支持音频、视频等更多功能。它的优点是,可在编辑模式下看大部分效果,不用状态机,控制得更细。
没读懂的地方
- 官方博文没有具体举例实现效果,直接放理论和代码,它讲的若干Playable好处我都不知道如何体现。以下是我觉得很重要但没读懂的地方:
- 【问题1】Playable Graph 怎么用?
- 【问题2】Animator怎样控制权重,Playable怎样控制权重?
- 【问题3】Clip怎样和Animator混用?
补足理解
环境
- 官方博文为了演示Playable Graph使用了Graph Visualizer工具,下载下来,把它安上。
- 官方博文中提到了示例工程Simple Animation,下载下来,打开工程看看里面有什么。
- Unity2019.2.6:因为Graph Visualizer工具和示例工程Simple Animation必须在Unity2018及以上版本才可运行,所以我的测试工程都会在Unity2019.2.6版本上运行。(我试过把它们安到Unity2017版本上,但没有成功)
Graph Visualizer工具
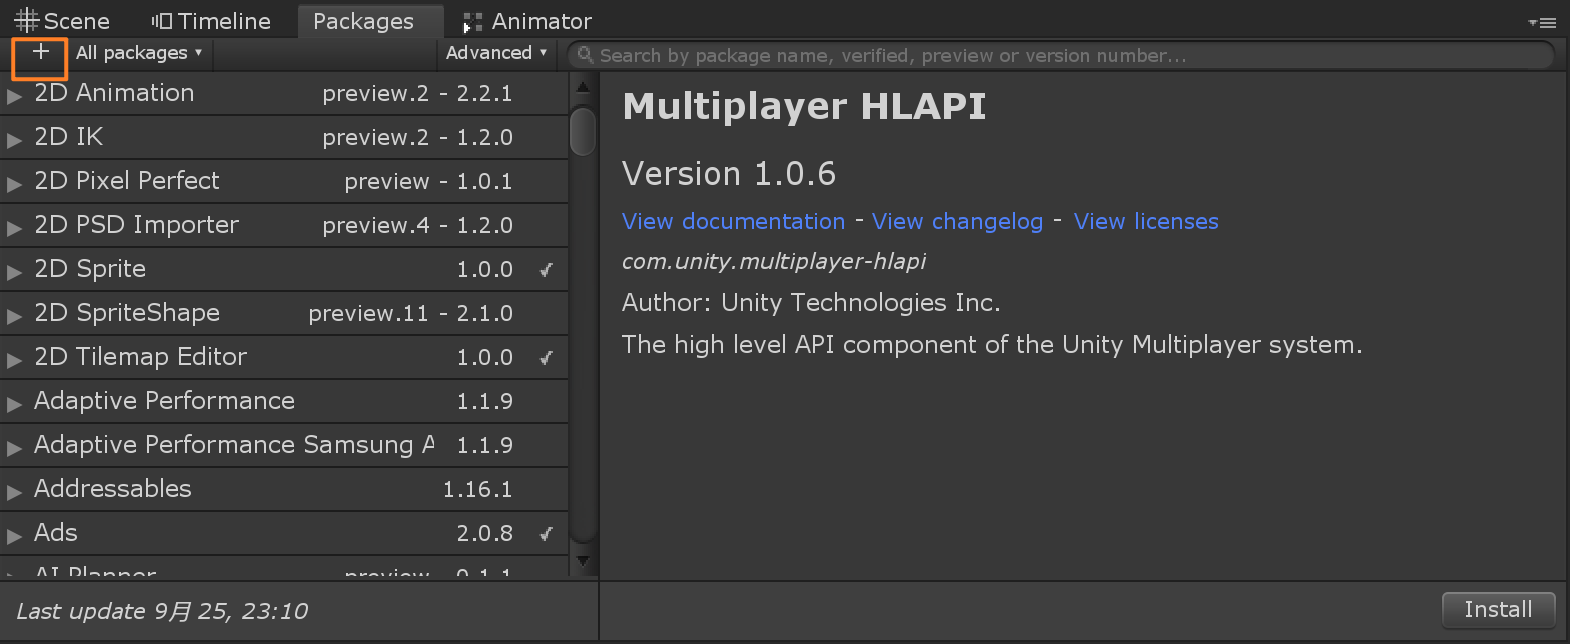
- 顾名思义,这是个可视化Playable Graph的工具。下好该工具压缩包并解压后,如下图,点击Packages面板的加号按钮导入它的package.json文件,即可安装。安装后在菜单栏Windows -> Analysis -> Playable Visualizer打开。
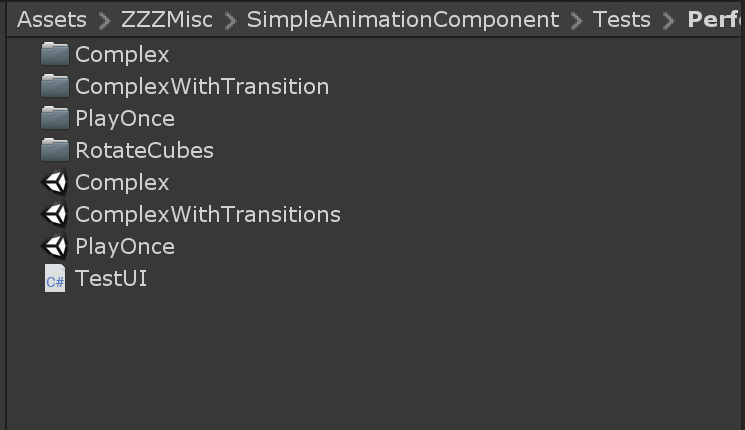
示例工程Simple Animation
- 在示例工程中,有3个场景,没有说明文档。随便打开一个场景运行,看到了三个差不多的效果,再翻了翻它的代码,竟然一时不知道它要告诉我什么。
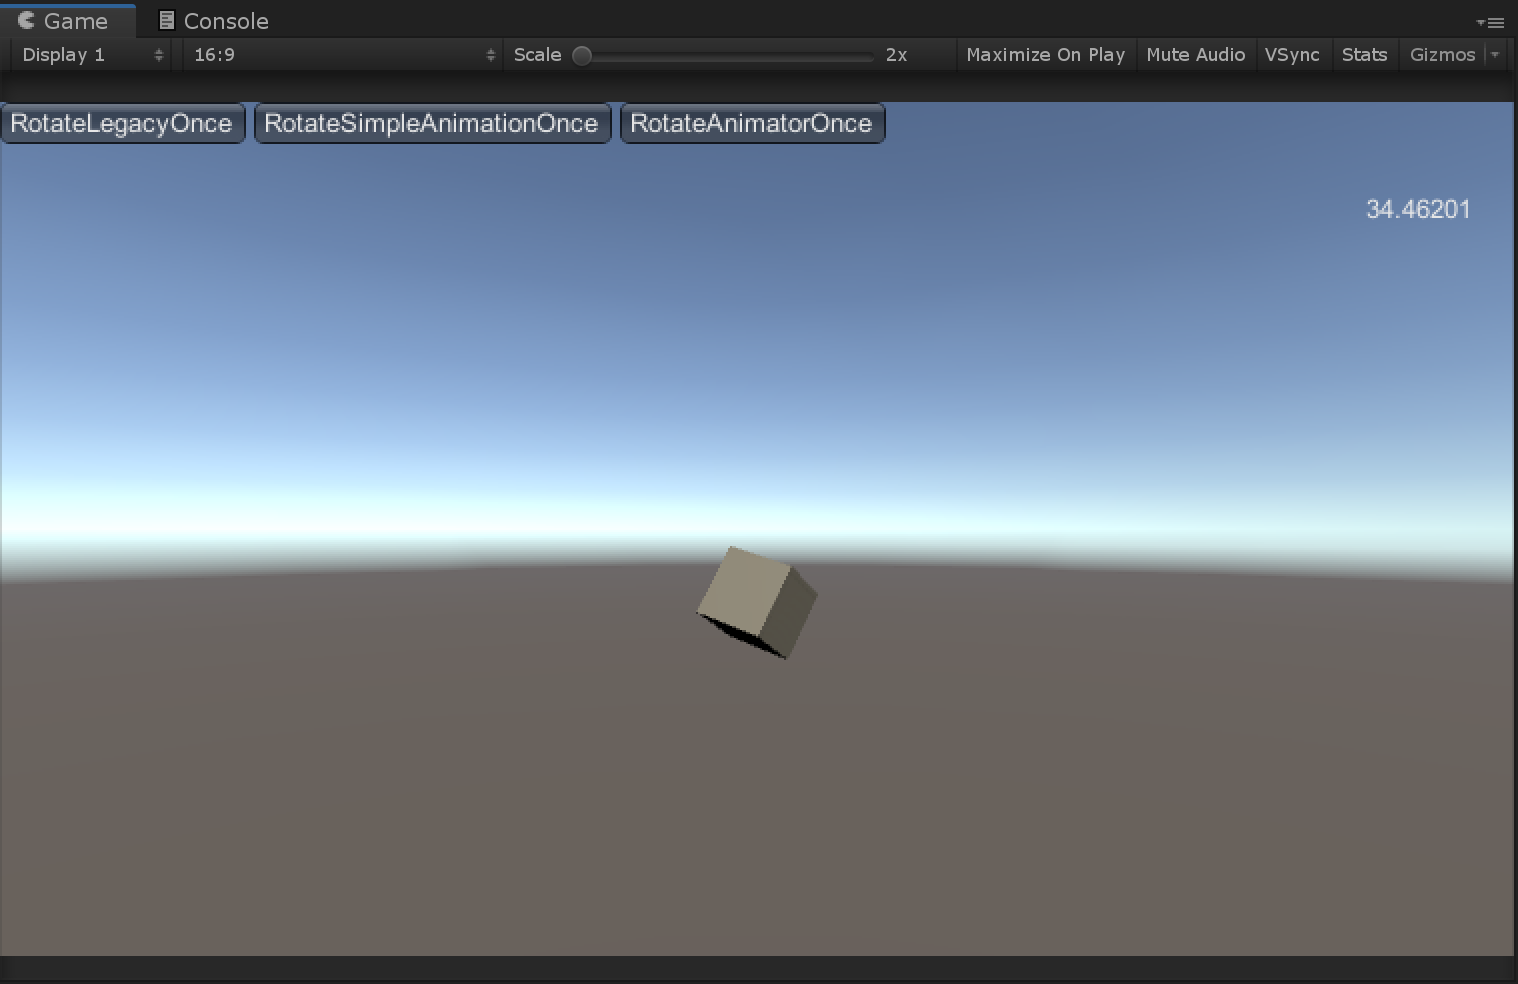
顶上三个按钮播放效果都是一样的
- 示例看不懂没关系,先给自己设下第一个测试小目标——怎样用Playble播放动画。毕竟要了解Playble,总得明白最简单的怎么播动画吧。再再具体一点,我设定了以下测试:
【测试1】旋转Cube
- 首先,我找到了一篇个人博文,它有着最基本的用Playble播放动画代码。我稍微修改了一下脚本(改了Graph起名,删注释),如下:

using System.Collections;
using System.Collections.Generic;
using UnityEngine;
using UnityEngine.Animations;
using UnityEngine.Playables;


[RequireComponent(typeof(Animator))]
public class Playable_RotateCube : MonoBehaviour
{
    public AnimationClip clip;
    private PlayableGraph graph;

    void Start()
    {
        graph = PlayableGraph.Create("RotateCube");
        AnimationPlayableOutput animOutput = AnimationPlayableOutput.Create(graph, "Animation", GetComponent<Animator>());
        AnimationClipPlayable clipPlay = AnimationClipPlayable.Create(graph, clip);
        animOutput.SetSourcePlayable(clipPlay);
        graph.Play();

        // 另一种写法,更方便的接口
        //AnimationPlayableUtilities.PlayClip(GetComponent<Animator>(), clip, out graph);

    }

    void OnDisable()
    {
        graph.Destroy();
    }

}
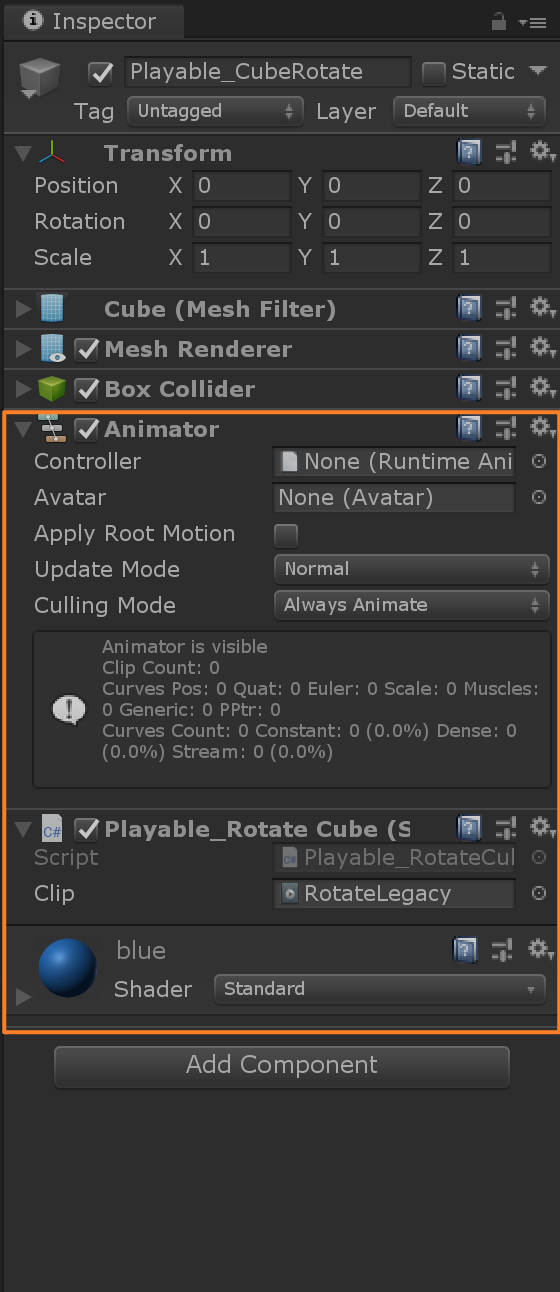
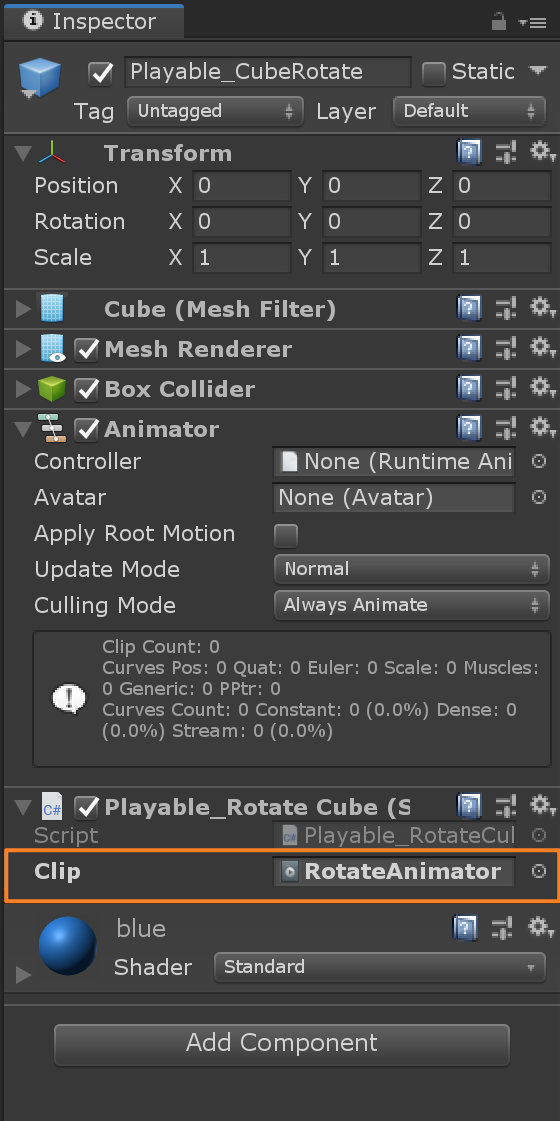
- 我在场景中准备了Cube,和从Simple Animation示例工程拷过来的旋转动画RotateLegacy。Cube挂了上面的播动画脚本,Animator组件去掉用不着的Animator Controller,具体设置如下:
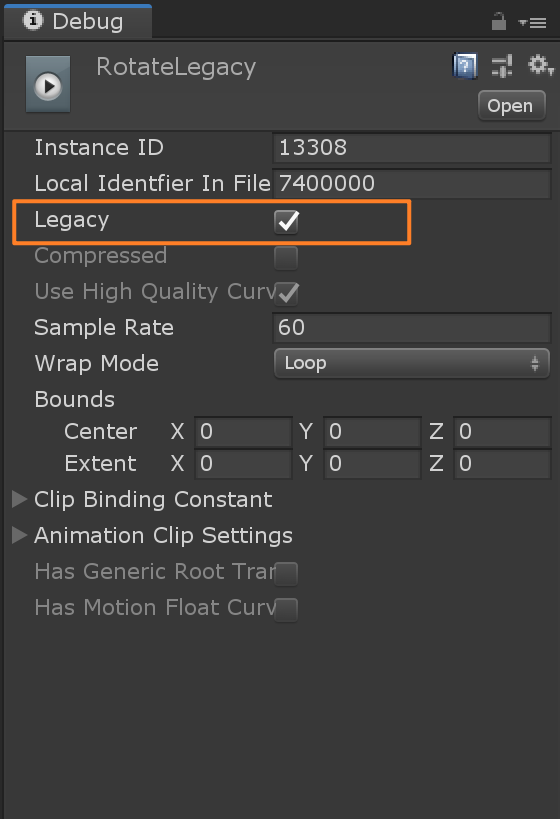
结果运行时报错“ArgumentException: Legacy clips cannot be used in Playables.”,官方解释脚本放的Clip不能是Legacy类型。怎么知道一个Clip是不是Legacy类型呢?将该Clip的Inspector面板切换到Debug模式,看Legacy选项是否打钩即可,如下图。

于是,我将Clip改为RotateAnimator,可以成功运行。
- 运行时,Cube成功播放旋转动画

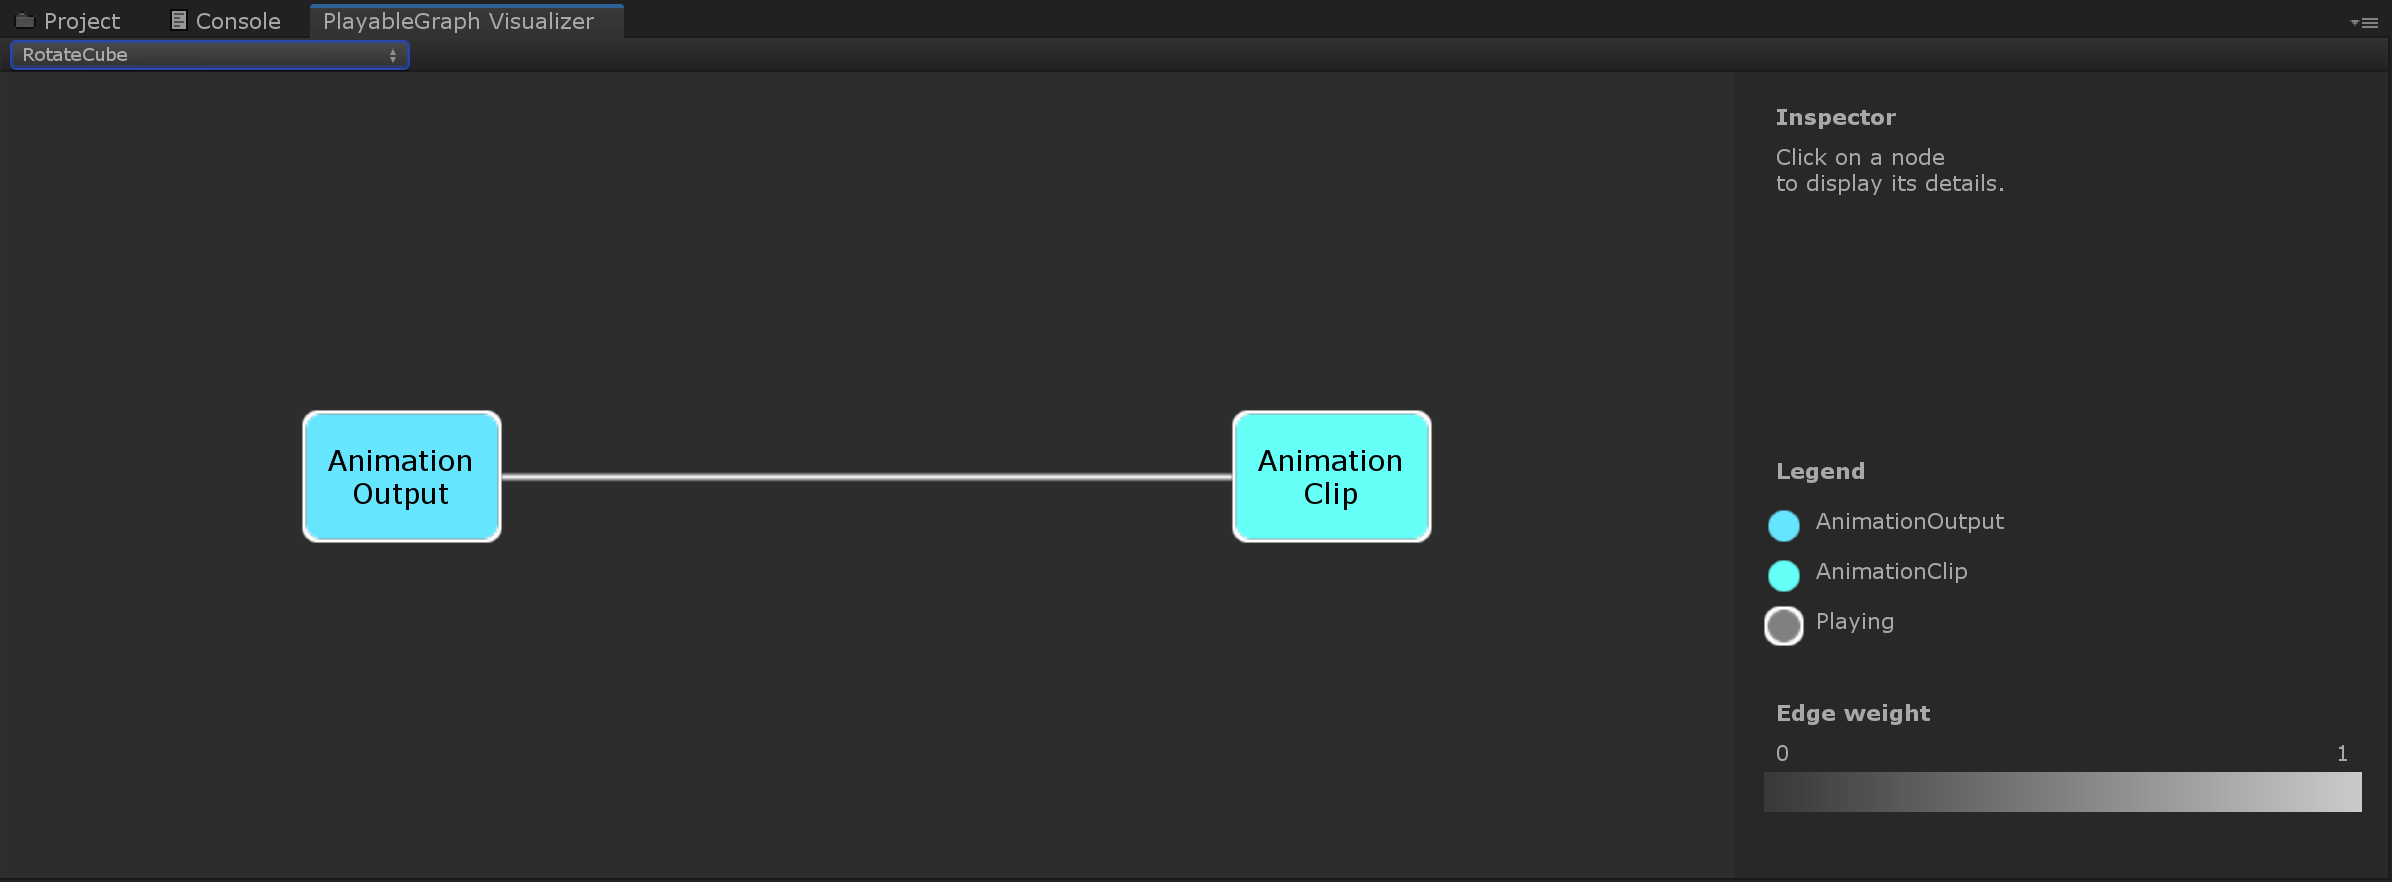
- 此时在Graph Visualizer窗口中,它的Graph如下图。如脚本中写的那样,Graph中只有一个AnimationOuput(它的全称是AnimationPlayableOutput),一个AnimationClip(它的全称是AnimationClipPlayable)。到这里,能对Playable Graph有一个初印象,它就像它的名字一样,相当于一张图,图上有着我们设置的各种Playable节点。
【测试2】cube一边旋转一边移动
- 现在我不仅仅想要旋转Cube,还想要它一边旋转一边上下移动。
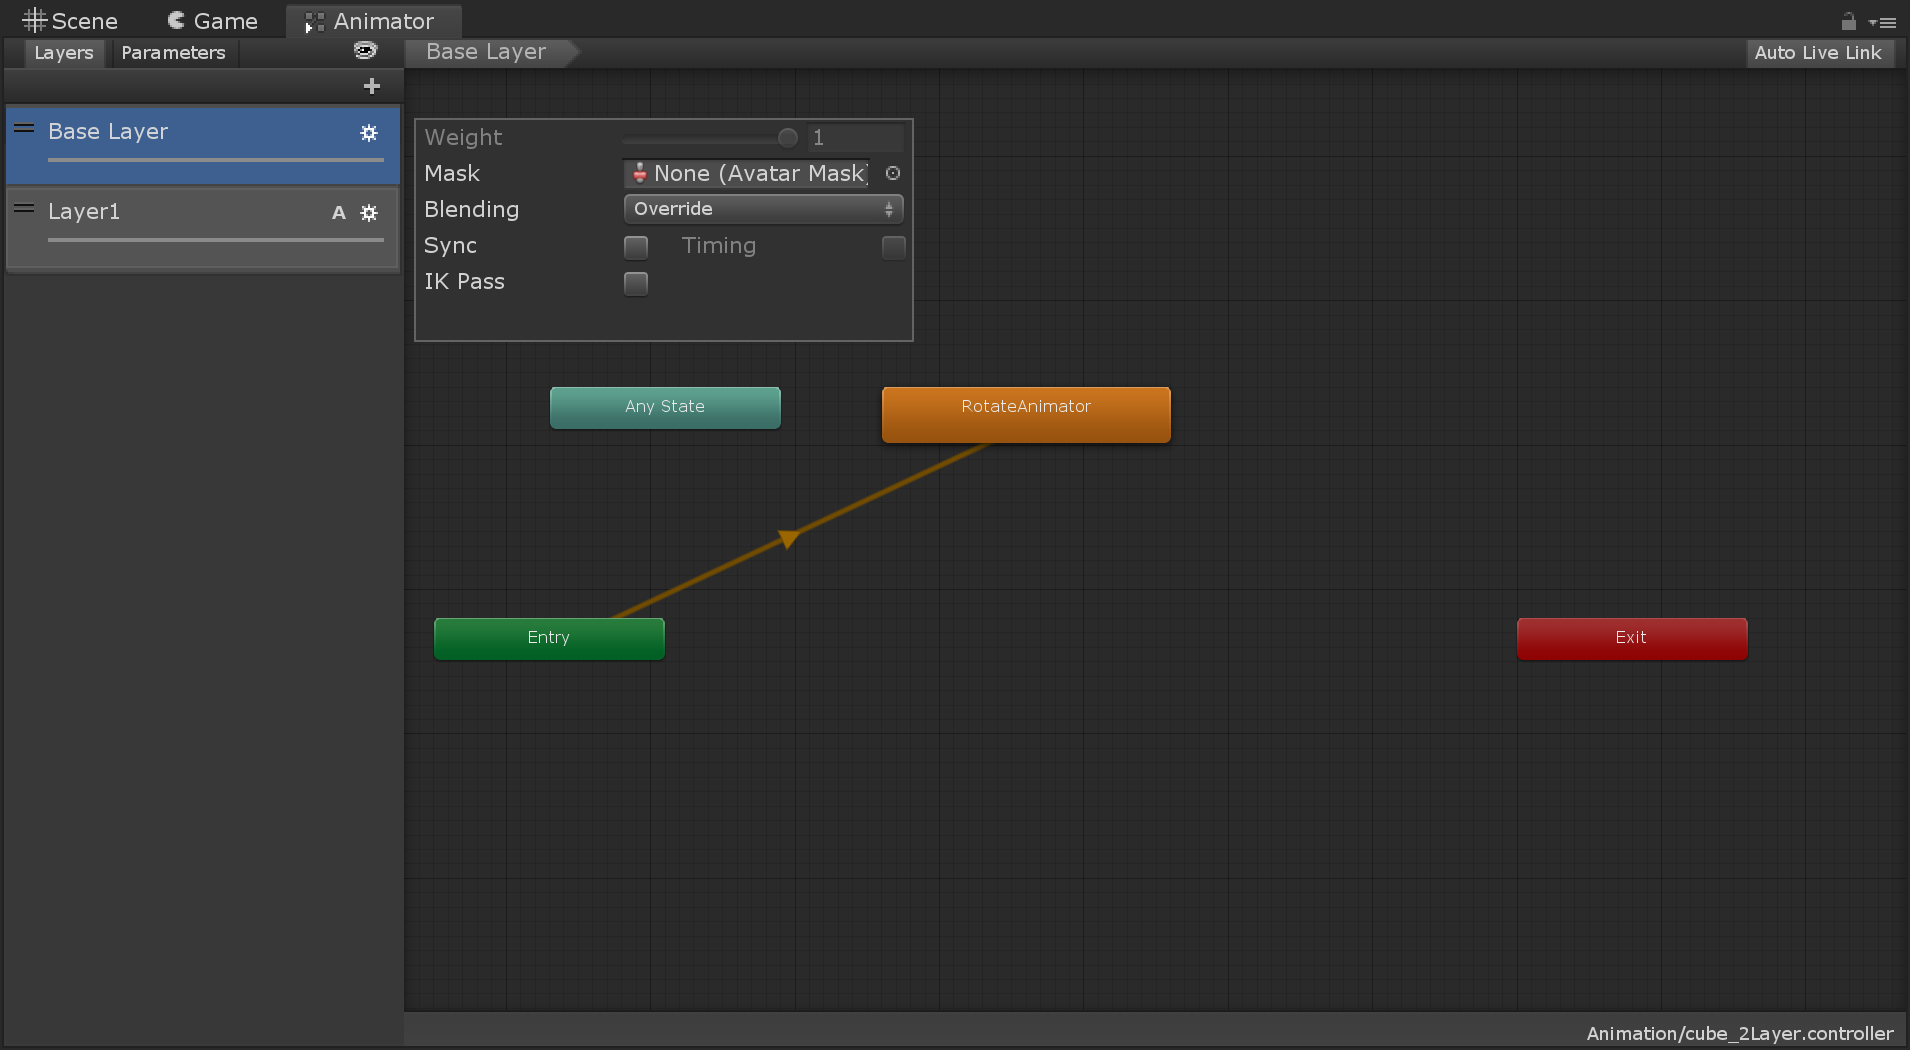
- 先不说Playable怎么实现,我都没想起怎么用Animator实现这个效果,所以我先去翻了翻Animator相关资料。Animator实现主要靠在Animator Controller上加Layer。这里我先将原先的Controller起名为cube_1Layer,接着另外创建了一个Controller名为cube_2Layer,它有两层Layer,Base Layer依然只有Rotate动画,具体设置如下图:
Layer1放了Move动画,具体设置如下图:
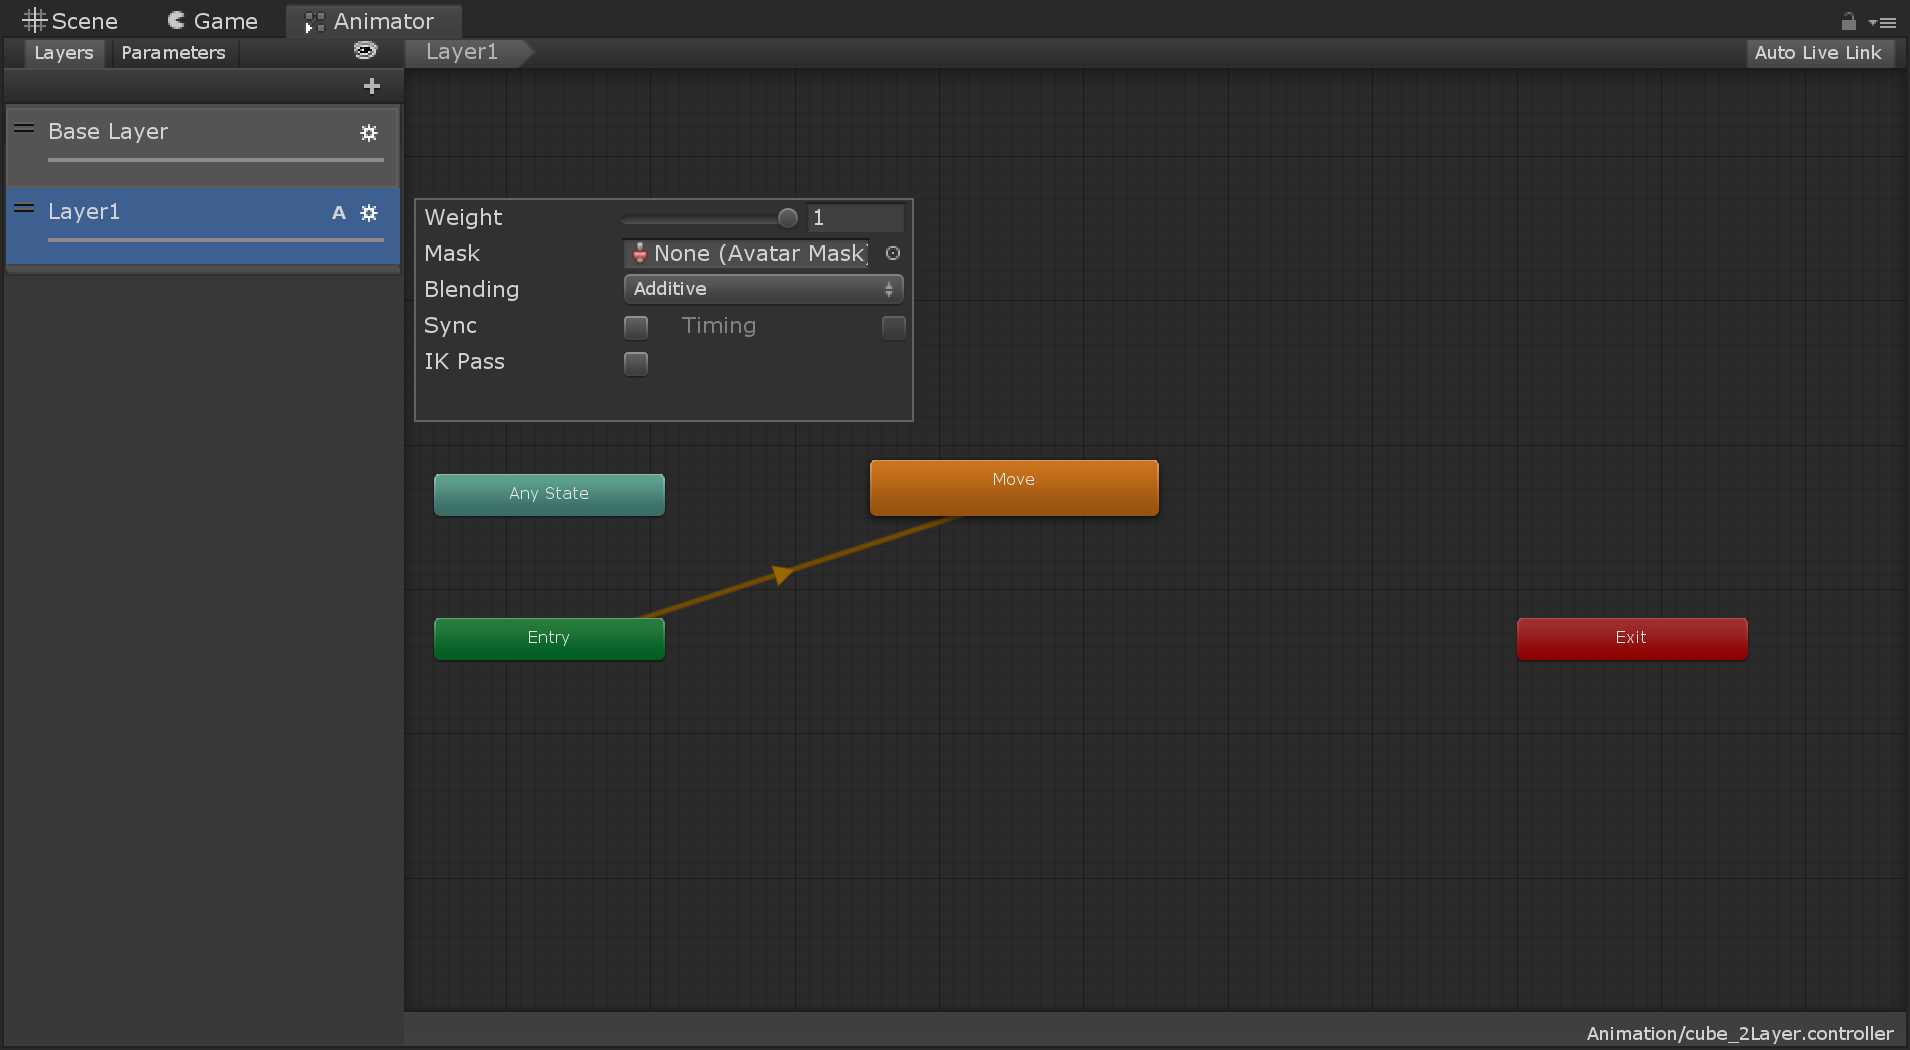
把Cube上的Animator Controller换为cube_2Layer,直接运行Unity即可看到Cube边旋转边移动效果。这里通过修改Layer中的Weight,可以解答“【问题2】Animator怎样控制权重”(更具体的可以参考这篇博文)。
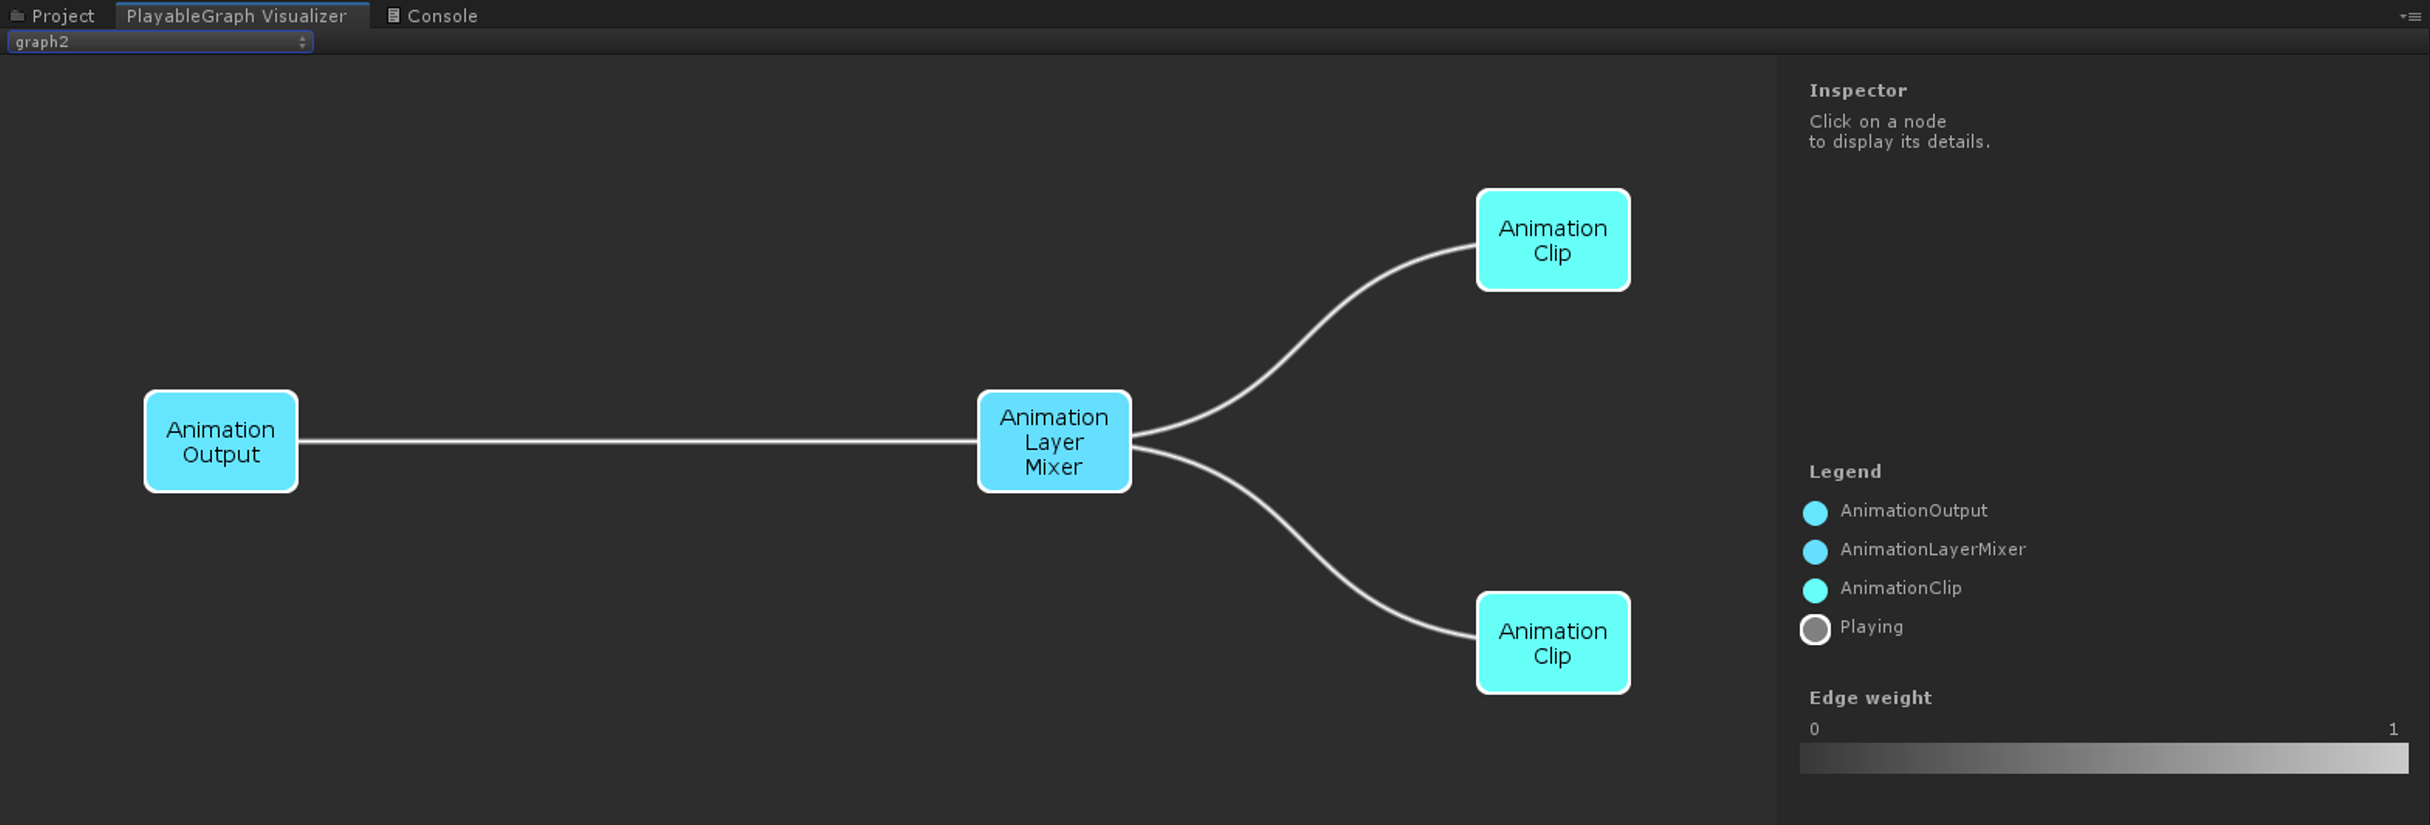
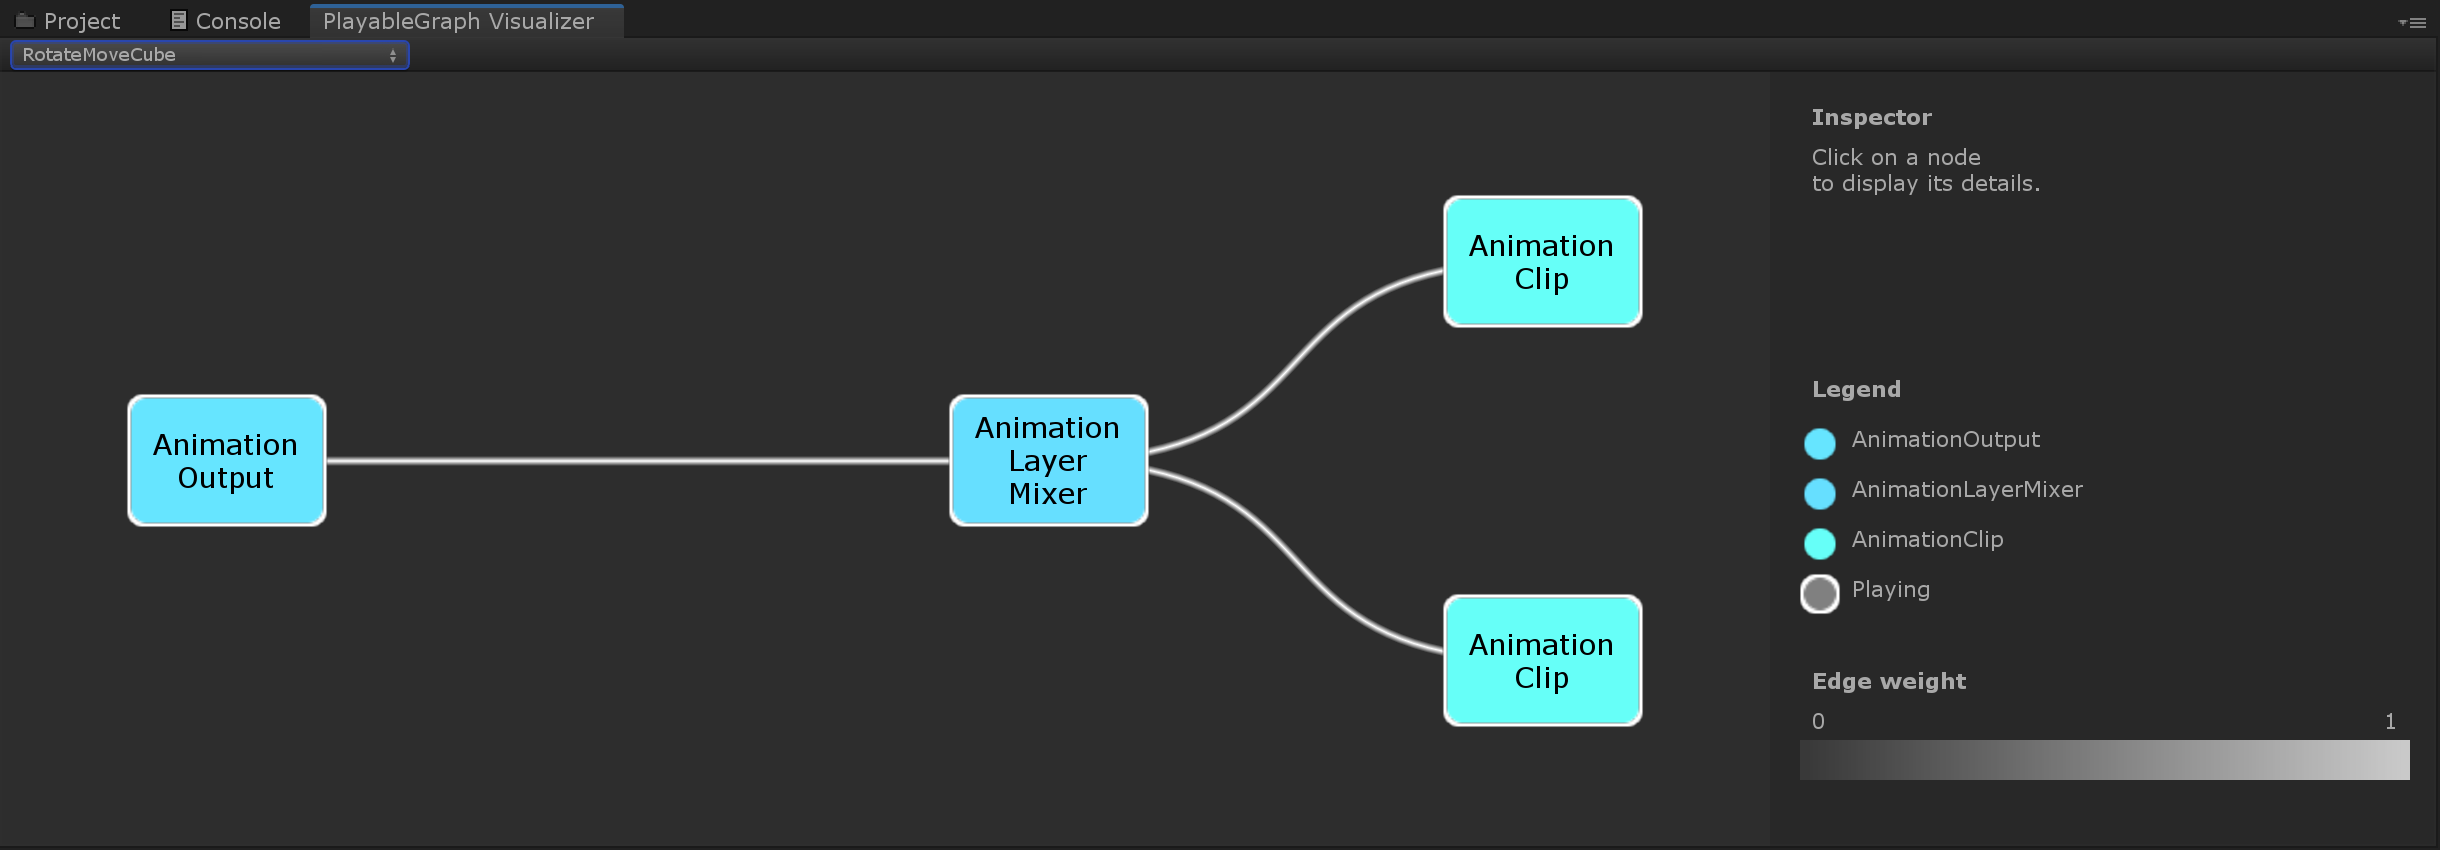
- 怎么用Playable实现同样效果呢?我没有搜到直接的博文,但在回顾之前的“实现字幕轨”时看到了InputWeight,猜测应该会用到它,然后我试着写出了能成功运行的脚本。最后,我在去看官方Manual——Playables API时发现官方早已写好种种说明,包括前面的实现代码,唯一少的就是具体例子。最开始的官方介绍博文“Playable API:定制你的动画系统”需要的程序就在Manual这里,示例工程Simple Animation也应该对照Manual阅读。和官方Manual相比,【测试1】参考的个人博客效果还不够充分,图中只有2种结点——Ouput和Clip,而按着Manual给的脚本,图中会有3种结点——Ouput,Clip和Mixer,如下图。
- 这里用的脚本如下,我除了实现播动画功能外,还加了点击按钮停止播放的功能。
using System.Collections;
using System.Collections.Generic;
using UnityEngine;
using UnityEngine.Animations;
using UnityEngine.Audio;
using UnityEngine.Playables;


/// <summary>
/// 这篇程序可以参考官方 https://docs.unity3d.com/ScriptReference/Playables.PlayableGraph.Connect.html
/// </summary>
[RequireComponent(typeof(Animator))]
public class Playable_RotateMoveCube : MonoBehaviour
{
    public AnimationClip animClipA;
    public AnimationClip animClipB;

    private PlayableGraph graph;
    private AnimationLayerMixerPlayable mixer;
    private AnimationPlayableOutput output;


    void Start()
    {
        graph = PlayableGraph.Create("RotateMoveCube");
        output = AnimationPlayableOutput.Create(graph, "Animation", GetComponent<Animator>());
        // inputCount 可以接几个playable
        mixer = AnimationLayerMixerPlayable.Create(graph, 3);
        output.SetSourcePlayable(mixer);

        AnimationClipPlayable clipPlayA = AnimationClipPlayable.Create(graph, animClipA);
        AnimationClipPlayable clipPlayB = AnimationClipPlayable.Create(graph, animClipB);
        // sourceOutputPort 默认为0
        graph.Connect(clipPlayA, 0, mixer, 0);
        graph.Connect(clipPlayB, 0, mixer, 1);
        // weight填0.5f只会有一半效果,和我理解的a + b + c = 1不同
        mixer.SetInputWeight(0, 1f);
        mixer.SetInputWeight(1, 1f);
        graph.Play();

    }

    public void ClickClose()
    {
        // ...这里暂无判空等检测
        graph.Disconnect(mixer, 0);
        graph.Disconnect(mixer, 1);

        graph.DestroyPlayable(mixer);
        graph.DestroyOutput(output);

        // cube位置会停在销毁的时刻

    }

    public void ClickStopB()
    {
        // ...这里暂无判空等检测
        mixer.SetInputWeight(1, 0f);

        //graph.Disconnect(mixer, 1);

    }

    void OnDisable()
    {
        graph.Destroy();

    }

}
- 在Cube上设置如下图:
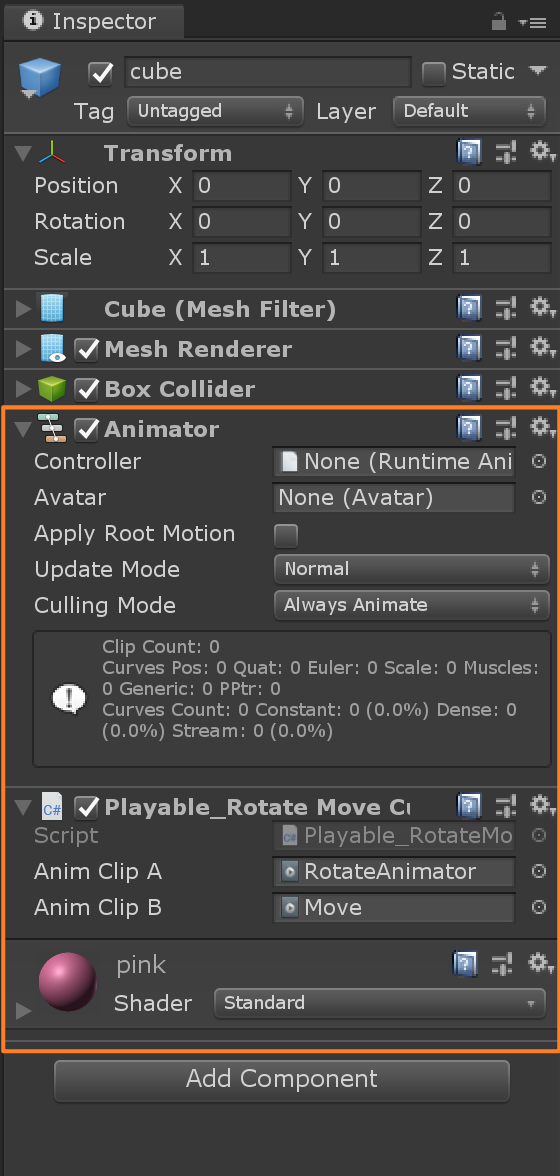
- 最后在运行时,还发现一个小问题:Move动作和Cube实际位置不一致,因为动作里记录的是Cube世界坐标,再给Cube套个父物体就能解决这个问题(具体可参考这篇博文)。最后,运行效果如下图。通过修改脚本中的InputWeight,可以解答“【问题2】Playable怎样控制权重”。
- 这里的Graph视图如下:
【测试3】Clip和Controller混用
- 为了解答“【问题3】Clip怎样和Animator混用”,实现要用到的脚本依然在Manual上可以找到,如下:
using System.Collections;
using System.Collections.Generic;
using UnityEngine;
using UnityEngine.Animations;
using UnityEngine.Playables;


[RequireComponent(typeof(Animator))]
public class Playable_BlendController : MonoBehaviour
{
    public AnimationClip clip;
    public RuntimeAnimatorController controller;
    public float weight;
    private PlayableGraph graph;
    private AnimationMixerPlayable mixer;

    void Start()
    {
        graph = PlayableGraph.Create("BlendController");
        AnimationPlayableOutput output = AnimationPlayableOutput.Create(graph, "Animation", GetComponent<Animator>());
        mixer = AnimationMixerPlayable.Create(graph, 2);
        output.SetSourcePlayable(mixer);
        AnimationClipPlayable clipP = AnimationClipPlayable.Create(graph, clip);
        AnimatorControllerPlayable ctrlP = AnimatorControllerPlayable.Create(graph, controller);
        graph.Connect(clipP, 0, mixer, 0);
        graph.Connect(ctrlP, 0, mixer, 1);
        graph.Play();

    }

    void Update()
    {
        weight = Mathf.Clamp01(weight);
        mixer.SetInputWeight(0, 1.0f - weight);
        mixer.SetInputWeight(1, weight);

    }

    void OnDisable()
    {
        graph.Destroy();

    }

}
- 因为用到的Controller是前面Cube的cube_1Layer,所以这次我选择在Capsule上挂这个脚本,具体设置如下图:
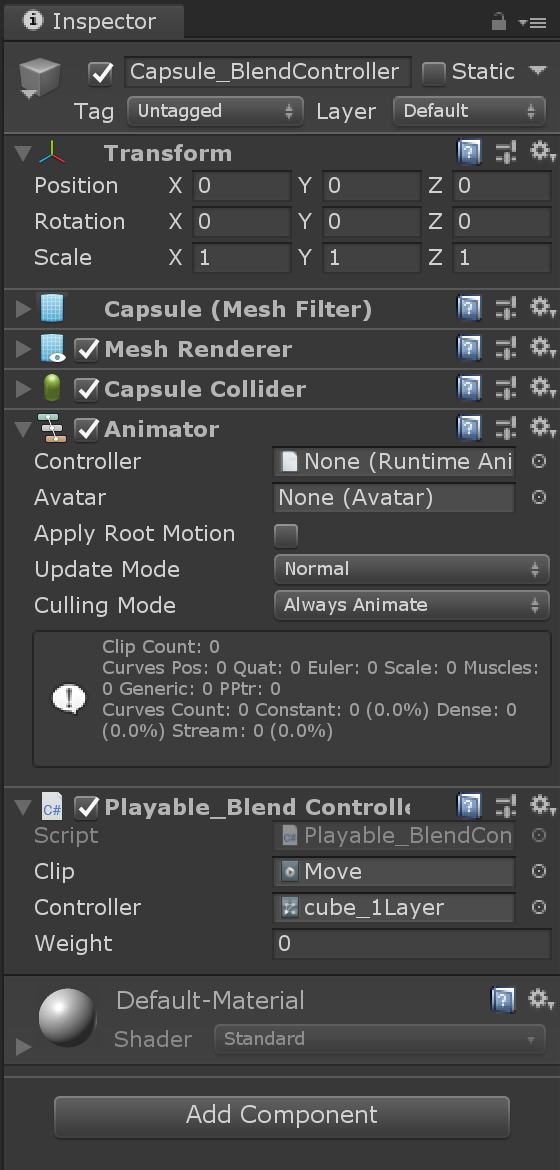
- 运行时调节Inspector面板上的Weight值,可以看到Capsule变化。以下是将Weight调为0.66时的效果。“【问题3】Clip怎样和Animator混用”解答完毕。
- 这里的Graph视图如下:
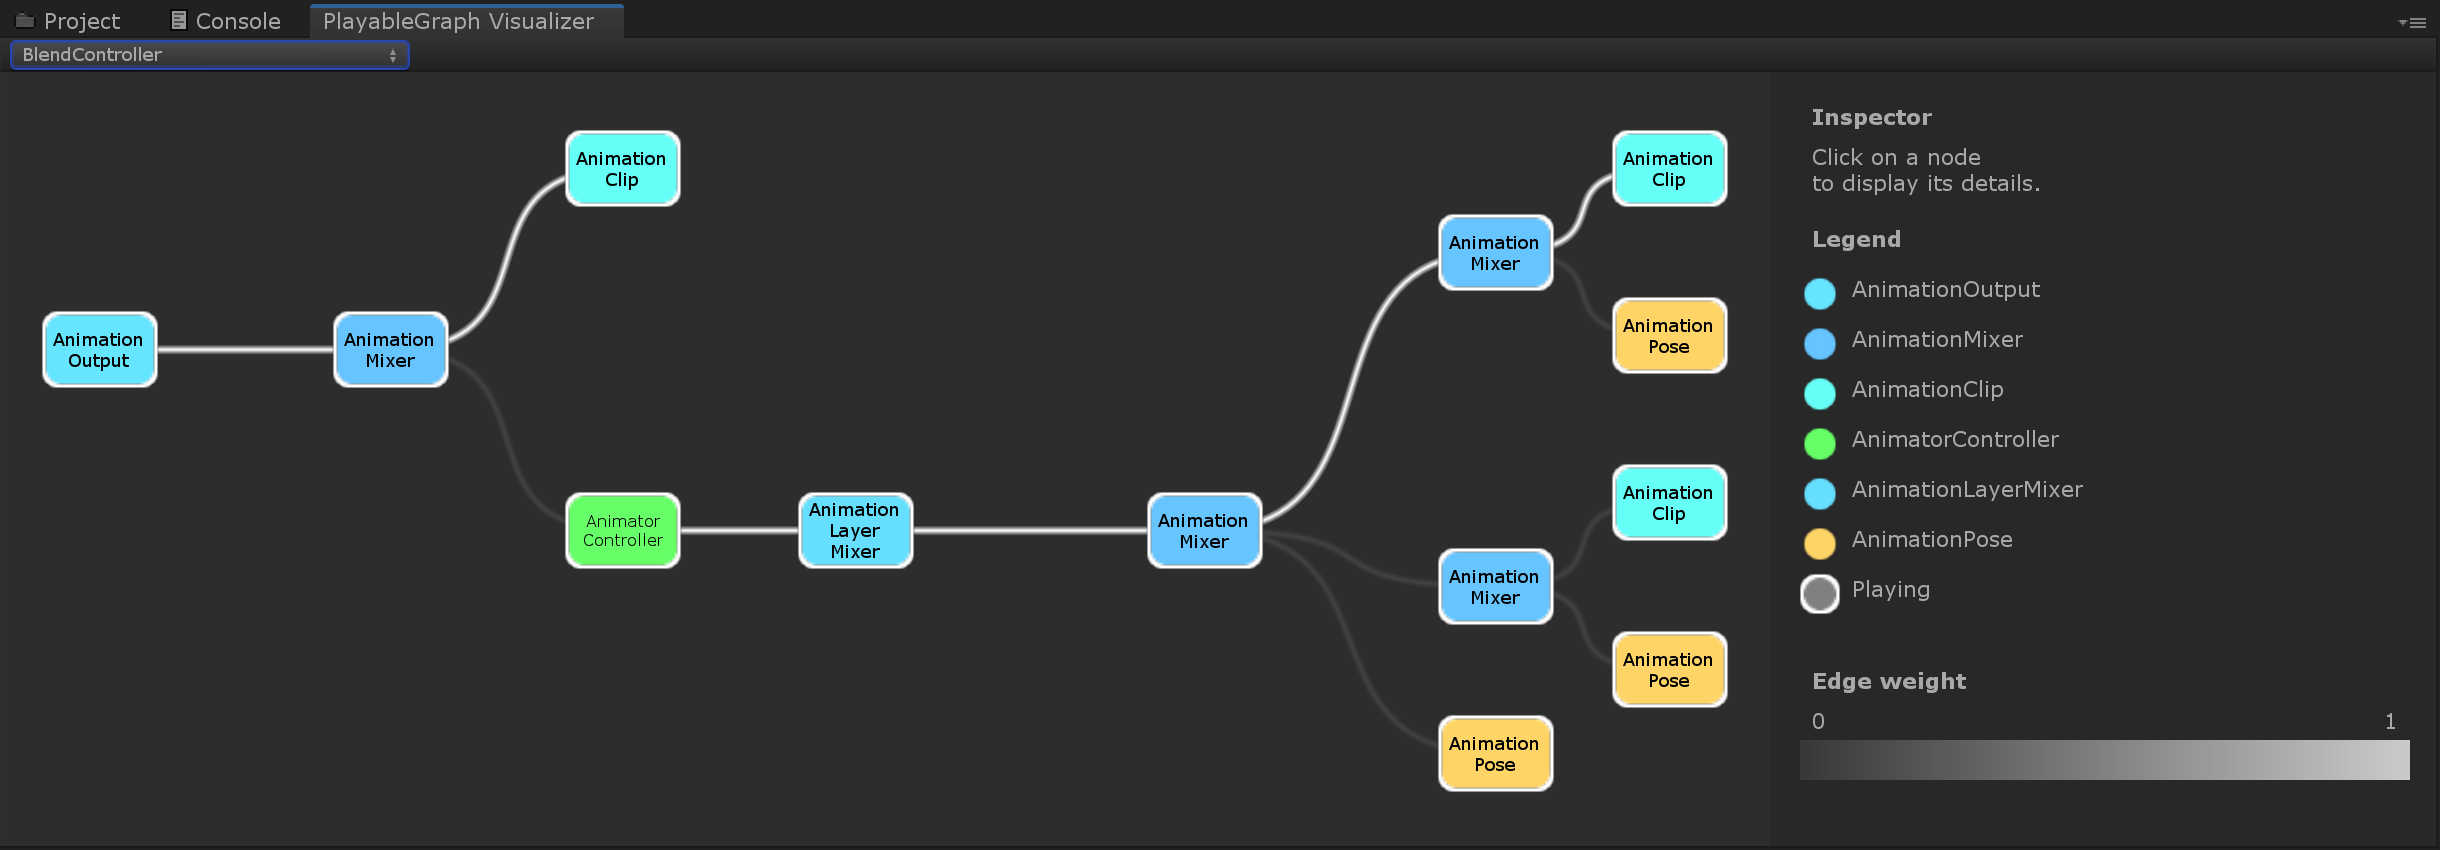
- 通过上面一系列测试,我对Graph有了一定了解。对于“【问题1】 Playable Graph 怎么用”,我的解答是:像它的名字一样,当一张图来用,在图上,可以找到我需要的任何节点。
回到示例工程Simple Animation
- 在完成上面测试后,对着Manual再次阅读官方介绍博文“Playable API:定制你的动画系统”,现在是时候回到示例工程Simple Animation了。看看效果,翻翻代码,我能明白示例工程这3个场景到底要告诉我什么了。
-
场景PlayOnce 演示重点:简单利用Playable播放一个cube旋转动画;同时和Legacy、Mecanim比较。
-
场景Complex演示重点:简单利用Playable播放一个人形动画;同时和Legacy、Mecanim比较。
-
场景ComplexWithTransitions演示重点:简单利用Playable播放人形动画A,然后直接粗暴切换到动画B;同时和Legacy、Mecanim比较。
-
没有提及的
- Manual上还有很多功能例如控制时间,按序列播放动画,这里都没有展开,我把它们的具体实现都一起放在测试工程里了。
下载
- 我的测试工程G站链接

【推荐】编程新体验,更懂你的AI,立即体验豆包MarsCode编程助手
【推荐】凌霞软件回馈社区,博客园 & 1Panel & Halo 联合会员上线
【推荐】抖音旗下AI助手豆包,你的智能百科全书,全免费不限次数
【推荐】博客园社区专享云产品让利特惠,阿里云新客6.5折上折
【推荐】轻量又高性能的 SSH 工具 IShell:AI 加持,快人一步