css新增UI方案
一、文本新增样式
opacity 不透明度
        h1{
                margin: 100px auto;
                opacity: 0.5;
            }
        </style>
    </head>

    <body>
        <h1>中山大学</h1>
    </body>
效果

rgba透明度(选中的就透明)一般应用在背景透明,文字不透明。是rgb的一个拓展,a的值在(0,1)之间,就是针对前面的颜色的一个透明度/不透明度的描述.
  h1{
            margin: 100px auto;
            color: rgba(255, 0, 0, 0.8);文字的(255,0,0)颜色的不透明度为0.8
            background-color: rgb(1,1,1);
        }
    </style>
    </head>
    <body>
        <h1>中山大学</h1>
    </body>
text-shadow:文字阴影,可以多层,阴影值之间可以用逗号隔开。前两个设置是偏移量,后面是模糊程度。
实战:做一个浮雕文字和文字模糊的效果
浮雕文字:
        h1{
        margin: 200px auto;
        color: white;
        text-shadow: black 1px 1px 10px;

    }
    </head>
    <body>
        <h1>中山大学</h1>
    </body>
效果:

文字模糊(悬浮在文字上面就出现模糊):
    h1{
        text-align: center;
        color: black;
    }
    h1:hover{
        color: white;
        text-shadow: black 1px 1px 100px;
    }
    </style>
    </head>
    <body>
        <h1>中山大学</h1>
    </body>
效果前后:


文字描边:
简介:CSS text-stroke属性的语法并不复杂,和border,background属性类似,其实是若干个CSS属性合并后的名称写法,不过仅仅是下面这两个CSS属性合体:text-stroke-width和text-stroke-color,也就是描边的宽度和描边的颜色,和border不同,对于text-stroke属性,我们无法指定描边的类型,只能是实线描边,不支持点线或者虚线,也无法指定描边是外描边还是内描边还是居中描边。
具体操作实现的代码如下:
        div{
                font-size: 50px;
                text-align: center;
                margin: 100px auto;
                -webkit-text-stroke: 2px pink;
            }

        </style>
    </head>
    <body>
        <div >
            中山大学
        </div>
效果:

文字排版
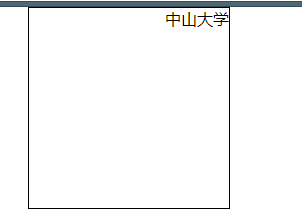
direction:控制文字的方向,一定要配合unicode-bid:bidi-override;来使用。
            div{
            width: 200px;
            height: 200px;
            margin: 0px auto;
            border: 1px solid;
            direction: rtl;

        }
        </style>
      </head>
      <body>
      <div >
          中山大学
      </div>
溢出省略号
1、首先多余的数据不让它进行换行
(white-space: nowrap;
overflow: hidden;)
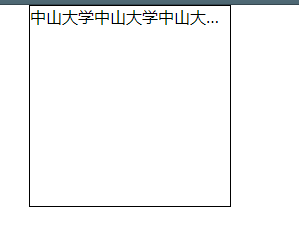
2、再使他出现省略号(text-overflow: ellipsis;)
text-overflow :确定如何向用户发出未显示的溢出内容信号
它可以被剪切
显示一个省略号(‘.....’)
    div{
                width: 200px;
                height: 200px;
                margin: 0px auto;
                border: 1px solid;
                white-space: nowrap;
                overflow: hidden;
                text-overflow: ellipsis;
            }

        </style>
    </head>
    <body>
        <div >
            中山大学中山大学中山大学中山大学中山大学中山大学中山大学中山大学中山大学中山大学中山大学中山大学中山大学中山大学中山大学中山大学中山大学中山大学中山大学中山大学中山大学
        </div>
    </body>
效果:
二、盒模型新增样式
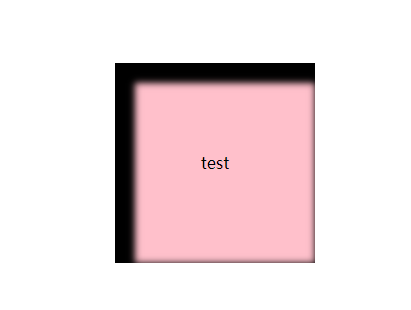
盒模型阴影
默认值:none 不可继承
值:inset
默认阴影在边框外,使用inset后,阴影在边框内
《offset-x》和《offset-y》
这是头两个《length》值,用来设置阴影偏移量。
《offset-x》设置水平偏移量,如果是负值则阴影位于元素左边
《offset-y》设置垂直偏移量,如果是负值则阴影位于元素上面
如果两者都是0,那么阴影位于元素后面。
这是如果设置了《blur-radius》或《spread-radius》则有模糊效果
《spread-radius》
这是第四个《length》值,取正值时,阴影扩大,取负值时,阴影收藏。默认为0,此时阴影与元素同样大。
《color》
阴影颜色,如果没有指定,则由浏览器决定。
不一样的颜色阴影用逗号隔开,第一个展示在最上面。
代码:
盒子居中代码并且出现盒子阴影:
    div{
            position: absolute;
            width: 200px;
            height: 200px;
            left: 0;
            right: 0;
            top: 0;
            bottom: 0;
            margin: auto;
            background: pink;
            text-align: center;
            line-height: 200px;
            box-shadow: inset 10px 10px 10px 10px black;(盒子阴影)
        }

            </style>
        </head>
        <body>
            <div >
                test
            </div>
效果:
(2)图片倒影
首先实现图片的居中,可以根据上面那种方式实现居中,也可以根据以下方式实现居中
    html,body{
                height: 100%;
            }
            body{
                text-align: center;
            }
            body:after{
                content: '';
                display: inline-block;
                height: 100%;
                vertical-align: middle;
            }
            img{
                vertical-align: middle;
            }
            因为img都是看做是替换元素,都是inline级别的元素,两个inline级别的元素,就都可以进行一个垂直居中,谁高就听谁的,after最高。
            vertical-align: middle;
            body的高度一定要百分之一百,要不然就只是图片的高度
接下来实现图片倒影
-webkit-box-reflect 设置元素的倒影(准确来说不算是css3的东西,类似文字描边,)
默认值:none 不可继承
值:(必须是123的顺序)
倒影的方向
第一个值,above,below,right,left
倒影的距离
第二个值,长度单位
渐变
第三个值
resize
css允许你控制一个元素的可调整大小性
(注意,一定要配合overflow:auto来使用)
默认值:none 不可以继承
值:
none
元素不能被用户缩放
both 允许用户在水平和垂直方向上调整元素的大小。
horizontal
允许用户在水平方向上调整元素的大小
vertical
允许用户在垂直方向上调整元素的大小
代码:
            body{
                text-align: center;
            }
            body:after{
                content: '';
                display: inline-block;
                height: 100%;
                vertical-align: middle;
            }
            div{
                display: inline-block;
                vertical-align: middle;
                height: 200px;
                width: 200px;
                background: pink;
                overflow: auto;
                resize: horizontal;
            }
box-sizing的作用是width和height的大小不会因为padding而撑大,会在此大小基础上,使得pading在里面生效,真正的width变小了(就是加边框那些就不会破坏布局)参数有(border-box,content-box,padding-box)
在这里讲一下另外一种居中方式(第三种)
                div{
                width: 200px;
                height: 200px;
                position: absolute;
                left: 50%;
                top: 50%;
                background: pink;
                margin-left: -100px;
                margin-top: -100px;
            }
新增UI样式
(1)圆角
border-radius(50%刚好是正方形的一个圆,大的话也是,小就不是一个圆,椭圆了)
css的新增的样式都是为了提高性能和提高用户体验
默认值:0 不可继承
值:
固定的px值定义圆形半径或者椭圆的半长轴,半短轴。不能用负值
使用百分数定义圆形半径或椭圆的半长轴。水平半轴相对于盒模型的宽度,垂直半轴相对于盒模型的高度,不能用负值。
这是一个简写属性,用来设置
border-top-left-radius,
border-top-right-radius
border-bottom-right-radius
border-bottom-left-radius
还可以多个值,代表不一样的形状。(在移动端,尽量使用px值)
半径的第一个语法取值可取-~4个值
border-radius:radius
border-radius:top-left-and-bottom-right top-right-and-bottom-left
border-radius:top-left top-right-and-bottom-right bottom-right
border-radius:top-left top-right bottom-right bottom-left
半径的第二个语法值也可取1~4个值
border-radius:(first radius values)/radius
border-radius:(first radius values)top-left-and-bottom-right top-right-and-bottom-left
border-radius:(first radius values)top-left top-right-and-bottom-right bottom-right
border-radius:(first radius values)top-left top-right bottom-right bottom-left
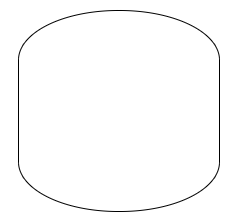
border-radius: 50%;=border-radius: 100px
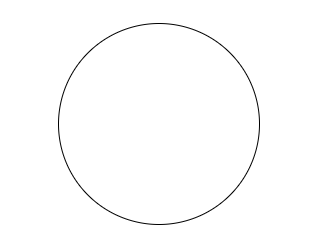
border-radius: 100px/50px 50px;
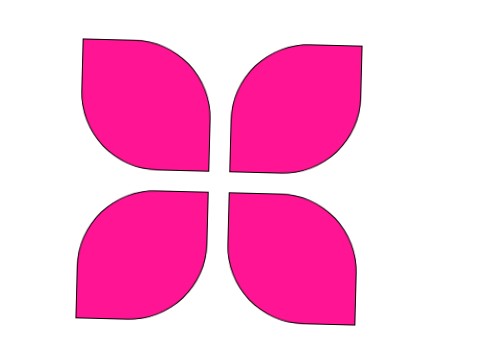
实战:制作风筝
画出四个小容器(div)分别有缝隙,然后制作圆角实现
代码:
<style type="text/css">
    *{
      margin: 0;
      padding: 0;
    }
    /*去掉系统的滚动条功能*/
    html,body{
      height: 100%;
      overflow: hidden;
    }
    #wrap{
      position: absolute;
      width: 300px;
      height: 300px;
      left: 0;
      right: 0;
      top: 0;
      bottom: 0;
      margin: auto;
      transition: 2s;

    }
    #wrap>div{
      margin: 10px;
      width: 130px;
      height: 130px;
      border: 1px solid black;
      float: left;
      box-sizing: border-box;
      background: deeppink;


    }
    #wrap div:nth-child(1),#wrap div:nth-child(4){
      border-radius: 0 60%;
    }
    #wrap div:nth-child(2),#wrap div:nth-child(3){
      border-radius: 60% 0;
    }
    #wrap:hover{
      transform: rotate(45deg);
    }
  </style>
</head>
<body>

<div id="wrap">
  <div></div>
  <div></div>
  <div></div>
  <div></div>
</div>
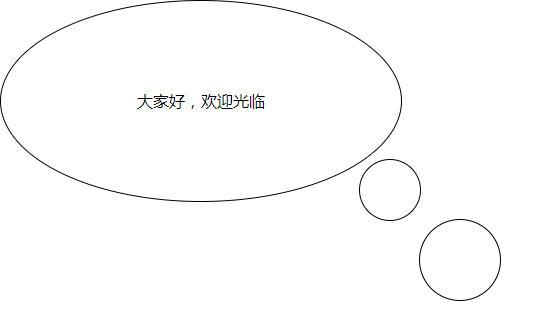
对话框实现
注意:after和before一定要给内容
要给相对定位和绝对定位
#wrap{
      width: 400px;
      height: 200px;
      border: 1px solid;
      border-radius: 50%;
      text-align: center;
      line-height: 200px;
      position: relative;
    }
    #wrap:before{

      content: '';
      display: block;
      width: 80px;
      height: 80px;
      border: 1px solid;
      position: absolute;
      right: -100px;
      bottom: -100px;
      border-radius: 50%;
    }
    #wrap:after{
      content: '';
      width: 60px;
      height: 60px;
      border: 1px solid;
      display: block;
      position: absolute;
      right: -20px;
      bottom: -20px;
      border-radius: 50%;

    }

  </style>
</head>
<body>

<div id="wrap">
  大家好,欢迎光临
</div>
效果:


【推荐】编程新体验,更懂你的AI,立即体验豆包MarsCode编程助手
【推荐】凌霞软件回馈社区,博客园 & 1Panel & Halo 联合会员上线
【推荐】抖音旗下AI助手豆包,你的智能百科全书,全免费不限次数
【推荐】轻量又高性能的 SSH 工具 IShell:AI 加持,快人一步