DevOps之三:Maven私服Nexus使用 && 清理nexus历史镜像
环境
Red Hat Enterprise Linux Server release 7.3 (Maipo)
jdk1.7.0_80
apache-tomcat-7.0.90
mysql-5.7.23
apache-maven-3.5.4
nexus-2.11.1-01
一、使用
1、Nexus的仓库类型分为以下四种:
group(仓库组):一组仓库的集合
hosted(宿主):配置第三方仓库 (包括公司内部私服 )
proxy(代理):私服会对中央仓库进行代理,用户连接私服,私服自动去中央仓库下载jar包或者插件
virtual(虚拟):兼容Maven1 版本的jar或者插件
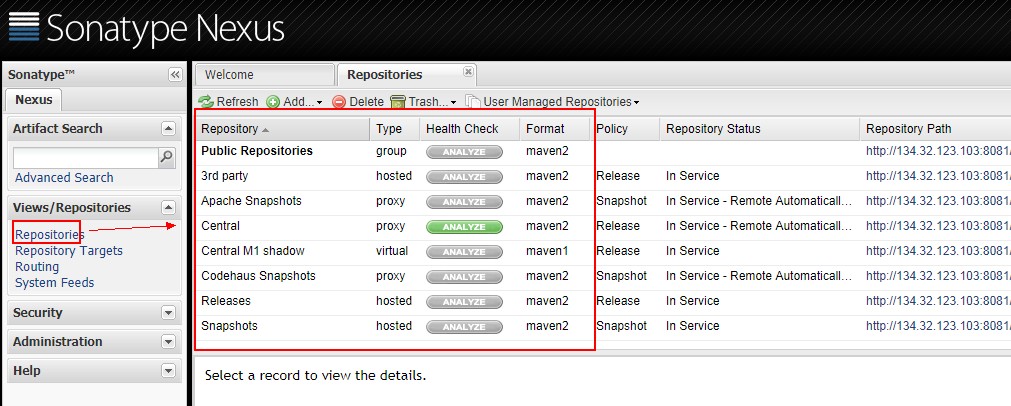
Public Repositories: 仓库组
3rd party: 无法从公共仓库获得的第三方发布版本的构件仓库
Apache Snapshots: 用了代理ApacheMaven仓库快照版本的构件仓库
Central: 用来代理maven中央仓库中发布版本构件的仓库
Central M1 shadow: 用于提供中央仓库中M1格式的发布版本的构件镜像仓库
Codehaus Snapshots: 用来代理CodehausMaven 仓库的快照版本构件的仓库
Releases: 用来部署管理内部的发布版本构件的宿主类型仓库
Snapshots:用来部署管理内部的快照版本构件的宿主类型仓库
2、常用设置
点击右上角的 Log In 按钮即可登陆了。默认登录账号/密码为: admin/admin123 ,登陆成功后的界面
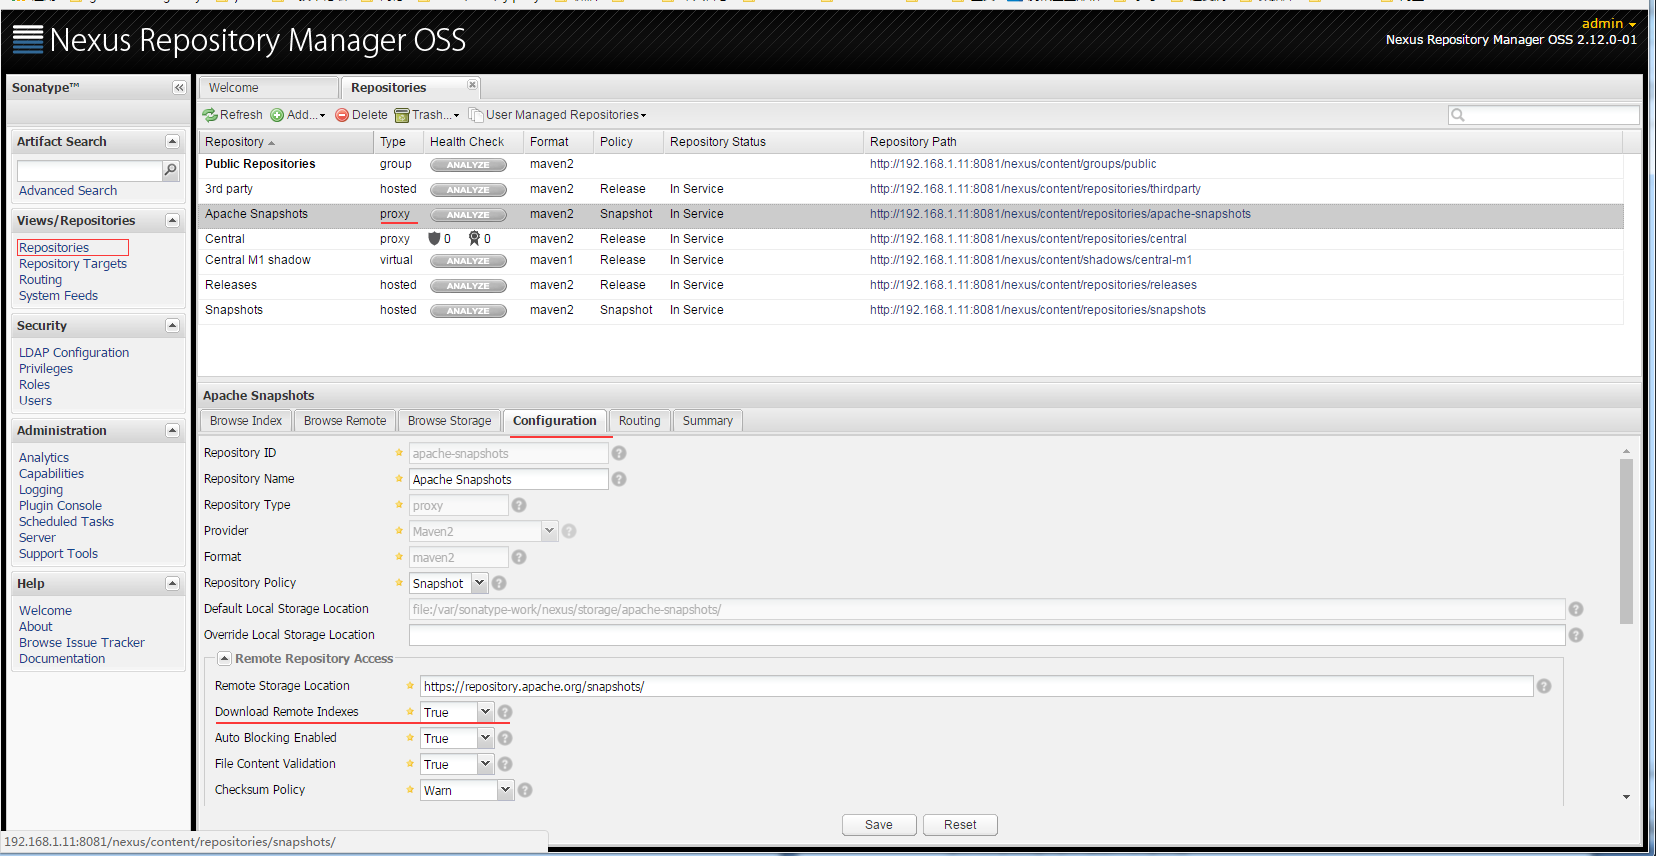
点击Repositories,将列表中所有Type为proxy 的项目的 Configuration 中的 Download Remote Indexes 设置为True
将Releases仓库的Deployment Policy设置为 Allow ReDeploy

当然我们也避免不了会使用到一些第三方的 jar ,而这些jar包也不存在于互联网上的maven中央仓库中,这时我们可以手工添加jar 到我们的私服中。
添加第三方 jar:

3、配置本地项目发布到Nexus
3.1在本地项目pom.xml中添加部署配置
<distributionManagement>
<repository>
<id>releases</id><!--这个ID需要与你的release仓库的Repository ID一致-->
<url>http://192.168.1.11:8081/nexus/content/repositories/releases</url>
</repository>
<snapshotRepository>
<id>snapshots</id><!--这个ID需要与你的snapshots仓库的Repository ID一致-->
<url>http://192.168.1.11:8081/nexus/content/repositories/snapshots</url>
</snapshotRepository>
</distributionManagement>
3.2在本地$MAVEN_HOME\conf目录下的settings.xml配置文件,添加认证配置
<servers>
<server>
<id>releases</id>
<username>admin</username>
<password>admin123</password>
</server>
<server>
<id>snapshots</id>
<username>admin</username>
<password>admin123</password>
</server>
</servers>
在本地工程目录下执行:mvn clean deploy
所部署的包就自动上传到了nexus安装目录下的
4、配置Maven从Nexus下载构件
4.1 配置maven 本地仓库路径
<localRepository>E:\repository</localRepository>
4.2 在项目POM中配置Nexus私服,这样的配置只对当前的Maven项目有效。
<!--指定Nexus的构件仓库-->
<repositories>
<repository>
<id>public</id>
<name>Team Maven Repository</name>
<url>http://192.168.123.103:8081/nexus/content/groups/public/</url>
<releases>
<enabled>true</enabled>
</releases>
<snapshots>
<enabled>true</enabled>
</snapshots>
</repository>
</repositories>

<!--指定Nexus的插件仓库-->
<pluginRepositories>
<pluginRepository>
<id>public</id>
<name>Team Maven Repository</name>
<url>http://192.168.123.103:8081/nexus/content/groups/public/</url>
<releases>
<enabled>true</enabled>
</releases>
<snapshots>
<enabled>true</enabled>
</snapshots>
</pluginRepository>
</pluginRepositories>
4.3在maven settings.xml中配置profile元素,这样就能让本机所有的Maven项目都使用自己的Maven私服。
(1) maven提供了profile来配置仓库信息
<profiles>
<profile>
<id>myprofile</id>
<repositories>
<repository>
<id>central</id>
<url>http://central</url>
<releases>
<enabled>true</enabled>
</releases>
<snapshots>
<enabled>true</enabled>
</snapshots>
</repository>
</repositories>
<pluginRepositories>
<pluginRepository>
<id>central</id>
<url>http://central</url>
<releases>
<enabled>true</enabled>
</releases>
<snapshots>
<enabled>false</enabled>
</snapshots>
</pluginRepository>
</pluginRepositories>
</profile>
</profiles>
(2)激活profile
<activeProfiles>
<activeProfile>myprofile</activeProfile>
</activeProfiles>
(3)配置镜像
<mirrors>
<mirror>
<id>nexus</id>
<url>http://127.0.0.1:7788/nexus/content/groups/public/</url>
<mirrorOf>*</mirrorOf>
</mirror>
</mirrors>
这里配置mirrorOf的值为*,代表maven的所有访问请求都会指向到Nexus仓库组。
二、清理无用的docker镜像(基于nexus3)
1、下载脚本并授权
#下载nexus-cli并赋可执行权限
[root@node06]$ wget https://s3.eu-west-2.amazonaws.com/nexus-cli/1.0.0-beta/linux/nexus-cli --no-check-certificate
[root@node06]$ chmod +x nexus-cli
2、配置待清理的库
[root@node06]$ ./nexus-cli configure
Enter Nexus Host: http://127.0.0.1:8081
Enter Nexus Repository Name: docker-release
Enter Nexus Username: admin
Enter Nexus Password: admin123
Repository Name是我们要清理的仓库名,http://127.0.0.1:8081 是Nexus服务的地址,为了安全,可以直接在 Nexus 所在的机器处理。
3、列出所有镜像
[root@node06]$ ./nexus-cli image ls
oauth-service
report-service
fund-service
...
这里仅列出三个作为例子。
4、清理镜像
#nexus-cli image delete -name IMAGE_NAME -keep X,-keep X 表示保留几个tag,清理单个镜像的tag,这里仅保留最新的X个tag
[root@node06]$ ./nexus-cli image delete -name fund-service -keep 2
fund-service:2018.11.1-113322 image will be deleted ...
fund-service:2018.11.1-113322 has been successful deleted
fund-service:2018.11.1-145912 image will be deleted ...
fund-service:2018.11.1-145912 has been successful deleted
...
5、清理磁盘空间
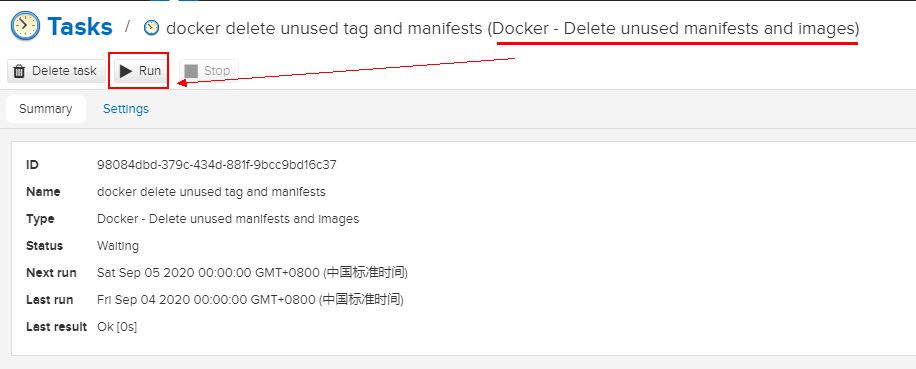
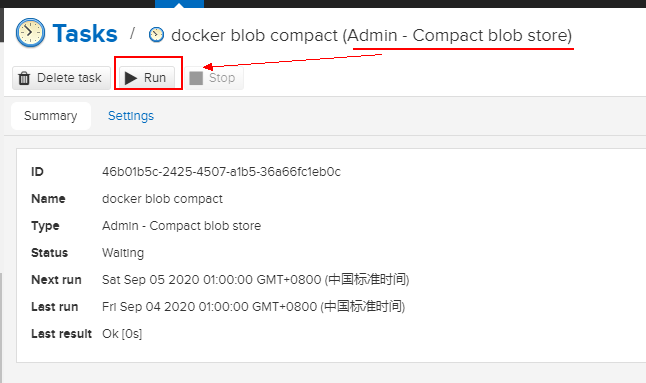
最后,创建两个Nexus Task 来清理物理空间。先运行 Delete unused manifests and images,再运行 Compact blob store。

此时,可以查看磁盘目录 /apps/nexus/sonatype-work/nexus3/blobs 的磁盘占用情况。
[root@node06]$ du -lh --max-depth=1 .
16G        ./docker
2.5G       ./default
19G        .
参考:
maven全局配置文件settings.xml详解
Maven Nexus
Linux 使用nexus搭建maven私服

 浙公网安备 33010602011771号