【Spring Boot学习之八】发布打包
环境
eclipse 4.7
jdk 1.8
Spring Boot 1.5.2
一、打jar类型
1、指定主程序入口,否则运行报错:没有主清单属性
pom.xml:
<build>
        <plugins>
            <plugin>
                <groupId>org.apache.maven.plugins</groupId>
                <artifactId>maven-compiler-plugin</artifactId>
                <version>3.1</version>
                <configuration>
                    <source>1.8</source>
                    <target>1.8</target>
                </configuration>
            </plugin>
            <plugin>
                <groupId>org.springframework.boot</groupId>
                <artifactId>spring-boot-maven-plugin</artifactId>
                <configuration>
                    <maimClass>com.wjy.APP</maimClass>
                </configuration>
                <executions>
                    <execution>
                        <goals>
                            <goal>repackage</goal>
                        </goals>
                    </execution>
                </executions>
            </plugin>
        </plugins>
    </build>
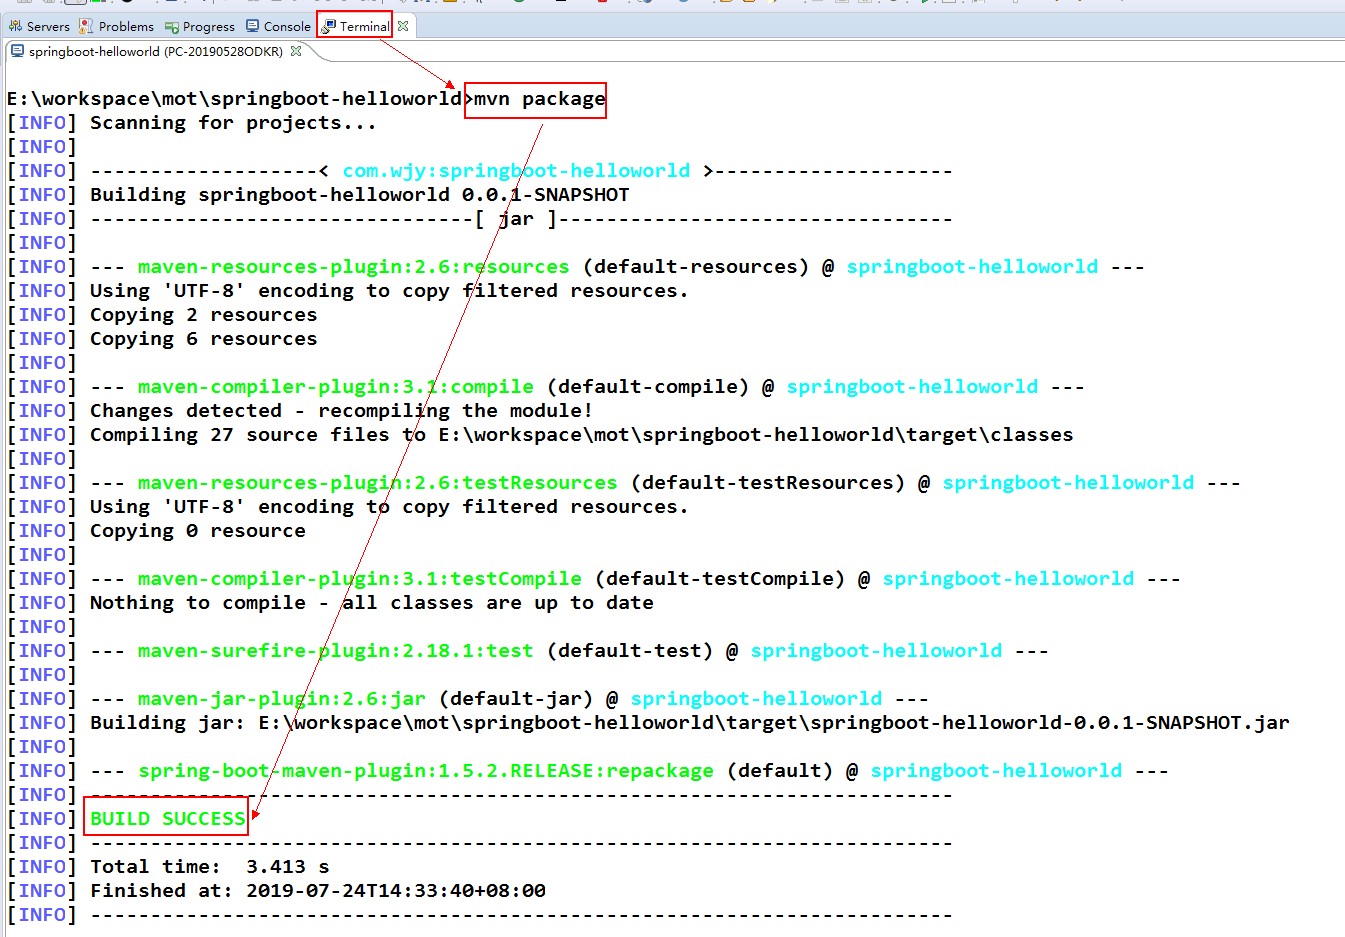
2、打包
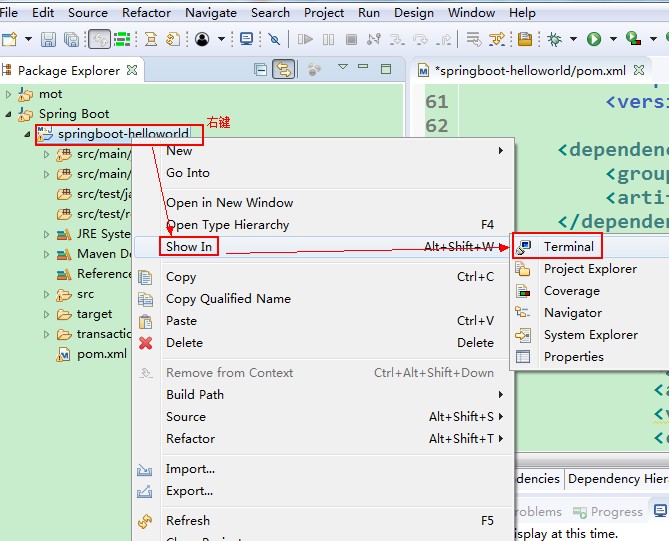
2、运行
java -jar springboot-helloworld-0.0.1-SNAPSHOT.jar

二、打war类型
如果要使打出来的war包可以使用命令 java -jar运行,需要将静态文件(html/jsp)一并打入可执行文件
1、pom.xml
这是一个整合jsp的web应用
<project xmlns="http://maven.apache.org/POM/4.0.0"
    xmlns:xsi="http://www.w3.org/2001/XMLSchema-instance"
    xsi:schemaLocation="http://maven.apache.org/POM/4.0.0 http://maven.apache.org/xsd/maven-4.0.0.xsd">
    <modelVersion>4.0.0</modelVersion>
    <groupId>com.wjy</groupId>
    <artifactId>spring-boot-jsp</artifactId>
    <version>0.0.1-SNAPSHOT</version>
    <packaging>war</packaging>

    <parent>
        <groupId>org.springframework.boot</groupId>
        <artifactId>spring-boot-starter-parent</artifactId>
        <version>1.3.3.RELEASE</version>
    </parent>
    <dependencies>
        <!-- SpringBoot 核心组件 -->
        <dependency>
            <groupId>org.springframework.boot</groupId>
            <artifactId>spring-boot-starter-web</artifactId>
        </dependency>
        <dependency>
            <groupId>org.springframework.boot</groupId>
            <artifactId>spring-boot-starter-tomcat</artifactId>
        </dependency>
        <dependency>
            <groupId>org.apache.tomcat.embed</groupId>
            <artifactId>tomcat-embed-jasper</artifactId>
        </dependency>
        <!-- 强制添加依赖 否则可能在解析JSP报错:No Java compiler available -->
        <dependency>
            <groupId>org.eclipse.jdt.core.compiler</groupId>
            <artifactId>ecj</artifactId>
            <version>4.6.1</version>
            <scope>provided</scope>
        </dependency>
    </dependencies>

    <build>
        <resources>
            <resource>
                <!--注意必须要放在此目录下才能被访问到 -->
                <directory>${basedir}/src/main/webapp</directory>
                <targetPath>META-INF/resources</targetPath>
                <includes>
                    <include>**/**</include>
                </includes>
            </resource>
            <resource>
                <directory>${basedir}/src/main/resources</directory>
                <includes>
                    <include>**/**</include>
                </includes>
            </resource>
        </resources>
        <plugins>
            <plugin>
                <groupId>org.apache.maven.plugins</groupId>
                <artifactId>maven-compiler-plugin</artifactId>
                <version>3.1</version>
                <configuration>
                    <source>1.8</source>
                    <target>1.8</target>
                </configuration>
            </plugin>
            <plugin>
                <groupId>org.springframework.boot</groupId>
                <artifactId>spring-boot-maven-plugin</artifactId>
                <executions>
                    <execution>
                        <goals>
                            <goal>repackage</goal>
                        </goals>
                    </execution>
                </executions>
            </plugin>
        </plugins>
    </build>

</project>
2、打包
mvn package
3、运行
java -jar spring-boot-jsp-0.0.1-SNAPSHOT.war
三、Spring Boot web应用打成WAR包部署到外部TOMCAT
1、pom.xml
(1)将打包方式修改为war
<packaging>war</packaging>
(2)移除tomcat依赖或者将tomcat依赖scope改为provide
<dependency>
  <groupId>org.springframework.boot</groupId>
    <artifactId>spring-boot-starter-web</artifactId>
    <!-- 移除嵌入式tomcat插件 -->
    <exclusions>
      <exclusion>
        <groupId>org.springframework.boot</groupId>
        <artifactId>spring-boot-starter-tomcat</artifactId>
      </exclusion>
    </exclusions>
</dependency>
或者
<dependency>
  <groupId>org.springframework.boot</groupId>
  <artifactId>spring-boot-starter-tomcat</artifactId>
  <scope>provided</scope>
</dependency>
2、继承SpringBootServletInitializer
继承org.springframework.boot.web.servlet.support.SpringBootServletInitializer,实现configure方法:
为什么继承该类,SpringBootServletInitializer就是原有的web.xml文件的替代。
(1)方式一,启动类继承SpringBootServletInitializer实现configure:
@SpringBootApplication
public class Application extends SpringBootServletInitializer {

    public static void main(String[] args) {
        SpringApplication.run(Application.class, args);
    }

    @Override
    protected SpringApplicationBuilder configure(SpringApplicationBuilder builder) {
        return builder.sources(Application.class);
    }
}
(2)方式二,新增加一个类继承SpringBootServletInitializer实现configure:
public class ServletInitializer extends SpringBootServletInitializer {

    @Override
    protected SpringApplicationBuilder configure(SpringApplicationBuilder builder) {
        //此处的Application.class为带有@SpringBootApplication注解的启动类
        return builder.sources(Application.class);
    }

}
3、注意事项:
(1)使用外部Tomcat部署访问的时候,application.properties(或者application.yml)中配置的
server.port=
server.servlet.context-path=
将失效;
(2)为了防止应用上下文所导致的项目访问资源加载不到的问题,建议pom.xml文件中<build></build>标签下添加<finalName></finalName>标签
<build>
  <finalName>${project.artifactId}</finalName>
</build>
(3)spring boot只支持tomcat 8.5 以上版本,如果外部tomcat版本过低,需要在pom.xml里指定低版本的tomcat
<properties>
    <tomcat.version>7.0.47</tomcat.version>
</properties>
4、示例:
SpringBoot整合jsp web应用使用外置容器运行示例:
(1)pom.xml
<project xmlns="http://maven.apache.org/POM/4.0.0"
    xmlns:xsi="http://www.w3.org/2001/XMLSchema-instance"
    xsi:schemaLocation="http://maven.apache.org/POM/4.0.0 http://maven.apache.org/xsd/maven-4.0.0.xsd">
    <modelVersion>4.0.0</modelVersion>
    <groupId>com.wjy</groupId>
    <artifactId>spring-boot-jsp</artifactId>
    <version>0.0.1-SNAPSHOT</version>
    <packaging>war</packaging>

    <parent>
        <groupId>org.springframework.boot</groupId>
        <artifactId>spring-boot-starter-parent</artifactId>
        <version>1.3.3.RELEASE</version>
    </parent>
    <dependencies>
        <!-- SpringBoot 核心组件 -->
        <dependency>
            <groupId>org.springframework.boot</groupId>
            <artifactId>spring-boot-starter-web</artifactId>
        </dependency>
        <dependency>
            <groupId>org.springframework.boot</groupId>
            <artifactId>spring-boot-starter-tomcat</artifactId>
            <scope>provided</scope>
        </dependency>
        <dependency>
            <groupId>org.apache.tomcat.embed</groupId>
            <artifactId>tomcat-embed-jasper</artifactId>
        </dependency>
        <!-- 强制添加依赖 否则可能在解析JSP报错:No Java compiler available -->
        <dependency>
            <groupId>org.eclipse.jdt.core.compiler</groupId>
            <artifactId>ecj</artifactId>
            <version>4.6.1</version>
            <scope>provided</scope>
        </dependency>
    </dependencies>
    <build>
        <plugins>
            <plugin>
                <groupId>org.apache.maven.plugins</groupId>
                <artifactId>maven-compiler-plugin</artifactId>
                <version>3.1</version>
                <configuration>
                    <source>1.8</source>
                    <target>1.8</target>
                </configuration>
            </plugin>
        </plugins>
        <finalName>${project.artifactId}</finalName>
    </build>
</project>
(2)Controller
package com.wjy.controller;

import org.springframework.stereotype.Controller;
import org.springframework.web.bind.annotation.RequestMapping;

@Controller
public class IndexController {

    @RequestMapping("/index")
    public String index() {
        return "index";
    }
}
(3)jsp
<%@ page language="java" contentType="text/html; UTF-8" pageEncoding="UTF-8"%>
<!DOCTYPE html PUBLIC "-//W3C//DTD HTML 4.01 Transitional//EN" "http://www.w3.org/TR/html4/loose.dtd">
<html>
<head>
<meta http-equiv="Content-Type" content="text/html; charset=UTF-8">
<title>Insert title here</title>
</head>
<body>
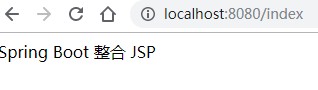
Spring Boot 整合 JSP
</body>
</html>
(4)启动类
package com.wjy;

import org.springframework.boot.SpringApplication;
import org.springframework.boot.autoconfigure.SpringBootApplication;
import org.springframework.boot.builder.SpringApplicationBuilder;
import org.springframework.boot.context.web.SpringBootServletInitializer;

@SpringBootApplication
public class App extends SpringBootServletInitializer{

    public static void main(String[] args) {
        SpringApplication.run(App.class, args);
    }

    @Override
    protected SpringApplicationBuilder configure(SpringApplicationBuilder builder) {
        return builder.sources(App.class);
    }
}
打包、部署到tomcat ,并启动tomcat:
测试验证:http://localhost:8080/spring-boot-jsp/index

参考:

 浙公网安备 33010602011771号