【Spring Boot学习之一】Spring Boot简介
环境
Java1.8
Spring Boot 1.3.2
一、Spring Boot特点
1、使用java运行项目,内置tomcat,无需外部容器;
2、减少XML配置,使用properties文件和注解;
3、Spring Boot对各个Spring技术进行了封装,并不是产生新技术,方便使用了Spring;
趋势:面向服务架构(SOA)转向微服务架构,
4、Spring Cloud基于Spring Boot,Spring Cloud(HTTP+rest),基于Spring Boot中WEB组件(Spring MVC);
二、入门项目
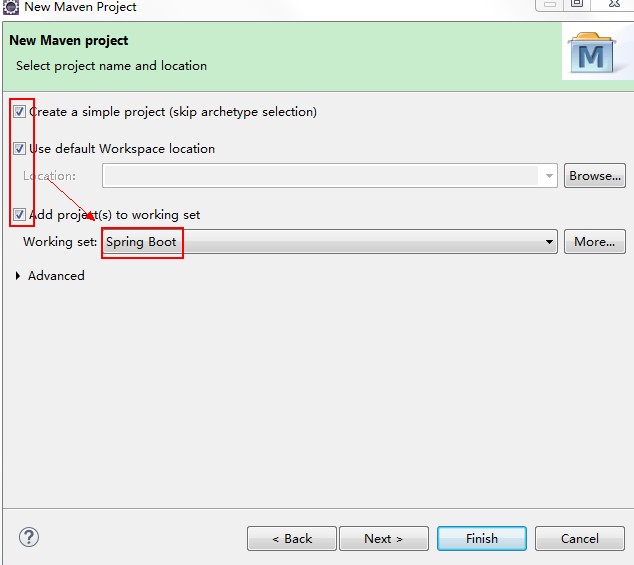
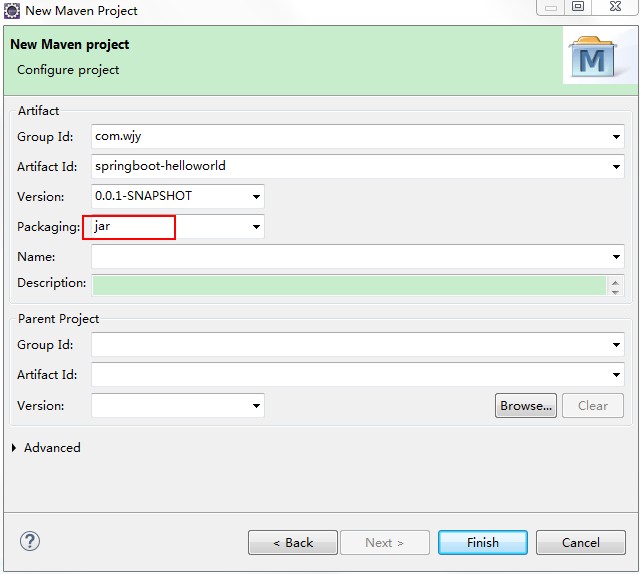
1、搭建
new-->maven project
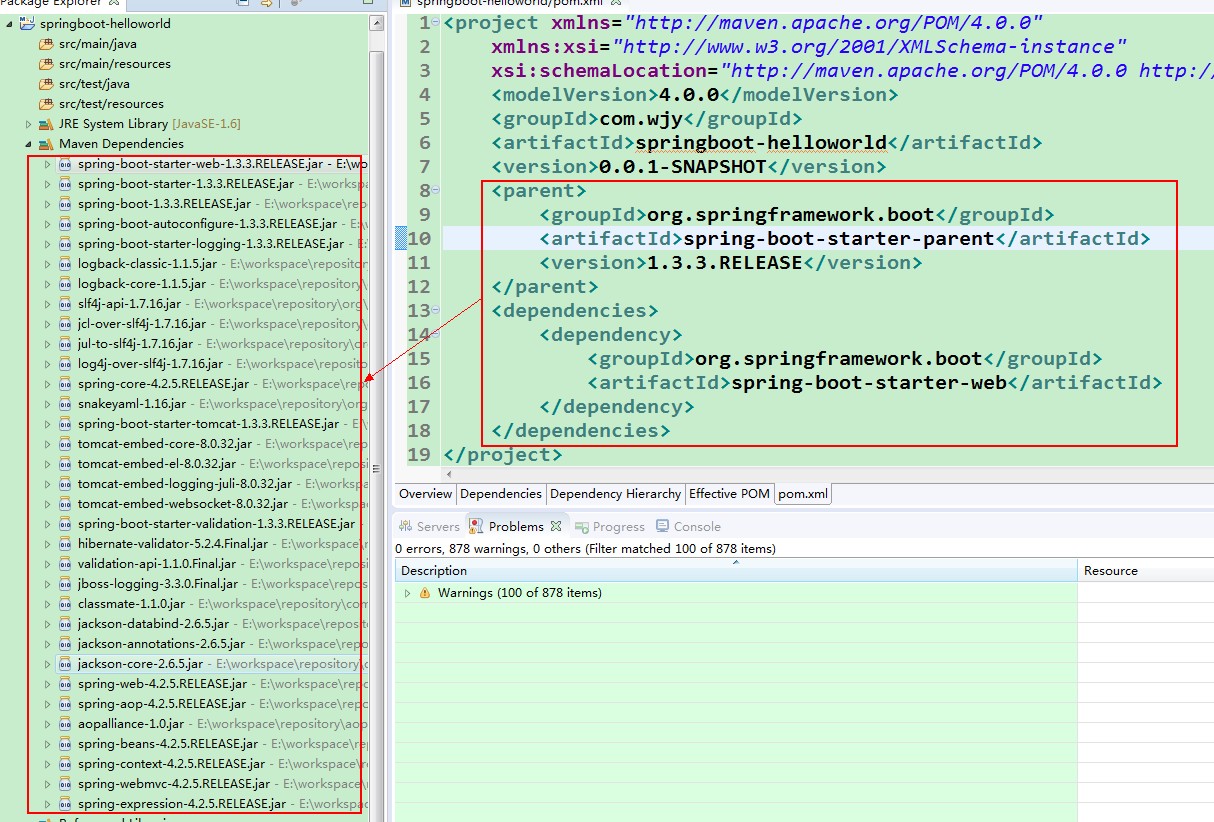
2、依赖
利用Maven继承依赖的特性,向上层级引入Spring Boot的其他依赖包。
(1)spring-boot-starter-parent作用
在pom.xml中引入spring-boot-start-parent,spring官方的解释叫什么stater poms,它可以提供dependency management,也就是说依赖管理,引入以后在申明其它dependency的时候就不需要version了,后面可以看到。
(2)spring-boot-starter-web作用
SpringWEB核心组件(springMVC + Spring)
(3)spring-boot-maven-plugin作用
如果我们要直接Main启动spring,那么以下plugin必须要添加,否则是无法启动的。如果使用maven 的spring-boot:run的话是不需要此配置的。(我在测试的时候,如果不配置下面的plugin也是直接在Main中运行的。)
3、编写HelloWord服务
package com.wjy.controller;

import org.springframework.boot.SpringApplication;
import org.springframework.boot.autoconfigure.EnableAutoConfiguration;
import org.springframework.web.bind.annotation.RequestMapping;
import org.springframework.web.bind.annotation.RestController;

@EnableAutoConfiguration
@RestController
public class HelloController {

    @RequestMapping("/hello")
    public String hello() {
        return "hello world";
    }

    public static void main(String[] args) {
        SpringApplication.run(HelloController.class, args);
    }

}
(1)@RestController
在上加上RestController 表示修饰该Controller所有的方法返回JSON格式,直接可以编写Restful接口 相当于@Controller+@ResponseBody
(2)@EnableAutoConfiguration
作用在于让Spring Boot根据应用所声明的依赖来对Spring框架进行自动配置:
这个注解告诉Spring Boot根据添加的jar依赖猜测你想如何配置Spring。由于spring-boot-starter-web添加了Tomcat和Spring MVC,所以auto-configuration将假定你正在开发一个web应用并相应地对Spring进行设置。
(3)SpringApplication.run(HelloController.class, args) 标识为启动类
(4)@ResponseBody 用在方法上将返回内容转换成json格式
(5)@SpringBootApplication = (默认属性)@Configuration + @EnableAutoConfiguration + @ComponentScan。
作用:启动项目 整合常用注解 扫包作用(扫描当前同级包及其子包)
@ComponentScan默认情况下:它扫描所有类型(@Service,@Repository,@Component,@Controller),并且扫描范围是@ComponentScan注解所在配置类包及子包的类
4、启动
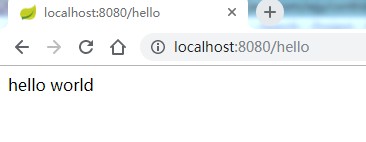
默认端口8080
(1)启动方式一 启动单个controller
package com.wjy.controller;

import org.springframework.boot.SpringApplication;
import org.springframework.boot.autoconfigure.EnableAutoConfiguration;
import org.springframework.web.bind.annotation.RequestMapping;
import org.springframework.web.bind.annotation.RestController;

@EnableAutoConfiguration
@RestController
public class HelloController {

    @RequestMapping("/hello")
    public String hello() {
        return "hello world";
    }

    public static void main(String[] args) {
        SpringApplication.run(HelloController.class, args);
    }

}
(2)启动方式二 扫包启动一片controller
package com.wjy.base;

import org.springframework.boot.SpringApplication;
import org.springframework.context.annotation.ComponentScan;

@ComponentScan(basePackages="com.wjy.controller")
public class App {

    public static void main(String[] args) {
        SpringApplication.run(App.class, args);
    }

}
浏览器访问验证:

 浙公网安备 33010602011771号