windows下安装php+nginx+mysql(一)
win10
安装之前,首先下载软件:
Nginx: http://nginx.org/en/download.html
PHP Stable PHP 7.2.3: http://php.net/downloads.php
mysql: http://dev.mysql.com/downloads/utilities/
1、E盘建立文件wnmp,并且把下载好得安装包放进去

2、安装nginx
2.1解压安装包。
2.2运行nginx.exe,打开浏览器访问http://localhost 或 http://127.0.0.1,看看是否出现“Welcome to nginx!”,出现的证明已经启动成功了。若启动不成功,查看是否端口被占用。
2.3需修改nginx.conf配置文件nginx-1.12.2\conf
1. 去掉worker_processes前的#号,开启一个进程
2. 添加events
3. 设置http->设置server->支持php
#user  nobody;
worker_processes  1;

#error_log  logs/error.log;
#error_log  logs/error.log  notice;
#error_log  logs/error.log  info;

#pid        logs/nginx.pid;


events {
    worker_connections  1024;
}


http {
    include       mime.types;
    default_type  application/octet-stream;

    #log_format  main  '$remote_addr - $remote_user [$time_local] "$request" '
    #                  '$status $body_bytes_sent "$http_referer" '
    #                  '"$http_user_agent" "$http_x_forwarded_for"';

    #access_log  logs/access.log  main;

    sendfile        on;
    #tcp_nopush     on;

    #keepalive_timeout  0;
    keepalive_timeout  65;

    #gzip  on;

    server {
        listen       80;
        server_name  localhost;

        #charset koi8-r;

        #access_log  logs/host.access.log  main;

        location / {
            root   html;
            index  index.html index.htm inde.php;
        }

        #error_page  404              /404.html;

        # redirect server error pages to the static page /50x.html
        #
        error_page   500 502 503 504  /50x.html;
        location = /50x.html {
            root   html;
        }

        # proxy the PHP scripts to Apache listening on 127.0.0.1:80
        #
        #location ~ \.php$ {
        #    proxy_pass   http://127.0.0.1;
        #}

        # pass the PHP scripts to FastCGI server listening on 127.0.0.1:9000
        #
        location  ~ [^/]\.php(/|$) {
                fastcgi_split_path_info  ^(.+?\.php)(/.*)$;
                if (!-f $document_root$fastcgi_script_name) {
                        return 404;
                }
                fastcgi_pass   127.0.0.1:9072;
                fastcgi_index  index.php;
                fastcgi_param  SCRIPT_FILENAME  $document_root$fastcgi_script_name;
                fastcgi_param  PATH_INFO        $fastcgi_path_info;
                fastcgi_param  PATH_TRANSLATED  $document_root$fastcgi_path_info;
                include        fastcgi_params;
        }


        # deny access to .htaccess files, if Apache's document root
        # concurs with nginx's one
        #
        #location ~ /\.ht {
        #    deny  all;
        #}
    }


    # another virtual host using mix of IP-, name-, and port-based configuration
    #
    #server {
    #    listen       8000;
    #    listen       somename:8080;
    #    server_name  somename  alias  another.alias;

    #    location / {
    #        root   html;
    #        index  index.html index.htm;
    #    }
    #}


    # HTTPS server
    #
    #server {
    #    listen       443 ssl;
    #    server_name  localhost;

    #    ssl_certificate      cert.pem;
    #    ssl_certificate_key  cert.key;

    #    ssl_session_cache    shared:SSL:1m;
    #    ssl_session_timeout  5m;

    #    ssl_ciphers  HIGH:!aNULL:!MD5;
    #    ssl_prefer_server_ciphers  on;

    #    location / {
    #        root   html;
    #        index  index.html index.htm;
    #    }
    #}

}
3、修改php下php.ini-development文件,将文件名修改为php.ini,找开php.ini:(自行配置)
4、在nginx下建立文件夹index.php即可确认php与nginx是否关联
5、mysql安装(此安装学习该博主的技术https://www.cnblogs.com/xinxin-csharp/p/6146770.html,感谢分享,非常详尽。)
一、下载
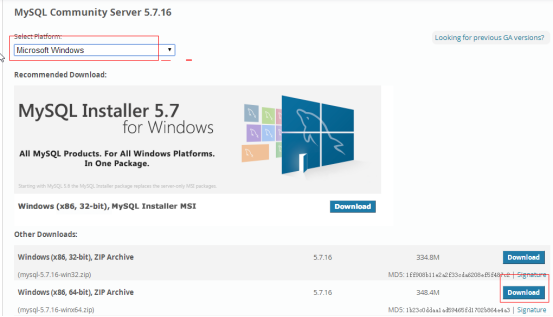
下载页面http://dev.mysql.com/downloads/mysql/
选择系统平台后,点击download(根据系统选择64或32位)

二、配置
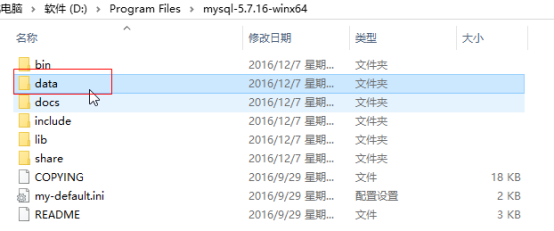
1、下载成功后,解压安装包到要安装的位置,我是安装在”D:\Program Files”
如果安装目录下包含data文件夹,删除
2、在环境变量PATH中把bin目录添加进去

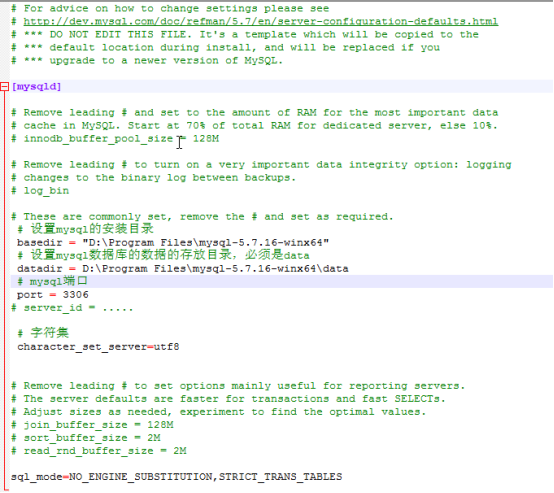
3、把安装目录下的my-default.ini复制一份并重命名为my.ini
修改配置参数,注意把安装目录改成你自己的哦
[mysqld]
# 设置mysql的安装目录
basedir = D:\Program Files\mysql-5.7.16-winx64
# 设置mysql数据库的数据的存放目录,必须是data
datadir = D:\Program Files\mysql-5.7.16-winx64\data
# mysql端口
port = 3306
# 字符集
character_set_server=utf8
sql_mode=NO_ENGINE_SUBSTITUTION,STRICT_TRANS_TABLES
如下图所示:
三、安装
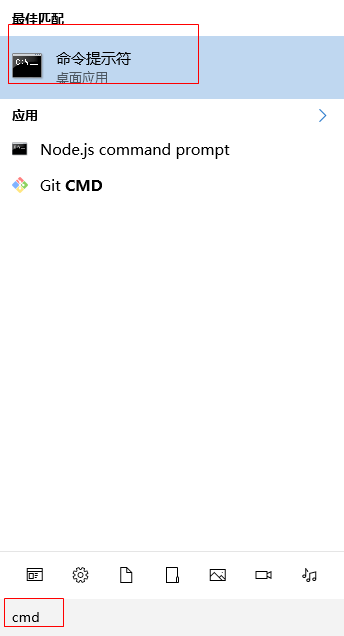
1、以管理员身份运行cmd(请注意,管理员身份)
2、进入安装目录下的bin文件夹
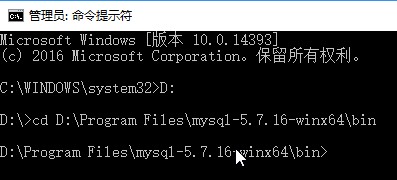
3、执行mysqld --initialize

执行成功,在安装目录下会生成data文件夹,打开文件夹找到.err文件,已文本编辑器打开
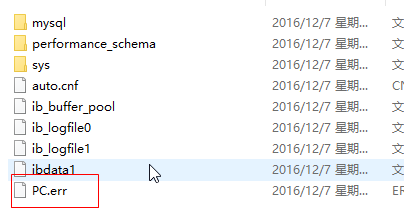
搜索”root”,冒号后面就是随机生成的临时密码

4、继续,输入mysqld --install MySQL --dufaults-file=”D:\Program Files\mysql-5.7.16-winx64\my.ini”或者 输入 mysqld --install 自动检索my.ini安装
Ps:卸载mysql是cd到bin目录下执行mysqld --remove

5、检测安装,输入 mysql --version

6、启动mysql服务,输入net start mysql,ps:停止服务是net stop mysql

四、修改root密码
1、在安装目录下新建mysql-init.txt,输入ALTER USER 'root'@'localhost' IDENTIFIED BY 'MyNewPass';,保存
PS:5.7.5以及以前版本输入SET PASSWORD FOR 'root'@'localhost' = PASSWORD('MyNewPass');
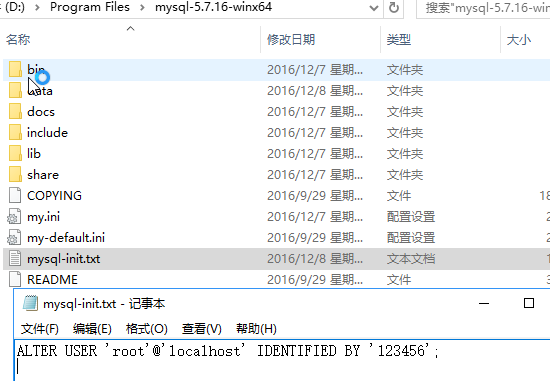
参考文档:http://dev.mysql.com/doc/refman/5.7/en/resetting-permissions.html
2、关闭mysql服务,然后在cmd中进入bin目录,输入mysqld --init-file=D:\Program Files\mysql-5.7.16-winx64\mysql-init.txt,执行完成后,删除mysql-init.txt文件,重启mysql服务

3、输入mysql -u root -p,随后输入密码登录(如果登录不了,输入.err里的随机密码进入mysql,执行第4步)
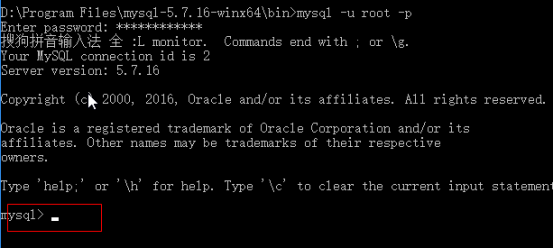
4、进入mysql的shell后重新键入前面在mysql-init.txt里的命令
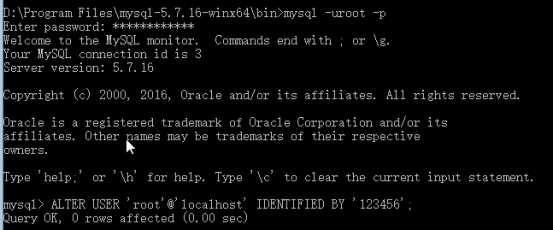
输入exit退出后重新用新密码登录
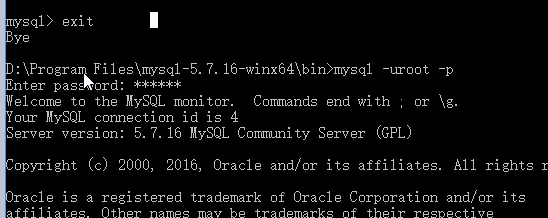
五、验证mysql正常使用
输入show databases;
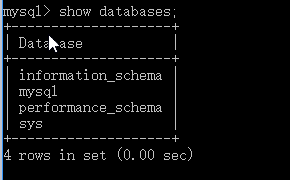
输入use mysql;

输入SELECT User,Host,authentication_string FROM user;


 浙公网安备 33010602011771号