3D Software Rendering Engine - Part I
转自:http://www.codeproject.com/KB/GDI/3DSoftwareRenderingEngine.aspx
Introduction
This is the article about the 3D software rendering engine. I will not discuss about the DirectX or OpenGL here. The running example is done in plain Windows GDI.
Background
You can find various articles here on the Code Project considering this topic so feel free to browse for them. The field of game programming is quite wide and covers a lot of different technical skills, rather then just programming in a certain programming language. I'll try to be as short as possible in this article, keeping the focus on the main subject, and that is why no other things are addressed here, like sounds, musics, physics, game UI, game scripts, etc.
Why a software 3D game engine?
I think that everyone will ask this question while reading this article. Well, writing games is a fun part of programming. We (programmers) while writing different kind of applications always ask ourselves (or more often other people ask us) if we are able to program a game. And while 2D games made of sprites can be written in a short period of time, the full 3D game engine is not such an easy topic. It takes time, time and time to finish it. If you ever finish it. Well, I hardly think that a single developer can deal with all main subsystems of a commercial quality 3D game engine, but rather holds to the part he knows the best. So, besides the time it takes more then a single man, it takes a team. It also takes a good knowledge of mathematics and physics.
So, one will ask, why don't use the existing one then writing your one from the beginning? It is the same, or almost the same. But, writing your one game engine, you learn and you practice fast coding, right?
You need also a good book to start learning about game engines. One more time, I will call for the technical book from Andre Lamothe (The Tricks Of The 3D Game Programming Gurus). This author has a whole series of books dedicated to this topic. Maybe it is not the state of art in the modern game programming, but for the beginners and intermediate developers in game programming, it is more then enough as the basic source. It is quite good place to start reading and learning.
I will try in this article to transfer my experience from reading this book.
The 3D Worlds - Polygons
All 3D graphics is created from the simple polygons called triangles. All modern graphic cards work only with these simple polygons.
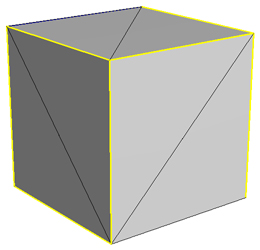
As an example please look the image above. This simple cube is made of 12 triangles. This 3D model has exactly 8 vertices and 12 defined polygons (triangles). So, to render the 3D cube you must render the polygons it is made of, so we are basycally dealing only with triangles. If you know how to draw a triangle you are able to render 3D object of any shape, even the most complex one.
Wireframe rendering
The first part we will cover is the wireframe drawing. That is the simple rendering technique in which you draw only edges of the triangles, but you do not fill them with color. You need to draw three lines for each triangle that connect corresponding three vertices. We need some good (or any available) line drawing algorithm like Bresenham's. You can find it here with all explanations. On the image below you can see how this algorithm works:
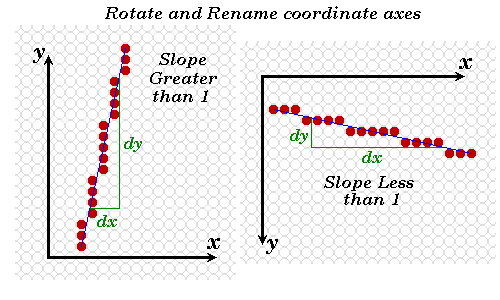
So, basically you calculate the line slope and interpolate from the start point to the end point. The slope is given as:
Slope = dy / dx = m = (y1 - y0) / (x1 - x0)
You can see on the next image how it looks like in the demo application when it is running in the wireframe mode>
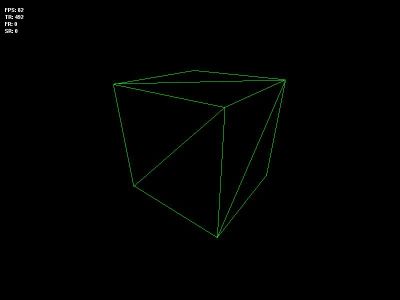
Our 3D model is now fully visible. You may ask however what happened with the sides of the cube that are not visible (the back faces). They are not rendered on this scene in order not bring to many details to the viewer, although in the wireframe mode it is normal to have them shown also.
Solid color rendering
All 3D object have some volume. In the wireframe mode we might not be able to see it clearly. We need then to fill these triangles with some color. For now, lets suppose that all triangles have the same color. Now, how to fill the triangle? It is not harder then to draw it. Just, instead of drawing line by line, you should transform the general triangle in something more easy to deal with. See the image below:
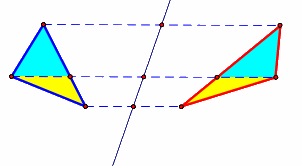
You can see here how a general triangle can be splitted in two simple triangles that are more easy to rasterize using a basic scanline rasterizer. For this scanline rasterizer implementation, please see the image below:
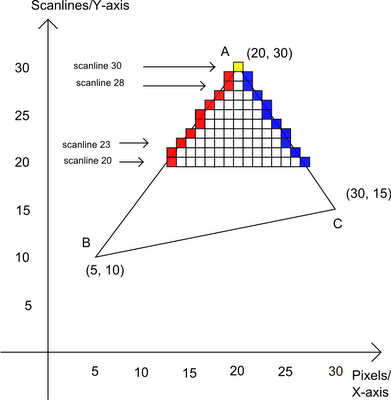
The scanline rasterizer calculates two slopes for two lines that comes out from the top vertex (if we are dealing with the flat bottom triangle). Similarly as when drawing lines, here as we go from the top to the bottom just fill the inner pixels with the specified color. So, we are not drawing just two pixels for two lines like before, but all middle pixel between those two edge pixels. The story is the same for the flat top triangle, only that we are going from the bottom vertex to the top of the triangle.
Now you can see the screenshot from the demo application running in the solid color mode:
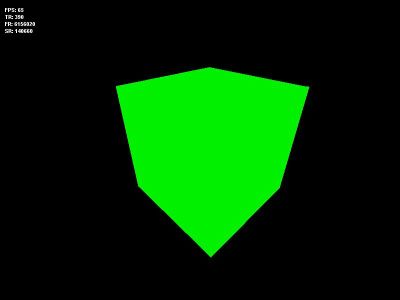
The cube now looks more interesting, right? It occupies some space in the 3D world as it should.
Flat shading
It is time now to mention something about the light. There is a light present in the real world so there should be light in the 3D world also. Since the light mathematics can be quite complex I will not dive into it but rather show you some basic algorithms for light modeling and how it reflects to our solid color rendering.
There are a few types of lights:
- Ambient light
- Directional light
- Point light
- Spot light
The so called flat shading takes into account the surface (triangle) normal and averages the influence of different light sources to the corresponding surface (triangle). See the image below:
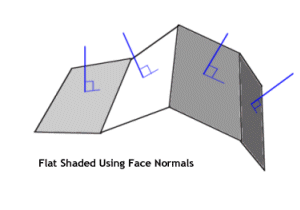
The screenshot from the demo application running in the flat shading mode is shown on the next image:

Now our cube looks a lot more realistic. So, the previuos triangle rasterization algorithm is not changed here, it only takes into account the different color for each surface (triangle).
Gouraud shading
This type of shading brings more reality into our 3D world. It is gradient type of shading. For this, a normal for each vertex is needed and not just the surface (triangle) normal.
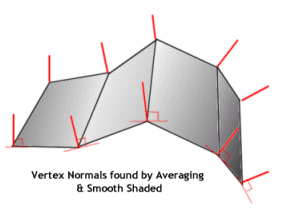
The algorithm for triangle rasterization using Gouraud shading is shown below:
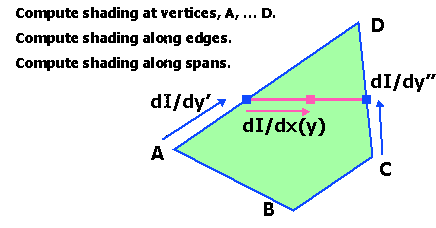
So, as the triangle is drawn the color is interpolated between the vertices. The image below is showing the screenshot from the demo application running in the Gouraud shading mode:

This 3D cube now looks better because of the smooth gradients that show how the cube surface reacts to the light.
Textures
It is needed that 3D object have some material or texture in order to increase the impression of reality they represent. That is the place where images (textures) fit in. But, how to apply them to the surfaces (triangles)?
Lets say here that there are two types of texturing: affine and perspective. The image below is showing the difference:

On the next image is shown the setup for the texture mapping:

So, the point here is to transfer the region from the image (texture) to the surface (triangle). Since we have already covered the color interpolation in Gouraud shading section, the same thing is used here. Instead of color, we are interpolation the image coordinates here.
On the image below is shown the screenshot from the demo application running in the texturing mode (no shading applied):
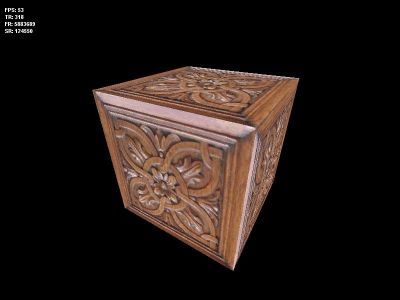
Now, this looks very nice and real, isn't it?
Flat shaded texture mapping
This is the simple combination of the lights and applied texture. During the interpolation, while you are rasterizing the triangle, you mix the final color of the surface (triangle) and the texture applied. It is easy to set the default color of the surface (triangle) to pure white and to apply lightning, and after that combine the resulting pixel value with the pixel from the texture. The lightmap that you got after calculation of lights is blended to the texture. See the image below:
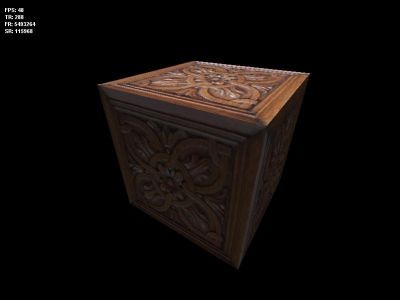
This is almost real enough.
Gouraud shaded texture mapping
We use here Gouraud shading instead of flat shading and mix it with texture applied. See the image below:
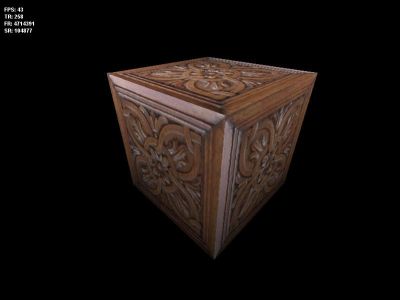
Now, this is good enough for me. What do you think?
What I did tell you till now
At this point you for sure understand how you can render your 3D models, in different modes, using your own software renderer. However, this is only the first part of the article series which will cover this 3D software renderer that I have designed. As far as this article is concerned you are free to test your skills in building your own rasterizer. In the next part I will show you the basics of every 3D game engine: 3D models, projection, camera system, texture filtering, game physics, etc.
The next article will also cover the optimizations that can be made so software renderer does not have to be slow as it is assumed at first.
Points of Interest
I like graphics programming very much, but I also like playing games. This is my attempt to build a 3D game engine graphical subsystem and to explain to the readers what are available simple techniques that they can use to build it.
History
3D software renderer v1.0 released on the March 17th, 2011.
License
This article, along with any associated source code and files, is licensed under The Code Project Open License (CPOL)
About the Author
darkoman Software Developer (Senior) Elektromehanika d.o.o. Nis Member |


