AngularX 路由总结
路由是 Angular 应用程序的核心,它加载与所请求路由相关联的组件,以及获取特定路由的相关数据。这允许我们通过控制不同的路由,获取不同的数据,从而渲染不同的页面。
Installing the router
yarn add @angular/router
# OR
npm i --save @angular/router
以上命令执行后,将会自动下载 @angular/router 模块到 node_modules 文件夹中。正常的angular项目一般不需要进行此步,在构建想的时候已经将此包下载。
Base href
我们需要做的最后一件事,是将 <base> 标签添加到我们的 index.html 文件中。路由需要根据这个来确定应用程序的根目录。例如,当我们转到 http://example.com/page1 时,如果我们没有定义应用程序的基础路径,路由将无法知道我们的应用的托管地址是 http://example.com 还是 http://example.com/page1 。
这件事操作起来很简单,只需打开项目中的 index.html 文件,添加相应的 <base> 标签,具体如下:
 1 <!doctype html>
 2 <html>
 3 <head>
 4   <meta charset="utf-8">
 5   <title>Mostlove</title>
 6   <base href="/">
 7
 8   <meta name="viewport" content="width=device-width, initial-scale=1">
 9   <link rel="icon" type="image/x-icon" href="favicon.ico">
10 </head>
以上配置信息告诉 Angular 路由,应用程序的根目录是 / 。如果没有此处的配置Angular将无法进行路由功能。
1.路由相关配置
路由类设置
/*路由基本模型*/
/*导入RouterModule,Routes类型*/
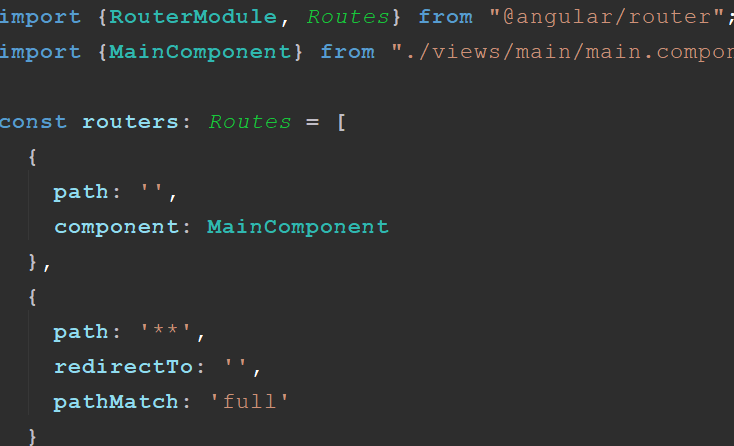
import { RouterModule, Routes } from '@angular/router';
import { LoginComponent } from "./login/login.component";
/*定义路由const表示不可改变*/
const routers: Routes = [
/*
path:字符串,表示默认登入,
path为路径 /login component:组件
component:组件
pathMatch:为字符串默认为前缀匹配 "prefix"; "full" 为完全匹配。
redirectTo:指向为路径,既path
outlet:字符串,路由目标,面对多个路由的情况
children:Routes 子路由相关
*/
{ path: '', component: LoginComponent },
// path:路径 /detail/1 :id代表参数相关
{ path: 'detail/:id', component: LoginComponent },
// 懒加载子模块, 子模块需要配置路由设置启动子组件,如果这样设置了路由,需要在子模块中再定义路由
{ path: 'other', loadChildren:"./demo/demo.module#demoModule" },
// 重定向,路径为** 表示不能识别的路径信息,重定向到相关路径下
{ path: '**', pathMatch: 'full', redirectTo: '' }
];
/*将路由设置导出,子模块中的路由使用 forChild 而不是 forRoot*/
export const appRouter = RouterModule.forRoot(routers);
ngModule设置
@NgModule({
  declarations: [
  ......
  ],
  imports: [
  ......
    appRouter
  ]
})
组件模板设置
<router-outlet></router-outlet>
2.多路由处理
{ path: 'news', outlet: 'let1', component: NewsComponent },
{ path: 'news', outlet: 'let2', component: News2Cmponent },
//模板中
<router-outlet name="let1"></router-outlet>
<router-outlet name="let2"></router-outlet>
访问 /news/ 时同时加载 NewsComponent 和 News2Cmponent 两个组件
3.路有链接以及组件中调用路由方法使用
<a routerLink="/detail/1" routerLinkActive="active">detail</a>
<a [routerLink]="['/detail', news.id]">{{news.title}}</a>
<a [routerLink]="[{ outlets: { let2: ['news'] } }]">Contact</a>
routerLinkActive="active" 即在本路由激活时添加样式 .active
或者:
this.router.navigate(['/detail', this.news.id])
this.router.navigate([{ outlets: { let2: null }}]);
其中:navigateByUrl 方法指向完整的绝对路径
4.路由守卫(适用于后台管理等需要登录才能使用的模块)
import { Injectable }     from '@angular/core';
import { CanActivate }    from '@angular/router';

@Injectable()
export class AuthService implements CanActivate {
  canActivate() {
    // 这里判断登录状态, 返回 true 或 false
    return true;
  }
}
在路由配置中的设置
{ path: '', component: LoginComponent, canActivate:[LoginComponent] },
5.退出守卫(适合于编辑器修改后的保存提示等场景)
import { Injectable }     from '@angular/core';
import { CanDeactivate, ActivatedRouteSnapshot, RouterStateSnapshot }    from '@angular/router';

// CanDeactivateComponent 是定义的接口,见下段代码
import { CanDeactivateComponent } from './can-deactivate.omponent';

@Injectable()
export class DeacService implements CanDeactivate<CanDeactivateComponent> {
  canDeactivate(
    canDeactivateComponent: CanDeactivateComponent,
    activatedRouteSnapshot: ActivatedRouteSnapshot,
    routerStateSnapshot: RouterStateSnapshot
  ) {
    // 目标路由和当前路由
    console.log(activatedRouteSnapshot);
    console.log(routerStateSnapshot);

    // 判断并返回
    return canDeactivateComponent.canDeactivate ? canDeactivateComponent.canDeactivate() : true

  }
}..
// 接口组件, 返回 true 或 false 如表单发生改变则调用对话框服务
export interface CanDeactivateComponent {
  canDeactivate: () => Observable<boolean> | Promise<boolean> | boolean;
}
路由配置
{
  path: ...,
  canDeactivate: [DeacService],
    component: ...
}
模块中添加服务
providers: [
  DeactivateGuardService
]
Using the router
要使用路由,我们需要在 AppModule 模块中,导入 RouterModule 。具体如下:
1 mport { BrowserModule } from '@angular/platform-browser';
2 import { NgModule } from '@angular/core';
3 import { FormsModule } from '@angular/forms';
4 import { HttpModule } from '@angular/http';
5 import { RouterModule } from "@angular/router";
此时我们的路由还不能正常工作,因为我们还未配置应用程序路由的相关信息。RouterModule 对象为我们提供了两个静态的方法:forRoot() 和 forChild() 来配置路由信息。
RouterModule.forRoot()
RouterModule.forRoot() 方法用于在主模块中定义主要的路由信息,通过调用该方法使得我们的主模块可以访问路由模块中定义的所有指令。接下来我们来看一下如何使用 forRoot() :
 1 @NgModule({
 2   declarations: [
 3     AppComponent,
 4     NavigationComponent,
 5     SideComponent,
 6     // DisplayComponent
 7   ],
 8   imports: [
 9     BrowserModule,
10     FormsModule,
11     HttpClientModule,
12     HttpModule,
13     RouterModule.forRoot(ROUTES),
14     // SideModule
15   ],
我们通过使用 const 定义路由的配置信息,然后把它作为参数调用 RouterModule.forRoot() 方法,而不是直接使用 RouterModule.forRoot([...]) 这种方式,这样做的好处是方便我们在需要的时候导出 ROUTES 到其它模块中。
RouterModule.forChild()
RouterModule.forChild() 与 Router.forRoot() 方法类似,但它只能应用在特性模块中。
友情提示:根模块中使用 forRoot(),子模块中使用 forChild()
这个功能非常强大,因为我们不必在一个地方(我们的主模块)定义所有路由信息。反之,我们可以在特性模块中定义模块特有的路由信息,并在必要的时候将它们导入我们主模块。
 1 import { NgModule } from '@angular/core';
 2 import { CommonModule } from '@angular/common';
 3 import { Routes, RouterModule } from '@angular/router';
 4
 5 export const ROUTES: Routes = [];
 6
 7 @NgModule({
 8   imports: [
 9     CommonModule,
10     RouterModule.forChild(ROUTES)
11   ],
12   // ...
13 })
14 export class ChildModule {}
通过以上示例,我们知道在主模块和特性模块中,路由配置对象的类型是一样的,区别只是主模块和特性模块中需调用不同的方法,来配置模块路由。接下来我们来介绍一下如何配置 ROUTES 对象。
Configuring a route
我们定义的所有路由都是作为 ROUTES 数组中的对象。首先,为我们的主页定义一个路由:
1 import { Routes, RouterModule } from '@angular/router';
2
3 import { HomeComponent } from './home/home.component';
4
5 export const ROUTES: Routes = [
6   { path: '', component: HomeComponent }
7 ];
示例中我们通过 path 属性定义路由的匹配路径,而 component 属性用于定义路由匹配时需要加载的组件。
友情提示:我们使用 path: '' 来匹配空的路径,例如:https://yourdomain.com
Displaying routes
配置完路由信息后,下一步是使用一个名为 router-outlet 的指令告诉 Angular 在哪里加载组件。当 Angular 路由匹配到响应路径,并成功找到需要加载的组件时,它将动态创建对应的组件,并将其作为兄弟元素,插入到 router-outlet 元素中。
在我们 AppComponent 组件中,我们可以在任意位置插入 router-outlet 指令:我们现在已经建立了应用程序的主路由,我们可以进一步了解路由的其它配置选项。
Further configuration
到目前为止我们已经介绍的内容只是一个开始 ,接下来我们来看看其它一些选项和功能。
Dynamic routes
如果路由始终是静态的,那没有多大的用处。例如 path: '' 是加载我们 HomeComponent 组件的静态路由。我们将介绍动态路由,基于动态路由我们可以根据不同的路由参数,渲染不同的页面。
例如,如果我们想要在个人资料页面根据不同的用户名显示不同的用户信息,我们可以使用以下方式定义路由:
1 import { HomeComponent } from './home/home.component';
2 import { ProfileComponent } from './profile/profile.component';
3
4 export const ROUTES: Routes = [
5   { path: '', component: HomeComponent },
6   { path: '/profile/:username', component: ProfileComponent }
7 ];
这里的关键点是 : ,它告诉 Angular 路由,:username 是路由参数,而不是 URL 中实际的部分。
友情提示:如果没有使用 : ,它将作为静态路由,仅匹配 /profile/username 路径
现在我们已经建立一个动态路由,此时最重要的事情就是如何获取路由参数。要访问当前路由的相关信息,我们需要先从 @angular/router 模块中导入 ActivatedRoute ,然后在组件类的构造函数中注入该对象,最后通过订阅该对象的 params 属性,来获取路由参数,具体示例如下:
 1 import { Component, OnInit } from '@angular/core';
 2 import { ActivatedRoute } from '@angular/router';
 3
 4 @Component({
 5   selector: 'profile-page',
 6   template: `
 7     <div class="profile">
 8       <h3>{{ username }}</h3>
 9     </div>
10   `
11 })
12 export class SettingsComponent implements OnInit {
13   username: string;
14   constructor(private route: ActivatedRoute) {}
15   ngOnInit() {
16     this.route.params.subscribe((params) => this.username = params.username);
17   }
18 }
介绍完动态路由,我们来探讨一下如何创建 child routes。
Child routes
实际上每个路由都支持子路由,假设在我们 /settings 设置页面下有 /settings/profile 和 /settings/password 两个页面,分别表示个人资料页和修改密码页。
我们可能希望我们的 / settings 页面拥有自己的组件,然后在设置页面组件中显示 / settings/profile 和 / settings/password 页面。我们可以这样做:
 1 import { SettingsComponent } from './settings/settings.component';
 2 import { ProfileSettingsComponent } from './settings/profile/profile.component';
 3 import { PasswordSettingsComponent } from './settings/password/password.component';
 4
 5 export const ROUTES: Routes = [
 6   {
 7     path: 'settings',
 8     component: SettingsComponent,
 9     children: [
10       { path: 'profile', component: ProfileSettingsComponent },
11       { path: 'password', component: PasswordSettingsComponent }
12     ]
13   }
14 ];
在这里,我们在 setttings 路由中定义了两个子路由,它们将继承父路由的路径,因此修改密码页面的路由匹配地址是 /settings/password ,依此类推。
接下来,我们需要做的最后一件事是在我们的 SettingsComponent 组件中添加 router-outlet 指令,因为我们要在设置页面中呈现子路由。如果我们没有在 SettingsComponent 组件中添加 router-outlet 指令,尽管 /settings/password 匹配修改密码页面的路由地址,但修改密码页面将无法正常显示。具体代码如下:
 1 import { Component } from '@angular/core';
 2
 3 @Component({
 4   selector: 'settings-page',
 5   template: `
 6     <div class="settings">
 7       <settings-header></settings-header>
 8       <settings-sidebar></settings-sidebar>
 9       <router-outlet></router-outlet>
10     </div>
11   `
12 })
13 export class SettingsComponent {}
Component-less routes
另一个很有用的路由功能是 component-less 路由。使用 component-less 路由允许我们将路由组合在一起,并让它们共享路由配置信息和 outlet。
例如,我们可以定义 setttings 路由而不需要使用 SettingsComponent 组件:
 1 import { ProfileSettingsComponent } from './settings/profile/profile.component';
 2 import { PasswordSettingsComponent } from './settings/password/password.component';
 3
 4 export const ROUTES: Routes = [
 5   {
 6     path: 'settings',
 7     children: [
 8       { path: 'profile', component: ProfileSettingsComponent },
 9       { path: 'password', component: PasswordSettingsComponent }
10     ]
11   }
12 ];
此时, /settings/profile 和 /settings/password 路由定义的内容,将显示在 AppComponent 组件的 router-outlet 元素中。
loadChildren
我们也可以告诉路由从另一个模块中获取子路由。这将我们谈论的两个想法联系在一起 - 我们可以指定另一个模块中定义的子路由,以及通过将这些子路由设置到特定的路径下,来充分利用 component-less 路由的功能。
让我们创建一个 SettingsModule 模块,用来保存所有 setttings 相关的路由信息:
 1 import { NgModule } from '@angular/core';
 2 import { CommonModule } from '@angular/common';
 3 import { Routes, RouterModule } from '@angular/router';
 4
 5 export const ROUTES: Routes = [
 6   {
 7     path: '',
 8     component: SettingsComponent,
 9     children: [
10       { path: 'profile', component: ProfileSettingsComponent },
11       { path: 'password', component: PasswordSettingsComponent }
12     ]
13   }
14 ];
15
16 @NgModule({
17   imports: [
18     CommonModule,
19     RouterModule.forChild(ROUTES)
20   ],
21 })
22 export class SettingsModule {}
需要注意的是,在 SettingsModule 模块中我们使用 forChild() 方法,因为 SettingsModule 不是我们应用的主模块。
另一个主要的区别是我们将 SettingsModule 模块的主路径设置为空路径 ('')。因为如果我们路径设置为 /settings ,它将匹配 /settings/settings ,很明显这不是我们想要的结果。通过指定一个空的路径,它就会匹配 /settings 路径,这就是我们想要的结果。
那么 /settings 路由信息,需要在哪里配置?答案是在 AppModule 中。这时我们就需要用到 loadChildren 属性,具体如下:
export const ROUTES: Routes = [
  {
    path: 'settings',
    loadChildren: './settings/settings.module#SettingsModule'
  }
];
需要注意的是,我们没有将 SettingsModule 导入到我们的 AppModule 中,而是通过 loadChildren 属性,告诉 Angular 路由依据 loadChildren 属性配置的路径去加载 SettingsModule 模块。这就是模块懒加载功能的具体应用,当用户访问 /settings/** 路径的时候,才会加载对应的 SettingsModule 模块,这减少了应用启动时加载资源的大小。
另外我们传递一个字符串作为 loadChildren 的属性值,该字符串由三部分组成:
-
需要导入模块的相对路径
-
#分隔符 -
导出模块类的名称
了解完路由的一些高级选项和功能,接下来我们来介绍路由指令。
Router Directives
除了 router-outlet 指令,路由模块中还提供了一些其它指令。让我们来看看它们如何与我们之前介绍的内容结合使用。
routerLink
为了让我们链接到已设置的路由,我们需要使用 routerLink 指令,具体示例如下:
1 <nav>
2   <a routerLink="/">Home</a>
3   <a routerLink="/settings/password">Change password</a>
4   <a routerLink="/settings/profile">Profile Settings</a>
5 </nav>
当我们点击以上的任意链接时,页面不会被重新加载。反之,我们的路径将在 URL 地址栏中显示,随后进行后续视图更新,以匹配 routerLink 中设置的值。
友情提示:我们也可以将 routerLink 的属性值,改成数组形式,以便我们传递特定的路由信息
如果我们想要链接到动态的路由地址,且该地址有一个 username 的路由变量,则我们可以按照以下方式配置 routerLink 对应的属性值:
<a [routerLink]="['/profile', username]">
  Go to {{ username }}'s profile.
</a>
routerLinkActive
在实际开发中,我们需要让用户知道哪个路由处于激活状态,通常情况下我们通过向激活的链接添加一个 class 来实现该功能。为了解决上述问题,Angular 路由模块为我们提供了 routerLinkActive 指令,该指令的使用示例如下:
<nav>
  <a routerLink="/settings" routerLinkActive="active">Home</a>
  <a routerLink="/settings/password" routerLinkActive="active">Change password</a>
  <a routerLink="/settings/profile" routerLinkActive="active">Profile Settings</a>
</nav>
通过使用 routerLinkActive 指令,当 a 元素对应的路由处于激活状态时,active 类将会自动添加到 a 元素上。
最后,我们来简单介绍一下 Router API。
Router API
我们可以通过路由还提供的 API 实现与 routerLink 相同的功能。要使用 Router API,我们需要在组件类中注入 Router 对象,具体如下:
 1 import { Component } from '@angular/core';
 2 import { Router } from '@angular/router';
 3
 4 @Component({
 5   selector: 'app-root',
 6   template: `
 7     <div class="app">
 8       <h3>Our app</h3>
 9       <router-outlet></router-outlet>
10     </div>
11   `
12 })
13 export class AppComponent {
14   constructor(private router: Router) {}
15 }
组件类中注入的 router 对象中有一个 navigate() 方法,该方法支持的参数类型与 routerLink 指令一样,当调用该方法后,页面将会自动跳转到对应的路由地址。具体使用示例如下:
 1 import { Component, OnInit } from '@angular/core';
 2 import { Router } from '@angular/router';
 3
 4 @Component({
 5   selector: 'app-root',
 6   template: `
 7     <div class="app">
 8       <h3>Our app</h3>
 9       <router-outlet></router-outlet>
10     </div>
11   `
12 })
13 export class AppComponent implements OnInit {
14   constructor(private router: Router) {}
15   ngOnInit() {
16     setTimeout(() => {
17       this.router.navigate(['/settings']);
18     }, 5000);
19   }
20 }
若以上代码成功运行,用户界面将在 5 秒后被重定向到 /settings 页面。这个方法非常有用,例如当检测到用户尚未登录时,自动重定向到登录页面。
另一个使用示例是演示页面跳转时如何传递数据,具体如下:
 1 import { Component, OnInit } from '@angular/core';
 2 import { Router } from '@angular/router';
 3
 4 @Component({
 5   selector: 'app-root',
 6   template: `
 7     <div class="app">
 8       <h3>Users</h3>
 9       <div *ngFor="let user of users">
10         <user-component
11           [user]="user"
12           (select)="handleSelect($event)">
13         </user-component>
14       </div>
15       <router-outlet></router-outlet>
16     </div>
17   `
18 })
19 export class AppComponent implements OnInit {
20   users: Username[] = [
21     { name: 'toddmotto', id: 0 },
22     { name: 'travisbarker', id: 1 },
23     { name: 'tomdelonge', id: 2 }
24   ];
25
26   constructor(private router: Router) {}
27
28   handleSelect(event) {
29     this.router.navigate(['/profile', event.name]);
30   }
31 }
Angular 路由的功能非常强大,既可以使用指令方式也可以使用命令式 API,希望本文可以帮助你尽快入门,若要进一步了解路由详细信息,请访问 - Angular Router 官文文档。
我有话说
除了使用 navigate() 方法外还有没有其它方法可以实现页面导航?
Angular Router API 为我们提供了 navigate() 和 navigateByUrl() 方法来实现页面导航。那为什么会有两个不同的方法呢?
使用 router.navigateByUrl() 方法与直接改变地址栏上的 URL 地址一样,我们使用了一个新的 URL 地址。然而 router.navigate() 方法基于一系列输入参数,产生一个新的 URL 地址。为了更好的区分它们之间的差异,我们来看个例子,假设当前的 URL 地址是:
/inbox/11/message/22(popup:compose)
当我们调用 router.navigateByUrl('/inbox/33/message/44') 方法后,此时的 URL 地址将变成 /inbox/33/message/44 。但如果我们是调用 router.navigate('/inbox/33/message/44') 方法,当前的 URL 地址将变成 /inbox/33/message/44(popup:compose) 。

 浙公网安备 33010602011771号