shiro登录流程源码分析
这里感谢张开涛的shiro教程,真的很不错,但是网上关于shiro执行流程的文章很少,我就写一篇比较容易理解的,我准备以后写拦截器,这里就先跳过,来看看shiro的登录流程,
直接打开Subject源码,查看login方法

首先解释下参数
subject,主题可以理解为“用户”
AuthenticationToken我理解的是校验凭证
里面就两个方法
打开shiro的默认实现就能看明白UsernamePasswordToken
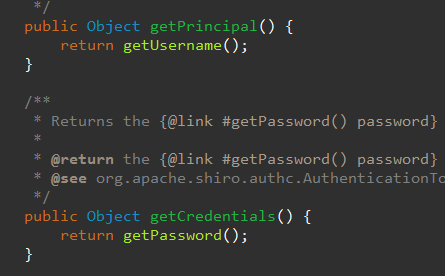
可以浅显得理解为authenticationtoken包含了用户名和密码
讲个额外的东西,shiro有点坑的地方与这个authenticationtoken有关
先看完流程,这个我放最后
打开login()的实现
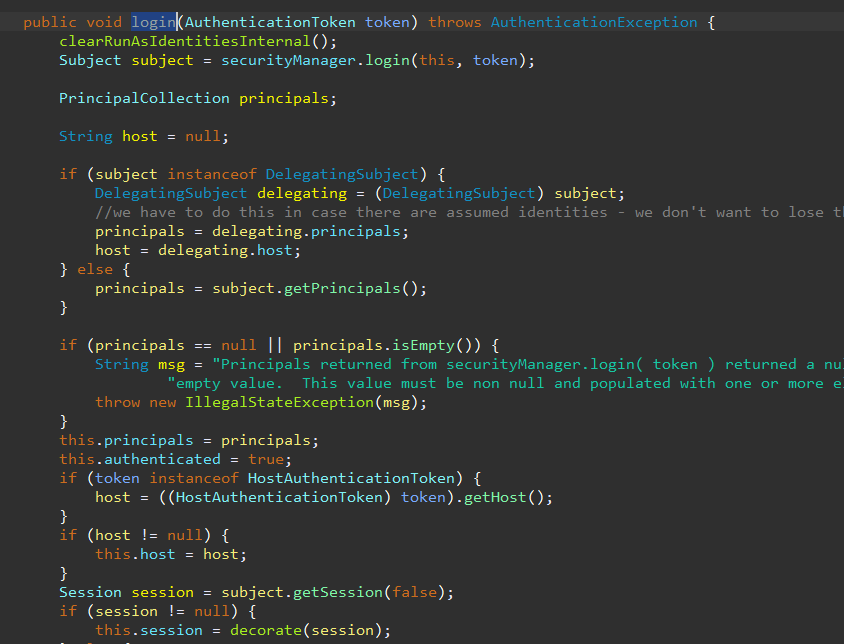
不看其他的,这里login交由securitymanager处理,打开它

打开默认的DefaultSecurityManager
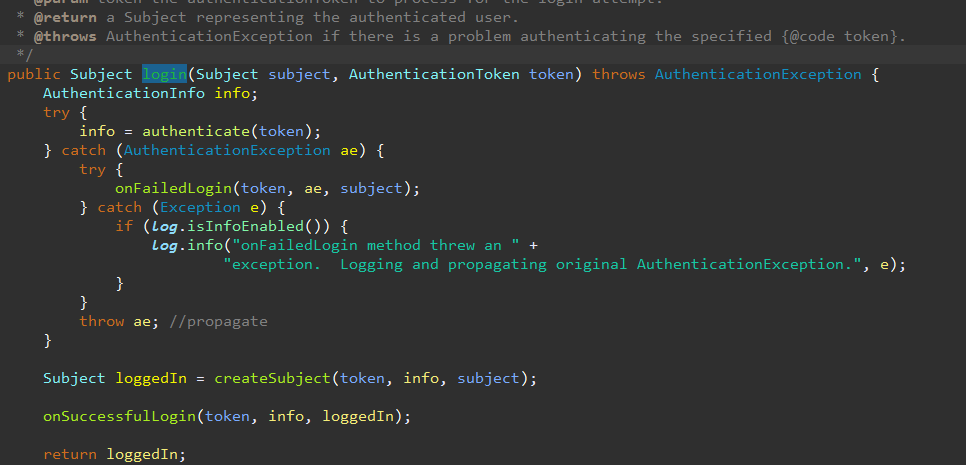
可以看到SecurityManager委托给Authenticator做认证处理
打开源码

Authenticator可能会委托给相应的AuthenticationStrategy进行多Realm身份验证,默认ModularRealmAuthenticator会调用AuthenticationStrategy进行多Realm身份验证
这是摘抄自博客的一句话,我当时很懵,到底是怎么委托过去的,关键还是在这个authenticate(),当然,验证失败会直接抛出异常
打开Authenticator的实现类AbstractAuthenticator,发现authenticate()的实现方法是在这里
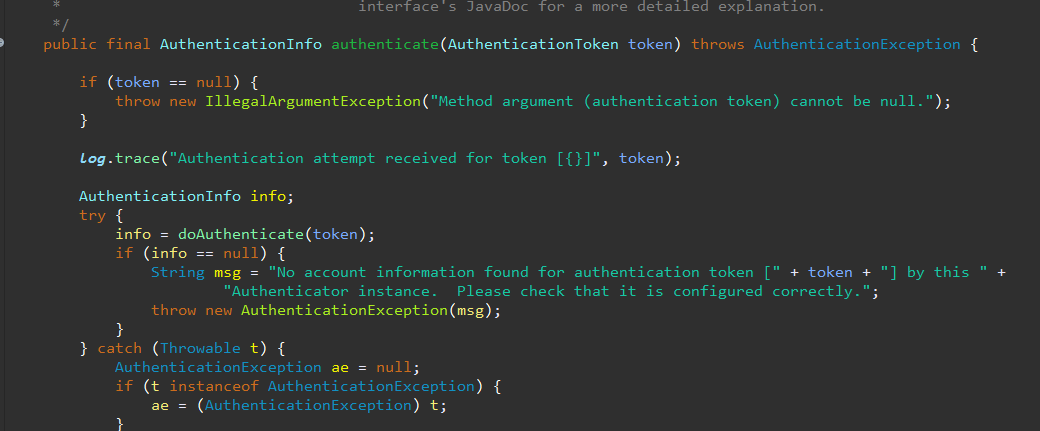
起作用的是这个doAuthenticate(),通过它委托给ModularRealmAuthenticator

ModularRealmAuthenticator会判断是否是多realm,我们这里是看流程所以只看单个realm的情况

点开doSingleRealmAuthentication

到这里,realm开始起作用了,其实看了源码之后,realm更适合理解为一个实体和数据库交互的实体,为什么,等会再说
可以看到authentication验证信息最终的验证处理委托给了realm的getAuthenticationInfo()方法

我们看实现
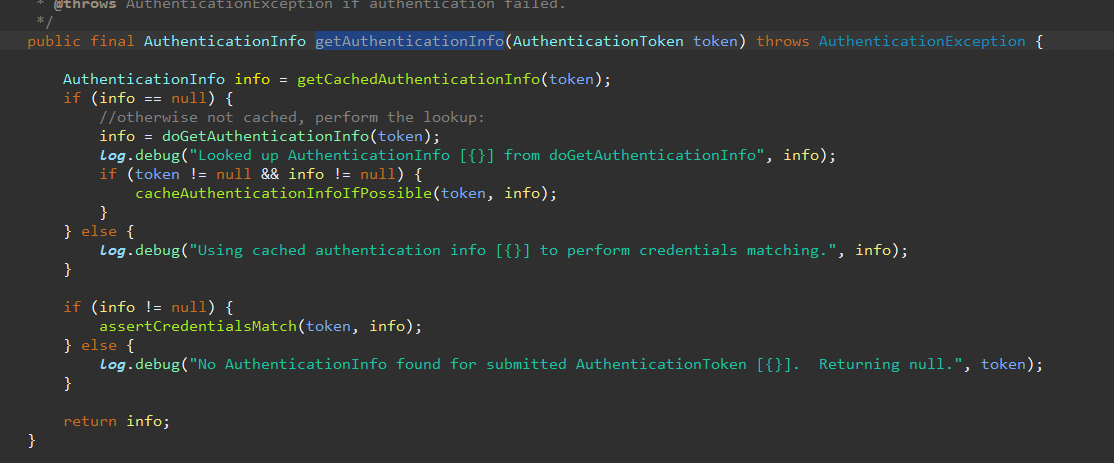
这里通过doGetAuthenticationInfo()获取info使用assertCredentialsMatch()与传入的token进行校验
doGetAuthenticationInfo可以不向下深究了,因为realm可以自定义,默认authentication的获取是通过ini文件配置,有兴趣的可以查看SimpleAccountRealm这里是shiro的默认的简单实现
要点在这里assertCredentialsMatch()【Shiro提供了PasswordService及CredentialsMatcher用于提供加密密码及验证密码服务。】,可以自定义

将校验委托给CredentialsMatcher,
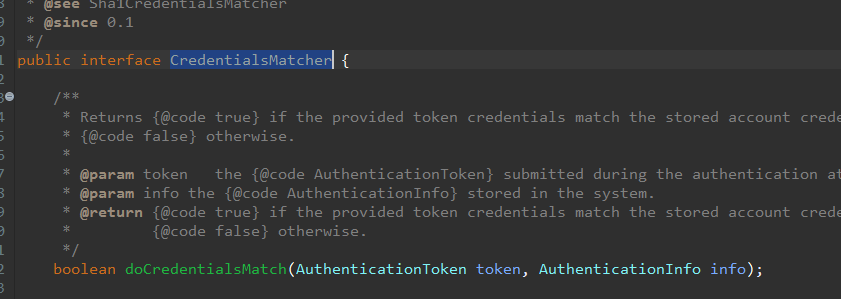
找到默认实现类SimpleCredentialsMatcher

这里equal值做了简单的字节比较,更加高级的身份校验与加密都是需要自己实现
然后我们往回推一遍,加深理解
SimpleCredentialsMatcher将传入的token与realm中获取的info进行匹配,假设成功返回true,
AuthenticatingRealm将返回realm获取到的authenticationinfo,结果返回给ModularRealmAuthenticator,然后一路提交至securitymanager的login方法中
至此,shiro最基础的认证流程就已经完成。
然后看篇说的坑在realm认证的过程中我们自定义的凭证匹配器实体需要和realm做一个绑定,如果不做绑定,默认会使用UsernamePasswordToken
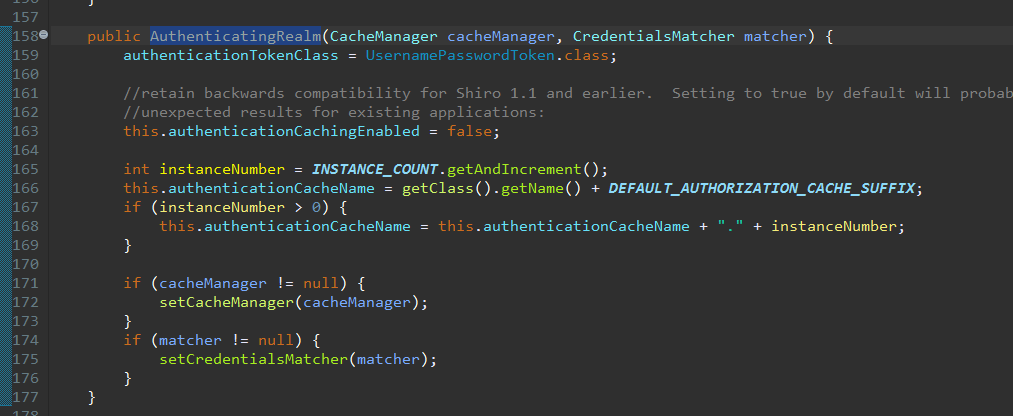
这样传入的凭证与和realm查询的info不一致,认证就会失败
再一个我建议realm在
doGetAuthenticationInfo方法中加入类型判断,避免错误

后续会更新授权,和拦截器的执行流程

 浙公网安备 33010602011771号