
一、安装node环境
这个之前做angular项目安装过,暂时先不整理,整理好vue相关知识再整理。
二、搭建vue项目环境
1、全局安装vue-cli
npm install --global vue-cli
不知道是不是网络问题,我使用上面命令安装失败,所以换成了下面命令,使用yarn安装
yarn global add vue-cli
npm install -g @vue/cli-init
2、说明
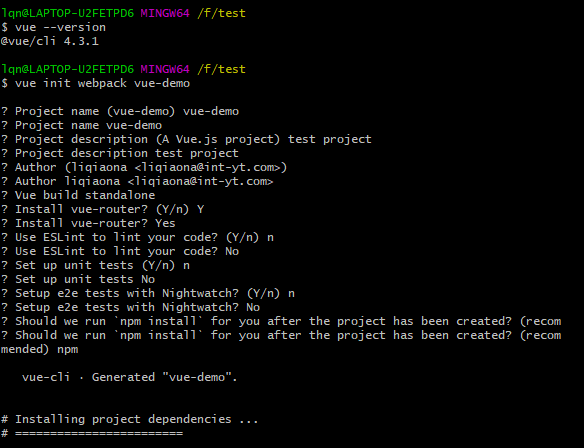
vue --version:查看安装版本
Vue build:打包方式,回车即可
Install vue-router:是否安装vue-router,我们项目中需要用到,所以Y回车
后面的ESLint(语法检测),unit tests(单元测试),e2e...(端到端测试工具)暂时不需要,所以都是n回车
3、安装依赖
yarn install
安装成功后,项目文件夹会多出一个目录:node_modules

4、启动项目
npm run dev
5、项目讲解
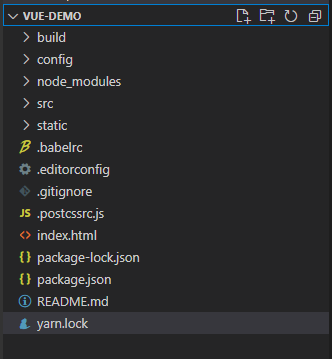
(1)build:构建脚本目录
   1)build.js   ==>  生产环境构建脚本;
  2)check-versions.js   ==>  检查npm,node.js版本;
  3)utils.js   ==>  构建相关工具方法;
  4)vue-loader.conf.js   ==>  配置了css加载器以及编译css之后自动添加前缀;
  5)webpack.base.conf.js   ==>  webpack基本配置;
  6)webpack.dev.conf.js   ==>  webpack开发环境配置;
  7)webpack.prod.conf.js   ==>  webpack生产环境配置;
(2)config:项目配置
   1)dev.env.js   ==>  开发环境变量;
  2)index.js   ==>  项目配置文件;
  3)prod.env.js   ==>  生产环境变量;
(3)node_modules:npm 加载的项目依赖模块
(4)src:这里是我们要开发的目录,基本上要做的事情都在这个目录里。里面包含了几个目录及文件:
   1)assets:资源目录,放置一些图片或者公共js、公共css。这里的资源会被webpack构建;
  2)components:组件目录,我们写的组件就放在这个目录里面;
  3)router:前端路由,我们需要配置的路由路径写在index.js里面;
  4)App.vue:根组件;
  5)main.js:入口js文件;
(5)static:静态资源目录,如图片、字体等。不会被webpack构建
(6)index.html:首页入口文件,可以添加一些 meta 信息等
(7)package.json:npm包配置文件,定义了项目的npm脚本,依赖包等信息
(8)README.md:项目的说明文档,markdown 格式
(9).xxxx文件:这些是一些配置文件,包括语法配置,git配置等
三、开启vue项目代码之旅
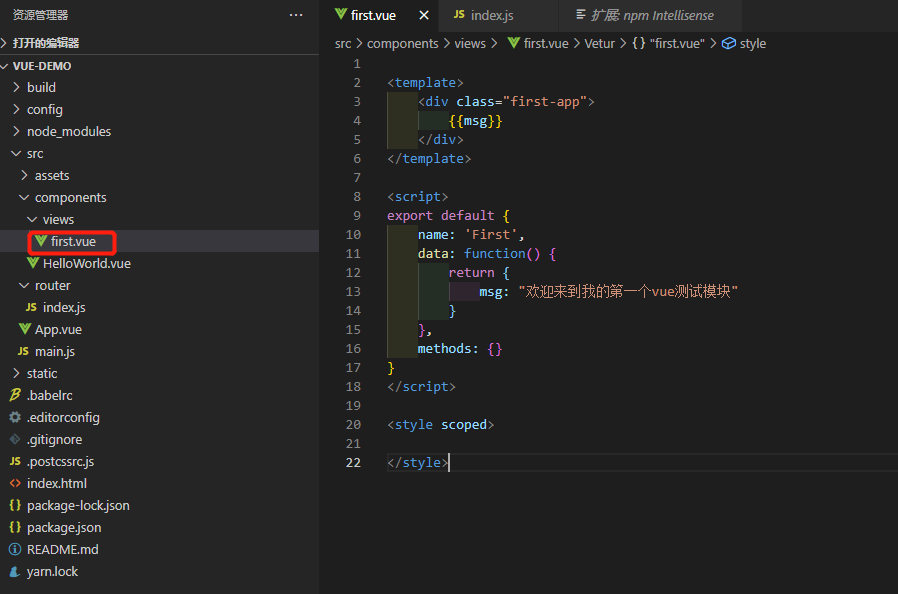
1、在components目录下新建一个views目录,里面写我们的vue组件,创建第一个组件
(1)在views目录下新建first.vue
(2)在router目录下的index.js里面配置路由路径
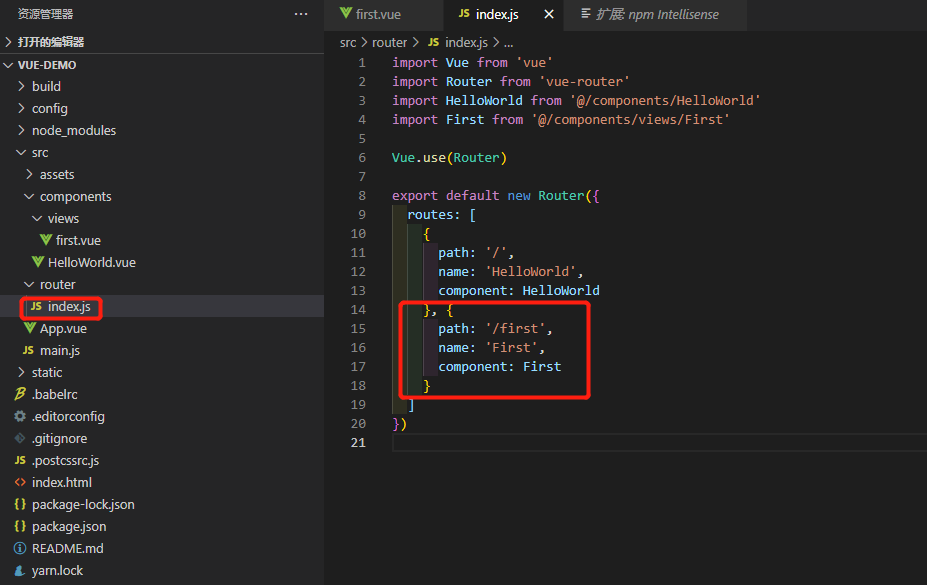
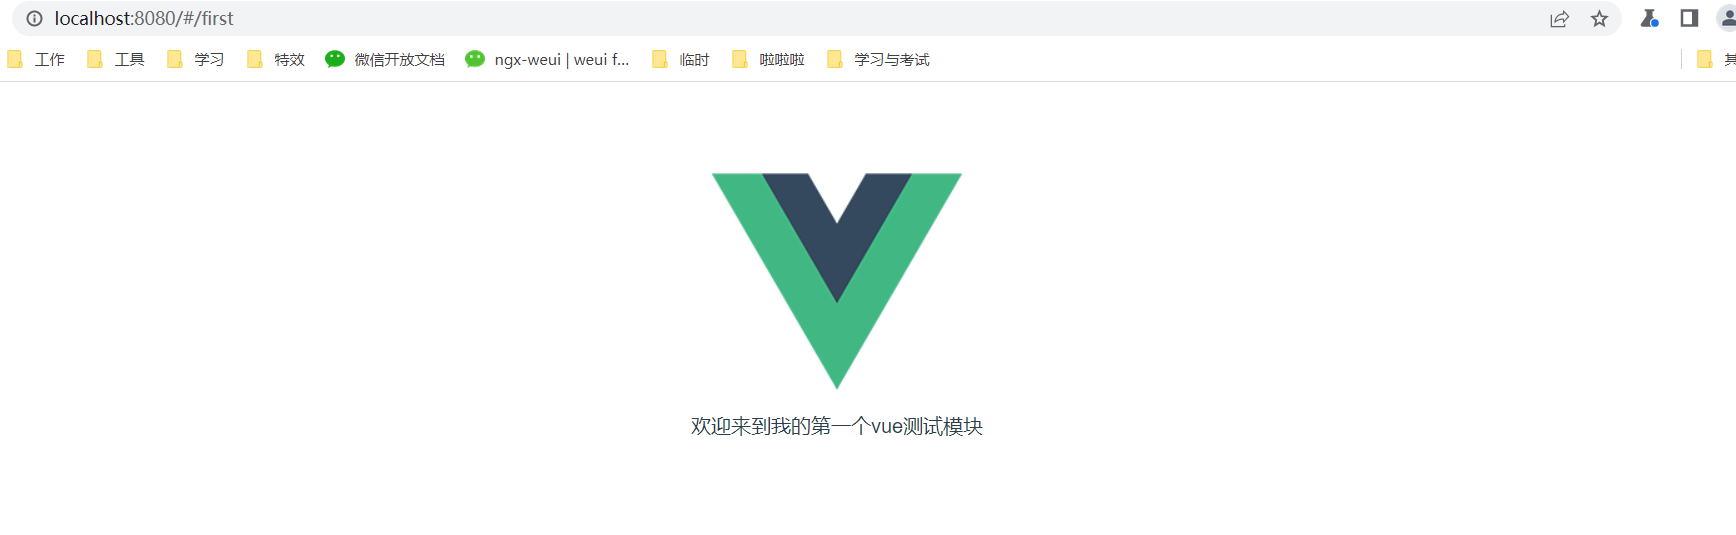
(3)浏览器中输入ip地址:http://localhost:8080/#/first,页面如下
(4)注意事项
a.一个组件下只能有一个并列的div
b.数据要写在 return 里面,而不是像文档那样子写
2、父子组件
(1)在components目录下新建sub文件夹,存放可复用的子组件,如新建confirm.vue
(2)在父组件first.vue中引用
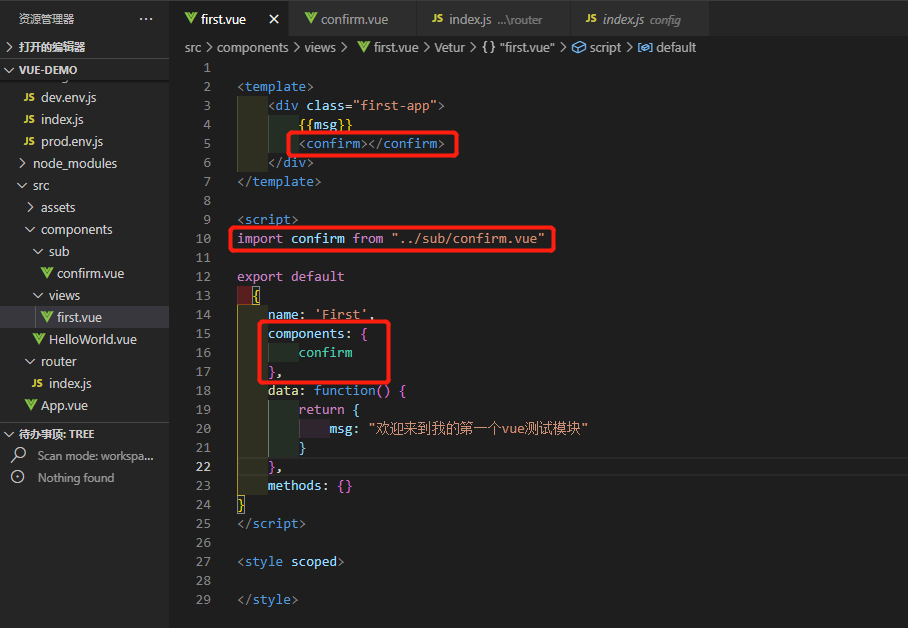
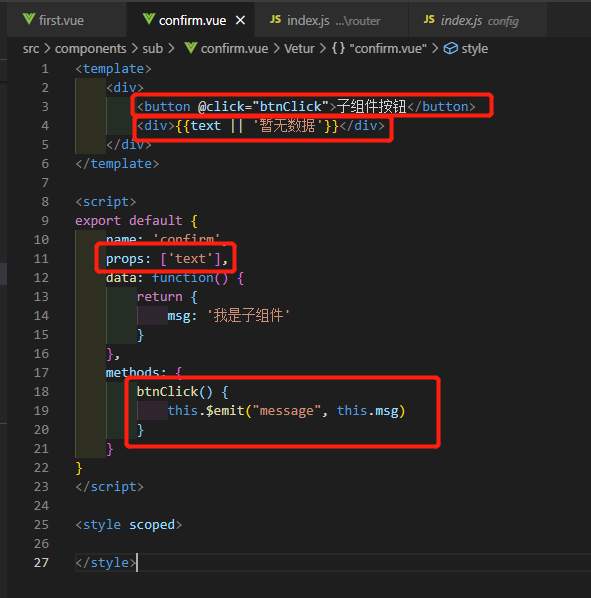
(3)父子组件互相通信
子组件:
父组件:

3、使用路由器官网地址:https://router.vuejs.org/zh-cn/
四、引用其他库
1、引用element组件库
官网地址:https://element.eleme.cn/#/zh-CN/component/installation
命令:npm i element-ui -S
引用:在main.js中进行配置
import ElementUI from 'element-ui';
import 'element-ui/lib/theme-chalk/index.css';
Vue.use(ElementUI);
2、引用less
安装less依赖包命令:
yarn add less@3.9.0 less-loader@5.0.0 --save
3、配置代理路径:config/index.js
参考:https://www.cnblogs.com/onesea/p/15745040.html
https://blog.csdn.net/qq_41961239/article/details/112756355
4、使用地图
参考:https://elemefe.github.io/vue-amap/#/zh-cn/introduction/install
5、接口请求
(1)install axios
命令:npm install axios
(2)创建request.js
import axios from 'axios'
import { MessageBox, Message } from 'element-ui'
import store from '@/store'
const service = axios.create({
  baseURL: '', // url = base url + request url
  // withCredentials: true, // send cookies when cross-domain requests
  timeout: 1000000 // request timeout
})

// request interceptor
service.interceptors.request.use(
  config => {
    if (store.getters.token) {
      // let each request carry token
      // ['X-Token'] is a custom headers key
      // please modify it according to the actual situation
      // config.headers['X-Token'] = getToken()
    }
    return config
  },
  error => {
    // do something with request error
    console.log(error) // for debug
    return Promise.reject(error)
  }
)

// response interceptor
service.interceptors.response.use(
  /**
   * If you want to get http information such as headers or status
   * Please return  response => response
  */

  /**
   * Determine the request status by custom code
   * Here is just an example
   * You can also judge the status by HTTP Status Code
   */
  response => {
    // console.log(response)
    const res = response

    // if the custom code is not 1, it is judged as an error.
    if (res.status !== 200) {
      Message({
        message: res.message || 'Error',
        type: 'error',
        duration: 5 * 1000
      })

      // 50008: Illegal token; 50012: Other clients logged in; 50014: Token expired;
      if (res.status === 400 || res.status === 403) {
        // to re-login
        MessageBox.confirm('You have been logged out, you can cancel to stay on this page, or log in again', 'Confirm logout', {
          confirmButtonText: 'Re-Login',
          cancelButtonText: 'Cancel',
          type: 'warning'
        }).then(() => {
          store.dispatch('user/resetToken').then(() => {
            location.reload()
          })
        })
      }
      return Promise.reject(new Error(res.message || 'Error'))
    } else {
      return res.data
    }
  },
  error => {
    // TODO 有报错直接重新登陆吧
    console.log(error)
    if (error.response.request.responseURL.split('/api')[1] !== '/web/user/current') {
      Message({
        message: error.response.data.message,
        type: 'error',
        duration: 5 * 1000
      })
      if (error.message.indexOf('403') !== -1) {
        store.dispatch('user/resetToken').then(() => {
          location.reload()
        })
      }
    }
    return Promise.reject(error)
  }
)

export default service
(3)引入
import request from '@/utils/request'
6、登录加密
(1)新建crypto.js,代码如下:
import { AES, enc, mode, pad } from 'crypto-js'
const key = 'cccv613bbcabdcbaf322ff6fb37204bb'
/**
   * AES加密
   */
export function encryptByEnAES(data) {
  const Key = enc.Utf8.parse(key)
  const tmpAES = AES.encrypt(enc.Utf8.parse(data), Key, {
    mode: mode.ECB,
    padding: pad.Pkcs7
  })
  return tmpAES.toString()
}

/**
   * AES解密
   */

export function encryptByDeAES(data) {
  const Key = enc.Utf8.parse(key)
  const tmpDeAES = AES.decrypt(data, Key, {
    mode: mode.ECB,
    padding: pad.Pkcs7
  })
  return tmpDeAES.toString(enc.Utf8)
}
(2)引入
import { encryptByEnAES } from '@/utils/crypto';
const aesBody = encryptByEnAES(JSON.stringify(this.loginForm))
五、其他
1、运行项目后自动在浏览器中打开
(1)打开config==>index.js
(2)module.exports配置中找到autoOpenBrowser,默认设置的是false,改为true
(3)保存后重启项目

 浙公网安备 33010602011771号