ansible开局配置-openEuler
ansible干啥用的就不多介绍了,这篇文章主要在说ansible的安装、开局配置、免密登录。
0a51e3f3-95b5-4570-aeb5-d5c1180cb56d
ansible安装
- 查看系统版本
cat /etc/openEuler-latest
输出内容如下:
openeulerversion=openEuler-24.03-LTS
compiletime=2024-05-27-21-31-28
gccversion=12.3.1-30.oe2403
kernelversion=6.6.0-28.0.0.34.oe2403
openjdkversion=1.8.0.412.b08-5.oe2403
- 清除软件库缓存
dnf clean all
- 建议软件库缓存
dnf makecache
- 安装epel-release软件仓
- 下载对应版本epel-release的软件仓库
# 不同系统版本需要安装不同的epel-release
wget https://mirrors.aliyun.com/repo/epel-testing.repo
2. 重新建立软件库索引
mv epel-testing.repo /etc/yum.repo.d/
dnf clean all
dnf makecache
- 安装ansible
dnf -y install ansible
等待安装完成即可
开局配置
- 常用文件介绍
/etc/ansible/hosts ## 用于存放需要批量管理的主机IP或主机名称
/etc/ansible/ansible.cfg ## 该文件为ansible的主要配置文件
- 添加主机到ansible
192.168.0.10    ansible_ssh_pass=主机密码        ansible_ssh_user=主机账号
192.168.0.11    ansible_ssh_pass=主机密码        ansible_ssh_user=主机账号
192.168.0.12    ansible_ssh_pass=主机密码       ansible_ssh_user=主机账号
ansible_ssh_pass:远程主机登录密码
ansible_ssh_user:远程主机登录账号
- 远程执行ping命令,会发现执行报错
ansible all -m ping
输出内容如下:
192.168.0.10 | FAILED! => {
"msg": "Using a SSH password instead of a key is not possible because Host Key checking is enabled and sshpass does not support
this. Please add this host's fingerprint to your known_hosts file to
manage this host."}
192.168.0.11 | FAILED! => {
"msg": "Using a SSH password instead of a key is not possible because Host Key checking is enabled and sshpass does not support
this. Please add this host's fingerprint to your known_hosts file to
manage this host."}
192.168.0.12 | FAILED! => {
"msg": "Using a SSH password instead of a key is not possible because Host Key checking is enabled and sshpass does not support
this. Please add this host's fingerprint to your known_hosts file to
manage this host."}
出现这个问题主要是因为ansible默认是没有开启账号密码登录的,默认采用证书登录,只需要在配置文件中把证书登录关闭就可以执行成功了。
进入/etc/ansible/ansible.cfg文件,将host_key_checking = False取消注释或者增加该内容即可
再次重新执行就不会有问题了,成功后输出内容如下
192.168.0.11 | SUCCESS => {
"ansible_facts": {

    "discovered_interpreter_python": "/usr/bin/python"

},

"changed": false,

"ping": "pong"
}
192.168.0.10 | SUCCESS => {
"ansible_facts": {

    "discovered_interpreter_python": "/usr/bin/python"

},

"changed": false,

"ping": "pong"
}
192.168.0.12 | SUCCESS => {
"ansible_facts": {

    "discovered_interpreter_python": "/usr/bin/python"

},

"changed": false,

"ping": "pong"
}
配置免密登录
- 生成密钥
ssh-keygen
一路回车即可,输出内容如下:
Generating public/private rsa key pair.
Enter file in which to save the key (/root/.ssh/id_rsa):
Enter passphrase (empty for no passphrase):
Enter same passphrase again:
Your identification has been saved in /root/.ssh/id_rsa
Your public key has been saved in /root/.ssh/id_rsa.pub
The key fingerprint is:
SHA256:+RGyyNnrIHOLllk+e2hpNyTmxjBZkMY5vvDmTGuEh5g root@ecs-5352
The key's randomart image is:
+---[RSA 3072]----+
| . o |
| B |
| o o . . |
| . ...+ + . |
| o = ++ S . |
|E o @ + .o . |
| Bo%o=. . |
| O=@++ |
| o.+o=.. |
+----[SHA256]-----+
- 编写playbook脚本文件
- hosts: # 主机组
  remote_user: # 用户名
  tasks:
    - name: push ansible key
      authorized_key: user=root key="{{ lookup('file' ,'密钥存放位置')}}" state=present
示例:
- hosts: all
  remote_user: root
  tasks:
    - name: push ansible key
      authorized_key: user=root key="{{ lookup('file' ,'/root/.ssh/id_rsa.pub')}}" state=present
- 执行playbook脚本文件
ansible-playbook push_key.yml
输出结果如下表示执行成功:
[root@ecs-5352 yml]# ansible-playbook push_key.yml
PLAY [all]
TASK [Gathering Facts]
ok: [192.168.0.10]
ok: [192.168.0.12]
ok: [192.168.0.11]
TASK [push ansible key]
changed: [192.168.0.10]
changed: [192.168.0.12]
changed: [192.168.0.11]
PLAY RECAP
192.168.0.10 : ok=2 changed=1 unreachable=0 failed=0 skipped=0 rescued=0 ignored=0
192.168.0.11 : ok=2 changed=1 unreachable=0 failed=0 skipped=0 rescued=0 ignored=0
192.168.0.12 : ok=2 changed=1 unreachable=0 failed=0 skipped=0 rescued=0 ignored=0
- 测试是否可以免密
- 将ansible.cfg配置文件中的host_key_checking = False注释掉
2. 删除hosts文件主机后面的用户名和密码
3. 测试执行ping命令
ansible all -m ping
输出结果如下:
192.168.0.10 | SUCCESS => {
"ansible_facts": {

    "discovered_interpreter_python": "/usr/bin/python"

},

"changed": false,

"ping": "pong"
}
192.168.0.12 | SUCCESS => {
"ansible_facts": {

    "discovered_interpreter_python": "/usr/bin/python"

},

"changed": false,

"ping": "pong"
}
192.168.0.11 | SUCCESS => {
"ansible_facts": {

    "discovered_interpreter_python": "/usr/bin/python"

},

"changed": false,

"ping": "pong"
}
- 再次测试
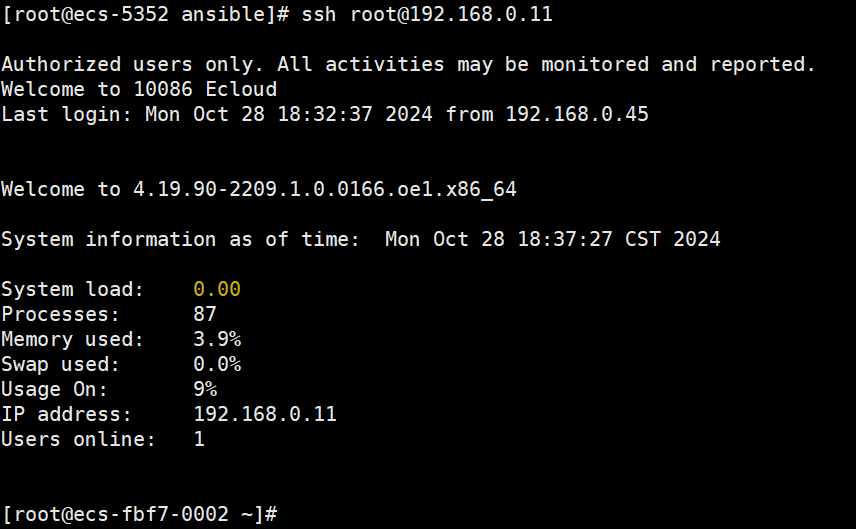
直接在ansible主机上,使用ssh命令测试是否可以免密登录
ssh root@192.168.0.11
无需输入密码即可登录成功


