
刻录工具
5 Apps to Create Multiboot USB – Linux and Windows ISOs Supported
This article will be showing you 5 applications you can use to create a multiboot USB. All of them can write multiple Linux distribution ISOs to USB flash drive and most of them can even write both Windows and Linux ISOs into the same USB flash drive. These 5 apps are:
- SARDU MultiBoot USB and DVD Creator
- MultiBootUSB
- MultiSystem
- YUMI (Your Universal MultBoot Installer)
- WinSetupFromUSB
If you have created a bootable USB with another tool, it’s recommended that you reformat the USB flash drive with FAT32 or NTFS file system before you use the tools mentioned in this article.
1. SARDU MultiBoot USB and DVD Creator
SARDU is a freemium software that can be used to create mutiboot USB and DVD.
Pros of SARDU:
- Runs on Linux and Windows.
- Can create a bootable USB containing both Linux and Windows ISO images (Windows 7, 8 and 10)
- A multitude of ISO images for you to select and download directly from the SARDU application.
- You can add additional ISO images to your USB without destroying previous ISO images in the USB flash drive.
- Supports persistent files for Linux distributions
- It can also be used to burn multiple ISO images to DVD.
- Supports both BIOS and UEFI firmware
- Test your USB with QEMU.
- SARDU uses the SYSLINUX boot loader by default, but can chainload to GRUB2 (premium feature)
Cons:
- The Linux version of SARDU doesn’t support Windows ISOs. To add Windows ISO image to your bootable USB flash drive, you need to use the Windows version of SARDU.
- The persistent files function can cause the program become unresponsive when using the Linux version. The Windows version works perfectly fine.
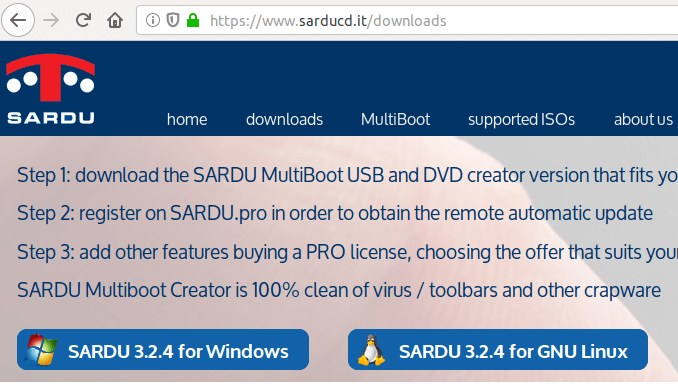
SARDU is a portable application. To use SARDU, go to the official download page and download the Linux version or Windows version, depending on your OS. I downloaded the Linux version.
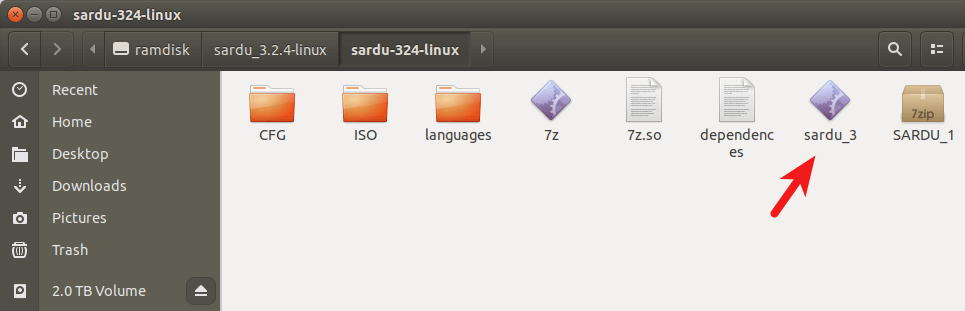
Once downloaded, open your file manager and go to the downloads directory. Extract the gzip archive.

Go to the extracted directory and double click the sardu_3 binary. The SARDU software will start.
 First, agree to the license.

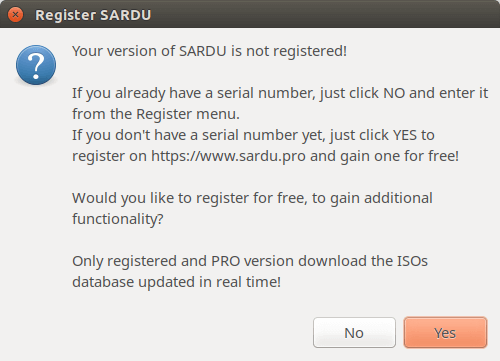
Then it will tell you to register an account. Registered users can download updated ISOs from SARDU database. If you prefer to use your own downloaded ISO files, then choose No.
At the left sidebar, there are 4 categories of ISO images
- Anti-virus
- Utility
- Linux distributions
- Windows
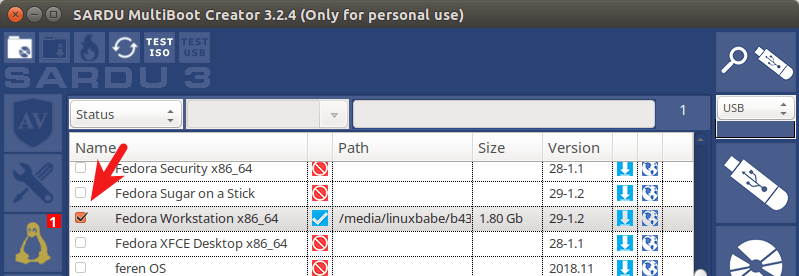
For example, you can click the penguin icon and right click on an OS name and select search ISO. This will allow you to select an ISO image from your hard drive.
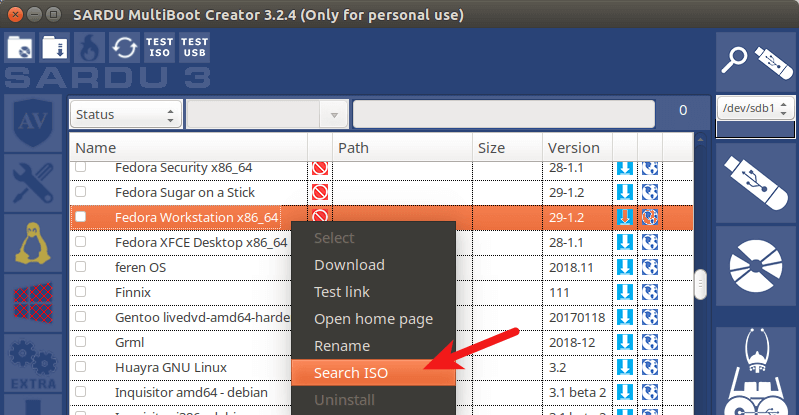
After that, tick on the OS name so that the ISO image will be written to USB flash drive.
It will also ask you if you want to enable persistent files. I found that if I choose Yes, the program would become unresponsive, so I choose No.
Then you can continue this process with another Linux distribution. After you select all your Linux distributions, insert your USB flash drive and click the USB icon on the upper-right corner to detect and select your USB flash drive.
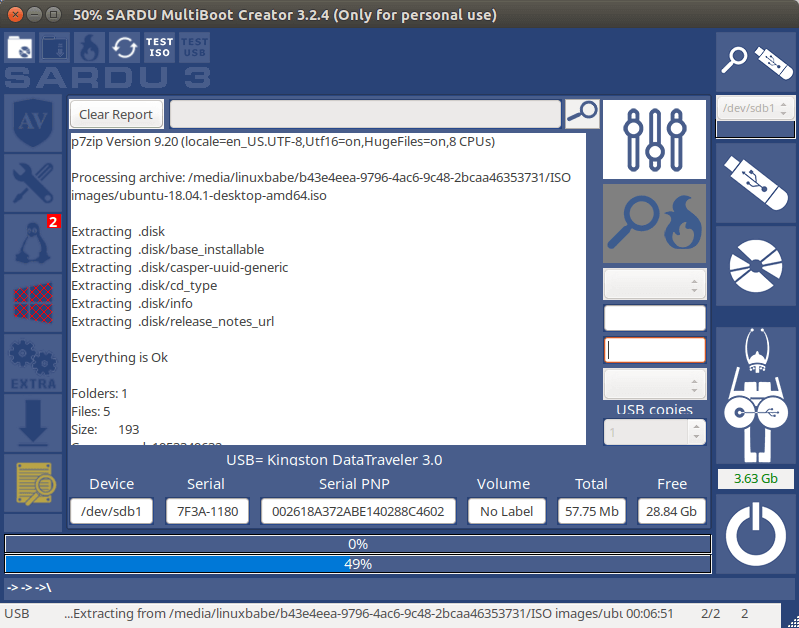
Next, click the big USB icon to create bootable USB.

This process can take some time if you selected several ISO images.
To add Windows 7, Windows 8, or Windows 10 ISO images to your USB flash drive, you need to use the SARDU Windows version. Click the Windows icon on the left bar, and select the first item in the list. Choose the ISO path, then tick on the name.

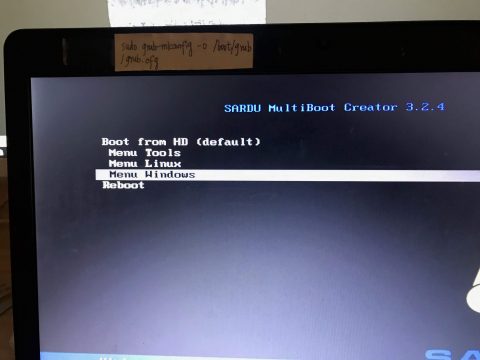
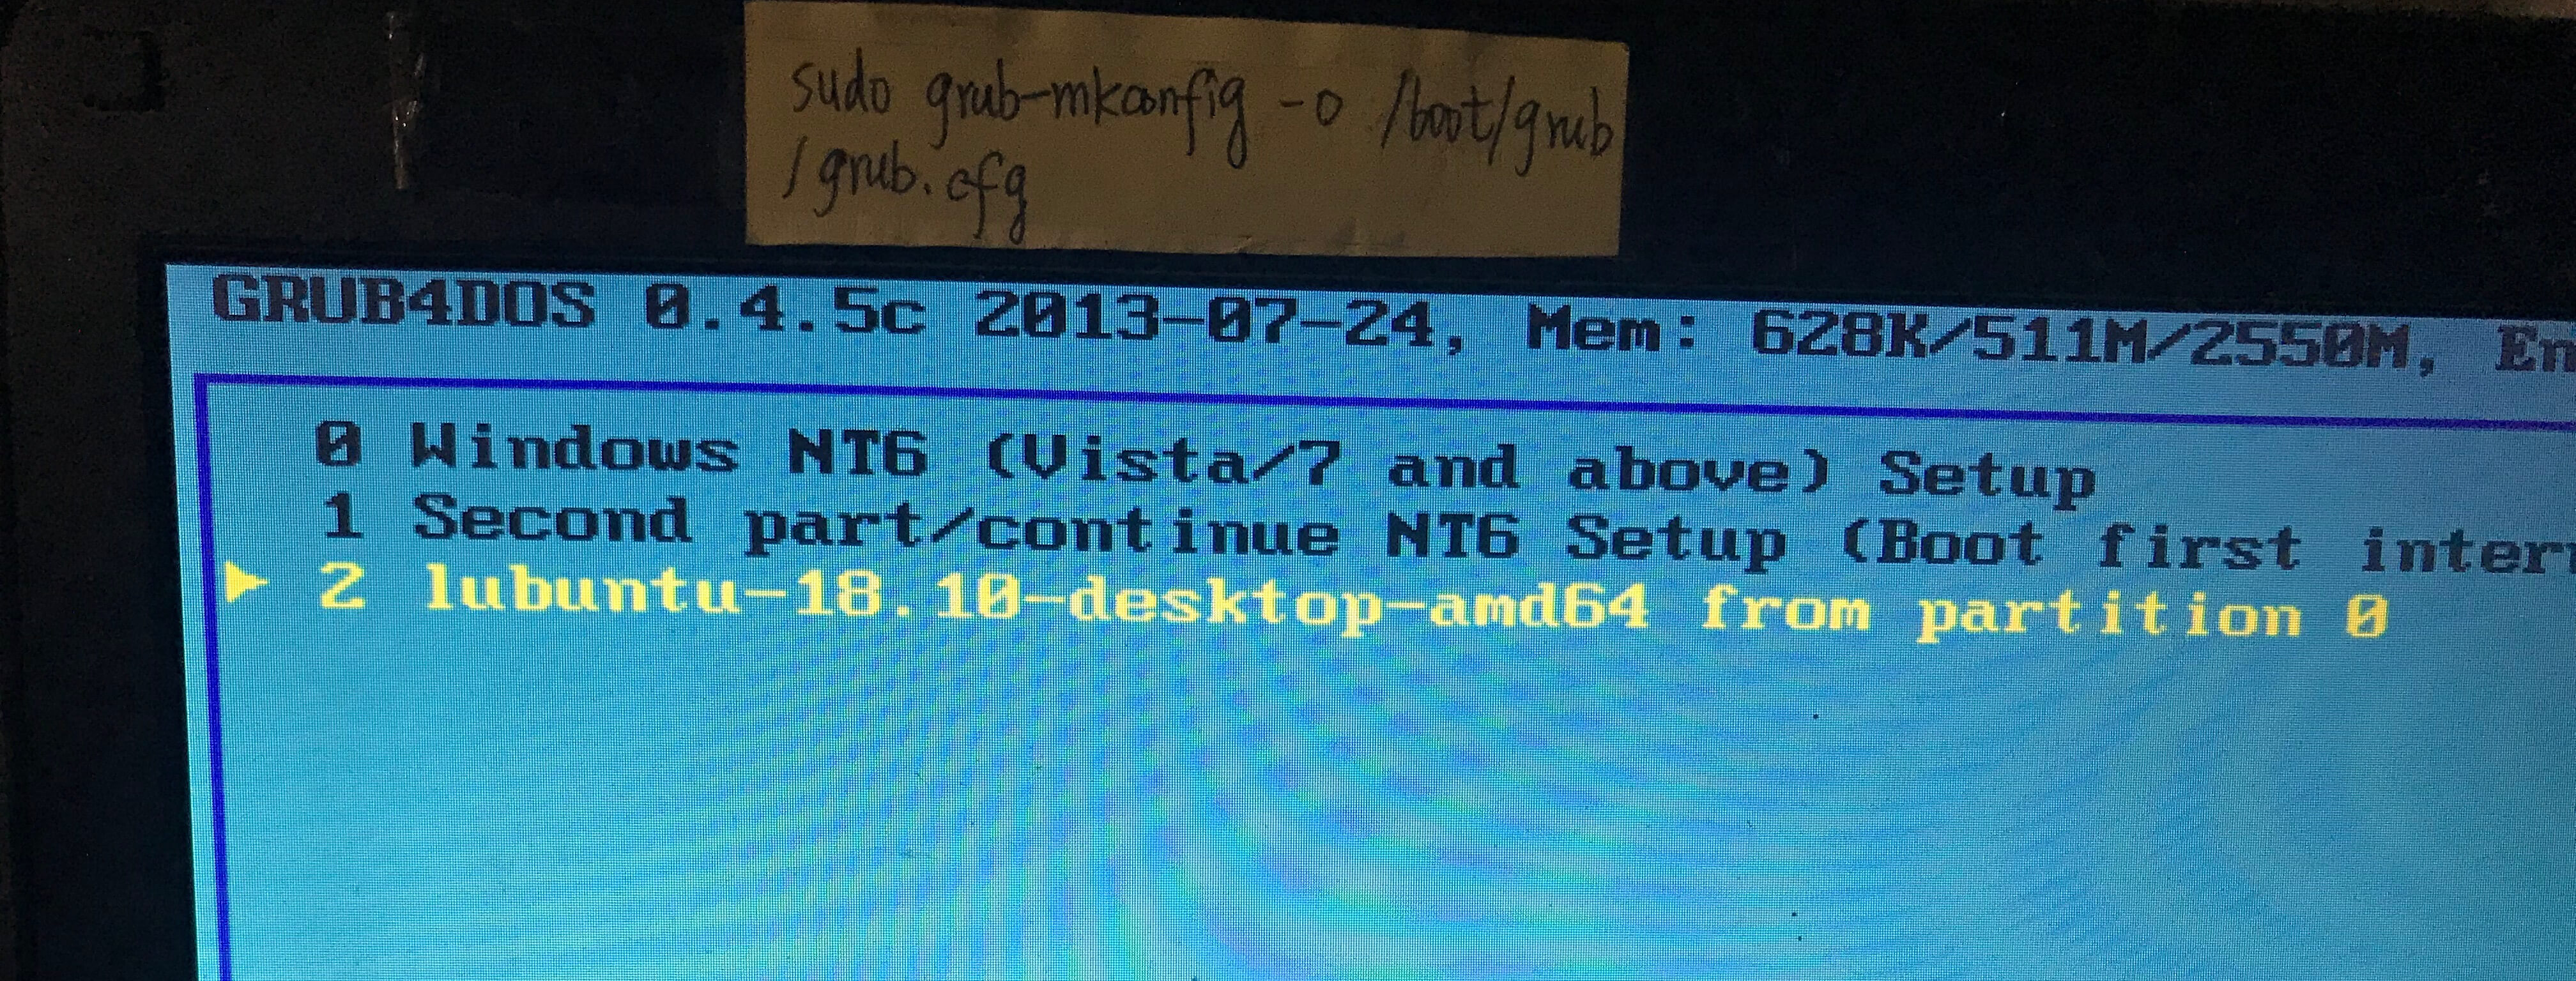
Please note that if your computer uses UEFI firmware, then you need to enable the legacy BIOS support in order to boot your computer from the SARDU USB flash drive. As you can see from the screenshot below, I can boot Linux or Windows ISOs from the SARDU boot menu.
2. MultiBootUSB
MultiBootUSB is an advanced cross-platform application for installing/uninstalling Linux operating systems on to a single USB flash drives.
MultiBootUSB Pros:
- Runs on Linux and Windows.
- Free and open Source. Released under General Public Licence (GPL).
- You can add additional ISO images to your USB without destroying previous ISO images in the USB flash drive.
- You can remove an ISO image from your bootable USB flash drive.
- Syslinux is used the default boot loader for making your USB Flash Drive bootable, can also chain load to GRUB2 if UEFI firmware is used.
- Supports both BIOS and UEFI firmware.
- Supports persistent files for distros that are based on Debian, Ubuntu and Fedora.
- Test your ISO and USB with QEMU.
- Has a command line interface.
Cons:
- You need to write ISO images to your USB flash drive one by one.
- It doesn’t support writing Windows ISO image to USB flash drive.
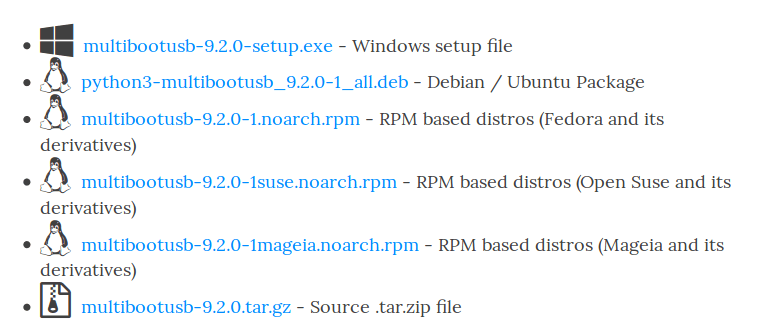
To use MultiBootUSB, go to the official download page and select the installer package according to your OS.
- Debian, Ubuntu users select the
.debpackage. - Fedora, OpenSUSE users select the
.rpmpackage. - Windows users select the
.exepackage.
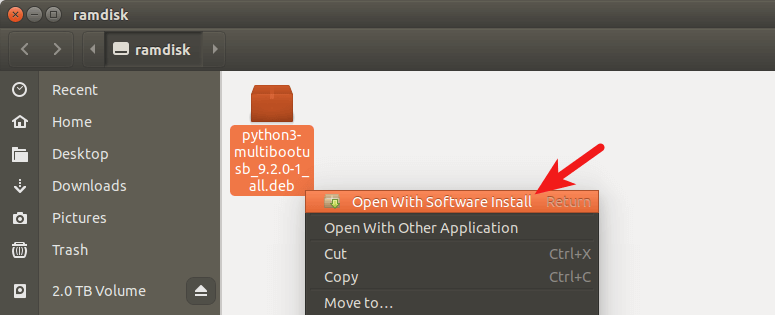
Once downloaded, open your file manager and go to the download directory and install the package.
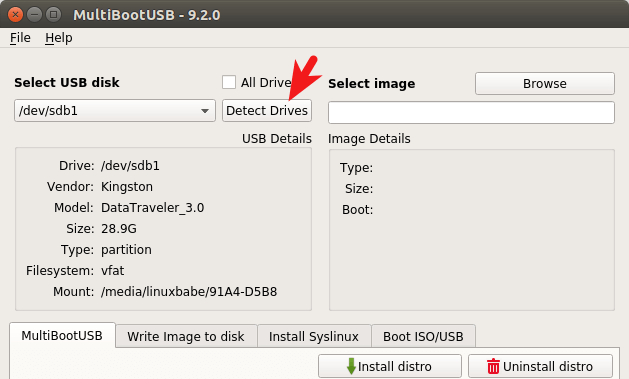
After it’s installed, open it from your application menu. To create a multiboot usb, first insert your USB flash drive. Next, click the Detect Drives button in MultiBootUSB and select a partition on the USB flash drive.
Then select a Linux distro ISO image from your hard drive. After that, you can specify the persistent file size.
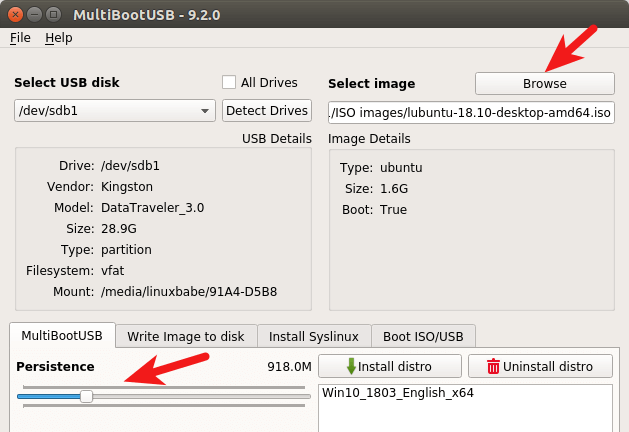
Finally, click the Install distro button to write the ISO image to your USB flash drive.
Once that’s done, you can click the Browse button again to select another Linux distro ISO image and click the Install distro button to write it to USB flash drive.
3 MultiSystem
MultiSystem is Linux-only application that allows you to create a multiboot Linux live USB.
MultiSystem Pros
- A multitude of ISO images for you to select and download directly from the application.
- Supports persistent files
- Can create a bootable USB containing both Linux and Windows ISO images.
- Test your live USB in QEMU or VirtualBox
Cons:
- Only works in Debian and Ubuntu based Linux distros.
- You need to write ISO images to your USB flash drive one by one.
- The Linux distro ISO images written to the USB flash drive can’t be booted in UEFI mode, you need to enable legacy BIOS support in order to boot them.
To install MultiSystem on Debian and Ubuntu based Linux distros, open up a terminal and run the following command.
sudo apt install software-properties-common
Then add the official software repository to your system.
sudo apt-add-repository 'deb http://liveusb.info/multisystem/depot all main'
Import the public key.
wget -q -O - http://liveusb.info/multisystem/depot/multisystem.asc | sudo apt-key add -
Update software repository index and install MultiSystem.
sudo apt updatesudo apt install multisystem
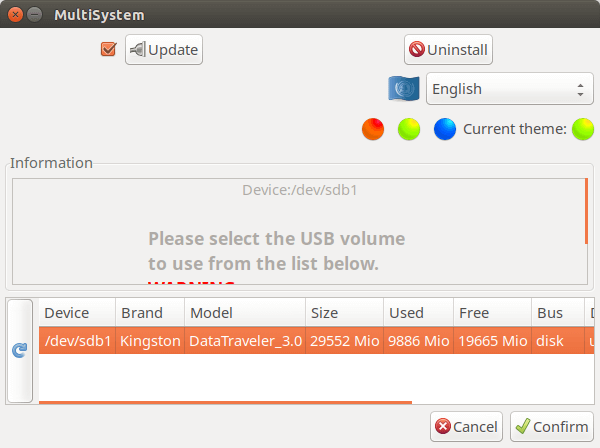
Once installed, open it from your application menu. Then insert your USB flash drive and click the refresh button in MultiSystem for it to detect your drive. (Make sure the USB flash drive is mounted). Once it find your USB flash drive, select the device and click confirm button.
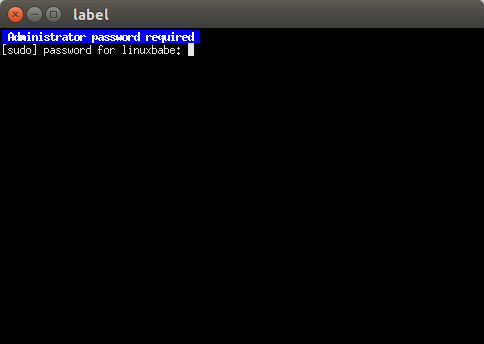
It will ask you to enter your password.
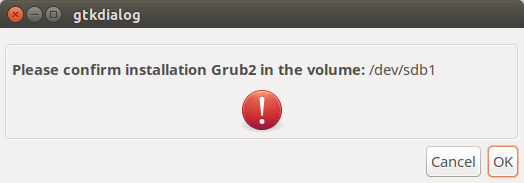
Then it will ask you if it’s Ok to install Grub2 boot loader to your USB flash drive. Click OK.
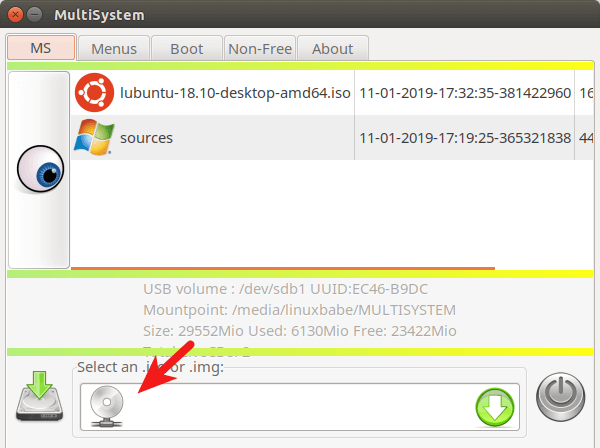
Once that’s done, click the DVD icon to select an ISO image from your hard drive.
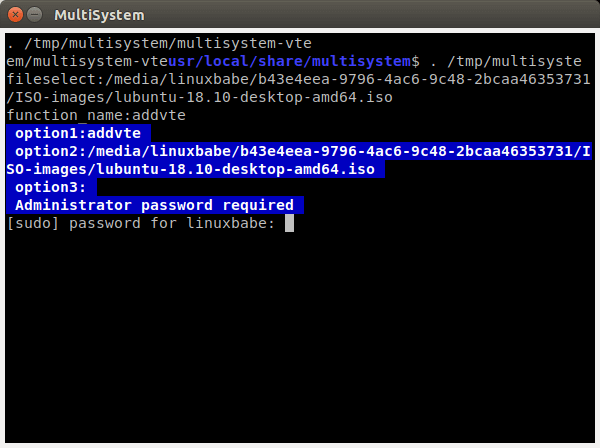
Then enter your password to write the ISO image for your USB flash drive.
Repeat this process to add additional ISO images to your USB flash drive.
4 YUMI (Your Universal Multiboot Installer)
YUMI can be used to create a Multiboot Bootable USB Flash Drive containing multiple operating systems, antivirus utilities, disc cloning, diagnostic tools, and more.
YUMI Pros:
- Supports both BIOS and UEFI firmware.
- Can create a bootable USB containing both Linux and Windows ISO images (Windows 7, 8 and 10)
- A multitude of ISO images for you to select and download directly from the application.
- You can add additional ISO images to your USB without destroying previous ISO images in the USB flash drive.
- Supports persistent files for Linux distributions.
- You can remove an ISO from USB flash drive.
Cons:
- There’s no Linux version, although you can try running YUMI on Linux through WINE.
YUMI can be downloaded from the official download page. There are two version of YUMI: one is for BIOS system and the other is for UEFI system. YUMI is a portable application. Once the .exe file is downloaed, you can double click it to start the application. Insert your USB flash drive and select it in YUMI user interface.
Then select the name of the OS you want to put into the USB. Next, select the ISO image file from your hard drive. In step 4, you can choose the persistent file size.
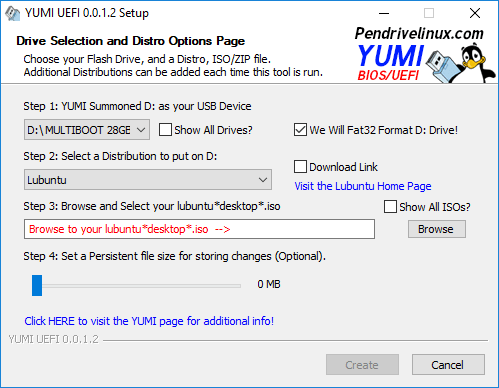
After that, click the create button to write the ISO image file to your USB flash drive.
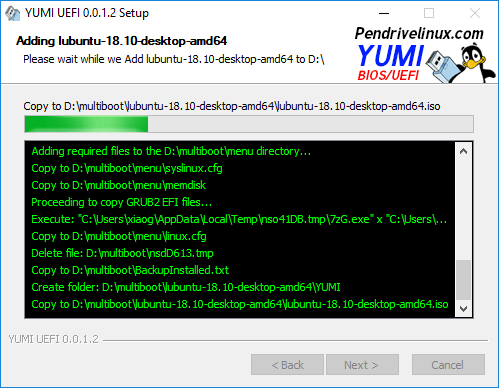
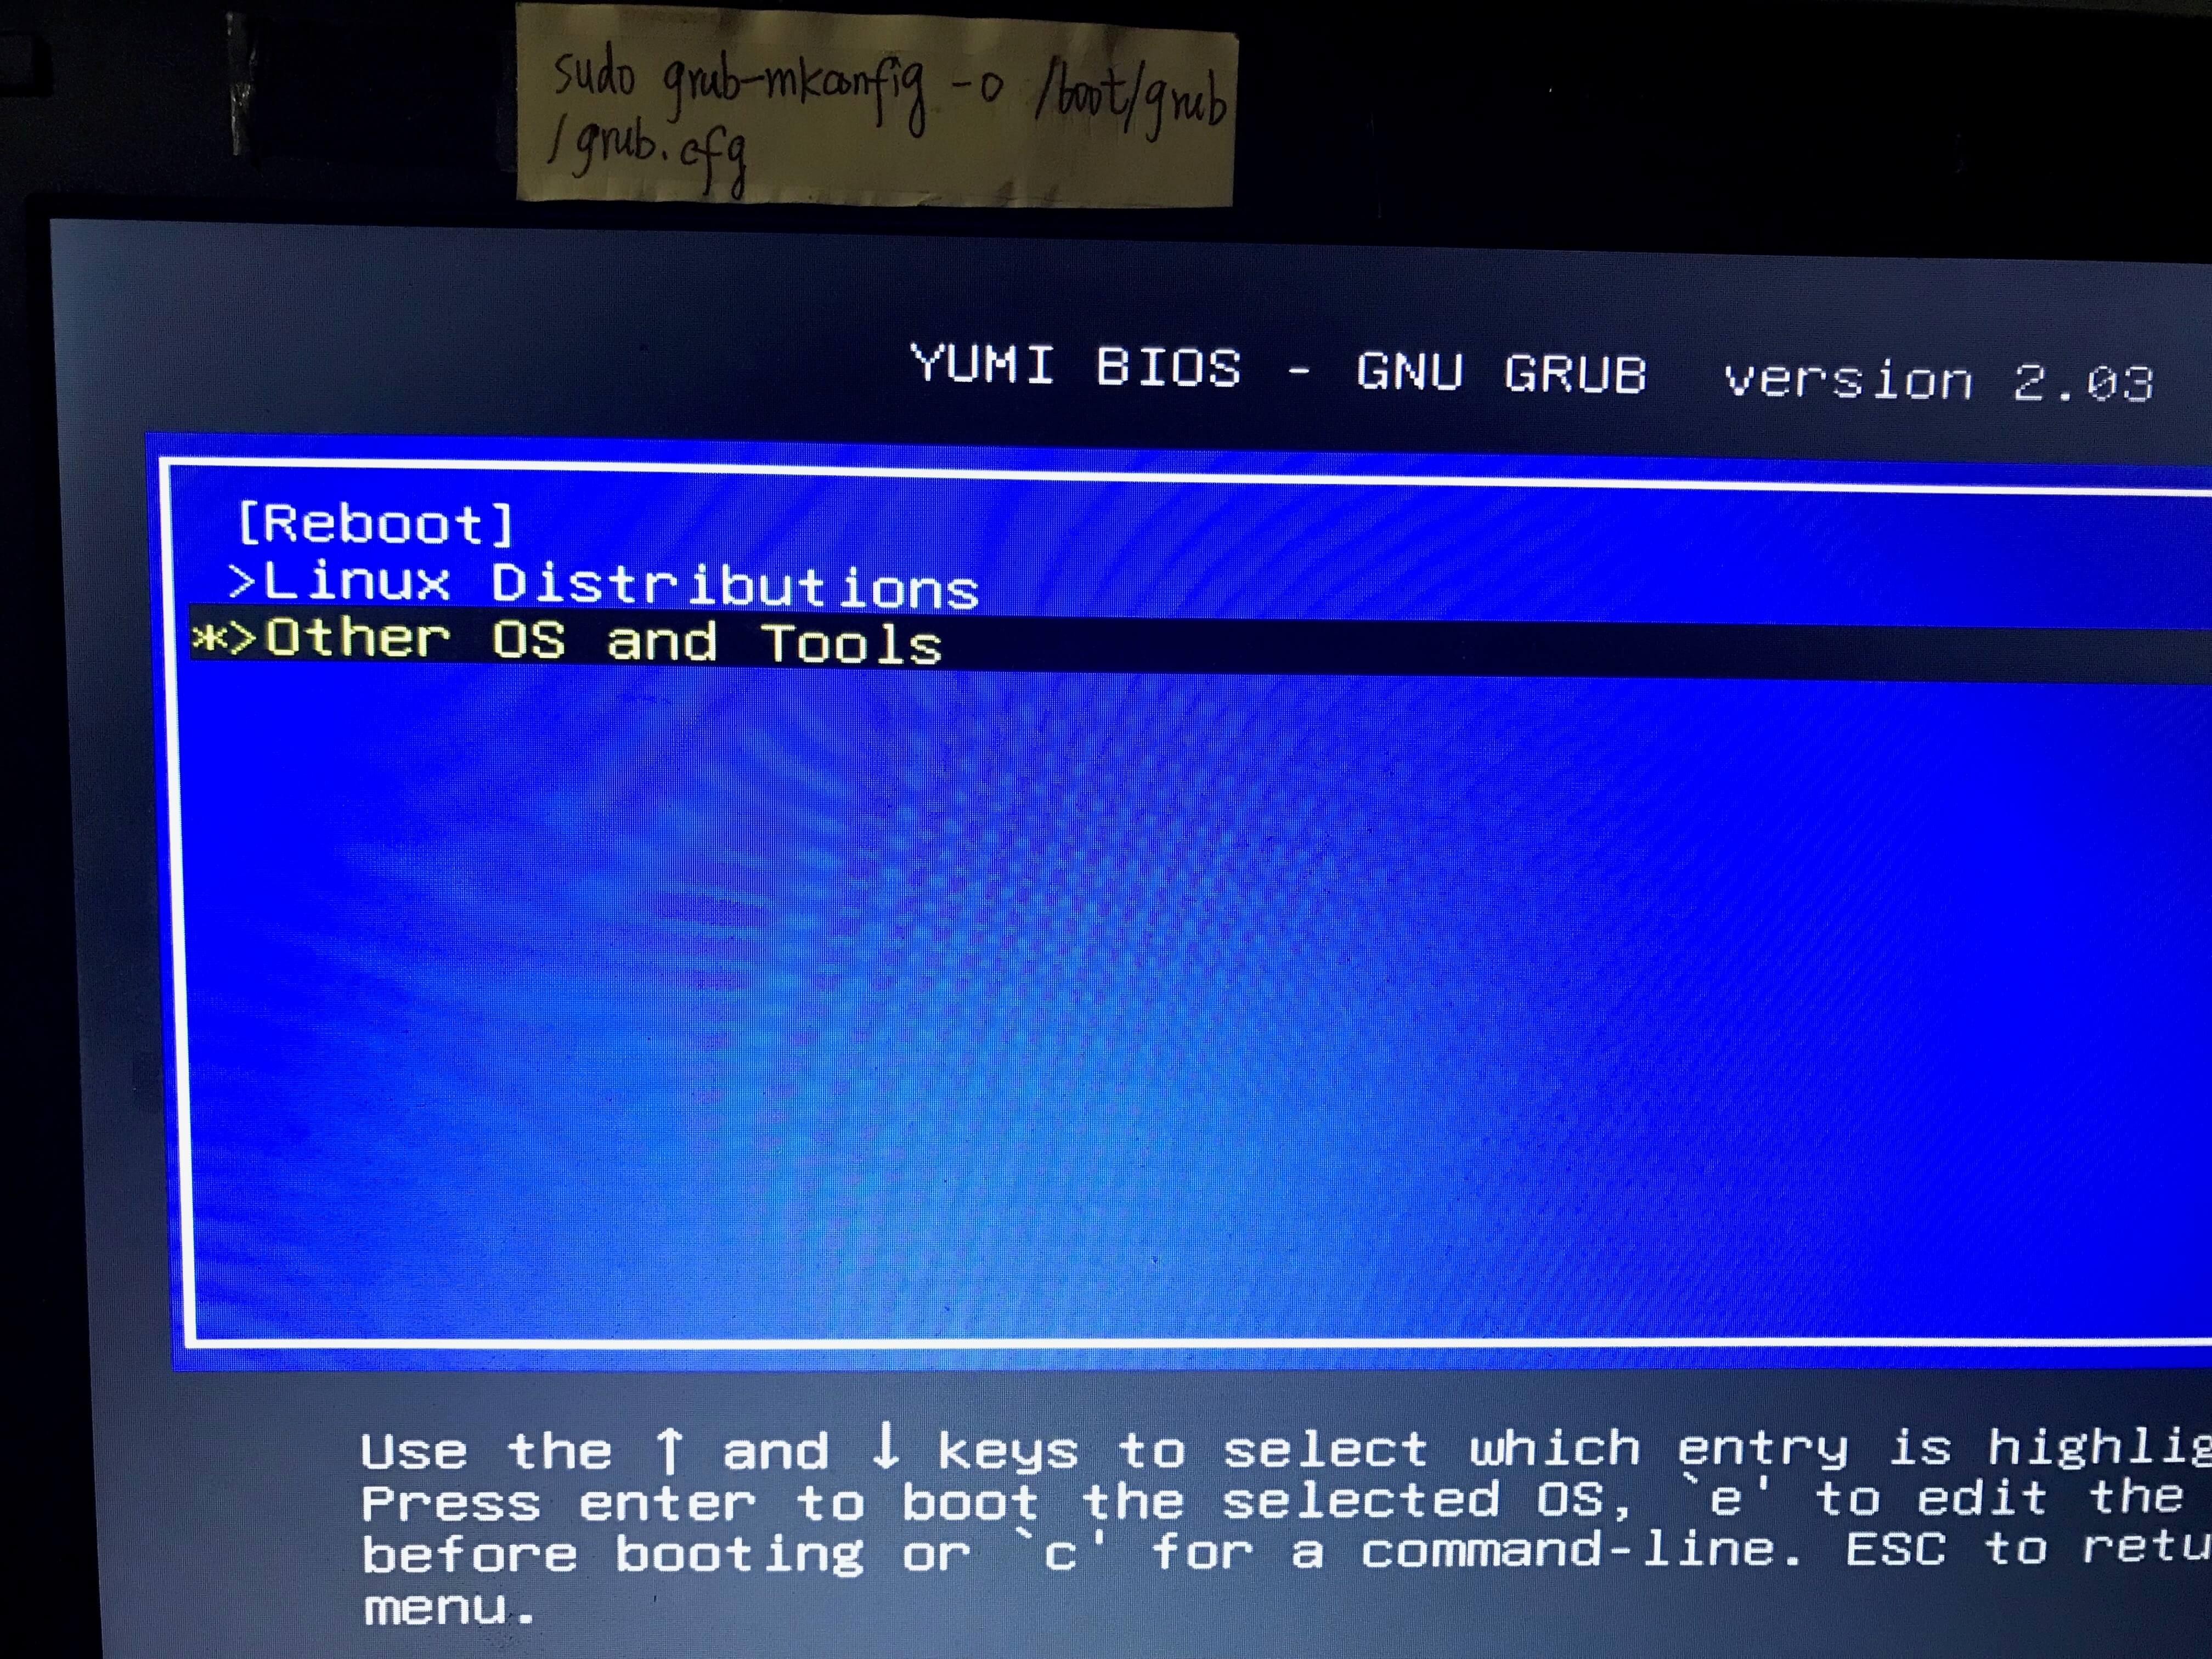
Once done, repeat the same process add additional ISO images files your USB flash drive. You can also add Windows ISO images. The Windows ISO will be put in Other OS and Tools in the Grub boot menu.
5 WinSetupFromUSB
WinSetupFromUSB is a Windows program that can create multiboot USB flash drive to install any Windows versions since 2000/XP, boot various Linux and *BSD flavors.
WinSetupFromUSB Pros:
- Supports both BIOS and UEFI firmware.
- Can create a bootable USB containing both Linux and Windows ISO images (Windows 7, 8 and 10)
- You can add additional ISO images to your USB without destroying previous ISO images in the USB flash drive.
- Supports persistent mode
- Test your live USB in QEMU.
Cons:
- There’s no Linux version, although you can try running WinSetupFromUSB on Linux through WINE.
WinSetupFromUSB can be downloaded from the official download page. Once it’s downloaded and installed, start it from the start menu. Insert your USB flash drive. WinSetupFromUSB will automatically select it.
Then you can choose to format it with FBinst. Next, select your Windows and Linux ISO image files.
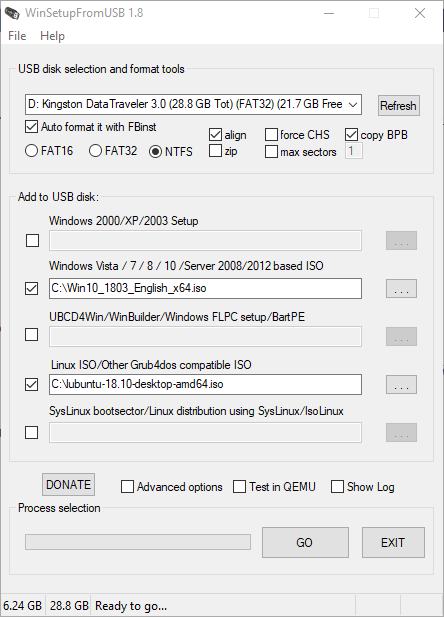
In the advanced options window, you can choose the persistent file size for Linux distributions.
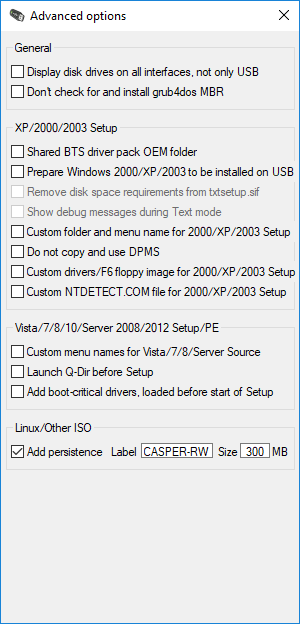
Once you are ready, click the Go button to start create the multiboot USB. After all your ISO images are written to USB flash drive. Restart your computer and boot from the USB drive.
That’s it! I hope this tutorial helped you create a multiboot USB flash drive. As always, if you found this post useful, then subscribe to our free newsletter to get more tips and tricks. Take care 🙂
12 Responses to “5 Apps to Create Multiboot USB – Linux and Windows ISOs Supported”
SaferVPN – 70% OFF

Featured Tutorials
-
![How to Install uTorrent in Ubuntu 18.04 and Ubuntu 19.04]() How to Install uTorrent in Ubuntu 18.04 and Ubuntu 19.04
How to Install uTorrent in Ubuntu 18.04 and Ubuntu 19.04
-
![How to Install LAMP Stack on Ubuntu 18.04 Server/Desktop]() How to Install LAMP Stack on Ubuntu 18.04 Server/Desktop
How to Install LAMP Stack on Ubuntu 18.04 Server/Desktop
-
![How to Easily Set up a Full-Fledged Mail Server on Ubuntu 16.04 with iRedMail]() How to Easily Set up a Full-Fledged Mail Server on Ubuntu 16.04 with iRedMail
How to Easily Set up a Full-Fledged Mail Server on Ubuntu 16.04 with iRedMail
-
![How to Install NextCloud on Ubuntu 18.04 with Nginx (LEMP Stack)]() How to Install NextCloud on Ubuntu 18.04 with Nginx (LEMP Stack)
How to Install NextCloud on Ubuntu 18.04 with Nginx (LEMP Stack)
-
![Install LEMP Stack (Nginx, MariaDB, PHP7.2) on RHEL 8/CentOS 8]() Install LEMP Stack (Nginx, MariaDB, PHP7.2) on RHEL 8/CentOS 8
Install LEMP Stack (Nginx, MariaDB, PHP7.2) on RHEL 8/CentOS 8
-
![Install Nginx, MariaDB, PHP7 (LEMP) on Arch Linux Server in 2019]() Install Nginx, MariaDB, PHP7 (LEMP) on Arch Linux Server in 2019
Install Nginx, MariaDB, PHP7 (LEMP) on Arch Linux Server in 2019
-
![How to Easily Enable TLS 1.3 in Nginx on Ubuntu 19.04, 18.04, 16.04]() How to Easily Enable TLS 1.3 in Nginx on Ubuntu 19.04, 18.04, 16.04
How to Easily Enable TLS 1.3 in Nginx on Ubuntu 19.04, 18.04, 16.04
-
![Install NextCloud on RHEL 8/CentOS 8 with Nginx (LEMP Stack)]() Install NextCloud on RHEL 8/CentOS 8 with Nginx (LEMP Stack)
Install NextCloud on RHEL 8/CentOS 8 with Nginx (LEMP Stack)
-
![Set up OpenConnect VPN Server (ocserv) on Ubuntu 16.04/18.04 with Let's Encrypt]() Set up OpenConnect VPN Server (ocserv) on Ubuntu 16.04/18.04 with Let’s Encrypt
Set up OpenConnect VPN Server (ocserv) on Ubuntu 16.04/18.04 with Let’s Encrypt
-
![How to Enable /etc/rc.local with Systemd]() How to Enable /etc/rc.local with Systemd
How to Enable /etc/rc.local with Systemd


Free Trial with Unlimited Access


 浙公网安备 33010602011771号
Very interesting article. I will definitely try a few of those. Would be nice to free a few USB-sticks.
Curious on how this persistent file feature will work.
Thanks,
I’ve enabled your account to SARDU PRO version
Try www.easy2boot.com. Download and run it to make a bootable USB drive. Then just copy over to the USB drive (or delete) any ISO you want to boot. It is free and supports Secure UEFI too. Keep 100’s of payloads all on one NTFS USB drive and also your own portable applications, image backups, etc.
I’ve installed multibootUSB on Ubuntu 19.04 but it seems the Python script is messing up the system and programs don’t want to start-up again, amongst other failures.
I’ve installed it 3x and even reinstalled Ubuntu 3x and tried it again to make sure but no solution.
Maybe it’s my system but better double check.
The graphical software installer will handle software dependency automatically. If you would like to install multibootUSB from command line, then you can use
apt, which will also handle software dependency for you.I was surprised not to see easy2boot here.
Hi Xiao,
Tnx for your reaction.
“The graphical software installer will handle software dependency automatically.”
That’s actually what I think might be going wrong and that’s the reason I warned here. However, I don’t know if it is generally or only on my laptop (with only an Intel chip and graphics).
As far as I know, there is no technical difference between the graphical software installer and apt is there? They do exactly the same?
I would love MultiBootUSB to become a Snap package so this whole thing will be something of the past 😃
The graphical software installer will invoke apt to install .deb packages. So there’s no technical difference.
Hi Xiao,
All the Windows boot options here are to the Installation/recovery enviroment, correct?
Because I would like to make a Linux/WindowsToGo-multiboot-usb. Making the WindowsToGo enviroment can be done using this Hasleo’s WinToUsb utility https://www.easyuefi.com/wintousb/
But after the WindowsToGo part is ready – how would it be possible to combine it with Linux-installations?
Xiao,
Have you really tried installing this? In Ubuntu or any other Debian-based distro? ‘Coz your suggestions of “sudo apt install [.deb file] and even the graphical software installer suggestion are quite obvious but if you actually try them, you’ll find out that they don’t work for multibootUSB. Please try in actuality first before writing about it as working. I have done so as well as the above commenter and got various problems. A quick google of “multibootUSB problems” showed it might not be working most of the time.
Jesse
Every tutorial on this blog is tested on my computer before published.
If it doesn’t work for you, perhaps you are using a very new distro, or maybe you have made some big changes to your OS, perhaps you downloaded the file to a different directory than mine. Please don’t be so certain that I didn’t try installing the software. I installed it successfully on my Ubuntu 18.04 OS when I was writing this article.
Now I try installing multibootusb on my Debian 10 and Linux Mint 19.1 OS.
Here’s how installing multibootusb on Debian 10 Buster goes on my computer.
See the screenshot
![multibootusb debian 10 buster]()
Here’s how it goes on my Linux Mint 19.1 OS.
Screenshot
![linux mint 19 multibootusb]()
As you can see, the installation went without a hitch on my Debian 10 buster and Linux Mint 19.1 Tessa OS.
If you copy the output from your terminal and paste them here, I might be able to help you troubleshoot the problem.