使用 Dynamixel shield 控制Dynamixel MX106R 舵机
原文链接:https://forum.robotis.com/t/controlling-dynamixel-mx106r-servo-with-dynamixel-shield/5602/1
Im struggling to get the Dynamixel servos to respond to the data sent via serial port, but when I manually generate random angles inside the loop the motor responds:
我很难让Dynamixel伺服系统对通过串行端口发送的数据做出响应,但当我手动在循环中生成任意角度时,电机会做出响应:
#include <DynamixelShield.h>
#if defined(ARDUINO_AVR_UNO) || defined(ARDUINO_AVR_MEGA2560)
#include <SoftwareSerial.h>
SoftwareSerial soft_serial(7, 8); // DYNAMIXELShield UART RX/TX
#define DEBUG_SERIAL soft_serial
#elif defined(ARDUINO_SAM_DUE) || defined(ARDUINO_SAM_ZERO)
#define DEBUG_SERIAL SerialUSB
#else
#define DEBUG_SERIAL Serial
#endif
//Please see eManual Control Table section of your DYNAMIXEL.
//This example is written for DYNAMIXEL AX & MX series with Protocol 1.0.
//For MX 2.0 with Protocol 2.0, refer to write_x.ino example.
#define CW_ANGLE_LIMIT_ADDR 6
#define CCW_ANGLE_LIMIT_ADDR 8
#define ANGLE_LIMIT_ADDR_LEN 2
#define OPERATING_MODE_ADDR_LEN 2
#define TORQUE_ENABLE_ADDR 24
#define TORQUE_ENABLE_ADDR_LEN 1
#define LED_ADDR 25
#define LED_ADDR_LEN 1
#define GOAL_POSITION_ADDR 30
#define GOAL_POSITION_ADDR_LEN 2
#define PRESENT_POSITION_ADDR 36
#define PRESENT_POSITION_ADDR_LEN 2
#define TIMEOUT 10 //default communication timeout 10ms
uint8_t turn_on = 1;
uint8_t turn_off = 0;
const uint8_t DXL_ID = 3;
const float DXL_PROTOCOL_VERSION = 1.0;
uint16_t goalPosition1 = 512;
uint16_t goalPosition2 = 1023;
DynamixelShield dxl;
void setup() {
// put your setup code here, to run once:
// For Uno, Nano, Mini, and Mega, use UART port of DYNAMIXEL Shield to debug.
DEBUG_SERIAL.begin(115200); //Set debugging port baudrate to 115200bps
while(!DEBUG_SERIAL); //Wait until the serial port for terminal is opened
// Set Port baudrate to 57600bps. This has to match with DYNAMIXEL baudrate.
dxl.begin(57600);
// Set Port Protocol Version. This has to match with DYNAMIXEL protocol version.
dxl.setPortProtocolVersion(DXL_PROTOCOL_VERSION);
// Turn off torque when configuring items in EEPROM area
if(dxl.write(DXL_ID, TORQUE_ENABLE_ADDR, (uint8_t*)&turn_off , TORQUE_ENABLE_ADDR_LEN, TIMEOUT))
DEBUG_SERIAL.println("DYNAMIXEL Torque off");
else
DEBUG_SERIAL.println("Error: Torque off failed");
// Set to Joint Mode
if(dxl.write(DXL_ID, CW_ANGLE_LIMIT_ADDR, (uint8_t*)&goalPosition1, ANGLE_LIMIT_ADDR_LEN, TIMEOUT)
&& dxl.write(DXL_ID, CCW_ANGLE_LIMIT_ADDR, (uint8_t*)&goalPosition2, ANGLE_LIMIT_ADDR_LEN, TIMEOUT))
DEBUG_SERIAL.println("Set operating mode");
else
DEBUG_SERIAL.println("Error: Set operating mode failed");
// Turn on torque
if(dxl.write(DXL_ID, TORQUE_ENABLE_ADDR, (uint8_t*)&turn_on, TORQUE_ENABLE_ADDR_LEN, TIMEOUT))
DEBUG_SERIAL.println("Torque on");
else
DEBUG_SERIAL.println("Error: Torque on failed");
dxl.write(DXL_ID, GOAL_POSITION_ADDR, (uint8_t*)&goalPosition1, GOAL_POSITION_ADDR_LEN, TIMEOUT);
}
void loop() {
// put your main code here, to run repeatedly:
int goalPosition1 = random(0, 181);
dxl.write(DXL_ID, GOAL_POSITION_ADDR, (uint8_t*)&goalPosition1, GOAL_POSITION_ADDR_LEN, TIMEOUT);
delay(500);
}
but when I try to get those numbers or continuously changing angles from my python code via serial port the motors dont respond even though Arduino shows that data is being received, the motors are connected to Dynamixel shield ,using 4pin RS485 cables ,which is stacked onto on an Arduino board:
但是当我试图通过串行端口获取这些数字或者不断地从我的python代码中改变角度时,即使Arduino显示正在接收数据,电机也没有响应,电机使用4pin RS485电缆连接到Dynamixel屏蔽,该屏蔽被堆叠在Arduino板上:
/*******************************************************************************
* Copyright 2016 ROBOTIS CO., LTD.
*
* Licensed under the Apache License, Version 2.0 (the "License");
* you may not use this file except in compliance with the License.
* You may obtain a copy of the License at
*
* http://www.apache.org/licenses/LICENSE-2.0
*
* Unless required by applicable law or agreed to in writing, software
* distributed under the License is distributed on an "AS IS" BASIS,
* WITHOUT WARRANTIES OR CONDITIONS OF ANY KIND, either express or implied.
* See the License for the specific language governing permissions and
* limitations under the License.
*******************************************************************************/
#include <DynamixelShield.h>
#include <Dynamixel2Arduino.h>
#if defined(ARDUINO_AVR_UNO) || defined(ARDUINO_AVR_MEGA2560)
#include <SoftwareSerial.h>
SoftwareSerial soft_serial(7, 8); // DYNAMIXELShield UART RX/TX
#define DEBUG_SERIAL soft_serial
#elif defined(ARDUINO_SAM_DUE) || defined(ARDUINO_SAM_ZERO)
#define DEBUG_SERIAL SerialUSB
#else
#define DEBUG_SERIAL Serial
#endif
DynamixelShield dxl;
const uint8_t DXL_ID = 3;
const float DXL_PROTOCOL_VERSION = 1.0;
//This namespace is required to use Control table item names
using namespace ControlTableItem;
void setup() {
// put your setup code here, to run once:
// For Uno, Nano, Mini, and Mega, use UART port of DYNAMIXEL Shield to debug.
DEBUG_SERIAL.begin(115200);
Serial.begin(57600);
// Set Port baudrate to 57600bps. This has to match with DYNAMIXEL baudrate.
dxl.begin(57600);
// Set Port Protocol Version. This has to match with DYNAMIXEL protocol version.
dxl.setPortProtocolVersion(DXL_PROTOCOL_VERSION);
// Get DYNAMIXEL information
dxl.ping(DXL_ID);
// Turn off torque when configuring items in EEPROM area
dxl.torqueOff(DXL_ID);
dxl.setOperatingMode(DXL_ID, OP_POSITION);
dxl.torqueOn(DXL_ID);
}
void loop() {
// put your main code here, to run repeatedly:
if (Serial.available()> 0) {
int goalPosition1 = Serial.parseFloat();
// Please refer to e-Manual(http://emanual.robotis.com/docs/en/parts/interface/dynamixel_shield/) for available range of value.
// Set Goal Position in RAW value
// dxl.setGoalPosition(DXL_ID, 512);
//delay(1000);
// Print present position in raw value
//DEBUG_SERIAL.print("Present Position(raw) : ");
//DEBUG_SERIAL.println(dxl.getPresentPosition(DXL_ID));
//delay(1000);
// Set Goal Position in DEGREE value
dxl.setGoalPosition(DXL_ID,goalPosition1, UNIT_DEGREE);
}
// Print present position in degree value
//DEBUG_SERIAL.print("Present Position(degree) : ");
//DEBUG_SERIAL.println(dxl.getPresentPosition(DXL_ID, UNIT_DEGREE));
//delay(1000);
}
Please help, what may be the problem for regarding the serial communication?
请帮忙,串行通信可能有什么问题?
On the Arduino Uno the serial port that you are using isn’t the one connected through the Arduino’s USB port. The available serial port is the one that’s made available through the 4 pin header on the top of the DYNAMXEL Shield. 2 You’ll need to use an LN101 or comparable serial adapter 2 to communicate over this port.
在Arduino Uno上,您使用的串行端口不是通过Arduino的USB端口连接的。可用的串行端口是通过DYNAMXEL Shield顶部的4针头提供的。2您需要使用LN101或类似的串行适配器2通过该端口进行通信。
Is it a must to use the 4 pin header to send the information from the Arduino’s USB port to the dynamixel servos for control? or is there another method to do it?
它是一个必须使用4针头发送信息从Arduino的USB端口到dynamixel伺服控制?还是有别的方法可以做到?
The Arduino shows that the data is arriving , so I need o get that data through the Dynamixel shield to the Servos
Arduino显示了即将到来的数据,所以我需要通过Dynamixel shield将数据传输到服务系统。
First, you need to help me getting the big picture of what you are trying to do:
首先,你需要帮助我了解你想要做的事情:
- You are using an UNO R3 or below (basically an AVR controller) to control the MX-106R via the DXL Hardware Serial (Pin 0 and Pin 1) on the Dynamixel Shield.
- You are also running another PC or SBC running Python code which figures out the Goal Position values that each MX-106 should be set at. And you want the MX-106 to pick up this type of information DIRECTLY (via SoftwareSerial (Pins 7 & 8) without having to use the Dynamixel2Arduino library, i.e. without having to use the Function dxl.setGoalPosition(DXL_ID,goalPosition1, UNIT_DEGREE)? Is this what you want to do? The short answer is - THIS IS NOT POSSIBLE.
1. 您使用UNO R3或更低的(基本上是AVR控制器)通过Dynamixel Shield上的DXL硬件串行(引脚0和引脚1)来控制MX-106R。
2. 您还在运行另一台PC或SBC,运行Python代码,计算出每个MX-106应该设置的目标位置值。你想让MX-106直接拾取这种类型的信息(通过SoftwareSerial(引脚7和8)而无需使用Dynamixel2Arduino库,即无需使用函数dxl.setGoalPosition(DXL_ID,goalPosition1,UNIT_DEGREE)?这是你想做的吗?简短的回答是-这是不可能的。
What is possible is that you can use RC100 protocol from the PC/SBC running on Python to send an RC100 packet (which is not the same as the DXL packet used by the Function setGoalPosition()). This RC100 packet has information about the DXL’s ID and wanted Goal Position for this ID (one set per MX-106), which the UNO can pick up then decodes this RC100 packet and use this information to set up the proper call to Function setGoalPosition() to send a DXL packet to the actual MX-106s (one at a time) or you can prepare a SyncWrite process too.
您可以使用运行在Python上的PC/SBC的RC100协议发送RC100数据包(这与Function setGoalPosition()使用的DXL数据包不同)。这个RC100数据包有关于DXL的ID和这个ID想要的目标位置的信息(每个MX-106一套),UNO可以拿起然后解码这个RC100数据包,并使用这些信息来设置正确的调用函数setGoalPosition()发送一个DXL数据包到实际的MX-106(一次一个)或您也可以准备一个SyncWrite进程。
By the way what kind of COM Port do you have on the PC/SBC side?
顺便问一下,你在PC/SBC端有什么样的COM端口?
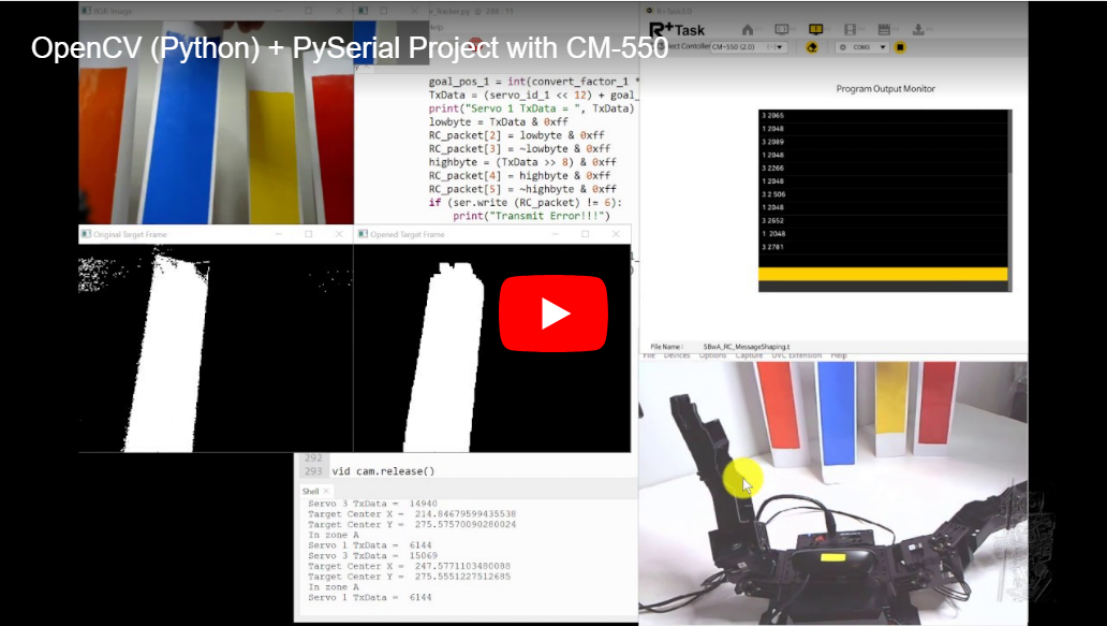
Some years back, I made this type of project between a PC running on Python and a CM-550 and reported it in this YouTube video. Please review it and let me know if that is what you want to do “concept-wise”. And then we’ll see what we can do to adapt these concepts to your specific conditions.
几年前,我在一台运行Python的PC和一台CM-550之间做了一个这种类型的项目,并在这个YouTube视频中报告了它。请审查它,让我知道,如果这是你想要做的“概念明智的”。然后,我们将看看我们能做些什么,使这些概念适应您的具体情况。
So far, I only read the specs for the UNO+DynamixelShield combo and I have not actually used this combo yet for my projects, so I may be mistaken here:
到目前为止,我只读了UNO+DynamixelShield组合的规范,实际上我还没有在我的项目中使用这个组合,所以我可能在这里犯了错误:
On the DXL Shield Pins 7 and 8 are UART Pins using 5V right? And the LN-101’s USART Pins are set at 3.3 V right? So shouldn’t we need a Logic Level Shifter module between the LN-101 and the DXL Shield?
在DXL屏蔽引脚7和8是UART引脚使用5V的权利?LN-101的USART引脚设置为3.3 V,对吗?因此,我们不应该需要一个逻辑电平转换模块之间的LN-101和DXL盾?
The DYNAMIXEL Shield uses the hardware UART on pins 0 and 1 for DYNAMIXEL control. The LN-101 port connected to pins 7 and 8 the DYNAMIXEL Shield is actually a software serial port, rather than a hardware one since the board only has the one dedicated hardware UART. The board does contain the required level shifter for safe operation though.
DYNAMIXEL Shield在引脚0和1上使用硬件UART进行DYNAMIXEL控制。连接到引脚7和8的LN-101端口DYNAMIXEL Shield实际上是一个软件串行端口,而不是硬件串行端口,因为主板只有一个专用的硬件UART。该委员会不包含所需的水平移位虽然安全操作。
Yes what you said is true in 1.) and 2) but I want to use the setGoalPosition or any that you recommend that could work, and also I’m open to using the Dynamixel2Arduino library, How should I use the Dynamixel2Arduino library? Can I also do this without having to use the SoftwareSerial when using the Dynamixel2Arduino library.
Please note Im still a novice in using Dynamixel servos and the shield
是的,你在1)和2)中所说的是真的,但我想使用setGoalPosition或你建议的任何可以工作的东西,而且我对使用Dynamixel2Arduino库持开放态度,我应该如何使用Dynamisel2Arduino库?在使用Dynamixel2Arduino库时,我也可以在不必使用SoftwareSerial的情况下执行此操作吗。
请注意,我仍然是使用Dynamixel伺服系统和shield的新手。
Yes I’ll Iook at video and give you a review. Thanks
是的,我会看录像,然后给你一个评价。谢谢
hey man i tried using this code to check if the motor is receiving the command, I use this code to turn on the LED on the motor if serial.available > 0:
/*******************************************************************************
* Copyright 2016 ROBOTIS CO., LTD.
*
* Licensed under the Apache License, Version 2.0 (the "License");
* you may not use this file except in compliance with the License.
* You may obtain a copy of the License at
*
* http://www.apache.org/licenses/LICENSE-2.0
*
* Unless required by applicable law or agreed to in writing, software
* distributed under the License is distributed on an "AS IS" BASIS,
* WITHOUT WARRANTIES OR CONDITIONS OF ANY KIND, either express or implied.
* See the License for the specific language governing permissions and
* limitations under the License.
*******************************************************************************/
#include <Dynamixel2Arduino.h>
//#include <DynamixelShield.h>
// Please modify it to suit your hardware.
#if defined(ARDUINO_AVR_UNO) || defined(ARDUINO_AVR_MEGA2560) // When using DynamixelShield
#include <SoftwareSerial.h>
SoftwareSerial soft_serial(7, 8); // DYNAMIXELShield UART RX/TX
#define DXL_SERIAL Serial
#define DEBUG_SERIAL soft_serial
const int DXL_DIR_PIN = 2; // DYNAMIXEL Shield DIR PIN
#elif defined(ARDUINO_SAM_DUE) // When using DynamixelShield
#define DXL_SERIAL Serial
#define DEBUG_SERIAL SerialUSB
const int DXL_DIR_PIN = 2; // DYNAMIXEL Shield DIR PIN
#elif defined(ARDUINO_SAM_ZERO) // When using DynamixelShield
#define DXL_SERIAL Serial1
#define DEBUG_SERIAL SerialUSB
const int DXL_DIR_PIN = 2; // DYNAMIXEL Shield DIR PIN
#elif defined(ARDUINO_OpenCM904) // When using official ROBOTIS board with DXL circuit.
#define DXL_SERIAL Serial3 //OpenCM9.04 EXP Board's DXL port Serial. (Serial1 for the DXL port on the OpenCM 9.04 board)
#define DEBUG_SERIAL Serial
const int DXL_DIR_PIN = 22; //OpenCM9.04 EXP Board's DIR PIN. (28 for the DXL port on the OpenCM 9.04 board)
#elif defined(ARDUINO_OpenCR) // When using official ROBOTIS board with DXL circuit.
// For OpenCR, there is a DXL Power Enable pin, so you must initialize and control it.
// Reference link : https://github.com/ROBOTIS-GIT/OpenCR/blob/master/arduino/opencr_arduino/opencr/libraries/DynamixelSDK/src/dynamixel_sdk/port_handler_arduino.cpp#L78
#define DXL_SERIAL Serial3
#define DEBUG_SERIAL Serial
const int DXL_DIR_PIN = 84; // OpenCR Board's DIR PIN.
#elif defined(ARDUINO_OpenRB) // When using OpenRB-150
//OpenRB does not require the DIR control pin.
#define DXL_SERIAL Serial1
#define DEBUG_SERIAL Serial
const int DXL_DIR_PIN = -1;
#else // Other boards when using DynamixelShield
#define DXL_SERIAL Serial1
#define DEBUG_SERIAL Serial
const int DXL_DIR_PIN = 2; // DYNAMIXEL Shield DIR PIN
#endif
//Please see eManual Control Table section of your DYNAMIXEL.
//This example is written for DYNAMIXEL AX & MX series with Protocol 1.0.
//For MX 2.0 with Protocol 2.0, refer to write_x.ino example.
#define CW_ANGLE_LIMIT_ADDR 6
#define CCW_ANGLE_LIMIT_ADDR 8
#define ANGLE_LIMIT_ADDR_LEN 2
#define OPERATING_MODE_ADDR_LEN 2
#define TORQUE_ENABLE_ADDR 24
#define TORQUE_ENABLE_ADDR_LEN 1
#define LED_ADDR 25
#define LED_ADDR_LEN 1
#define GOAL_POSITION_ADDR 30
#define GOAL_POSITION_ADDR_LEN 2
#define PRESENT_POSITION_ADDR 36
#define PRESENT_POSITION_ADDR_LEN 2
#define TIMEOUT 10 //default communication timeout 10ms
uint8_t turn_on = 1;
uint8_t turn_off = 0;
const uint8_t DXL_ID = 3;
const float DXL_PROTOCOL_VERSION = 1.0;
uint16_t goalPosition1 = 90;
//uint16_t goalPosition2 = 1023;
Dynamixel2Arduino dxl(DXL_SERIAL, DXL_DIR_PIN);
void read_command() {
// Set DXL_DIR_PIN to HIGH for transmission mode
// Read incoming command from the serial port and parse it
if (Serial.available() >= 4) {
// Assuming the command format is [CMD, ARG1, ARG2, ARG3]
// Read and store the command parameters
dxl.write(DXL_ID, LED_ADDR, (uint8_t*)&turn_on, LED_ADDR_LEN, TIMEOUT);
//delay(500); // Delay for LED visibility
uint8_t cmd = Serial.read();
uint16_t arg1 = Serial.read();
uint16_t arg2 = Serial.read();
uint16_t arg3 = Serial.read();
digitalWrite(DXL_DIR_PIN, HIGH);
// Process the command as needed
// For simplicity, you can directly actuate the Dynamixel motors here
// Example: Set goal positions
if (cmd == 1) {
uint16_t goalPosition1 = arg1;
//goalPosition2 = arg2;
}
}
}
void execute_command() {
// Actuate the Dynamixel motors based on the received command
// For simplicity, this function can directly set goal positions
dxl.write(DXL_ID, GOAL_POSITION_ADDR, (uint8_t*)&goalPosition1, GOAL_POSITION_ADDR_LEN, TIMEOUT);
delay(1000); // Delay for stability
// Example: Turn on LED
//dxl.write(DXL_ID, LED_ADDR, (uint8_t*)&turn_on, LED_ADDR_LEN, TIMEOUT);
//delay(500); // Delay for LED visibility
// Example: Set a different goal position
// dxl.write(DXL_ID, GOAL_POSITION_ADDR, (uint8_t*)&goalPosition2, GOAL_POSITION_ADDR_LEN, TIMEOUT);
//delay(1000); // Delay for stability
// Example: Turn off LED
//dxl.write(DXL_ID, LED_ADDR, (uint8_t*)&turn_off, LED_ADDR_LEN, TIMEOUT);
//delay(500); // Delay for LED visibility
}
void setup() {
// put your setup code here, to run once:
pinMode(DXL_DIR_PIN, OUTPUT); // Set DXL_DIR_PIN as an output pin
// For Uno, Nano, Mini, and Mega, use UART port of DYNAMIXEL Shield to debug.
DEBUG_SERIAL.begin(115200); //Set debugging port baudrate to 115200bps
while(!DEBUG_SERIAL); //Wait until the serial port for terminal is opened
// Set Port baudrate to 57600bps. This has to match with DYNAMIXEL baudrate.
dxl.begin(57600);
// Set Port Protocol Version. This has to match with DYNAMIXEL protocol version.
dxl.setPortProtocolVersion(DXL_PROTOCOL_VERSION);
// Turn off torque when configuring items in EEPROM area
if(dxl.write(DXL_ID, TORQUE_ENABLE_ADDR, (uint8_t*)&turn_off , TORQUE_ENABLE_ADDR_LEN, TIMEOUT))
DEBUG_SERIAL.println("DYNAMIXEL Torque off");
else
DEBUG_SERIAL.println("Error: Torque off failed");
// Set to Joint Mode
if(dxl.write(DXL_ID, CW_ANGLE_LIMIT_ADDR, (uint8_t*)&goalPosition1, ANGLE_LIMIT_ADDR_LEN, TIMEOUT))
DEBUG_SERIAL.println("Set operating mode");
else
DEBUG_SERIAL.println("Error: Set operating mode failed");
// Turn on torque
if(dxl.write(DXL_ID, TORQUE_ENABLE_ADDR, (uint8_t*)&turn_on, TORQUE_ENABLE_ADDR_LEN, TIMEOUT))
DEBUG_SERIAL.println("Torque on");
else
DEBUG_SERIAL.println("Error: Torque on failed");
}
void loop() {
// Read incoming command and execute it
read_command();
execute_command();
}
and the LED is not turning on, but when I put : dxl.write(DXL_ID, LED_ADDR, (uint8_t*)&turn_on, LED_ADDR_LEN, TIMEOUT); outside the if(Serial.available>0) the LED turns on
LED不亮,但当我输入:dxl.write(dxl_ID,LED_ADDR,(uint8_t*)&turn_on,LED_ADDR_LEN,TIMEOUT)时;在外部,如果(Serial.available>0)LED亮起
The serial port that you are trying to read from is the same port that you’re using to control the DYNAMIXEL actuators.
您试图读取的串行端口与您用来控制DYNAMIXEL执行器的端口相同。
There’s only one hardware UART available on the Arduino Uno board, so you won’t be able to take serial input over the USB port at the same time as you are controlling the DYNAMIXEL actuators.
Arduino Uno板上只有一个硬件UART可用,因此在控制DYNAMIXEL执行器的同时,您将无法通过USB端口进行串行输入。
I agree with @Jonathon. For your needs of DXL control and inter-controller communication at the same time you have to forget about the UNO R3 and earlier. You’ll need at least 2 hardware UARTs. Unfortunately the UNO R4 is not fully operational at this point in time. You’ll have to look at MKR Zero or OpenRB-150 but they only have X3P connectors. So you’ll have to add a DXL communication bridge also to control your MX-106R.
我同意乔纳森的观点。对于您的需要DXL控制和控制器之间的通信,在同一时间,你必须忘记的UNO R3和更早。您将需要至少2个硬件UART。遗憾的是,Unfortunately的R4目前还没有完全投入使用。你得看看MKR零号或OpenRB-150但它们只有X3P连接器。因此,您必须添加一个DXL通信桥也控制您的MX-106R。
I thought the Dynamixel shield has its own serial too, so cant we write the data to that serial after reading it from the USB port?
我认为Dynamixel shield也有自己的串行,所以我们不能在从USB端口读取数据后将数据写入该串行吗?
Thank you by the way
顺便谢谢你
It is only a software UART linked to Pins 7 & 8 and connected to that 4-pin connector for BT210/410 or LN-101 as Jonathon mentioned before. It may not have the performance needed
它只是一个连接到引脚7和8并连接到BT210/410或LN-101的4引脚连接器的软件UART,正如Jonathon之前提到的那样。它可能没有所需的性能
Ok thanks man, I hope I’ll manage with information you’ve provided
好的,谢谢,伙计,我希望我能利用你提供的信息
By the way, One last quesion, Is it not possible to just control the servos using arduino without the Shield, can I not write the functions needed and then make them into a header file so that I can call it in Arduino to get the motors runnning
顺便说一句,最后一个问题,是不是不可能在没有屏蔽的情况下使用arduino来控制伺服系统,我可以不写所需的函数,然后将它们制作成头文件,这样我就可以在arduino中调用它来运行电机
No because the DXLs communicate at half-duplex while the UART is at full duplex. The Dir-pin D2 is used by robotis software to make the UART behaves like a half-duplex. Also there are specific circuitry on the Shield to do that job too.
否,因为DXL以半双工通信,而UART以全双工通信。robotis软件使用Dir引脚D2使UART表现为半双工。此外,Shield上也有特定的电路来完成这项工作。
As you are using Python on a host computer and if your robot can be tied to your host computer via USB cable. Then there is another different option whereas you use the U2D2 and DXL SDK to control the DXLs from the PC directly.
当你在主机上使用Python时,如果你的机器人可以通过USB电缆连接到主机上。然后还有另一个不同的选项,您可以使用U2D2和DXL SDK直接从PC控制DXL。
U2D2 供电转接板 Power Hub Bard Dynamixel舵机供电板电源
https://item.jd.com/63176764098.html
U2D2:Dynamixel舵机驱动器U2D2PHB多功能转接口USB通讯转换器Power U2D2多功能转接器
https://item.jd.com/68987043504.html
The DXL SDK has a Python version.
DXL SDK有一个Python版本
Hello. Would it be possible to use the Arduino Due which has multiple hardware serial ports to try controlling the motors. Using a serial to usb adapter to receive incremental angles from the python code and write them to the Arduino(connecting it to one of the RX-17 and TX-16 pins on the Arduino), process them and then try controlling the motors using the dynamixel shield via RX-0 and TX-1.
你好是否可以使用具有多个硬件串行端口的Arduino Due来尝试控制电机。使用串行到usb适配器从python代码接收增量角度,并将其写入Arduino(将其连接到Arduino上的RX-17和TX-16引脚之一),对其进行处理,然后尝试通过RX-0和TX-1使用dynamixel shield控制电机。
Personally I have not used the Due, so I can’t help you much here.
就我个人而言,我没有使用Due,所以我在这里帮不了你太多。
According to this Arduino post, the Arduino Due is not directly compatible with the Dynamixel Shield, because the Due uses 3.3V for its I/O pins and the Dynamixel Shield uses 5V for its I/O pins.
根据Arduino的这篇帖子,Arduino Due与Dynamixel Shield不直接兼容,因为Due的I/O引脚使用3.3V,Dynamixel-Shield的I/O引脚则使用5V。

 浙公网安备 33010602011771号