openstack-keystone身份认证服务
-
管理用户及其权限
-
维护 OpenStack Services 的 Endpoint
-
Authentication(认证)和 Authorization(鉴权)

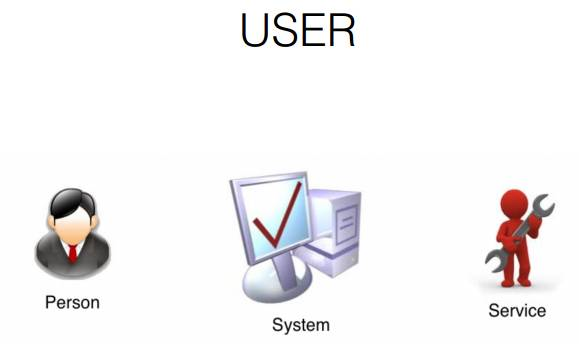

admin:openstack平台的超级管理员,负责openstack服务的管理和访问权限
demo: 常规(非管理)任务应该使用无特权的项目和用户,所有要创建 demo 项目和 demo 用户除了 admin 和 demo,OpenStack 也为 nova、cinder、glance、neutron 服务创建了相应的 User。 admin 也可以管理这些 User。


-
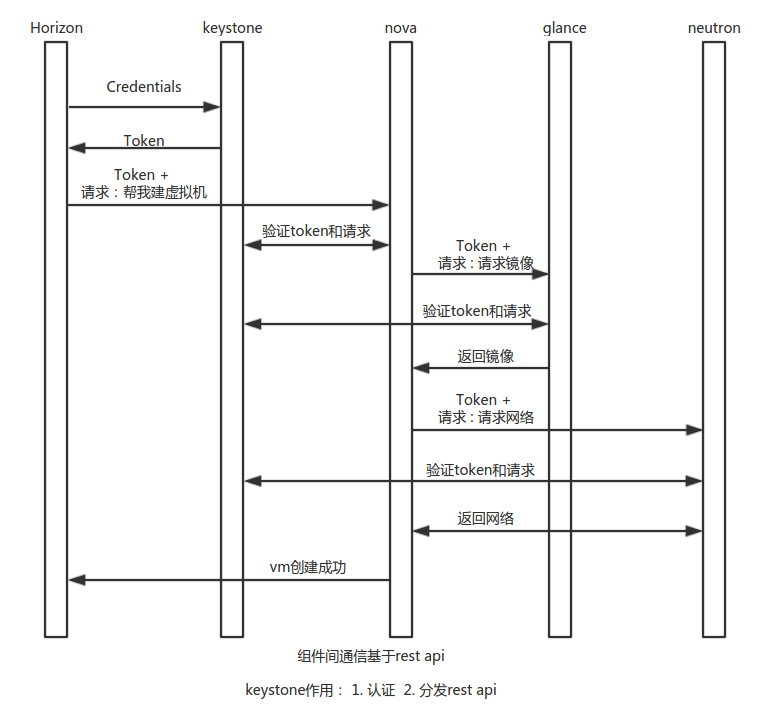
Token 用做访问 Service 的 Credential
-
Service 会通过 Keystone 验证 Token 的有效性
-
Token 的有效期默认是 24 小时

-
资源的所有权是属于 Project 的,而不是 User。
-
在 OpenStack 的界面和文档中,Tenant / Project / Account 这几个术语是通用的,但长期看会倾向使用 Project
-
每个 User(包括 admin)必须挂在 Project 里才能访问该 Project 的资源。 一个User可以属于多个 Project。
-
admin 相当于 root 用户,具有最高权限


# source devstack/openrc admin admin# openstack catalog list

-
Keystone定义Role
![]()
-
可以为 User 分配一个或多个 Role,Horizon 的菜单为:Identity->Project->ManageMembers

-
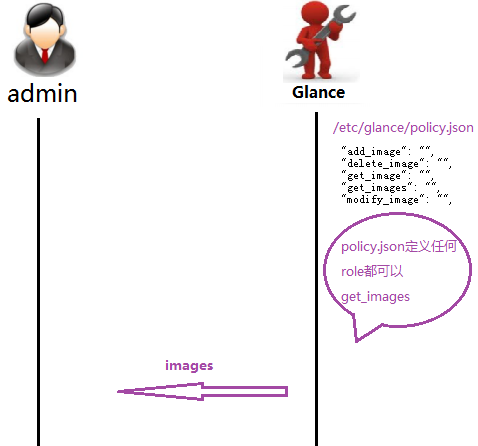
Service 决定每个 Role 能做什么事情 Service 通过各自的 policy.json 文件对 Role 进行访问控制。 下面是 Nova 服务 /etc/nova/policy.json 中的示例:

一个是管理员admin
一个是租户_member_
二、Keystone基本架构:

三、通过例子认识Keystone:
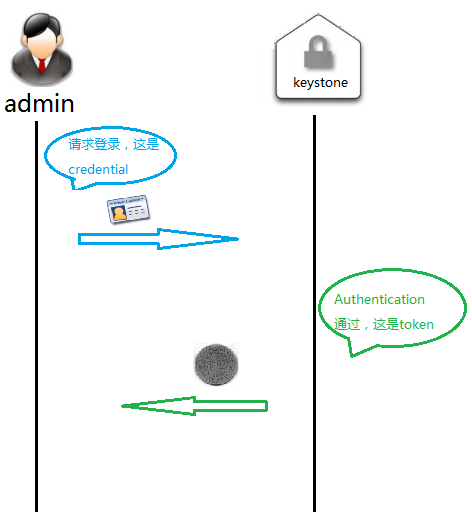
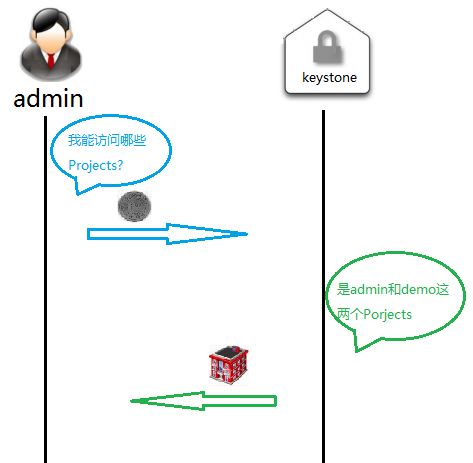
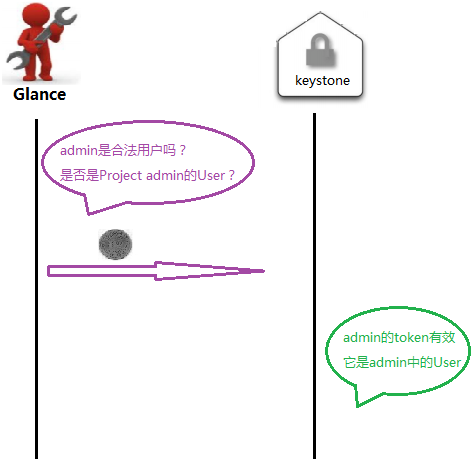
我们通过“查询可用 image”这个实际操作让大家对这些概念建立更加感性的认识。User admin 要查看 Project 中的 image
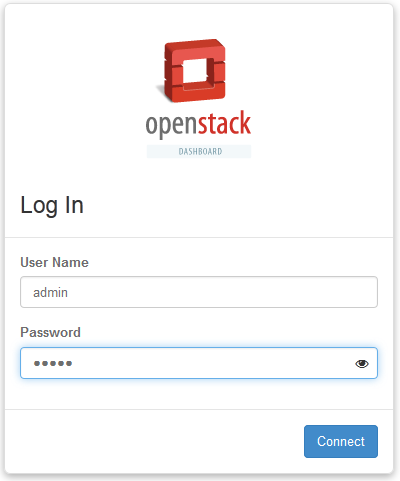
 时,OpenStack 内部发生了哪些事情?请看下面





四、搭建Keystone:
一、部署openstack的共享服务组件
1.安装openstack的服务端
yum install python-openstackclient -y
2.安装openstack的selinux
yum install openstack-selinux -y
3.安装数据库
yum install mariadb mariadb-server python2-PyMySQL -y
4.创建和编辑openstack.conf的配置文件
vim /etc/my.cnf.d/openstack.cnf
#################################################
[mysqld]
bind-address = 192.168.44.151 #集群网的ip地址
default-storage-engine = innodb
innodb_file_per_table = on
max_connections = 4096
collation-server = utf8_general_ci
character-set-server = utf8
##################################################
5.启动数据库
systemctl restart mariadb
systemctl enable mariadb
6.初始化数据库
mysql_secure_installation
7.安装消息队列rabbitmq并设置开机启动
yum install rabbitmq-server
systemctl enable rabbitmq-server.service
ystemctl start rabbitmq-server.service
8.创建openstack的用户
rabbitmqctl add_user openstack openstack
rabbitmqctl set_permissions openstack ".*" ".*" ".*"
rabbitmqctl set_user_tags openstack administrator
9.安装memcache
yum install memcached python-memcached
10.配置memcache的文件
vim /etc/sysconfig/memcached
##########################################################
OPTIONS="-l 127.0.0.1,::1,controller" #controller主机名
##########################################################
二、安装keystone服务
1.要在数据库中方创建随用服务用户并设置权限
mysql -u root -p root
CREATE DATABASE keystone;
grant all privileges on keystone.* to 'keystone'@'localhost' identified by 'KEYSTONE_DBPASS';
GRANT ALL PRIVILEGES ON keystone.* TO 'keystone'@'%' IDENTIFIED BY 'KEYSTONE_DBPASS';
2.安装对应服务的软件包
yum install openstack-keystone httpd mod_wsgi
3.修改服务的配置文件
cp /etc/keystone/keystone.conf /etc/keystone/keystone.conf.bak
vim /etc/keystone/keystone.conf
##############################################################################################################################
[DEFAULT]
[assignment]
[auth]
[cache]
[catalog]
[cors]
[cors.subdomain]
[credential]
[database]
connection = mysql+pymysql://keystone:KEYSTONE_DBPASS@controller/keystone #controller是登陆的主机,keystone是登录的库
[domain_config]
[endpoint_filter]
[endpoint_policy]
[eventlet_server]
[federation]
[fernet_tokens]
[healthcheck]
[identity]
[identity_mapping]
[kvs]
[ldap]
[matchmaker_redis]
[memcache]
[oauth1]
[oslo_messaging_amqp]
[oslo_messaging_kafka]
[oslo_messaging_notifications]
[oslo_messaging_rabbit]
[oslo_messaging_zmq]
[oslo_middleware]
[oslo_policy]
[paste_deploy]
[policy]
[profiler]
[resource]
[revoke]
[role]
[saml]
[security_compliance]
[shadow_users]
[signing]
[token]
provider = fernet
[tokenless_auth]
[trust]
##############################################################################################################################
4.同步数据库
su -s /bin/sh -c "keystone-manage db_sync" keystone
5.创建keystone的用户和组
keystone-manage fernet_setup --keystone-user keystone --keystone-group keystone
keystone-manage credential_setup --keystone-user keystone --keystone-group keystone
6.设置keystone服务的服务端点
keystone-manage bootstrap --bootstrap-password admin \
--bootstrap-admin-url http://node1:35357/v3/ \
--bootstrap-internal-url http://node1:5000/v3/ \
--bootstrap-public-url http://node1:5000/v3/ \
--bootstrap-region-id RegionOne
7.修改http服务的配置文件
/etc/httpd/conf/httpd.conf
###################################################
ServerName controller
###################################################
8.做一个keystone的软连接
ln -s /usr/share/keystone/wsgi-keystone.conf /etc/httpd/conf.d/
9.启动http服务
systemctl enable httpd.service
systemctl start httpd.service
10.字符界面登录(配置管理帐户)
vim openrc
###################################################
export OS_USERNAME=admin
export OS_PASSWORD=admin
export OS_PROJECT_NAME=admin
export OS_USER_DOMAIN_NAME=Default
export OS_PROJECT_DOMAIN_NAME=Default
export OS_AUTH_URL=http://node1:35357/v3
export OS_IDENTITY_API_VERSION=3
###################################################
source openrc



 浙公网安备 33010602011771号