下载地址:http://www.apache.org/dyn/closer.lua/flume/1.6.0/apache-flume-1.6.0-bin.tar.gz
1.解压
tar -zxvf apache-flume-1.6.0-bin.tar.gz -C /opt/bigdata/
2.改名
mv apache-flume-1.6.0-bin flume-1.6.0
3.cd flume-1.6.0
4.删除文档
rm -rf docs/
5.cd conf
6.改名
mv flume-env.sh.template flume.env.sh
7.编辑 vi flume.env.sh
配置java环境
export JAVA_HOME=/usr/java/xxx

可以通过 :! ls /usr/java 查看具体路径
8.配置flume环境 、etc/profile
9.source /etc/profile
10. fl + table键测试安装是否成功

11.查看版本信息

12.启动Flume
- 创建文件 option
- 配置option文件
# example.conf: A single-node Flume configuration

# Name the components on this agent
a1.sources = r1
a1.sinks = k1
a1.channels = c1

# Describe/configure the source
a1.sources.r1.type = netcat
a1.sources.r1.bind = node03
a1.sources.r1.port = 44444

# Describe the sink
a1.sinks.k1.type = logger

# Use a channel which buffers events in memory
a1.channels.c1.type = memory
a1.channels.c1.capacity = 1000
a1.channels.c1.transactionCapacity = 100

# Bind the source and sink to the channel
a1.sources.r1.channels = c1
a1.sinks.k1.channel = c1
#a1是agent的名称 因为flumn就是个agent
#Sources 数据源
#Sinks 发送
#channels管道
#R1.type netcat 网咯传输方式
#Ke02 那台机器
#端口号
#logger sink输出方式到控制台
#管道的存储方式内存、缓存区内容纳多少条记录、每次传输拿多少条记录
#将sink、sources、channels之间连接起来
- 启动命令
flume-ng agent --conf-file option --name a1 -Dflume.root.logger=INFO,console
option 上面的文件
--name a1 文件名 a1也是内容里面的开头信息,不能乱写
13.测试
- linux测试
- 下载telnet工具 yum install telnet -y
- telnet node03 44444
- 发送消息,flume界面会接受到
windows测试 - 打开telnet,在软件卸载哪里
- telnet node03 44444
- 关闭telnet
1.ctrl + ]
2.quit
两台Flume配置,telnet访问方式
#ke02、ke03配置flume对应的环境信息 #ke02: # Name the components on this agent a1.sources = r1 a1.sinks = k1 a1.channels = c1 # Describe/configure the source a1.sources.r1.type = netcat a1.sources.r1.bind = ke02 a1.sources.r1.port = 44444 # Describe the sink a1.sinks.k1.type = avro a1.sinks.k1.hostname = ke03 a1.sinks.k1.port = 10086 # Use a channel which buffers events in memory a1.channels.c1.type = memory a1.channels.c1.capacity = 1000 a1.channels.c1.transactionCapacity = 100 # Bind the source and sink to the channel a1.sources.r1.channels = c1 a1.sinks.k1.channel = c1 #flume-ng agent --conf-file option2 --name a1 -Dflume.root.logger=INFO,console#ke03 # Name the components on this agent a1.sources = r1 a1.sinks = k1 a1.channels = c1 # Describe/configure the source a1.sources.r1.type = avro a1.sources.r1.bind = ke03 a1.sources.r1.port = 10086 # Describe the sink a1.sinks.k1.type = logger # Use a channel which buffers events in memory a1.channels.c1.type = memory a1.channels.c1.capacity = 1000 a1.channels.c1.transactionCapacity = 100 # Bind the source and sink to the channel a1.sources.r1.channels = c1 a1.sinks.k1.channel = c1# flume-ng agent --conf-file option3 --name a1 -Dflume.root.logger=INFO,console
备注: 先启动ke03、在启动ke02
flume指定加载文件
# Name the components on this agent
a1.sources = r1
a1.sinks = k1
a1.channels = c1

# Describe/configure the source
a1.sources.r1.type = exec
a1.sources.r1.command = tail -F /root/log

# Describe the sink
a1.sinks.k1.type = logger

# Use a channel which buffers events in memory
a1.channels.c1.type = memory
a1.channels.c1.capacity = 1000
a1.channels.c1.transactionCapacity = 100

# Bind the source and sink to the channel
a1.sources.r1.channels = c1
a1.sinks.k1.channel = c1
备注:
- 每次重启都会重新加载/root/log文件,至于想每次加载多少行根据tail命令决定
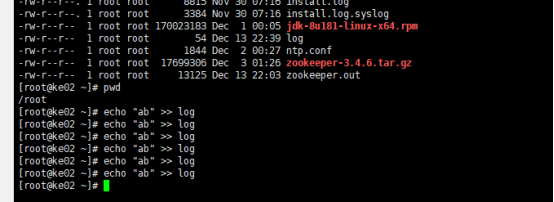
- 如下,给/root/log文件追加内容,实时被flume读取


flume指定加载文件夹下所有文件
# Name the components on this agent
a1.sources = r1
a1.sinks = k1
a1.channels = c1

# Describe/configure the source
a1.sources.r1.type = spooldir
a1.sources.r1.spoolDir = /root/data/
a1.sources.r1.fileHeader = true
#a1.sources.r1.fileSuffix=.msb

# Describe the sink
a1.sinks.k1.type = logger

# Use a channel which buffers events in memory
a1.channels.c1.type = memory
a1.channels.c1.capacity = 1000
a1.channels.c1.transactionCapacity = 100

# Bind the source and sink to the channel
a1.sources.r1.channels = c1
a1.sinks.k1.channel = c1
备注:
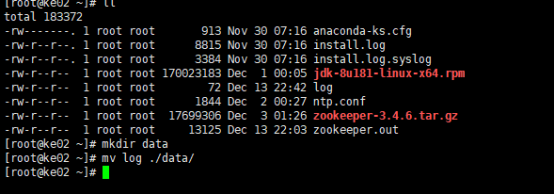
- 目标文件夹/root/data/需要先创建
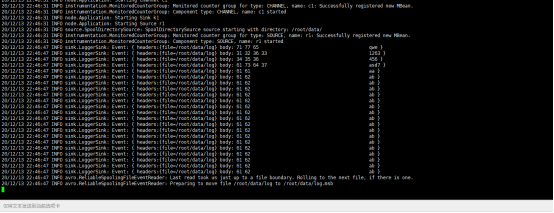
- .COMPLETED是已经读取过该文件,则下次重启不加载该文件

- 如果想加载已经读取过得文件,则增加配置a1.sources.r1.fileSuffix=.msb(配置任意后缀)
- 如下将log文件移入/root/data文件夹中,数据被加载


fulme加载telnet内容到HDFS中
# Name the components on this agent
a1.sources = r1
a1.sinks = k1
a1.channels = c1

# Describe/configure the source
a1.sources.r1.type = netcat
a1.sources.r1.bind = ke02
a1.sources.r1.port = 44444

# Describe the sink
a1.sinks.k1.type = hdfs
a1.sinks.k1.hdfs.path = /flume/events/%y-%m-%d/%H%M/%S
a1.sinks.k1.hdfs.filePrefix = events-
a1.sinks.k1.hdfs.round = true
a1.sinks.k1.hdfs.roundValue = 10
a1.sinks.k1.hdfs.roundUnit = second
a1.sinks.k1.hdfs.useLocalTimeStamp = true

# Use a channel which buffers events in memory
a1.channels.c1.type = memory
a1.channels.c1.capacity = 1000
a1.channels.c1.transactionCapacity = 100

# Bind the source and sink to the channel
a1.sources.r1.channels = c1
a1.sinks.k1.channel = c1
备注:以上代表意义查看官网
- 访问https://flume.apache.org/
- Documentation
- Flume User Guide
- 找对应文档内容及解释说明


【推荐】编程新体验,更懂你的AI,立即体验豆包MarsCode编程助手
【推荐】凌霞软件回馈社区,博客园 & 1Panel & Halo 联合会员上线
【推荐】抖音旗下AI助手豆包,你的智能百科全书,全免费不限次数
【推荐】轻量又高性能的 SSH 工具 IShell:AI 加持,快人一步