后台管理页面布局
一、整体分布
简单的一个页面布局,头部、左侧菜单栏,右侧内容,头部和菜单栏固定位置,内容部分如果很长就会出现滚动条
两种方法能实现,其实两种差别只有一个属性不一样。
1.1 使用position:fixed
1.先定义三个div标签
<body>
    <div class="pg_header"></div>
    <div class="pg_content"></div>
    <div class="pg_footer"></div>
</body>
2.设定头部样式,高48px,背景色蓝色
    <style>
        body{
            margin: 0 auto;
        }
        .pg_header{
            height: 48px;
            background-color: #2459a2;
            color: white;
        }

    </style>
顶部出现一个蓝色长条

3.在pg_content里划分出两个区域,一个左侧菜单栏,一个右侧内容区
一般会要求左侧菜单栏能固定位置,一直显示在左侧,高度就是整个浏览器高度
# 先增加两个div标签

 <div class="pg_content">
    <div class="menu"></div>
    <div class="content"></div>
</div>


# 为menu设置样式

.pg_content .menu{
            position: fixed;
            top: 50px;
            left: 0;
            bottom: 0;
            width: 200px;
            background-color: #dddddd;
        }
左侧增加一个灰色长条:

4.同样我们想要右侧的内容区也能像菜单栏一样,固定位置、并占据整个右侧位置。并且在内容过长时,会出现滚动条(overflow实现)
.pg_content .content{
            position: fixed;
            top: 50px;
            right: 0;
            bottom: 0;
            left: 202px;
            background-color: darkturquoise;
            overflow: auto;
        }
当内容很长时,会出现滚动条:

1.2 使用position:absolute
第二种方法相比第一种方法,只需将position:fixed改为position:absolute
再为content增加一个最小宽度的属性,当浏览器缩小时,小于一定宽度是,就会出现横滚动条,可以防止页面内容布局错乱,但是这样header也需要修改一下,加了最小宽度以后,header在有横滚动条时宽度无法满屏
<!DOCTYPE html>
<html lang="en">
<head>
    <meta charset="UTF-8">
    <title>Page_layout2</title>
    <style>
        body{
            margin: 0 auto;
        }
        .pg_header{
            position: fixed;
            top: 0;
            width: 100%;
            height: 48px;
            background-color: #2459a2;
            color: white;
        }
        .pg_content .menu{
            position: absolute;
            top: 50px;
            left: 0;
            bottom: 0;
            width: 200px;
            background-color: #dddddd;
        }
        .pg_content .content{
            position: absolute;
            top: 50px;
            right: 0;
            bottom: 0;
            left: 202px;
            background-color: darkturquoise;
            overflow: auto;
            min-width: 980px;
        }
    </style>
</head>
<body>
    <div class="pg_header"></div>
    <div class="pg_content">
        <div class="menu"></div>
        <div class="content">

        </div>
    </div>
    <div class="pg_footer"></div>
</body>
</html>
整体效果和上一个差不多: 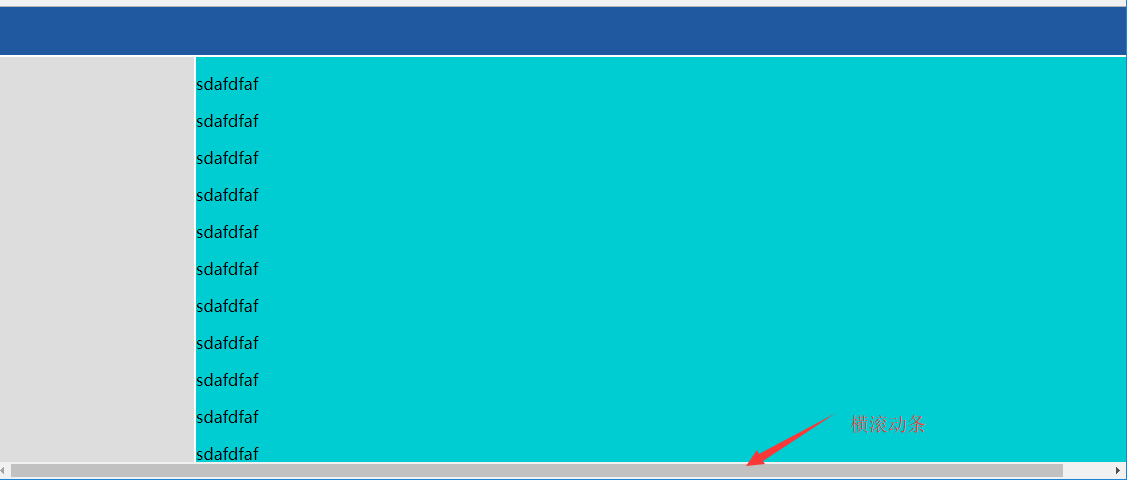
二、头部设计
2.1 头部左侧增加logo
(1)首先定义两个经常用到的float css样式
        .left{
            float: left;
        }
        .right{
            float: right;
        }
(2)在header下定义一个div
# 定义div
<div class="pg_header">
        <div class="logo left">
            <a href="https://www.google.com" target="_blank">
                <img src="images/logo.png">
            </a>
        </div>
</div>


# css样式
.pg_header .logo{
            height: 48px;
            width: 200px;
            text-align: center;
            color: white;
        }
.pg_header .logo a img{
            height: 48px;
            width: 50px;
        }
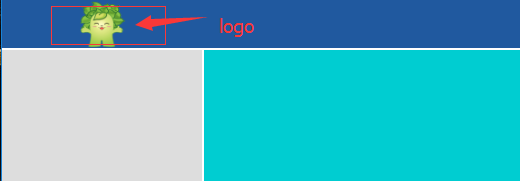
增加了logo:
2.2 header右侧增加登入信息
(1)头像
右侧个人信息其实只要一个头像,鼠标移到头像上时,会有信息框出现
# 在header中定义一个div标签
<div class="pg_header">
        <div class="person_info right">
            <img src="images/head.jpg">
        </div>
</div>

# 添加person_info的css样式

.pg_header .person_info{
            position: relative;
            height: 48px;
            width: 160px;
        }
.pg_header .person_info img{
            border: 0;
            height: 48px;
            width: 50px;
            /*使用border-radius可以定义边框的圆角程度*/
            border-radius: 50%;
        }
出现头像:

(2)增加一个div,用于显示信息和操作,其位置相对于peron_info固定
# 在person_info下增加一个div
<div class="info">
                <a>我的信息</a>
                <a>注销</a>
                <a>修改密码</a>
                <a>修改头像</a>
</div>

# 为其设置css样式

.pg_header .person_info .info{
            position: absolute;
            width: 150px;
            background-color: cornflowerblue;
            top: 50px;
            z-index: 20;
        }
.pg_header .person_info .info a{
            display: block;
            color: white;
        }
这样完成后还是不行,因为看不到这个标签,我们需要对pg_header也增加一个z-index属性,设置值为10

(3)默认情况下是看不到info这个标签的,所以还需要对info的css样式增加display:none属性
.pg_header .person_info .info{
            position: absolute;
            width: 150px;
            background-color: cornflowerblue;
            top: 50px;
            z-index: 20;
            display: none;
        }
(4)显示info标签
增加了display:none后,信息标签默认看不到,现在的需求是鼠标移到person_info这个div标签时,info标签显示
# 增加一个css样式就能实现

.pg_header .person_info:hover .info{
            display: block;
        }


# hover就是为元素增加样式的,上面的意思就是当鼠标移到person_info这个标签时,就将info标签的display设置为block
鼠标移到头像出就显示信息:

2.3 插入图标
头部信息中通常还有邮件和提醒服务存在,也就是插入一下图标,登入后提示一下信息需要处理。
需要的图标可以在https://fontawesome.com中去下载,并放到自己的项目中。
(1)寻找图标
在下载图标的网站上寻找需要的图标

点击相应的图标,拷贝

(2)增加邮件和铃铛的图标
# 引用css样式
<link rel="stylesheet" href="fontawesome-free-5.1.0-web/css/all.css">

# 在pg_header下增加两个div标签(person_info div之后)

        <div class="icons right">
            <i class="far fa-bell"></i>
        </div>
        <div class="icons right">
            <i class="far fa-envelope"></i>
        </div>

# 增加css样式
        .pg_header .icons{
            line-height: 48px;
            padding: 0 20px 0 5px;
        }
        .pg_header .icons:hover{
            background-color: cornflowerblue;
        }
效果:

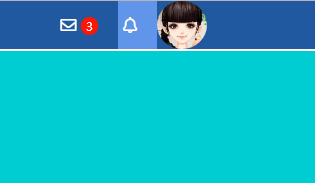
(3)增加消息数量显示
如果有3封邮件,就在邮件旁边显示数字3
# 邮件图标的div下增加一个span标签
<div class="icons right">
       <i class="far fa-envelope"></i>
       <span>3</span>
</div>

# 为span 添加css样式

.pg_header .icons span{
            padding: 1px 5px;
            line-height: 1px;
            border-radius: 50%;
            background-color: red;
            font-size: 12px;
        }
效果:
完整html:
<!DOCTYPE html>
<html lang="en">
<head>
    <meta charset="UTF-8">
    <title>Page_layout2</title>
    <link rel="stylesheet" href="fontawesome-free-5.1.0-web/css/all.css">
    <style>
        body{
            margin: 0 auto;
        }
        .left{
            float: left;
        }
        .right{
            float: right;
        }

        .pg_header{
            position: fixed;
            top: 0;
            width: 100%;
            height: 48px;
            background-color: #2459a2;
            color: white;
            z-index: 10;
        }
        .pg_header .logo{
            height: 48px;
            width: 200px;
            text-align: center;
            color: white;
        }
        .pg_header .logo a img{
            height: 48px;
            width: 50px;
        }
        .pg_header .person_info{
            position: relative;
            height: 48px;
            width: 160px;
            /*text-align: center;*/
        }
        .pg_header .person_info img{
            border: 0;
            height: 48px;
            width: 50px;
            /*使用border-radius可以定义边框的圆角程度*/
            border-radius: 50%;
        }
        .pg_header .person_info .info{
            position: absolute;
            width: 150px;
            background-color: cornflowerblue;
            top: 50px;
            z-index: 20;
            display: none;
        }
        .pg_header .person_info .info a{
            display: block;
            color: white;
        }
        .pg_header .person_info:hover .info{
            display: block;
        }
        .pg_header .icons{
            line-height: 48px;
            padding: 0 20px 0 5px;
        }
        .pg_header .icons:hover{
            background-color: cornflowerblue;
        }
        .pg_header .icons span{
            padding: 1px 5px;
            line-height: 1px;
            border-radius: 50%;
            background-color: red;
            font-size: 12px;
        }
        .pg_content .menu{
            position: absolute;
            top: 50px;
            left: 0;
            bottom: 0;
            width: 200px;
            background-color: #dddddd;
        }
        .pg_content .content{
            position: absolute;
            top: 50px;
            right: 0;
            bottom: 0;
            left: 202px;
            background-color: darkturquoise;
            overflow: auto;
            min-width: 980px;
            z-index: 8;
        }
    </style>
</head>
<body>
    <div class="pg_header">
        <div class="logo left">
            <a href="https://www.google.com" target="_blank">
                <img src="images/logo.png">
            </a>
        </div>
        <div class="person_info right">
            <img src="images/head.jpg">
            <div class="info">
                <a>我的信息</a>
                <a>注销</a>
                <a>修改密码</a>
                <a>修改头像</a>
            </div>
        </div>
        <div class="icons right">
            <i class="far fa-bell"></i>
        </div>
        <div class="icons right">
            <i class="far fa-envelope"></i>
            <span>3</span>
        </div>
    </div>
    <div class="pg_content">
        <div class="menu"></div>
        <div class="content">

        </div>
    </div>
    <div class="pg_footer"></div>
</body>
</html>
