IDEA Springboot 配置外部 Tomcat 和 SSL配置 使用阿里云SSL证书
- IDEA 配置外部Tomcat
- IDEA配置SSL
- 配置Tomcat的SSL
- 部署war到Tomcat
1,IDEA 配置外部Tomcat
IDEA -> Run -> Edit Configurations
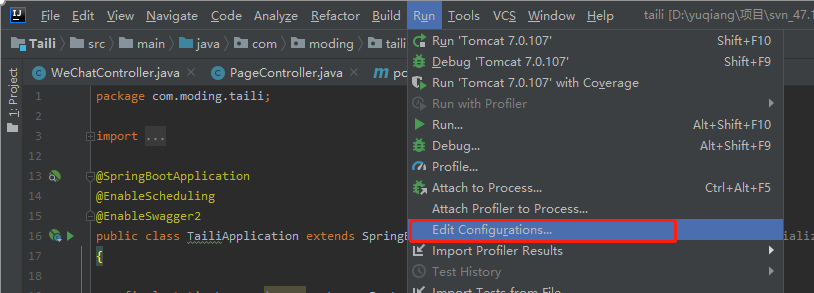
Tomcat Server配置

- IDEA配置SSL
启动项增加如图代码
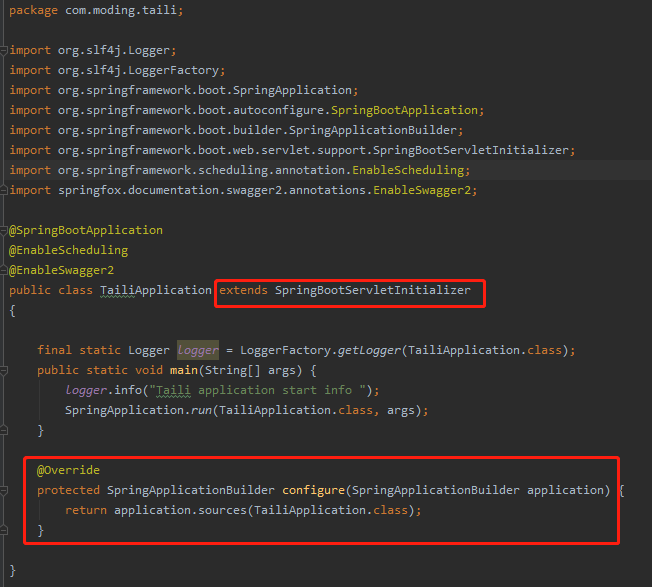
@SpringBootApplication
@EnableScheduling
@EnableSwagger2
public class TailiApplication extends SpringBootServletInitializer
{
final static Logger logger = LoggerFactory.getLogger(TailiApplication.class);
public static void main(String[] args) {
    logger.info("Taili application start info ");
    SpringApplication.run(TailiApplication.class, args);
}

@Override
protected SpringApplicationBuilder configure(SpringApplicationBuilder application) {
    return application.sources(TailiApplication.class);
}
}
添加如下图依赖

<dependency>
	<groupId>org.springframework.boot</groupId>
	<artifactId>spring-boot-starter-tomcat</artifactId>
	<scope>provided</scope>
</dependency>
配置ssl相关内容,application.yml

- 配置Tomcat的SSL
我用的是tomcat7官网下载后解压到D盘目录,不要放到C盘会有权限问题
下载地址: https://tomcat.apache.org/download-70.cgi
解压后进到conf目录编辑server.xml文件修改下面两处内容


<Connector port="8443" protocol="org.apache.coyote.http11.Http11Protocol"
maxThreads="150" SSLEnabled="true" scheme="https" secure="true"
keystoreFile="D:\Program Files\apache-tomcat-7.0.107\cert\123456.pfx"
keystoreType="PKCS12"
keystorePass="56546123"
clientAuth="false" sslProtocol="TLS"
ciphers="TLS_RSA_WITH_AES_128_CBC_SHA,TLS_RSA_WITH_AES_256_CBC_SHA,TLS_ECDHE_RSA_WITH_AES_128_CBC_SHA,TLS_ECDHE_RSA_WITH_AES_128_CBC_SHA256,TLS_RSA_WITH_AES_128_CBC_SHA256,TLS_RSA_WITH_AES_256_CBC_SHA256"/>
<Host name="localhost" appBase="webapps"
unpackWARs="true" autoDeploy="true">
<!-- SingleSignOn valve, share authentication between web applications
Documentation at: /docs/config/valve.html -->
<!--
<Valve className="org.apache.catalina.authenticator.SingleSignOn" />
-->
<!-- Access log processes all example.
Documentation at: /docs/config/valve.html
Note: The pattern used is equivalent to using pattern="common" -->
<Valve className="org.apache.catalina.valves.AccessLogValve" directory="logs"
prefix="localhost_access_log." suffix=".txt"
pattern="%h %l %u %t "%r" %s %b" />
<Context docBase="taili-1.0" path="" reloadable="true"/>
</Host>
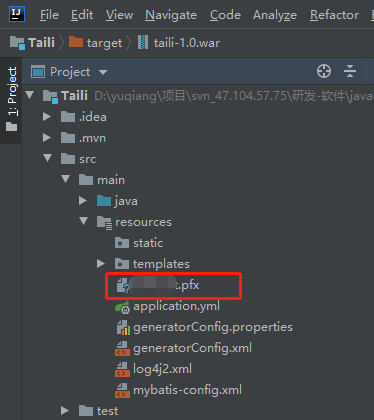
将阿里云生成的证书放到resources目录下 见下图
- 部署war到Tomcat
注意 将tomcat安装目录webapps文件夹中文件全部删除

将项目添加到tomcat
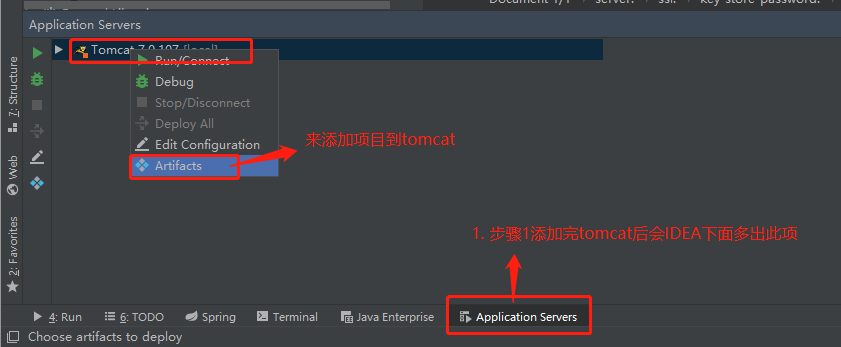
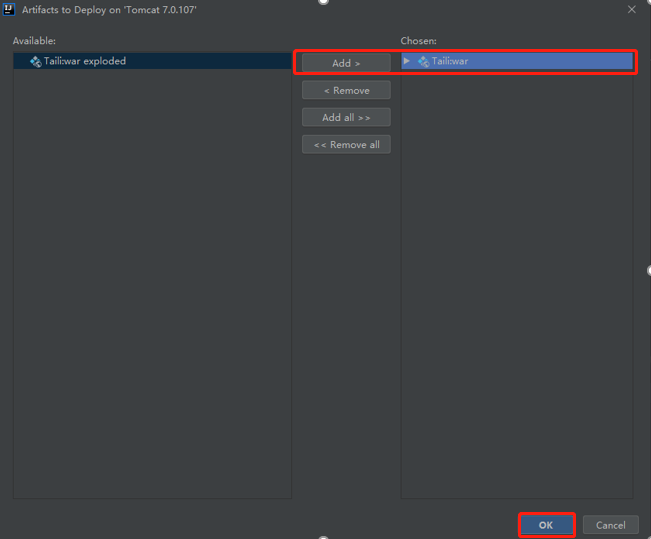
编译工程 IDEA -> Build -> Build Project
然后见下图启动tomcat
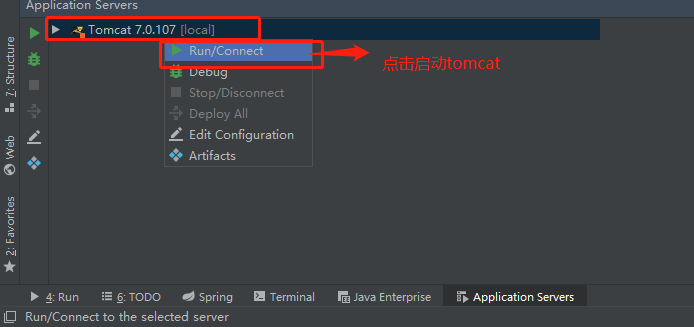
启动后会在tomcat安装目录webapps文件夹下生产ROOT文件夹

此时就可以通过访问网页的形式来访问了如https://localhost:8443
下图是自己随便写的demo页面


