
SpringBoot之hello world!
哈哈哈,还是在元旦这一天对你下手了。麻溜的给自己充电,在这个寒冬,不断听到裁员的消息或者新闻,可对于我这个外包和外派的人来说,好像并没有受到什么影响。可能是人手不够可能是项目很忙。对于明年的三月金四月银,我想在帝都,能有学习的时间还是要及时抓住,因为学习成本太高了。不罗嗦了,以后从帝都回去了再好好罗嗦。
SpringBoot入门学习参考:https://www.cnblogs.com/ityouknow/p/5662753.html
1、首先创建一个maven项目,创建过程如下所示:


2、然后添加maven依赖的jar包,如下所示:

<project xmlns="http://maven.apache.org/POM/4.0.0" xmlns:xsi="http://www.w3.org/2001/XMLSchema-instance" xsi:schemaLocation="http://maven.apache.org/POM/4.0.0 http://maven.apache.org/xsd/maven-4.0.0.xsd">
  <modelVersion>4.0.0</modelVersion>
  <parent>
    <groupId>org.springframework.boot</groupId>
    <artifactId>spring-boot-starter-parent</artifactId>
    <version>1.5.10.RELEASE</version>
  </parent>
  <groupId>com.bie</groupId>
  <artifactId>spring-boot-hello</artifactId>
  <version>0.0.1-SNAPSHOT</version>


  <!-- 修改jdk版本,修改完jdk以后,更新项目,maven, Update Project-->
  <properties>
      <json.version>1.8</json.version>
  </properties>


  <dependencies>
      <!-- 注入spring boot的启动坐标 -->
      <!-- https://mvnrepository.com/artifact/org.springframework.boot/spring-boot-starter-web -->
    <!-- 注入spring boot的启动器 -->
    <dependency>
        <groupId>org.springframework.boot</groupId>
        <artifactId>spring-boot-starter-web</artifactId>
    </dependency>
  </dependencies>


</project>
由于java是单继承的,如果pom配置里面已经继承了其他的框架组件,那么springboot还可以如下方式实现进行依赖:
 1 <project xmlns="http://maven.apache.org/POM/4.0.0" xmlns:xsi="http://www.w3.org/2001/XMLSchema-instance" xsi:schemaLocation="http://maven.apache.org/POM/4.0.0 http://maven.apache.org/xsd/maven-4.0.0.xsd">
 2   <modelVersion>4.0.0</modelVersion>
 3   <!-- <parent>
 4     <groupId>org.springframework.boot</groupId>
 5     <artifactId>spring-boot-starter-parent</artifactId>
 6     <version>1.5.10.RELEASE</version>
 7   </parent> -->
 8   <groupId>com.bie</groupId>
 9   <artifactId>spring-boot-hello</artifactId>
10   <version>0.0.1-SNAPSHOT</version>
11
12
13   <!-- 修改jdk版本,修改完jdk以后,更新项目,maven, Update Project-->
14   <properties>
15       <json.version>1.8</json.version>
16   </properties>
17
18   <dependencyManagement>
19       <dependencies>
20           <dependency>
21               <groupId>org.springframework.boot</groupId>
22               <artifactId>spring-boot-dependencies</artifactId>
23               <version>1.5.10.RELEASE</version>
24               <scope>import</scope>
25               <type>pom</type>
26           </dependency>
27       </dependencies>
28   </dependencyManagement>
29
30   <dependencies>
31       <!-- 注入spring boot的启动坐标 -->
32       <!-- https://mvnrepository.com/artifact/org.springframework.boot/spring-boot-starter-web -->
33     <!-- 注入spring boot的启动器 -->
34     <dependency>
35         <groupId>org.springframework.boot</groupId>
36         <artifactId>spring-boot-starter-web</artifactId>
37     </dependency>
38   </dependencies>
39
40
41
42 </project>
3、开发一个最简单的action,
 1 package com.bie.action;
 2
 3 import java.util.HashMap;
 4 import java.util.Map;
 5
 6 import org.springframework.stereotype.Controller;
 7 import org.springframework.web.bind.annotation.RequestMapping;
 8 import org.springframework.web.bind.annotation.ResponseBody;
 9
10 /**
11  *
12  * @Description TODO
13  * @author biehl
14  * @Date 2018年12月22日 下午5:54:41
15  *
16  */
17 @Controller
18 public class HelloWorld {
19
20     /**
21      *
22      * @return
23      */
24     @RequestMapping("/hello")
25     @ResponseBody
26     public Map<String, Object> helloWorld() {
27         Map<String,Object> map = new HashMap<String, Object>();
28         map.put("msg", "hello world SpringBoot !");
29         return map;
30     }
31
32 }
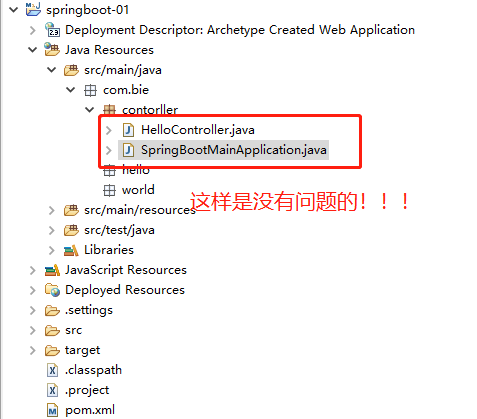
4、书写一个SpringBoot的启动类。建议写代码的时候事先了解一下SpringBoot,这样帮助自己理解和学习。
package com.bie.action;

import org.springframework.boot.SpringApplication;
import org.springframework.boot.autoconfigure.SpringBootApplication;

/**
 *
 * @Description TODO
 * @author biehl
 * @Date 2018年12月22日 下午7:39:50
 *
 * 1、启动器类和项目同包不会出现问题。
 *        平行包会出现问题。
 */
@SpringBootApplication
public class SpringBootMain {

    public static void main(String[] args) {
        //启动类
        SpringApplication.run(SpringBootMain.class, args);
    }
}
5、看看运行效果吧:

运行效果如下所示:

如果你的SpringBoot项目启动了,但是页面访问无法访问,可能是你的启动类放置的位置错了哟。
6、将SpringBoot的项目打成可执行的jar包。在pom.xml引用这个插件。
1 <!--此插件,可以将该应用打包成一个可以执行的jar包 -->
2     <build>
3         <plugins>
4             <plugin>
5                 <groupId>org.springframework.boot</groupId>
6                 <artifactId>spring-boot-maven-plugin</artifactId>
7             </plugin>
8         </plugins>
9     </build>

运行如下所示:
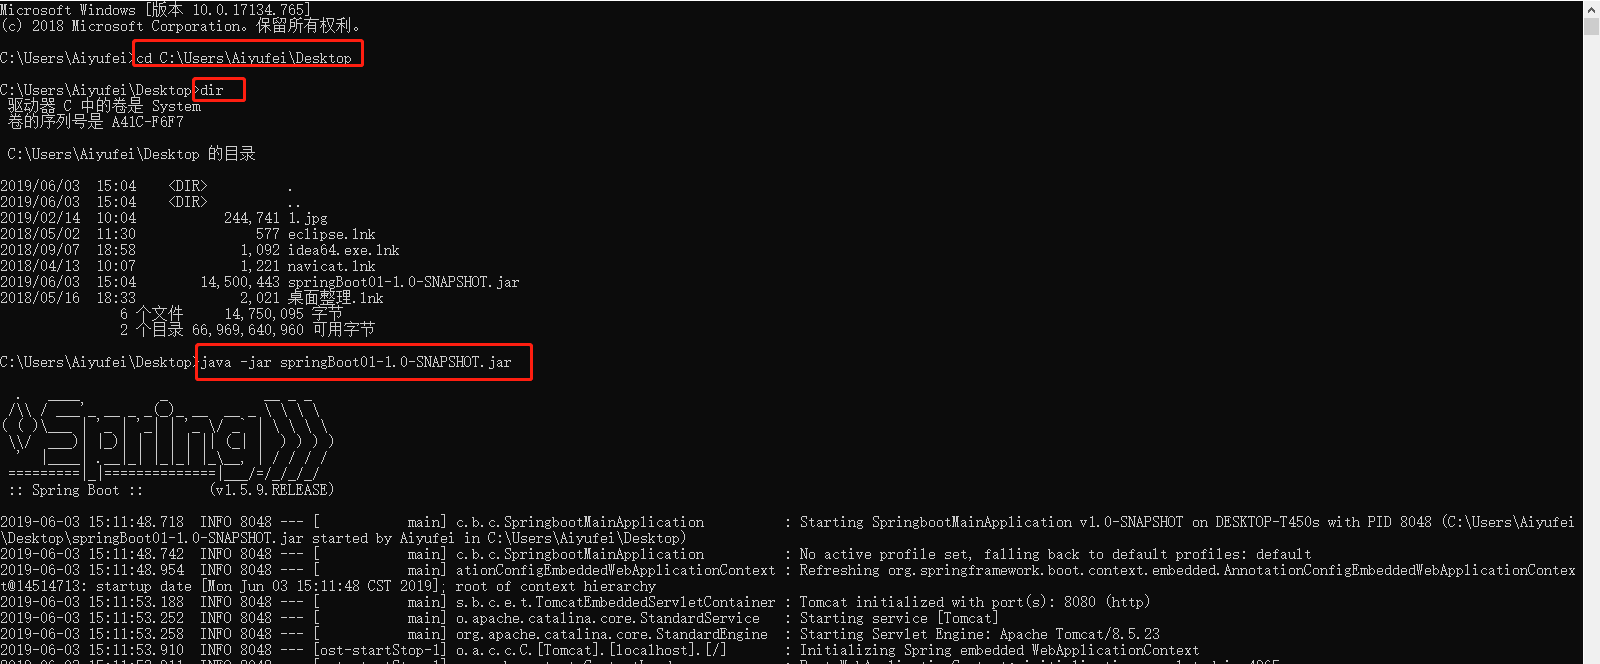
访问地址:http://localhost:8080/hello

今天2018-12-24 18:33:42,祝大家平安夜快乐,不管过节不过节呢。都开开心心上班,及时充电。
待续......
分类:
SpringBoot


【推荐】国内首个AI IDE,深度理解中文开发场景,立即下载体验Trae
【推荐】编程新体验,更懂你的AI,立即体验豆包MarsCode编程助手
【推荐】抖音旗下AI助手豆包,你的智能百科全书,全免费不限次数
【推荐】轻量又高性能的 SSH 工具 IShell:AI 加持,快人一步
· 如何编写易于单元测试的代码
· 10年+ .NET Coder 心语,封装的思维:从隐藏、稳定开始理解其本质意义
· .NET Core 中如何实现缓存的预热?
· 从 HTTP 原因短语缺失研究 HTTP/2 和 HTTP/3 的设计差异
· AI与.NET技术实操系列:向量存储与相似性搜索在 .NET 中的实现
· 周边上新:园子的第一款马克杯温暖上架
· Open-Sora 2.0 重磅开源!
· 分享 3 个 .NET 开源的文件压缩处理库,助力快速实现文件压缩解压功能!
· Ollama——大语言模型本地部署的极速利器
· DeepSeek如何颠覆传统软件测试?测试工程师会被淘汰吗?