opencv——图像的灰度处理(线性变换/拉伸/直方图/均衡化)
实验内容及实验原理:
1、灰度的线性变换
灰度的线性变换就是将图像中所有的点的灰度按照线性灰度变换函数进行变换。该线性灰度变换函数是一个一维线性函数:f(x)=a*x+b
其中参数a为线性函数的斜率,b为线性函数的在y轴的截距,x表示输入图像的灰度,f(x)表示输出图像的灰度。
要求:输入一幅图像,根据输入的斜率和截距进行线性变换,并显示。
2、灰度拉伸
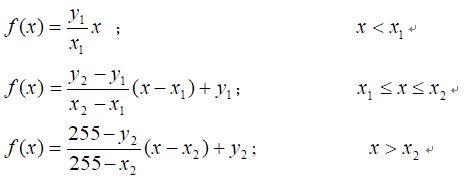
灰度拉伸和灰度线性变换相似。不同之处在于它是分段线性变换。表达式如下:
其中,x1和x2是分段函数的转折点。
要求:输入一幅图像,根据选择的转折点,进行灰度拉伸,显示变换后的图像。
3、灰度直方图
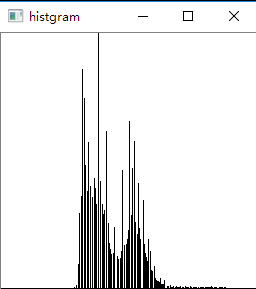
灰度直方图是灰度值的函数,描述的是图像中具有该灰度值的像素的个数,其横坐标表示像素的灰度级别,纵坐标表示该灰度出现的频率(象素的个数)。
要求:输入一幅图像,显示它的灰度直方图,可以根据输入的参数(上限、下限)显示特定范围的灰度直方图。
4、直方图均衡:要求
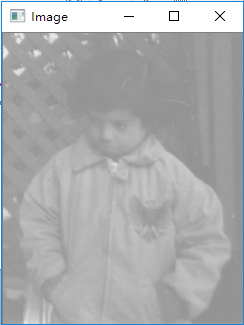
1) 显示一幅图像pout.bmp的直方图;
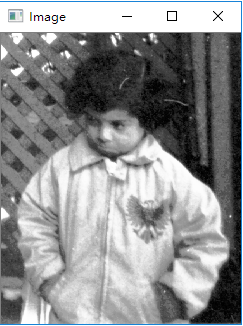
2) 用直方图均衡对图像pout.bmp进行增强;
3) 显示增强后的图像。
实验过程:
打开原图像,创建结果图像:
IplImage *src = cvLoadImage("pout.bmp", 1);//原图
IplImage *dst =cvCreateImage(cvSize(src->width, src->height), IPL_DEPTH_8U, 1);
函数说明:
CVAPI(IplImage*)cvLoadImage( constchar* filename, intiscolorCV_DEFAULT (CV_LOAD_IMAGE_COLOR));

//Iscolor的值:
enum{
/* 8bit, color ornot */  CV_LOAD_IMAGE_UNCHANGED  =-1,
/* 8bit, gray */         CV_LOAD_IMAGE_GRAYSCALE  =0,
/* ?, color */           CV_LOAD_IMAGE_COLOR      =1,
/* any depth, ? */       CV_LOAD_IMAGE_ANYDEPTH   =2,
/* ?, any color */       CV_LOAD_IMAGE_ANYCOLOR   =4,
/* ?, no rotate */       CV_LOAD_IMAGE_IGNORE_ORIENTATION  =128
};

CVAPI(IplImage*)  cvCreateImage( CvSizesize, intdepth, intchannels );
@param size Imagewidth and height
@param depth Bitdepth of image elements. See IplImage for valid depths.
@param channelsNumber of channels per pixel. See IplImage for details. This function onlycreates
images withinterleaved channels.
图像显示:
cvNamedWindow("Image", 1);//创建窗口
cvShowImage("Image", dst);//显示图像,在指定窗口显示制定图像
cvWaitKey(0); //等待按键
cvDestroyWindow("Image");//销毁窗口

//函数说明
CVAPI(int)cvNamedWindow( constchar* name, intflagsCV_DEFAULT(CV_WINDOW_AUTOSIZE) );
Flags:
CV_WINDOW_NORMAL   =0x00000000, //the user canresize the window (no constraint)  / alsouse to switch a fullscreen window to a normal size
CV_WINDOW_AUTOSIZE = 0x00000001, //the user cannot resize the window, the size isconstrainted by the image displayed
CV_WINDOW_OPENGL   =0x00001000, //window with openglsupport
灰度线性变换
对图像的每个像素遍历,获取原图像的灰度值,然后计算线性变换后的值,设置目标图像相应位置的灰度值
for (int i = 0;i < src->height; i++){
     for (int j = 0; j < src->width; j++){
         CvScalar s =cvGet2D(src, i, j);
         s.val[0] = fa * s.val[0] + fb;
         cvSet2D(dst, i, j, s);
     }
}

//函数说明:
//参数为图像指针和坐标,如果指定位置不存在则返回0
CVAPI(CvScalar)cvGet2D( constCvArr* arr, intidx0, intidx1 );
The functions returna specific array element. In the case of a sparse array the functions return 0
if the requestednode does not exist (no new node is created by the functions).
@param arr Inputarray
@param idx0 Thefirst zero-based component of the element index
//返回值类型:
typedefstructCvScalar{
double val[4];
}
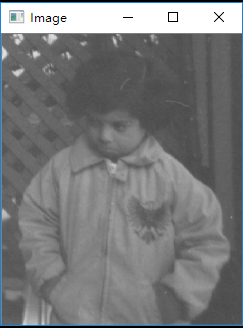
变换前:
变换后:
灰度拉伸
根据当前灰度值所处的区间进行相应的变换
for (int i = 0;i < src->height; i++){
     for (int j = 0; j < src->width; j++){
         CvScalar s =cvGet2D(src, i, j);
         if(s.val[0] < x1)
              s.val[0] = y1 / x1*s.val[0];
         elseif (s.val[0] <= x2)
              s.val[0] = (y2 - y1) / (x2 -x1)*(s.val[0] - x1) + y1;
         else
              s.val[0] = (255 - y2) / (255 -x2)*(s.val[0] - x2) + y2;
         cvSet2D(dst, i, j, s);
     }
}
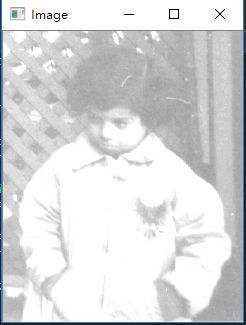
变换前:
变换后:
灰度直方图
将灰度分为256个离散的值进行统计,存放在table数组中
for (int i = 0;i < src->height; i++){
     for (int j = 0; j < src->width; j++){
         CvScalar s =cvGet2D(src, i, j);
         table[(int)s.val[0]]++;
     }
}

//找出灰度出现次数的最大值,以对直方图进行缩放
for (int i = 0;i < 256; i++)
     if (table[i]> max)max = table[i];

//创建直方图:
Mat histgram(256, 256, CV_8U, Scalar(255));

//构造函数说明:
/** @overload
@param rows Numberof rows in a 2D array.
@param cols Numberof columns in a 2D array.
@param type Arraytype. Use CV_8UC1...CV_64FC4 to create 1-4 channel matrices, orCV_8UC(n)...CV_64FC(n) to create multi-channel (up toCV_CN_MAX channels) matrices.
@param s An optionalvalue to initialize each matrix element with. To set all the matrix elements tothe particular value after the construction, use theassignment operator
Mat::operator=(constScalar& value) .
*/
Mat(introws, intcols, inttype, constScalar& s);//s是所有像素的初始化值

//绘制直方图:在指定的范围内画线,线的长度为指定会的像素个数,并且缩放到255之间
for (int i =range[0]; i <= range[1]; i++)
     line(histgram, Point(i,255), Point(i, (255 - table[i]*255/max)), Scalar(0));
直方图:
直方图均衡
计算累计直方图并取整确定映射关系:
for (int i = 1;i < 256; i++){
     s_table[i%2] = s_table[(i - 1)%2] + (float)table[i] / sum;
     new_table[i] = (int)(s_table[i%2]* 255 + 0.5);
}
用新值绘制新图
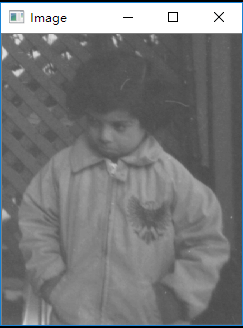
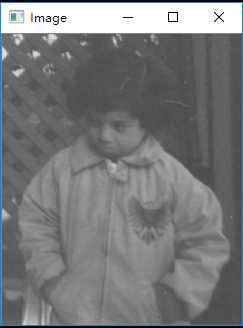
均衡前:
均衡后:
源码:
// opencv1.cpp: 定义控制台应用程序的入口点。
//

#include "stdafx.h"
#include<iostream>
#include <opencv2/core/core.hpp>
#include <opencv2/highgui/highgui.hpp>
#include <cv.h>
//#include <highgui.h>
#include <cxcore.h>
#include <cvaux.h>
#include <stdlib.h>
#include <imgproc.hpp>

using namespace cv;

int main()
{
	IplImage *src;
	src = cvLoadImage("pout.bmp", 1);//原图
	IplImage *dst = cvCreateImage(cvSize(src->width, src->height), IPL_DEPTH_8U, 1);


	std::cout << "灰度线性变换..."<<std::endl;
	double fa = 1.0, fb = 0.0;
	while (fa >= 0)
	{
		for (int i = 0; i < src->height; i++)
		{
			for (int j = 0; j < src->width; j++)
			{
				CvScalar s = cvGet2D(src, i, j);
				s.val[0] = fa * s.val[0] + fb;
				cvSet2D(dst, i, j, s);
			}
		}
		cvNamedWindow("Image", 1);//创建窗口
		cvShowImage("Image", dst);//显示图像
		cvWaitKey(0); //等待按键
		cvDestroyWindow("Image");//销毁窗口

		std::cin >> fa >> fb;
	}

	std::cout << "灰度拉伸..."<<std::endl;
	double x1 = 0.0, y1 = 0.0, x2 = 1.0, y2 = 1.0;
	while (x1 >= 0)
	{
		for (int i = 0; i < src->height; i++)
		{
			for (int j = 0; j < src->width; j++)
			{
				CvScalar s = cvGet2D(src, i, j);
				if (s.val[0] < x1)
				{
					s.val[0] = y1 / x1*s.val[0];
				}
				else if (s.val[0] <= x2)
				{
					s.val[0] = (y2 - y1) / (x2 - x1)*(s.val[0] - x1) + y1;
				}
				else
				{
					s.val[0] = (255 - y2) / (255 - x2)*(s.val[0] - x2) + y2;
				}
				cvSet2D(dst, i, j, s);
			}
		}
		cvNamedWindow("Image", 1);//创建窗口
		cvShowImage("Image", dst);//显示图像
		cvWaitKey(0); //等待按键
		cvDestroyWindow("Image");//销毁窗口

		std::cin >> x1 >> y1 >> x2 >> y2;
	}


	std::cout << "灰度直方图..." << std::endl;

	int table[256] = { 0 };
	int range[] = { 0, 255 };
	std::cin >> range[0] >> range[1];
	for (int i = 0; i < src->height; i++)
	{
		for (int j = 0; j < src->width; j++)
		{
			CvScalar s = cvGet2D(src, i, j);
			table[(int)s.val[0]]++;
		}
	}
	double max = 0;
	int sum = 0;
	for (int i = 0; i < 256; i++)
	{
		sum += table[i];
		if (table[i] > max)max = table[i];
		//std::cout << table[i] << std:: endl;
	}
	Mat histgram(256, 256, CV_8U, Scalar(255));
	for (int i = range[0]; i <= range[1]; i++)
	{
		line(histgram, Point(i, 255), Point(i, (255 - table[i]*255/max)), Scalar(0));
	}
	namedWindow("histgram");
	imshow("histgram", histgram);
	waitKey(0);


	std::cout << "灰度均衡直方图..." << std::endl;
	int new_table[256] = { 0 };
	float s_table[2] = { (float)table[0]/sum };
	for (int i = 1; i < 256; i++)
	{
		s_table[i%2] = s_table[(i - 1)%2] + (float)table[i] / sum;
		new_table[i] = (int)(s_table[i%2] * 255 + 0.5);
	}
	for (int i = 0; i < src->height; i++)
	{
		for (int j = 0; j < src->width; j++)
		{
			CvScalar s = cvGet2D(src, i, j);
			s.val[0] =new_table[(int)s.val[0]];
			cvSet2D(dst, i, j, s);
		}
	}


	cvNamedWindow("Image", 1);//创建窗口
	cvShowImage("Image", dst);//显示图像
	cvWaitKey(0); //等待按键
	cvDestroyWindow("Image");//销毁窗口


	cvReleaseImage(&dst); //释放图像
}
原图:(原来是bmp格式的,但是不能上传,改成png格式了,分辨率都是256X256的)



 浙公网安备 33010602011771号