4. Spring配置文件 - Bean的依赖注入方式
我们之前写的代码 只有实现业务逻辑层,实际MVC模式开发中 业务逻辑层 和 Dao【数据库】层是一起用的,那么在MVC开发模式中:
业务逻辑层里面要调用Dao层,怎么来获取Bean呢? 我们写个简单的示范:【先来个MVC Service调用Dao 层的模拟:】
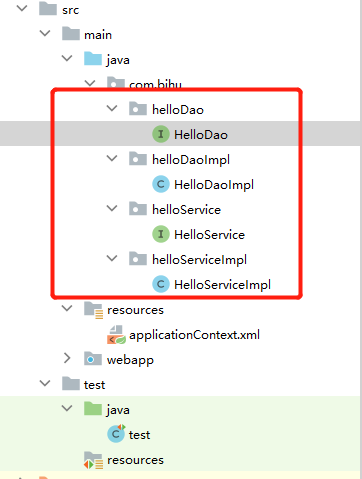
图片可以看出 其中 接口都是 void show() 方法,
实现都是实现 show方法:
DAOIMPL:
   public void show() {
        System.out.println("HelloDaoImpl 的 show 方法.");
    }
SERVICEIMPL:
  public void show() {
        System.out.println("HelloServiceImpl 的 show 方法.");
    }
Spring配置文件:
<?xml version="1.0" encoding="UTF-8" ?>
<beans xmlns="http://www.springframework.org/schema/beans"
       xmlns:xsi="http://www.w3.org/2001/XMLSchema-instance"
       xsi:schemaLocation="
http://www.springframework.org/schema/beans
http://www.springframework.org/schema/beans/spring-beans.xsd">

    <bean id="Dao" class="com.bihu.helloDaoImpl.HelloDaoImpl"></bean>
    <bean id="Service" class="com.bihu.helloServiceImpl.HelloServiceImpl"></bean>
</beans>
然后我们改写一下 SERVICEIMPL,我们来调用DAO的实现:
package com.bihu.helloServiceImpl;

import com.bihu.helloDaoImpl.HelloDaoImpl;
import com.bihu.helloService.HelloService;
import org.springframework.context.ApplicationContext;
import org.springframework.context.support.ClassPathXmlApplicationContext;

public class HelloServiceImpl implements HelloService {

    /**
     * 相当于通过 Service的show方法调用Dao的show方法。
     */
    public void show() {
        ApplicationContext app =  new ClassPathXmlApplicationContext("applicationContext.xml");
        //获取到Dao的Bean
        HelloDaoImpl dao = (HelloDaoImpl) app.getBean("Dao");
        //调用HelloDaoImpl 中的 show
        dao.show();
    }
}
最后我们测试类,获取到HelloServiceImpl的Bean,调用HelloServiceImol 的show 方法 方可 在内部又调用到了 HelloDaoImpl 的show方法:
import com.bihu.helloServiceImpl.HelloServiceImpl;
import org.junit.Test;
import org.springframework.context.ApplicationContext;
import org.springframework.context.support.ClassPathXmlApplicationContext;

public class test {

    @Test //要导入 Junit 的 GAV
    public void springTest(){
        ApplicationContext app =  new ClassPathXmlApplicationContext("applicationContext.xml");
        HelloServiceImpl service = (HelloServiceImpl)app.getBean("Service");
        service.show();
    }
}
运行结果:
信息: Loading XML bean definitions from class path resource [applicationContext.xml]
HelloDaoImpl 的 show 方法.
所以说 这就是一个很简单很简单的一个传递调用而已。
所以下面我们分析一下:
因为UserService和UserDao都在Spring容器中,而最终程序直接使用的是UserService,所以可以在 Spring容器中,将UserDao设置到UserService内部。
获得UserService实例,内部已经存在UserDao 实例了,直接调用UserDao的save()方法即可。
Bean的依赖注入概念
依赖注入(Dependency Injection):它是 Spring 框架核心 IOC 的具体实现。
在编写程序时,通过控制反转,把对象的创建交给了 Spring,但是代码中不可能出现没有依赖的情况。 IOC 解耦只是降低他们的依赖关系,但不会消除。
例如:业务层仍会调用持久层的方法。 那这种业务层和持久层的依赖关系,在使用 Spring 之后,就让 Spring 来维护了。 简单的说,就是坐等框架把持久层对象传入业务层,而不用我们自己去获取。
------
依赖注入的涵义:通过Spring容器帮我们new指定实例并且将实例注入到需要该对象的类中。依赖注入的另一种说法是“控制反转”,通俗的理解是:平常我们new一个实例,这个实例的控制权是我们程序员,而控制反转是指new实例工作不由我们程序员来做而是交给spring容器来做。
------
怎么将HelloDao怎样注入到HelloService内部呢?
1 构造方法
2 set方法
Set方法注入:
在HelloServiceImpl 中添加 方法 SethelloDao,
package com.bihu.helloServiceImpl;

import com.bihu.helloDao.HelloDao;
import com.bihu.helloDaoImpl.HelloDaoImpl;
import com.bihu.helloService.HelloService;


    public class HelloServiceImpl implements HelloService {

       private HelloDao helloDao;
        /*创建SetHelloDao方法*/
    //注意这里名字一定要是 setXXXXX!前面的set是写死了的 我就吃亏了..
    public void setHelloDao(HelloDao helloDao){
        this.helloDao = helloDao;
    }


    @Override
    public void show() {
        this.helloDao.show();   //调用HelloDap的show方法
    }
}
⭐然后去Spring配置文件 配置一下:
<?xml version="1.0" encoding="UTF-8" ?>
<beans xmlns="http://www.springframework.org/schema/beans"
       xmlns:xsi="http://www.w3.org/2001/XMLSchema-instance"
       xsi:schemaLocation="
http://www.springframework.org/schema/beans
http://www.springframework.org/schema/beans/spring-beans.xsd">

<!-- Dao的Bean   -->
    <bean id="Dao" class="com.bihu.helloDaoImpl.HelloDaoImpl"></bean>

    <!-- Service的Bean   -->
    <bean id="Service" class="com.bihu.helloServiceImpl.HelloServiceImpl">
<!--  property 标签,其中name是setHelloDao方法名,规则就是要把set去掉然后首字母变小写 【注意!!!  只有Set方法注入参数name才是这个按照这个规则写! 如果是有参构造的话 不是这样的啊 name指的是参数名】
      ref指的是Spring配置文件中HelloDaoImpl的Bean的(ID)
-->
        <property name="helloDao" ref="Dao"></property>
    </bean>
</beans>
其中的 property 标签 就是将HelloDao怎样注入到HelloService内部的实现。
然后Spring会自动执行setHelloDao这个方法,这样 HelloServiceImpl 的this.helloDao 就会有值了.
然后你就可以调用 HelloDao中的方法了。
总结就是说,学会这种调用方法.
import com.bihu.helloServiceImpl.HelloServiceImpl;
import org.junit.Test;
import org.springframework.context.ApplicationContext;
import org.springframework.context.support.ClassPathXmlApplicationContext;

public class test {

    @Test //要导入 Junit 的 GAV
    public void springTest(){
        ApplicationContext app =  new ClassPathXmlApplicationContext("applicationContext.xml");
        HelloServiceImpl service = (HelloServiceImpl)app.getBean("Service");
        service.show();
    }
}
允许结果:
信息: Loading XML bean definitions from class path resource [applicationContext.xml]
HelloDaoImpl 的 show 方法.
所以证明Set依赖注入成功~
你也可以试着 直接new一个HelloServiceImpl对象 会发现空指针异常 因为Spring没有给他里面的this.HelloDao赋值。
Get依赖注入还有一个更方便的方式:
P命名空间注入 他本质也是Set方式注入的一种,入,但比起上述的set方法注入更加方便,主要体现在配置文件中,如下: 首先,需要引入P命名空间:
首先,需要在Spring配置文件中引入P命名空间:
然后我们需要在Sping中: 因为是P命名空间模式 所以下面用把property删除 然后在bean中加上p标签 p:helloDao-ref=xxx 值是helloDaoBean的ID 很方便啊 但是一般用的多还是普通的Set方式:
<?xml version="1.0" encoding="UTF-8" ?>
<!--首先,需要引入P命名空间: xmlns:p="http://www.springframework.org/schema/p" 【在下面】-->
<beans xmlns="http://www.springframework.org/schema/beans"
       xmlns:xsi="http://www.w3.org/2001/XMLSchema-instance"
       xmlns:p="http://www.springframework.org/schema/p"
       xsi:schemaLocation="
http://www.springframework.org/schema/beans
http://www.springframework.org/schema/beans/spring-beans.xsd">


    <bean id="Dao" class="com.bihu.helloDaoImpl.HelloDaoImpl"></bean>

<!-- 因为是P命名空间模式 所以下面用把property删除 然后在bean中加上p标签
    p:helloDao-ref=xxx  值是helloDaoBean的ID 很方便啊 但是一般用的多还是普通的Set方式
 -->
    <bean id="Service" class="com.bihu.helloServiceImpl.HelloServiceImpl" p:helloDao-ref="Dao"></bean>
</beans>
所以P标签命名注入 对比 传统的Set依赖注入:
要改的地方只有一处 那就是Spring的配置文件。
Set方法讲完了 讲第二种方法: 通过构造方法(有参)注入:
创建有参构造:
package com.bihu.helloServiceImpl;

import com.bihu.helloDao.HelloDao;
import com.bihu.helloDaoImpl.HelloDaoImpl;
import com.bihu.helloService.HelloService;


    public class HelloServiceImpl implements HelloService {

        private HelloDao helloDao;
        /*创建有参构造*/
        public HelloServiceImpl(HelloDao helloDao) {
            this.helloDao = helloDao;
        }

        @Override
    public void show() {
        this.helloDao.show();   //调用HelloDao的show方法
    }
}
配置文件:
<?xml version="1.0" encoding="UTF-8" ?>
<beans xmlns="http://www.springframework.org/schema/beans"
       xmlns:xsi="http://www.w3.org/2001/XMLSchema-instance"
       xsi:schemaLocation="
http://www.springframework.org/schema/beans
http://www.springframework.org/schema/beans/spring-beans.xsd">


    <bean id="Dao" class="com.bihu.helloDaoImpl.HelloDaoImpl"></bean>

<!--
       构造方法注入:
       其中 constructor-arg 标签 代表 构造的意思
       name值得是构造参数的名字
       ref值得是 Dao的Id
除了name  还可以用index来定位参数,例如:
<constructor-arg index="0" ref="dao"/>
-->
    <bean id="Service" class="com.bihu.helloServiceImpl.HelloServiceImpl">
        <constructor-arg name="helloDao" ref="Dao"></constructor-arg>
    </bean>

</beans>
不仅可以用name进行参数固定 还可以用 index 来 index从0开始 0代表第一个参数!
所以你看 有新学了个constructor-arg 标签 可以看出 constructor是构造的意思 ,会用即可,注释写的明明白白的呢...
Bean的依赖注入的数据类型
上面的操作,都是注入的引用Bean,除了对象的引用可以注入,普通数据类型,集合等都可以在容器中进行注入。
注入数据的三种数据类型:
1、普通数据类型
2、引用数据类型
3、集合数据类型
其中引用数据类型,这里不说了,之前的操作都是对UserDao对象的引用进行注入的,下面将以set方法注入为 例,演示普通数据类型和集合数据类型的注入。
下面示例一下 普通数据依赖注入,注入方法用set:
package com.bihu.helloDaoImpl;

import com.bihu.helloDao.HelloDao;

public class HelloDaoImpl implements HelloDao {

    private String name;
    private String age;

    /*⭐⭐ 这里注入 普通参数 创建有参构造: */

    public void setName(String name) {
        this.name = name;
    }

    public void setAge(String age) {
        this.age = age;
    }

    public void show() {
        System.out.println("HelloDaoImpl 的 show 方法.");
        System.out.println("我叫" + name + "我今年" + age +  "岁");
    }

}
配置文件:
<?xml version="1.0" encoding="UTF-8" ?>
<beans xmlns="http://www.springframework.org/schema/beans"
       xmlns:xsi="http://www.w3.org/2001/XMLSchema-instance"
       xsi:schemaLocation="
http://www.springframework.org/schema/beans
http://www.springframework.org/schema/beans/spring-beans.xsd">

<!--  通过set方式去注入普通参数  -->
    <bean id="Dao" class="com.bihu.helloDaoImpl.HelloDaoImpl">
        <property name="name" value="小红"></property>
        <property name="age" value="18" ></property>
    </bean>


    <bean id="Service" class="com.bihu.helloServiceImpl.HelloServiceImpl">
        <constructor-arg name="helloDao" ref="Dao"></constructor-arg>
    </bean>

</beans>
所以 当你调用Dao的show方法时 就会打印出来,这就是很简单的一种普通变量依赖注入。【带脑子看代码】
记住一个点 : 带ref 的一般都是 引用的数据类型
集合注入:
这次直接Service 写接口 ServiceImpl写实现:
也是用set方式进行注入吧:
三种集合:
List
Map
Properties:
代码入下:
ServiceImpl:
package com.bihu.helloServiceImpl;

import com.bihu.Mondle.User;
import com.bihu.helloService.HelloService;

import java.util.List;
import java.util.Map;
import java.util.Properties;


public class HelloServiceImpl implements HelloService {
    private List list;
    private Map<String , User> map;
    private Properties properties;

    //Set 方法:
    public void setList(List list) {
        this.list = list;
    }

    public void setMap(Map<String, User> map) {
        this.map = map;
    }

    public void setProperties(Properties properties) {
        this.properties = properties;
    }

    @Override
    public void show() {
        //此方法显示全部集合数据
        System.out.println(list);
        System.out.println(map);
        System.out.println(properties);
    }
}
User:
package com.bihu.Mondle;

public class User {
    private String name;
    private int age;

    public String getName() {
        return name;
    }

    public void setName(String name) {
        this.name = name;
    }

    public int getAge() {
        return age;
    }

    public void setAge(int age) {
        this.age = age;
    }
@Override
public String toString() {
    return "User{" +
            "name='" + name + '\'' +
            ", age=" + age +
            '}';
}
}
那么配置文件:
<?xml version="1.0" encoding="UTF-8" ?>
<beans xmlns="http://www.springframework.org/schema/beans"
       xmlns:xsi="http://www.w3.org/2001/XMLSchema-instance"
       xsi:schemaLocation="
http://www.springframework.org/schema/beans
http://www.springframework.org/schema/beans/spring-beans.xsd">
    <bean id="Service" class="com.bihu.helloServiceImpl.HelloServiceImpl">
<!--    list 直接用一个list表标签 下面直接value 注入值    -->
      <property name="list">
          <list>
              <value>值1</value>
              <value>值2</value>
              <value>值3</value>
          </list>
      </property>

        <!--    Map集合注入 那么你肯定先要有个user 那就先创建个userBean    -->
        <!--    然后来个map标签  map标签中放entry标签  -->
        <!--    entry标签 有个属性 key 就是map对应的key value 就是key对应的值 -->
        <!--    主义 key属性和value属性 如果带 ref 那么就是引用类型的!!
                好比如 这里的User就是专门示范这个特性的 User是引用类型
         -->
        <property name="map">
           <map>
               <entry key="key1" value-ref="user1"></entry>
               <entry key="key2" value-ref="user2"></entry>
           </map>
        </property>

        <!--  properties 集合类型:
  没听过这个类型 但是听说key和value都是字符串....
   JDK:本Properties类代表一个持久的属性集。所述Properties可以被保存到一个流或从流加载。属性列表中的每个键及其对应的值都是一个字符串。
   此类是线程安全的:多个线程可以共享单个 Properties对象,而无需外部同步。
   -->
<!--   其中 property集合注入用 props标签 props标签下分prop标签
     prop标签属性key代表key 值直接在外面写
     key和value都是整型
     -->
        <property name="properties">
            <props>
                <prop key="v1">值1</prop>
                <prop key="v2">值2</prop>
                <prop key="v3">值3</prop>
                <prop key="v4">值4</prop>
                <prop key="v5">值5</prop>
            </props>
        </property>


    </bean>


<!--  UserBean:  -->
    <bean id="user1" class="com.bihu.Mondle.User">
<!--   user 也是一个类 也有值 所以。。。。    -->
        <property name="name" value="小w"></property>
        <property name="age" value="18"></property>
    </bean>

    <bean id="user2" class="com.bihu.Mondle.User">
        <!--   user 也是一个类 也有值 所以。。。。    -->
        <property name="name" value="小黄"></property>
        <property name="age" value="3"></property>
    </bean>


</beans>
注意看注释即可,这玩意有点套娃 但是只要逻辑清晰步入 没啥问题哈
然后我们打印一下测试类:
import com.bihu.helloServiceImpl.HelloServiceImpl;
import org.junit.Test;
import org.springframework.context.ApplicationContext;
import org.springframework.context.support.ClassPathXmlApplicationContext;

public class test {

    @Test //要导入 Junit 的 GAV
    public void springTest(){
        ApplicationContext app =  new ClassPathXmlApplicationContext("applicationContext.xml");
        HelloServiceImpl service = (HelloServiceImpl)app.getBean("Service");
        service.show();
    }
}
输出值:
信息: Loading XML bean definitions from class path resource [applicationContext.xml]
[值1, 值2, 值3]
{key1=com.bihu.Mondle.User@612679d6, key2=com.bihu.Mondle.User@11758f2a}
{v5=值5, v4=值4, v3=值3, v2=值2, v1=值1}

Process finished with exit code 0
都是有值的啊 所以呢 这代表注入成功了,目前介绍那么多。
所以 我小总结了一下,
注入参数,三种方式:
1. 普通数据类型
2.引用数据类型
3.集合数据类型
注入模式有两种:
1.有参构造方式
2.set方法 方式【p标签模式】
PS: 这里是 Bean的依赖注入参数 请别和 Bean的实例化 搞混!
Bean的实例化有Bean实例化的方法:无参构造、静态工厂、工厂模式,而
Bean的参数注入有Bean参数注入方法:有参构造、Set方式.
这里重点说下 Bean的参数注入:千万别弄混了!【问过老师 的:】
有参构造: 是用 constructor-arg 标签配,字段name是参数名,字段index是参数的下标,参数名和下标二选一,然后注入的值 如果你要注入的值是 普通类型 那么就写 value 如果是引用数据类型的话 那么用ref即可
Set方式:是用 property 标签配,字段name是去掉set[记住是小写的set,推荐的一键生成];然后首字母小写【严格要求标准】,如果你要注入的值是 普通类型 那么就写 value 如果是引用数据类型的话 那么用ref即可,但 Set方式只能注入一个参数!!!! 不可能存在很多个的!我尝试注入很多个失败才去找的老师总的结。
个人很喜欢学原始【手动配置】的在学方便【注解】的!emm因为那样看你会懂得多 也学得好一点吧!
还有一些要注意的是 习惯性导入GAV 习惯性Test 和 源码分文件夹,习惯性xml配置文件放resource 代码放java中 习惯性用MVC...
本文来自博客园,作者:咸瑜,转载请注明原文链接:https://www.cnblogs.com/bi-hu/p/14901478.html