springboot源码(八)
springboot中嵌入tomcat原理分析
首先要了解tomcat本身,否则springboot内嵌tomcat就很难分析。关于tomcat的源码会后续更新。
本文主要先简单分析一下springboot内嵌tomcat的源码,深入了解以后再更新。
还是先从springboot的启动入口run()方法开始分析。。。。。。
public ConfigurableApplicationContext run(String... args) {
        StopWatch stopWatch = new StopWatch();
        stopWatch.start();
        ConfigurableApplicationContext context = null;
        Collection<SpringBootExceptionReporter> exceptionReporters = new ArrayList<>();
        configureHeadlessProperty();
        SpringApplicationRunListeners listeners = getRunListeners(args);
        listeners.starting();
        try {
            ApplicationArguments applicationArguments = new DefaultApplicationArguments(args);
            ConfigurableEnvironment environment = prepareEnvironment(listeners, applicationArguments);
            configureIgnoreBeanInfo(environment);
            Banner printedBanner = printBanner(environment);
            //创建应用上下文
            context = createApplicationContext();
            exceptionReporters = getSpringFactoriesInstances(SpringBootExceptionReporter.class,
                    new Class[] { ConfigurableApplicationContext.class }, context);
            prepareContext(context, environment, listeners, applicationArguments, printedBanner);
            //刷新应用上下文,完成spring容器的初始化,也会加载tomcat
            refreshContext(context);
            afterRefresh(context, applicationArguments);
            stopWatch.stop();
            if (this.logStartupInfo) {
                new StartupInfoLogger(this.mainApplicationClass).logStarted(getApplicationLog(), stopWatch);
            }
            listeners.started(context);
            callRunners(context, applicationArguments);
        }
        catch (Throwable ex) {
            handleRunFailure(context, ex, exceptionReporters, listeners);
            throw new IllegalStateException(ex);
        }

        try {
            listeners.running(context);
        }
        catch (Throwable ex) {
            handleRunFailure(context, ex, exceptionReporters, null);
            throw new IllegalStateException(ex);
        }
        return context;
    }
进入refreshContext()----》ServletWebServerApplicationContext.refreshContext()方法:

进入super.refresh()方法后,进入到spring的源码中了,在进入onRefreshContext()方法---》ServletWebServerApplicationContext.onRefreshContext()方法
@Override
    protected void onRefresh() {
        super.onRefresh();
        try {
            //创建web实例
            createWebServer();
        }
        catch (Throwable ex) {
            throw new ApplicationContextException("Unable to start web server", ex);
        }
    }
进入createWebServer()方法:
private void createWebServer() {
        WebServer webServer = this.webServer;
        ServletContext servletContext = getServletContext();
        if (webServer == null && servletContext == null) {
            //获取webServer的工厂对象
            ServletWebServerFactory factory = getWebServerFactory();
            //获得具体的webServer对象------>TomcatWebServer
            this.webServer = factory.getWebServer(getSelfInitializer());
            getBeanFactory().registerSingleton("webServerGracefulShutdown",
                    new WebServerGracefulShutdownLifecycle(this.webServer));
            getBeanFactory().registerSingleton("webServerStartStop",
                    new WebServerStartStopLifecycle(this, this.webServer));
        }
        else if (servletContext != null) {
            try {
                getSelfInitializer().onStartup(servletContext);
            }
            catch (ServletException ex) {
                throw new ApplicationContextException("Cannot initialize servlet context", ex);
            }
        }
        initPropertySources();
    }
再看一下getWebServer()里的逻辑---》直接进入TomcatServletWebServerFactory.getWebServer()中

public WebServer getWebServer(ServletContextInitializer... initializers) {
        if (this.disableMBeanRegistry) {
            Registry.disableRegistry();
        }
        //创建tomcat对象
        Tomcat tomcat = new Tomcat();
        File baseDir = (this.baseDirectory != null) ? this.baseDirectory : createTempDir("tomcat");
        tomcat.setBaseDir(baseDir.getAbsolutePath());
        //创建连接器
        Connector connector = new Connector(this.protocol);
        connector.setThrowOnFailure(true);
        //service关联连接器
        tomcat.getService().addConnector(connector);
        customizeConnector(connector);
        tomcat.setConnector(connector);
        tomcat.getHost().setAutoDeploy(false);
        //配置Engin
        configureEngine(tomcat.getEngine());
        for (Connector additionalConnector : this.additionalTomcatConnectors) {
            tomcat.getService().addConnector(additionalConnector);
        }
        prepareContext(tomcat.getHost(), initializers);
        //返回获取的TomcatWebServer对象
        return getTomcatWebServer(tomcat);
    }
然后进入到getTomcatWebServer()方法中
protected TomcatWebServer getTomcatWebServer(Tomcat tomcat) {
        //直接创建,我们需要看构造方法
        return new TomcatWebServer(tomcat, getPort() >= 0, getShutdown());
    }
TomcatWebServer的构造方法:
public TomcatWebServer(Tomcat tomcat, boolean autoStart, Shutdown shutdown) {
        Assert.notNull(tomcat, "Tomcat Server must not be null");
        this.tomcat = tomcat;
        this.autoStart = autoStart;
        this.gracefulShutdown = (shutdown == Shutdown.GRACEFUL) ? new GracefulShutdown(tomcat) : null;
        //初始化  重点
        initialize();
    }
进入initialize()方法:
private void initialize() throws WebServerException {
        logger.info("Tomcat initialized with port(s): " + getPortsDescription(false));
        synchronized (this.monitor) {
            try {
                addInstanceIdToEngineName();

                Context context = findContext();
                context.addLifecycleListener((event) -> {
                    if (context.equals(event.getSource()) && Lifecycle.START_EVENT.equals(event.getType())) {
                        // Remove service connectors so that protocol binding doesn't
                        // happen when the service is started.
                        removeServiceConnectors();
                    }
                });

                // Start the server to trigger initialization listeners
                //启动Tomcat通过发布事件触发一些Listener的初始化

                this.tomcat.start();  //启动tomcat

                // We can re-throw failure exception directly in the main thread
                rethrowDeferredStartupExceptions();

                try {
                    ContextBindings.bindClassLoader(context, context.getNamingToken(), getClass().getClassLoader());
                }
                catch (NamingException ex) {
                    // Naming is not enabled. Continue
                }

                // Unlike Jetty, all Tomcat threads are daemon threads. We create a
                // blocking non-daemon to stop immediate shutdown
                startDaemonAwaitThread();
            }
            catch (Exception ex) {
                stopSilently();
                destroySilently();
                throw new WebServerException("Unable to start embedded Tomcat", ex);
            }
        }
    }
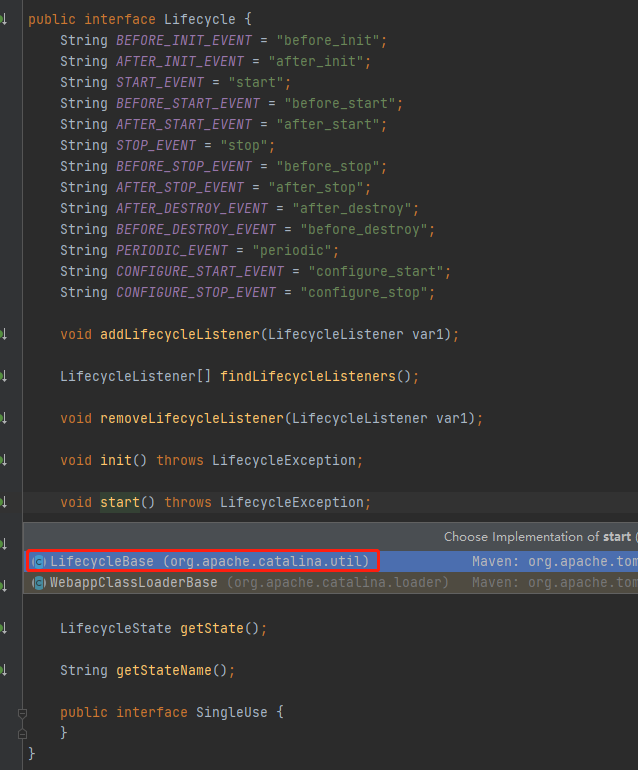
进入start()方法:
public void start() throws LifecycleException {
        this.getServer();
        this.server.start();
    }

到这儿后面的逻辑其实就是Tomcat自身启动的逻辑了。这就需要你的Tomcat基础了,到这SpringBoot启动是如何内嵌Tomcat容器的到这儿就结束了哦。
springboot源码大致流程也就结束了。后面会有一些细节补充的内容。
萝莉身,御姐心。。。。。
分类:
springboot
标签:
springboot


【推荐】国内首个AI IDE,深度理解中文开发场景,立即下载体验Trae
【推荐】编程新体验,更懂你的AI,立即体验豆包MarsCode编程助手
【推荐】抖音旗下AI助手豆包,你的智能百科全书,全免费不限次数
【推荐】轻量又高性能的 SSH 工具 IShell:AI 加持,快人一步
· TypeScript + Deepseek 打造卜卦网站:技术与玄学的结合
· Manus的开源复刻OpenManus初探
· AI 智能体引爆开源社区「GitHub 热点速览」
· 三行代码完成国际化适配,妙~啊~
· .NET Core 中如何实现缓存的预热?