python利用ffmpeg实现声音视频传输
1. 背景
由于项目需求,需要用到视频音频同步传输到服务器并获取播放,这里用到了推流的知识,由于项目是python项目,自己django框架还不熟悉,这里代码等着后续给补上
2. 介绍
直播可以快速准确地传递现场信息,给大家带去强烈的现场感,越来越多的人通过网站和手机来观看直播。在这里,我们将通过本文系统地向大家阐述直播中另一个重要的操作环节推流。在搜索引擎上有很多朋友咨询推流是什么,直播为什么要推流等相关信息,下面由小编为大家统一解答。
1.推流是什么?
百科的解释是这样的:把采集阶段封包好的内容传输到服务器的过程。 光看这个很难理解,我们伴随着问题会容易理解很多。 推流就相当于你的内容要先上传服务器,然后服务器那边才能传输给观众。 跟上传有点类似,只不过是实时上传。对方不上传视频,你能看到吗?就是这个意思。
2. 推流的意义是什么?
推流的意义是把信包传输到服务器,如果不推流,对方就看不到画面。 让对方看到你的画面就是推流最大的意义。
原文链接:https://blog.csdn.net/vzan2022/article/details/124833170
总结:服务器不存储任何内容,本地(主播电脑)将视频推给服务器,服务器上的ffmpeg服务端会将收到的流推送给服务器供他人观看,实现实时观看,达到直播的效果
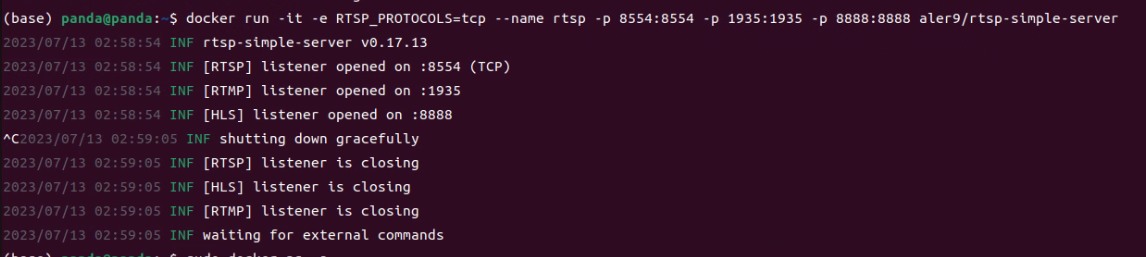
3. Docker上面搭建rtsp服务(作为推流服务器使用)
在docker上建立rtsp服务容器:
docker run --restart=always -d -it -e RTSP_PROTOCOLS=tcp --name rtsp -p 8554:8554 -p 1935:1935 -p 8888:8888 aler9/rtsp-simple-server
注:上述--restart=always为设置该容器开机自启 -d为设置该容器在后台运行,如果没有这两个需求,则可以不加
查看所有容器:
sudo docker ps -a

启动docker内rtsp服务容器:
sudo docker start 容器id/容器名

查看所有容器:
sudo docker ps -a

4. windows上面搭建rtsp服务器
下载rtspwindows系统压缩包
rtsp服务器github网址
github为外网,会比较慢
解压缩,双击rtsp-simple-server.exe 安装
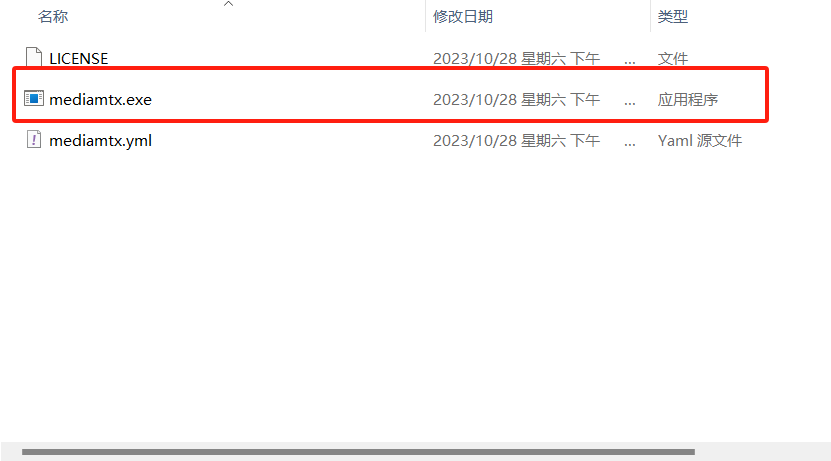
安装完如上图,双击mediamtx.exe启动rtsp服务器
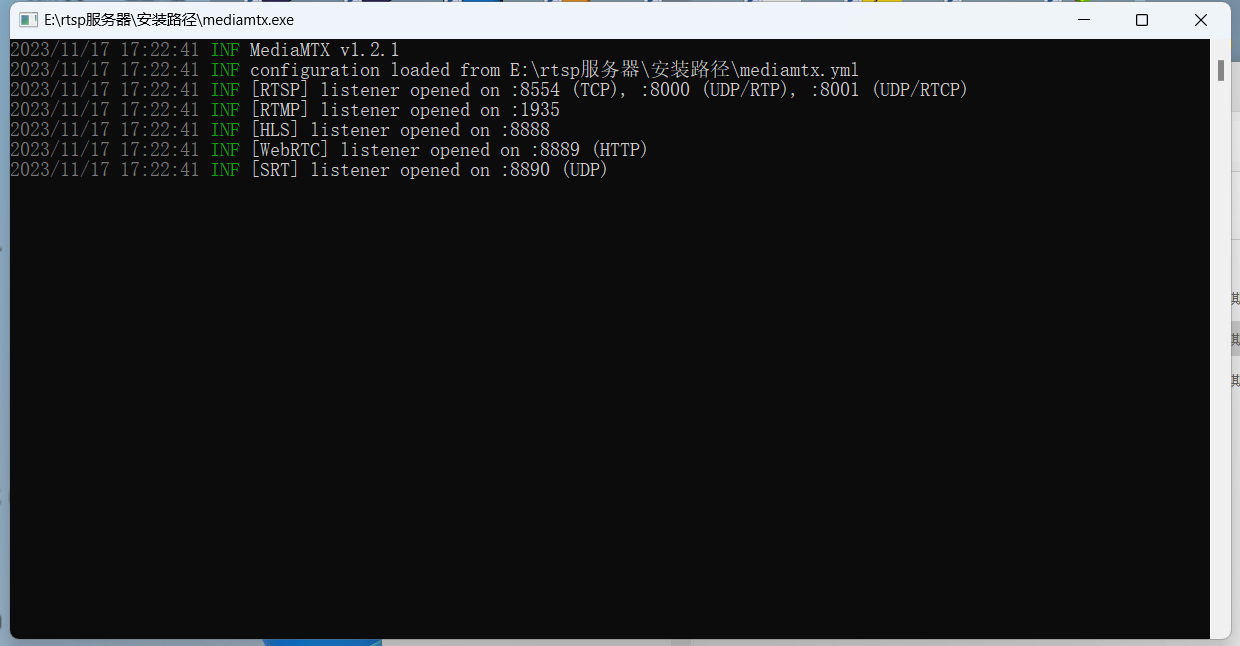
运行时会打开命令行窗口,如果关闭窗口,则rtsp服务也关闭
5. 下载ffmpeg客户端
5.1. Windows系统下载ffmpeg
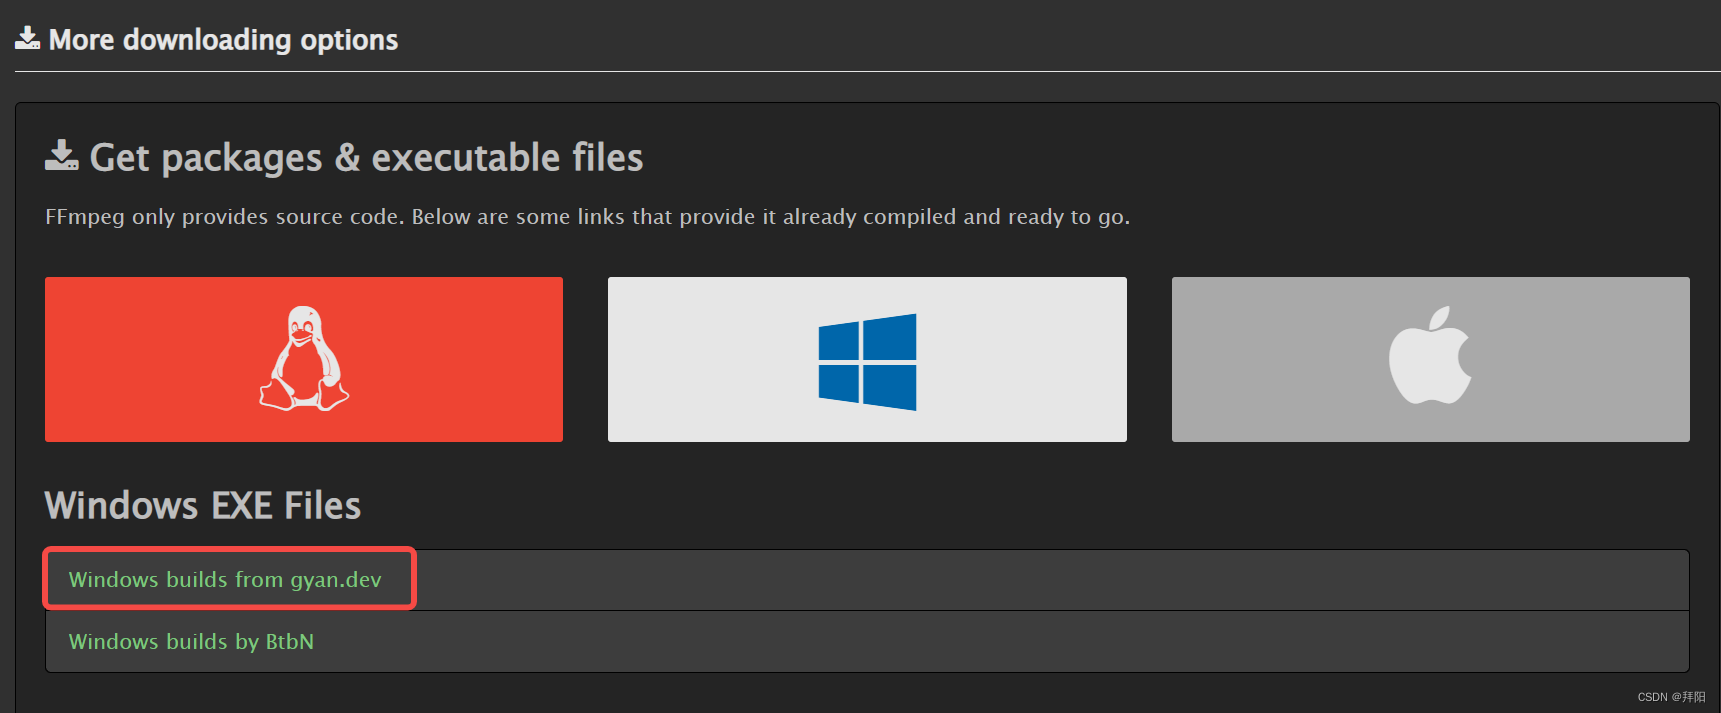
5.1.1.下载ffmpeg安装包
下载地址:https://ffmpeg.org/download.html
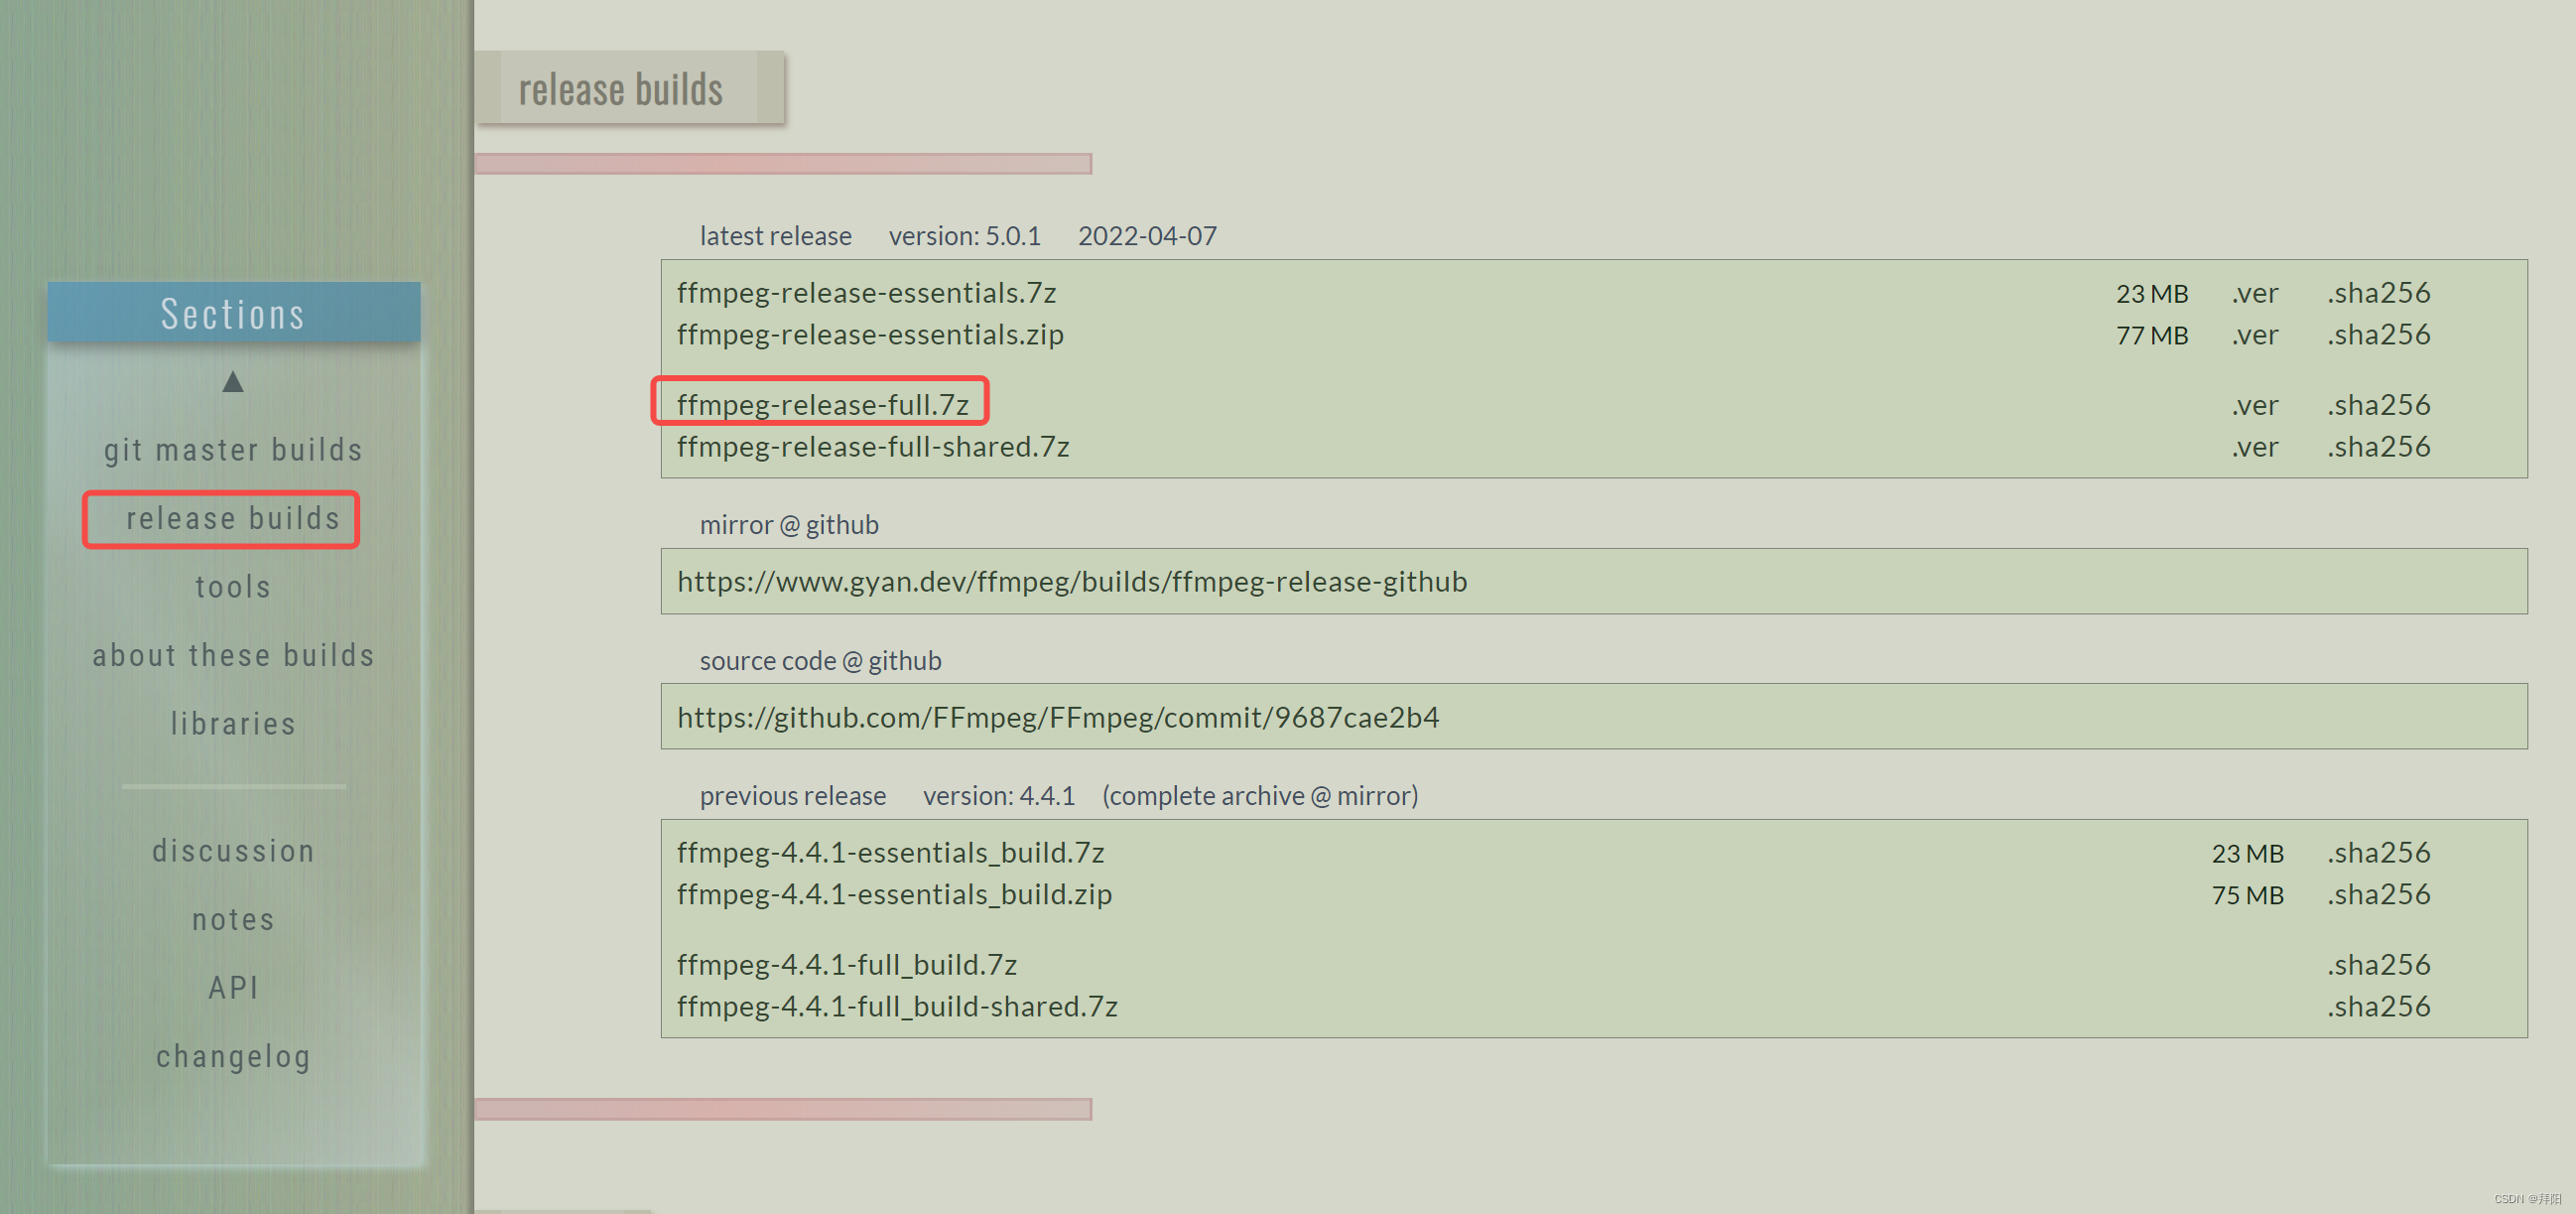
5.1.2. 解压安装
解压并配置用户变量里的“path”环境变量
将安装包解压至任意目录,比如我这里是E:\ffmpeg\install
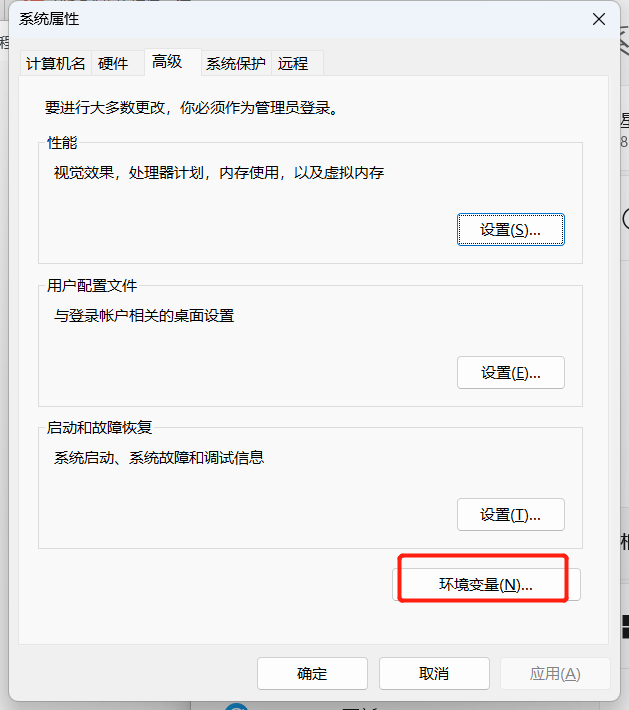
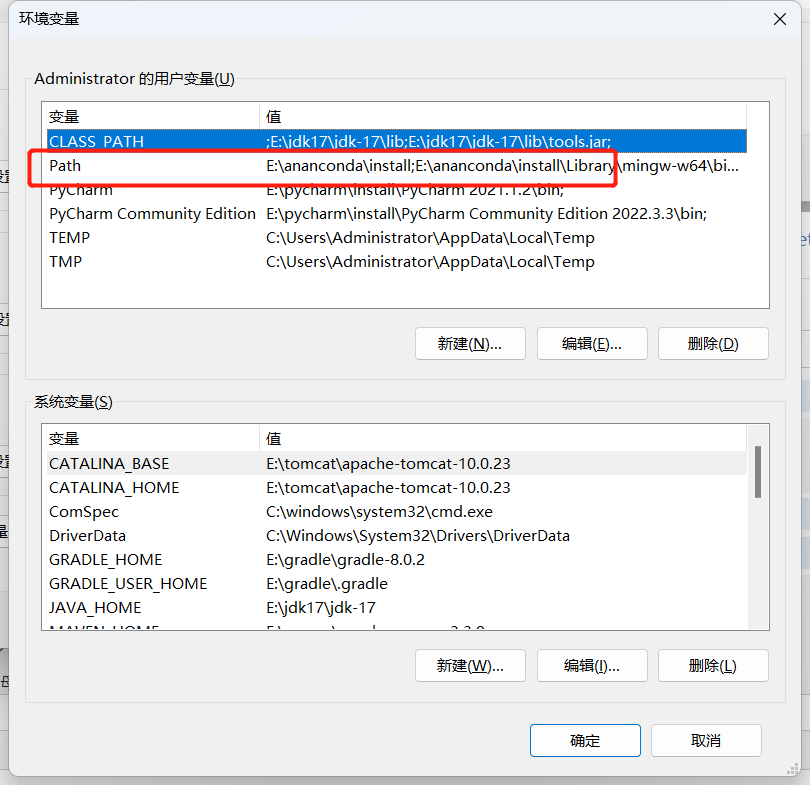
按照以下顺序点击:“此电脑(右键)——属性——高级系统设置——环境变量”
然后把ffmpeg.exe所在路径,即E:\ffmpeg\install\ffmpeg-5.0.1-full_build\bin添加到Path中

打开cmd,,输入ffmpeg
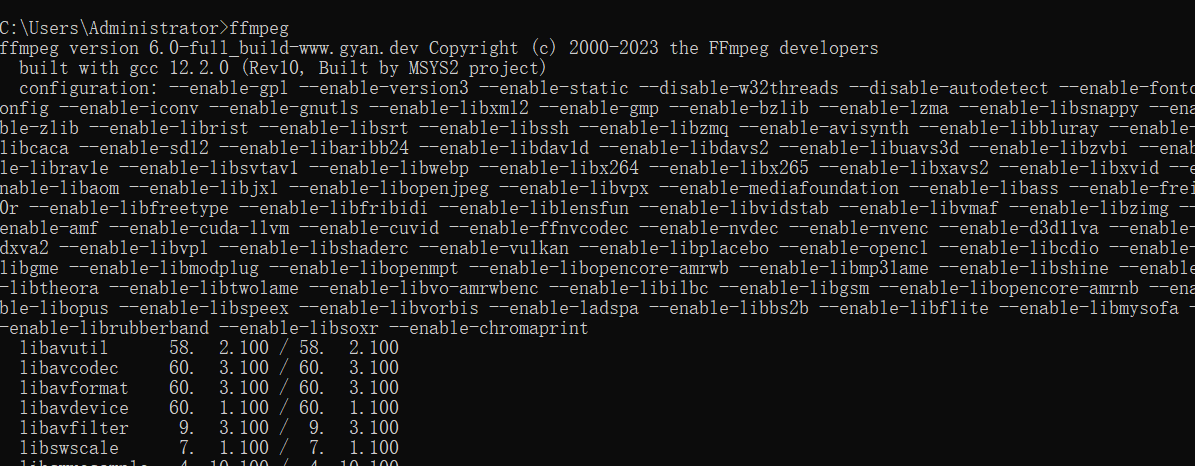
原文链接:https://blog.csdn.net/bby1987/article/details/125562773
5.2. Linux系统安装ffmpeg(这里仅测试了ubuntu系统,其他系统应该差不多)
命令行输入:
sudo apt install ffmpeg
5.3. 校验测试
cmd里推流:ffmpeg -re -i 本地视频 -vcodec copy -acodec copy -f rtsp rtsp://服务器IP地址:8554/live
服务器也在docker上添加镜像下一个ffmpeg
浏览器访问:rtsp://服务器IP地址:8554/live
上述只是在cmd中进行的视频流推流
6、代码实现视频推流
首先这里我们当时是有三种方式去实现
1、方式一: 采用推送一条视频主流,在通过从主流上推送一直视频流(无声音),一条声音流(无视频)
2、方式二: 采用一条命令直接将视频分为声音流与图像流,对图像进行处理后,全扔进队列里,同时推出
3、方式三:采用一条命令直接将视频分为声音流与图像流,对图像进行处理后,声音流视频流按照时间帧进行合流,进而推出视频
说明:以上命令如果通过cmd命令,而且不跑算法是非常容易实现的,但是通过代码就会比较复杂,而且图像流通过算法后会造成延时,所以就使得整体很烦。。。。。。。。。。
6.1 cmd命令(前提是安装了上述的ffmpeg与rtsp服务器):
桌面推流:
ffmpeg -f gdigrab -r 30 -i desktop -vcodec libx264 -preset:v ultrafast -tune:v zerolatency -f rtsp -g 5 -an rtsp://192.168.110.200:8554/mystream
指定视频推流:
ffmpeg -re -i E:/桌面/新建文件夹/test.mp4 -vcodec copy -acodec copy -f rtsp rtsp://192.168.110.200:8554/live
推送视频的声音流:
ffmpeg -i a.mp4 -acodec copy -vn r2.mp4
推送视频的图像流:
ffmpeg -i a.mp4 -vcodec copy -an r1.mp4
声音流与图像流合为视频流:
ffmpeg -i rtsp://192.168.110.200:8554/video -i rtsp://192.168.110.200:8554/audio -map 0:v -map 1:a -acodec copy -vcodec copy -copyts -f rtsp rtsp://192.168.110.200:8554/mystream
直接将视频分为声音流与视频流:
ffmpeg -re -i E:/桌面/新建文件夹/test.mp4 -vn -acodec copy -f rtsp rtsp://192.168.110.200:8554/audio -an -vcodec copy -f rtsp rtsp://192.168.110.200:8554/vedio
无限制循环推流命令:
ffmpeg -re -stream_loop -1 -i testVideo.mp4 -vcodec copy -acodec copy -f rtsp rtsp://192.168.110.200:8554/live
将一张图片推成视频流:
ffmpeg -loop 1 -i 1.jpg -c:v libx264 -preset veryfast -tune zerolatency -crf 25 -f rtsp rtsp://localhost:8554/live
参考文档:https://blog.csdn.net/bby1987/article/details/125562773
6.2 方式一(三次推流一次合流):

推送视频流:
import cv2
import subprocess as sp
def pull():
    push_url= "rtsp://192.168.110.200:8554/live/total1"
    command_total = ['ffmpeg', '-re',
                 '-i', 'E:/桌面/新建文件夹/test.mp4',
                 '-vcodec', 'copy',
                 '-acodec', 'copy',
                 '-f', 'rtsp',
                 push_url,
                     ]  # rtsp rtmp
    pipetotal = subprocess.Popen(command_total, shell=False, stdin=subprocess.PIPE)
    for line in pipetotal.stdout:
        print(line)
    pipetotal.wait()
    if pipetotal.poll() == 0:
        print("success:", pipetotal)
    else:
        print("error:", pipetotal)
推送图像流(中途可对图像进行处理):
def videostream():
    rtspfrom = 'rtsp://192.168.0.123:8554/total1' #这里改成本地ip,端口号不变,文件夹自定义
    rtspto = 'rtsp://192.168.0.123:8554/total1/video'

    command = [
        'ffmpeg', '-i',
        rtspfrom, '-vcodec',
        'copy', '-an',
        rtspto]
    pipetotal = subprocess.Popen(command, shell=False, stdin=subprocess.PIPE)
    for line in pipetotal.stdout:
        print(line)
    pipetotal.wait()
    if pipetotal.poll() == 0:
        print("success:", pipetotal)
    else:
        print("error:", pipetotal)
推送声音流:
import numpy as  np
import librosa
def audiostream():
    speech_array = librosa.load("input.wav", sr=44100)  # 对于rtmp, 音频速率是有要求的,这里采用了44100
    speech_array = (speech_array * 32767).astype(np.int16)  # 转为整型

    rtspfrom = 'rtsp://192.168.0.123:8554/total1'
    rtspto = 'rtsp://192.168.0.123:8554/total1/audio'

    command = ['ffmpeg', '-i',
               rtspfrom, '-acodec',
               'copy', '-vn',
               rtspto]  # rtsp rtmp

    pipetotal = subprocess.Popen(command, shell=False, stdin=subprocess.PIPE)
    for line in pipetotal.stdout:
        print(line)
    pipetotal.wait()
    if pipetotal.poll() == 0:
        print("success:", pipetotal)
    else:
        print("error:", pipetotal)
合并声音流与图像流:
def merge():
    push_url_video = "rtsp://192.168.110.200:8554/total1/video"
    push_url_audio = "rtsp://192.168.110.200:8554/total1/audio"
    command_total = ['ffmpeg',  # linux不用指定
                     '-i', push_url_video,
                     '-i', push_url_audio,
                     '-map', '0:v',
                     '-map', '1:a',
                     '-acodec', 'copy',
                     '-vcodec', 'copy',
                     '-f', 'rtsp',
                     'rtsp://192.168.110.200:8554/total2'
                     ]  # rtsp rtmp
    pipetotal = subprocess.Popen(command_total, shell=False, stdin=subprocess.PIPE)
    for line in pipetotal.stdout:
        print(line)
    pipetotal.wait()
    if pipetotal.poll() == 0:
        print("success:", pipetotal)
    else:
        print("error:", pipetotal)
上述的print可能会报没有返回值的错误,所以可以将print换成return
由于没有服务器(公司的服务器不上班时没法用),所以上述代码都是解决后自己按记忆所写,若有错误希望评论中指出并改正,不过核心思想如下:
上述所有代码基本原理都是先整个command列表(cmd中的命令),然后将command放进管道里,通过循环调用管道里的命令,将上述步骤实现后可以通过线程调用实现最后的功能,不过会出现音频不同步的情况(主要是因为图像流要处理),所以不建议使用。
6.3 方式二(一次推流一次合流)
方式一是通过三次推流一次合并流实现,最终的效果是走线程时需要声音流等待图像流14秒,这个时间由电脑的性能决定,如果你的电脑性能好,那么等待时间会更短,反之则会更长,所以不是最优选,所以才会继续寻找其他办法。。。。。
方式一改进:
视频流推流:
cmd:
ffmpeg -re -i E:/桌面/新建文件夹/test.mp4 -vn -acodec copy -f rtsp rtsp://192.168.110.200:8554/audio -an -vcodec copy -f rtsp rtsp://192.168.110.200:8554/vedio
这条命令只用了一条命令就将视频流分为了图像流与声音流
剩下这里基本上与方案一相同,之前想用队列实现声音流与图像流同时放出,达到音频同步的目的,但是后来这种方案被我否决了,因为理论上声音流快,图像流慢,进入队列同时出,会造成声音流队列无限增大,更何况这是摄像头,所以方案行不通。。。。。。。。。。。。。。。。。。。。
6.4 方式三(ffmpeg+pyav)
import av

options = {
    "rtsp_transport": "tcp",
    # "buffer_size": "1024000",
}
container = av.open('rtsp://192.168.110.200:8554/live', 'r', options=options)
stream_video = container.streams.video[0]
stream_audio = container.streams.audio[0]

container_out = av.open(file='rtsp://192.168.110.200:8554/live/total2', mode='w', format="rtsp",
                        options={'rtsp transport': 'TCP'})
out_stream_audio = container_out.add_stream('mp3')
out_stream_video = container_out.add_stream("mpeg4", rate=25)

for packet in container.demux():
    frames = packet.decode()
    if len(frames) == 0:
        continue
    frame = frames[0]
    try:
        if type(frame) == av.video.frame.VideoFrame:
            for p in out_stream_video.encode(frame):
                # packet.stream = out_stream_video
                container_out.mux(p)
        if type(frame) == av.audio.frame.AudioFrame:
            # for i in range(len(frame.layout.channels)):
            # data = np.zeros(FRAME_SIZE, dtype=av.audio.frame.format_dtypes[INPUT_FORMAT])
            # for j in range(FRAME_SIZE):
            #     data[j] = np.sin(2 * np.pi * (10 + j) * (i + 1) / float(FRAME_SIZE))
            # frame.planes[i].update(data)
            for p in out_stream_audio.encode(frame):
                # p.stream = out_stream_audio
                container_out.mux(p)
    except  Exception:
        print(Exception)
上述方法由于过程过于艰苦,所以就仅仅记录了零星的知识,不过方式三是肯定能用的,方式一二等我有时间再去完善
方式三写完后导包完成后将视频路径改为自己的,然后右击运行这个文件就可以了
最终是用方案三实现的。。
经过反复测试方式三是效果最好的,不过非常占用电脑性能,最终决定放弃推流方法(实在没有低性能效果又好的),改为每次从视频流中取一帧图片处理过算法后,推送到redis中,由前端去订阅该主题,实现播放的目的,但是这样会没有声音,所幸项目中不需要声音(只有一处用声音,但是不需过算法,可以用推流)
redis推送:
新建redis客户端用来推送订阅和发布
import  redis
class RedisSubscri():

    def __init__(self):
        self.coon=redis.Redis(host="192.168.110.200",password="rootroot")

    def publish(self,message,channel):#发布
        self.coon.publish(channel=channel,message=message)

    def subscribe(self,channel):#订阅
        pub=self.coon.pubsub()
        pub.subscribe(channel)
        pub.parse_response()
        return  pub

    def unsubsceribe(self,channel):#取消订阅
        self.coon.pubsub().unsubscribe(channel)
图片处理推送(过算法已经被注释,算法还有些问题)
def algo_process(streaming_from_address, streaming_to_address, algorithm_param, node_ip, node_port,
                                     video_length, camera_id):
    """
        开启算法进程
        :param video_length: 保存告警视频长度
        :param streaming_from_address:
        :param streaming_to_address:
        :param algorithm_param:
        :param node_ip:
        :param node_port:
        :return:
        """

    # rtsp_server = streaming_to_address  # push server (output server)

    # pull rtsp data, or your cv cap.  (input server)
    # cap = cv2.VideoCapture(
    #     streaming_from_address)
    #
    # sizeStr = str(int(cap.get(cv2.CAP_PROP_FRAME_WIDTH))) + \
    #           'x' + str(int(cap.get(cv2.CAP_PROP_FRAME_HEIGHT)))
    # fps = int(cap.get(cv2.CAP_PROP_FPS))
    cap = cv2.VideoCapture(streaming_from_address)


    while cap.isOpened():
        try:
            ret, frame = cap.read()
            # im = Image.fromarray(frame)
            # print(im.size)
            # width, height = im.size
            # w = 165
            # h = int(height * w / width)
            # # image = im.resize((int(w), int(h)), Image.ANTIALIAS)
            # image = im.resize((int(w), int(h)))
            # print(image.size)
            # im_array = np.array(image)
            # ret, jpeg = cv2.imencode('.jpg', im_array)
            ret, jpeg = cv2.imencode('.jpg', frame)
            img_base64 = base64.b64encode(jpeg).decode('utf-8')
            # print('处理算法')
            # # 添加算法处理,返回算法所处理的图片 23.9.19
            # response = requests.post('http://127.0.0.1:5000/oil_leakage', data={'picture': img_base64})
            # # print(response)
            # img_base64 = json.loads(response.text)['picture']
            # redis_conn = get_redis_connection("default")
            # redis_conn.set(streaming_to_address, img_base64)
            redisd = RedisSubscri()
            # print(img_base64)
            redisd.publish(channel=streaming_to_address,message=img_base64)


        except Exception as e:
            pass
注:上述代码不过算法是没问题的,但是如果添加算法,由于算法处理需要时间,而opencv是不会自带缓冲区的,所以当你代码的图片推送速度与视频本身的帧率存在较大差距时会导致图像模糊卡死等情况
解决办法:添加缓冲队列,设置两个线程,一个线程用于读取视频流,存放在缓冲队列里,另一个线程用于将队列中的图片推送出去,如果缓冲队列为空,则不推送,即跳过
思路逻辑:判断是否需要过算法,如果需要开启进程,不需要则开启线程(因为线程内调用算法,性能是撑不住的,需要开启进程)
我们这里是设置了全局一个字典,用于存放每个视频的最新帧,如果最新帧为空,则跳过不处理,最新代码如下:
进程是所有参数互不影响,线程为所有参数共享,所以用的字典,之前用的变量,在进程中可用,因为不影响,在线程中就乱了。。。。。。。。。。。
开启进程函数:
def start_process(camera_id, algo_id=-1, request_from=0, user_id=-1, isEmergency=False):
    """
    开启新的算法进程,修改关联用户id

    :param user_id:
    :param request_from:
    请求来源 0 前端
            1 两票
            2 running schedule

    当 request_from=0 user_id 必选项
    当 request_from=1 或 request_from=2 , user_id 默认值
    :param camera_id:
    :param algo_id: 有可能为空
    :return:
    """
    running_info_lst = CameraRunning.objects.filter(algorithm_id=algo_id, camera_id=camera_id).values()
    if not running_info_lst:  # 表明摄像头和算法对尚未启动
        # 获取读流地址,并更新camera streaming_from_address字段
        camera_info = Camera.objects.filter(id=camera_id).values()[0]
        code = camera_info['code']
        # streaming_from_address = get_url_from_hike(code)
        streaming_from_address = camera_info['streaming_from_address']
        video_length = camera_info['video_length']
        Camera.objects.filter(id=camera_id).update(streaming_from_address=streaming_from_address)
        # 生成发流地址
        streaming_to_address = gen_streaming_to_address(camera_id, algo_id)
        # streaming_to_address = 'rtsp://192.168.110.219:8554/show/23/7/20230802095208'
        algorithm_model = AlgorithmModel.objects.filter(id=algo_id).first()
        camera_model = Camera.objects.filter(id=camera_id).first()

        # 获得算法参数
        algorithm_param = {}
        if algo_id > -1:
            if request_from in [0, 2]:
                algorithm_param_lst = CameraAlgorithmParam.objects.filter(algorithm_model=algorithm_model,
                                                                          camera=camera_model).values()
                if len(algorithm_param_lst) > 0:
                    algorithm_param = algorithm_param_lst[0]['algorithm_param']
                else:
                    algorithm_default_param_lst = ModelParam.objects.filter(algorithm_model=algorithm_model).values()
                    if len(algorithm_default_param_lst) > 0:
                        algorithm_param = algorithm_default_param_lst[0]['param']
                    else:
                        algorithm_param = {}

            if request_from == 1:
                votes_cameras_info = VotesCameras.objects.filter(camera_id=camera_id, algo_id=algo_id).values()
                if votes_cameras_info:

                    algorithm_param = votes_cameras_info[0]['param']
                else:
                    algorithm_param = {}

        # 查找算法服务节点
        node_ip, node_port, node_id = get_node(algo_id)

        # if node_ip is None:  # 不存在该算法服务,直接以原始流返回
        if node_ip is None:
            print("=============================")
            # t = threading.Thread(target=show_raw_rtsp, args=(streaming_from_address, streaming_to_address,isEmergency))
            # t.daemon = True
            # t.start()
            # time.sleep(1)
            t = threading.Thread(target=algo_process,
                                 args=(
                                     streaming_from_address, streaming_to_address, algorithm_param, node_ip, node_port,
                                     video_length, camera_id))
            t.daemon = True
            t.start()
            time.sleep(1)
            # p = Process(target=show_raw_rtsp, args=(streaming_from_address, streaming_to_address))
            # p.daemon = True  # #daemon:守护进程,父进程终止后自动终止,且自己不能产生新进程,必须在start()之前设置
            # p.start()
        else:
            print("==============================", node_ip, node_port)
            # t = threading.Thread(target=algo_process,
            #                      args=(
            #                          streaming_from_address, streaming_to_address, algorithm_param, node_ip, node_port,
            #                          video_length, camera_id))
            # t.daemon = True
            # t.start()
            # time.sleep(1)

            # 开启算法进程
            torch.multiprocessing.set_start_method('spawn', force=True)
            t = multiprocessing.Process(target=algo_process,
                                        args=(streaming_from_address, streaming_to_address, algorithm_param, node_ip,
                                              node_port,
                                              video_length, camera_id))
            t.daemon = True  # #daemon:守护进程,父进程终止后自动终止,且自己不能产生新进程,必须在start()之前设置
            t.start()

        # # 更新running表
        # if request_from == 0:  # 前端请求查看
        #     data = {'camera_id': camera_id, 'algorithm_id': algo_id, 'node_id': node_id,
        #             'streaming_to_address': streaming_to_address, 'process_id': p.pid,
        #             'link_user_ids': [user_id].__str__()}
        # else:  # 来自两票和运行规则
        #     data = {'camera_id': camera_id, 'algorithm_id': algo_id, 'node_id': node_id,
        #             'streaming_to_address': streaming_to_address, 'process_id': p.pid}

        # 更新running表
        if request_from == 0:  # 前端请求查看
            data = {'camera_id': camera_id, 'algorithm_id': algo_id, 'node_id': node_id,
                    'streaming_to_address': streaming_to_address, 'process_id': t.ident,
                    'link_user_ids': [user_id].__str__()}

            # t.daemon = True
            # t.start()
            # time.sleep(1)
        else:  # 来自两票和运行规则
            data = {'camera_id': camera_id, 'algorithm_id': algo_id, 'node_id': node_id,
                    'streaming_to_address': streaming_to_address, 'process_id': t.ident}

        CameraRunning.objects.create(**data)
        return streaming_to_address

    else:  # 算法对已经启动
        running_info = running_info_lst[0]
        streaming_to_address = running_info['streaming_to_address']
        user_id_lst = list(eval(running_info['link_user_ids']))
        if request_from == 0:
            if user_id not in user_id_lst:
                user_id_lst.append(user_id)
            CameraRunning.objects.filter(algorithm_id=algo_id, camera_id=camera_id).update(
                link_user_ids=user_id_lst.__str__())

        return streaming_to_address
进程函数:
def algo_process(streaming_from_address, streaming_to_address, algorithm_param, node_ip, node_port,
                 video_length, camera_id):
    """
        开启算法进程
        :param video_length: 保存告警视频长度
        :param streaming_from_address:
        :param streaming_to_address:
        :param algorithm_param:
        :param node_ip:
        :param node_port:
        :return:
        """

    cap = cv2.VideoCapture(streaming_from_address)
    algo_id = int(streaming_to_address.split("/")[-2])
    rate = 25
    frame_num = 0
    movie_queue_pre = Queue(maxsize=int(video_length / 2) * rate)
    movie_queue_after = Queue(maxsize=int((video_length + 1) / 2) * rate)
    alarm_time = None

    def read_frame(streaming_to_address):
        print(streaming_to_address)
        global frame_dict
        while cap.isOpened():
            _, temp = cap.read()
            frame_dict[streaming_to_address] = temp
            # print('------', frame)

    t = threading.Thread(target=read_frame, args=(streaming_to_address,))
    t.start()
    if node_ip:
        while True:
            if streaming_to_address not in frame_dict:
                continue
            frame_result, status = runAlgo(algo_id=algo_id, frame=frame_dict[streaming_to_address], frame_index=30,
                                           algo_params={},
                                           yolo_model=model_helmet)
            ret, jpeg = cv2.imencode('.jpg', frame_result)
            img_base64 = base64.b64encode(jpeg).decode('utf-8')
            # response = {'picture': base64.b64encode(jpeg).decode('utf-8'), 'state': re_frame[0], 'type': 0}

            # alarm_by_algo = json.loads(response.text)['state']
            # # 判断是否出现告警
            # if alarm_by_algo:
            #     if (time.time() - pre_alarm_time) / 60 > 1:  # 每分钟最多出现一次告警
            #         alarm = True
            #         pre_alarm_time = time.time()
            #         alarm_time = datetime.datetime.now()
            #
            # if not alarm:
            #     if movie_queue_pre.full():
            #         movie_queue_pre.get()
            #         movie_queue_pre.put(img_base64)
            # else:
            #     if not movie_queue_after.full():
            #         movie_queue_after.put(img_base64)
            #     else:
            #         alarm = False
            #         alarm_imgs_lst = []
            #         alarm_imgs_lst.extend(list(movie_queue_pre.queue))
            #         alarm_imgs_lst.extend(list(movie_queue_after.queue))
            #         # 保存告警视频
            #         threading.Thread(target=alarm_upload_algo,
            #                          args=(alarm_imgs_lst, camera_id, alarm_time)).start()
            # if alarm_by_algo:
            #     alarm_by_algo = False
            redisd = RedisSubscri()
            # print(img_base64)
            redisd.publish(channel=streaming_to_address, message=img_base64)
    else:
        while True:
            if streaming_to_address not in frame_dict:
                continue
            ret, jpeg = cv2.imencode('.jpg', frame_dict[streaming_to_address])
            img_base64 = base64.b64encode(jpeg).decode('utf-8')
            redisd = RedisSubscri()
            redisd.publish(channel=streaming_to_address, message=img_base64)
    # except Exception as e:
    #     print(e)
    #     pass
下期将更新利用算法处理高空作业未佩戴安全带。。。。。。。敬请期待

 浙公网安备 33010602011771号