spring boot开发web项目实现数据的增、删、改、查的demo
环境介绍
开发工具:
IntelliJ IDEA 2020.1.2 (Ultimate Edition)
开发框架:
spring boot 2.3.1
数据持久层框架:MyBatis
模板引擎:Thymeleaf(spring boot默认模板)
web服务器:Tomcat9.0(spring boot内置)
数据库:
MySQL
一、准备数据
+----+--------+-------+
| id | name | power |
+----+--------+-------+
| 1 | 关羽 | 99.2 |
| 2 | 吕布 | 99.9 |
| 3 | 张飞 | 98.5 |
+----+--------+-------+
说明:mysql本地数据库,数据库名为"study",表名"hero"。
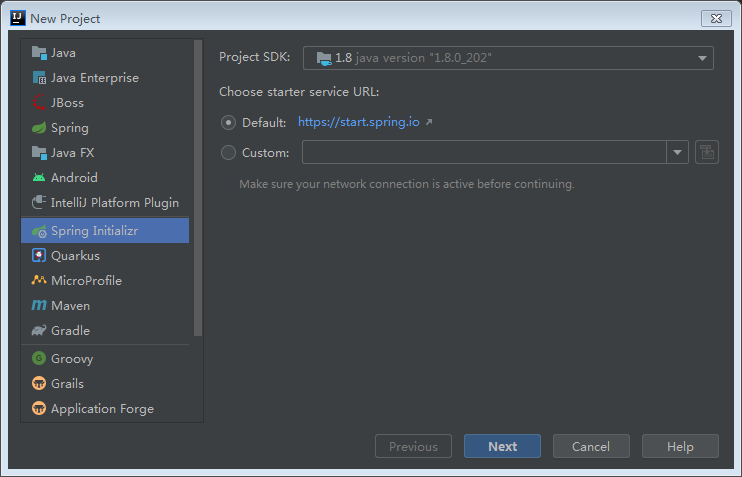
二、创建spring boot项目
1、使用Initializr方式智能创建,需要接入外网
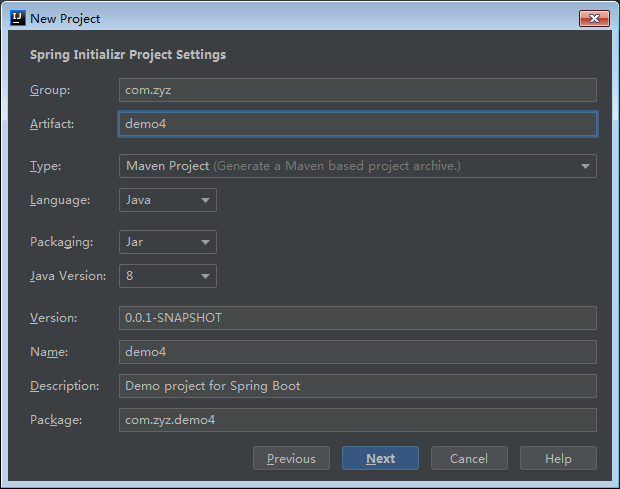
2、填写组织名和项目名即可,其它默认。
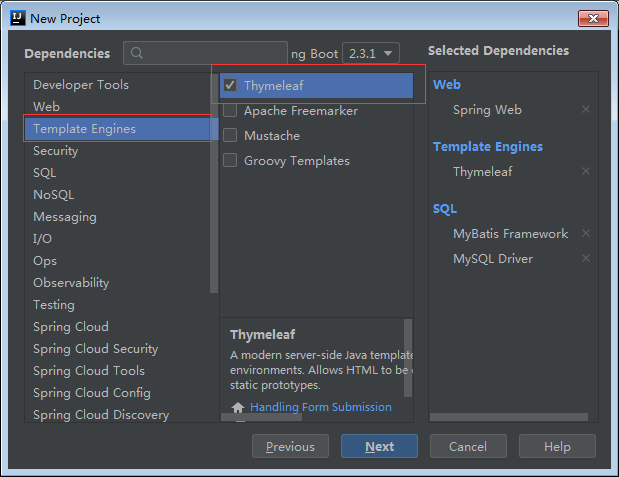
3、选择依赖
(1)Spring web
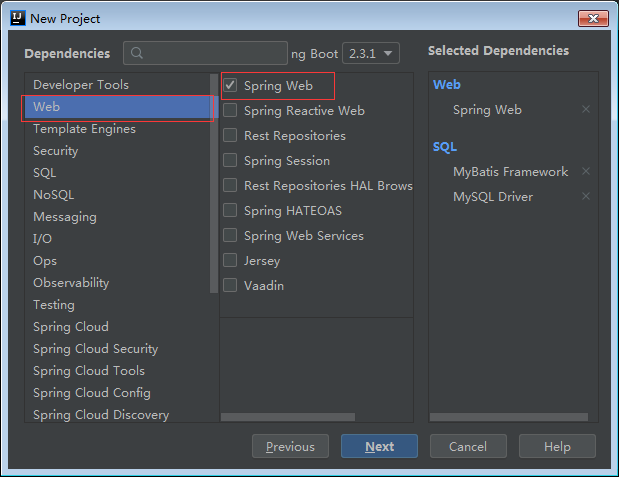
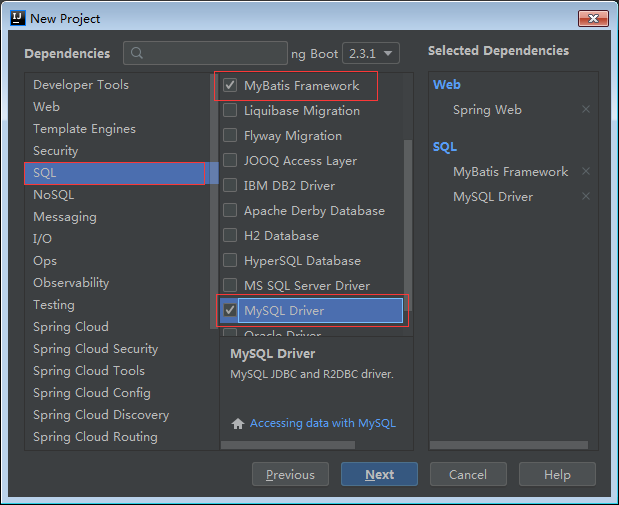
(2)MyBatis Framework依赖和MySQL Driver依赖。
(3)模板引擎Thymeleaf依赖
4、完成
三、配置
src/main/resources/application.properties


 1 # 视图引擎thymeleaf的配置
 2 # 开启缓存,在开发阶段可关闭,部署后可开启
 3 spring.thymeleaf.cache=true
 4 spring.thymeleaf.encoding=utf-8
 5 spring.thymeleaf.mode=HTML
 6 spring.thymeleaf.prefix=classpath:/templates/
 7 spring.thymeleaf.suffix=.html
 8
 9 # mysql数据库的配置(版本8.0)
10 spring.datasource.driver-class-name=com.mysql.cj.jdbc.Driver
11 spring.datasource.url=jdbc:mysql://localhost:3306/study?serverTimezone=UTC
12 spring.datasource.username=root
13 spring.datasource.password=root
四、开发
1、实体类
Hero.java
 1 package com.zyz.demo4.domain;
 2
 3 /**
 4  * Hero类跟表hero一一对应
 5  */
 6 public class Hero {
 7     private Integer id;
 8
 9     public Integer getId() {
10         return id;
11     }
12
13     public void setId(Integer id) {
14         this.id = id;
15     }
16
17     public String getName() {
18         return name;
19     }
20
21     public void setName(String name) {
22         this.name = name;
23     }
24
25     public Float getPower() {
26         return power;
27     }
28
29     public void setPower(Float power) {
30         this.power = power;
31     }
32
33     private String name;
34     private Float power;
35 }
2、Mapper接口
HeroMapper.java
 1 package com.zyz.demo4.mapper;
 2
 3 import com.zyz.demo4.domain.Hero;
 4 import org.apache.ibatis.annotations.*;
 5
 6 import java.util.List;
 7
 8 @Mapper
 9 public interface HeroMapper {
10
11     @Select("select * from hero")
12     public List<Hero> list();
13
14     @Select("select * from hero where id=#{id}")
15     public Hero get(Integer id);
16
17     @Insert("insert into hero(name,power) values(#{name},#{power})")
18     public void add(Hero hero);
19
20     @Delete("delete from hero where id=#{id}")
21     public void delete(Integer id);
22
23      @Update("update hero set name=#{name},power=#{power} where id=#{id}")
24     public void update(Hero hero);
25
26 }
3、控制器
 1 package com.zyz.demo4.controller;
 2
 3 import com.zyz.demo4.domain.Hero;
 4 import com.zyz.demo4.mapper.HeroMapper;
 5 import org.springframework.beans.factory.annotation.Autowired;
 6 import org.springframework.stereotype.Controller;
 7 import org.springframework.ui.Model;
 8 import org.springframework.web.bind.annotation.GetMapping;
 9 import org.springframework.web.bind.annotation.ModelAttribute;
10 import org.springframework.web.bind.annotation.PostMapping;
11 import org.springframework.web.bind.annotation.RequestParam;
12
13 /**
14  * 控制器
15  */
16 @Controller
17 public class HeroController {
18     @Autowired
19     private HeroMapper heroMapper;
20
21     /**
22      * 列表
23      * @param model
24      * @return
25      */
26     @GetMapping("/list")
27     public String list(Model model) {
28         model.addAttribute("heros", heroMapper.list());
29         return "list";
30     }
31
32     /**
33      * 表单(新增/编辑)
34      * @param action  请求参数,若值为add表示新增
35      * @param model
36      * @return
37      */
38     @GetMapping("/heroForm")
39     public String heroForm(@RequestParam(name = "action") String action, Model model) {
40         if (action.equals("add")) {
41             model.addAttribute("hero", new Hero());
42         }
43         return "hero_form";
44     }
45
46     /**
47      * 保存(新增/更新)
48      * @param hero
49      * @return
50      */
51     @PostMapping("/save")
52     public String save(@ModelAttribute Hero hero) {
53         if (hero.getId() == null) {//根据表单中的id字段是否为空来进行新增或修改
54             heroMapper.add(hero);
55         } else {
56             heroMapper.update(hero);
57         }
58         return "redirect:/list";
59     }
60
61     /**
62      * 删除
63      * @param id
64      * @return
65      */
66     @GetMapping("/delete")
67     public String delete(@RequestParam(name = "id") Integer id) {
68         heroMapper.delete(id);
69         return "redirect:/list";
70     }
71
72     /**
73      * 编辑
74      * @param id
75      * @param model
76      * @return
77      */
78     @GetMapping("/edit")
79     public String edit(@RequestParam(name = "id") Integer id, Model model) {
80         model.addAttribute("hero", heroMapper.get(id));//获得指定id对象,带到表单中
81         return "hero_form";
82     }
83
84 }
4、视图
(1)表单(新增/修改)
1 <!DOCTYPE html> 2 <html lang="en" xmlns:th="http://www.thymeleaf.org"> 3 <head> 4 <meta charset="UTF-8"> 5 <title>编辑</title> 6 </head> 7 <body> 8 <form th:action="@{/save}" method="post" th:object="${hero}"> 9 <input type="hidden" th:field="*{id}"> 10 <p> 11 姓名:<input type="text" th:field="*{name}"> 12 </p> 13 <p> 14 武力:<input type="text" th:field="*{power}"> 15 </p> 16 <p> 17 <input type="submit" value="保存"> 18 <input type="button" value="取消" onclick="window.location.href='/list'"> 19 </p> 20 </form> 21 </body> 22 </html>
(2)列表
1 <!DOCTYPE html> 2 <html lang="en" xmlns:th="http://www.thymeleaf.org"> 3 <head> 4 <meta charset="UTF-8"> 5 <title>三国群英传</title> 6 <style> 7 .list{ 8 margin-top: 10px; 9 width:100%; 10 border: 1px solid #ccc; 11 border-collapse: collapse; 12 } 13 .list td{ 14 border: 1px solid #ccc; 15 text-align: center; 16 } 17 </style> 18 </head> 19 <body> 20 <h2 style="text-align: center;">三国群英传</h2> 21 <hr> 22 <div style="width: 600px;margin: auto;"> 23 <a th:href="@{/heroForm(action=add)}">add</a> 24 <table class="list" cellpadding="5"> 25 <tr> 26 <th>id</th> 27 <th>name</th> 28 <th>power</th> 29 <th>action</th> 30 </tr> 31 <tr th:each="hero:${heros}"> 32 <td th:text="${hero.id}"></td> 33 <td th:text="${hero.name}"></td> 34 <td th:text="${hero.power}"></td> 35 <td> 36 <a th:href="@{/delete(id=${hero.id})}">delete</a> 37 <a th:href="@{/edit(id=${hero.id})}">edit</a> 38 </td> 39 </tr> 40 </table> 41 </div> 42 </body> 43 </html>
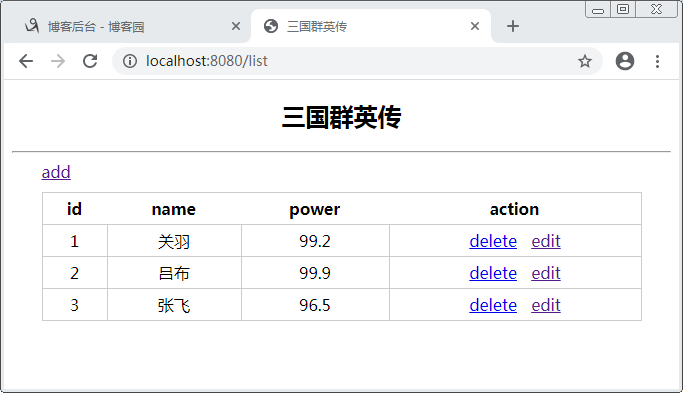
五、运行效果
添加前列表
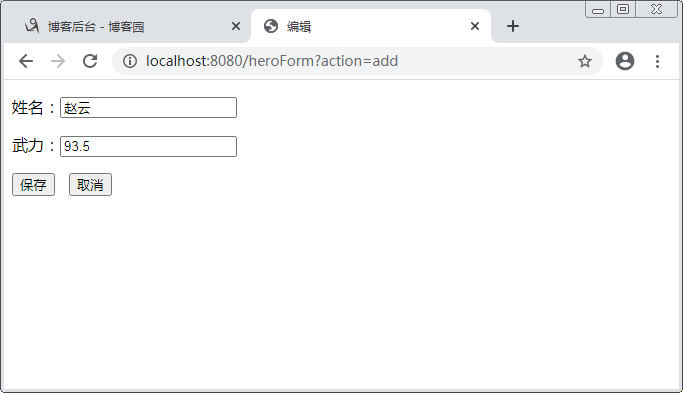
添加表单
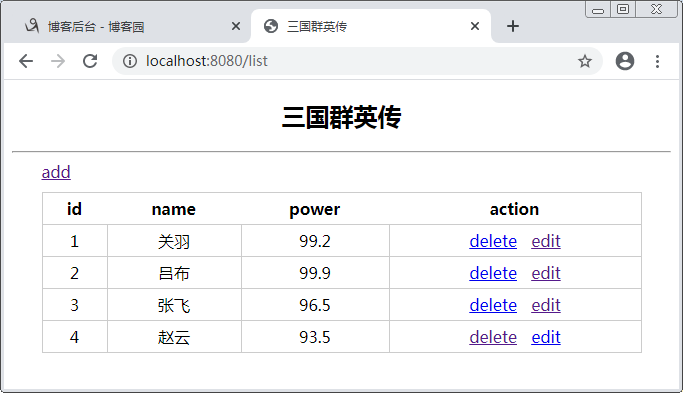
添加后列表
六、部署
因为新建spring boot项目默认的打包方式为jar包,部署服务器需要一直运行命令:nohug java -jar xxx.jar &。
所以要改成war包方式部署
1、 在pom.xml中修改打包方式为war
<packaging>war</packaging>
2、在启动程序相同位置建立类
ServletInitializer.java
 1 package com.zyz.demo4;
 2
 3 import org.springframework.boot.SpringApplication;
 4 import org.springframework.boot.autoconfigure.SpringBootApplication;
 5
 6 @SpringBootApplication
 7 public class Demo4Application {
 8
 9     public static void main(String[] args) {
10         SpringApplication.run(Demo4Application.class, args);
11     }
12
13
14 }
3、在pom.xml中修改maven编译的jdk版本
 1 <build>
 2         <plugins>
 3             <plugin>
 4                 <groupId>org.springframework.boot</groupId>
 5                 <artifactId>spring-boot-maven-plugin</artifactId>
 6             </plugin>
 7             <plugin>
 8                 <!-- 指定maven编译的jdk版本 -->
 9                 <groupId>org.apache.maven.plugins</groupId>
10                 <artifactId>maven-compiler-plugin</artifactId>
11                 <version>3.8.1</version>
12                 <configuration>
13                     <verbose>true</verbose>
14                     <fork>true</fork>
15                     <!--你的jdk地址-->
16                     <executable>C:\Java\jdk1.8.0_202\bin\javac.exe</executable>
17                 </configuration>
18             </plugin>
19         </plugins>
20     </build>
4、在终端Terminal执行打包命令
xxx>mvn clean package
5、将war包上传到tomcat的webapps目录
6、运行
http://www.syrkitty.com/hero/list
七、小结
使用sping boot框架开发web项目相对原生(servlet+jsp+jdbc)开发来说,具有以下优点:
1、没有了jdbc的底层操作代码,是因为MyBatis做了ORM映射和封装DAO操作。
2、使用模板引擎Thymeleaf使用前后端彻底分离,是因为Thymeleaf不允许嵌入Java代码,
3、spring boot控制器实现了方法到url的映射,而servlet只能做到类到url的映射。
总之,spring boot框架相对原生的web开发来说,大大地减少了代码量,使用快速开发成为可能。
spring boot提供默认配置,需要使用的技术只要加入starter就配置好了,可以说开箱即用,相对于spring来说,消除了繁琐的配置,减少了开发的难度,使轻松开发成为可能。

 浙公网安备 33010602011771号