


C++11最新特性总结
自己开发了一个股票智能分析软件,功能很强大,需要的点击下面的链接获取:
https://www.cnblogs.com/bclshuai/p/11380657.html
目录
1 C++11新特性
1.1 关键字和新语法
1.1.1 auto关键字
1.1.2 空指针关键字nullptr
1.2 新增STL容器
1.2.1 std::array数组
1.2.2 std::forward_list
1.2.3 std::unordered_map无序哈希map
1.2.4 std::unordered_set无序容器
1.3 多线程
1.3.1 std::thread类
1.3.2 自带锁的原子性变量std::atomic
1.3.3 条件等待std::condition_variable
1.4 智能指针std::shared_ptr
1.4.1 std::shared_ptr
1.4.2 std::weak_ptr
1.4.3 std::function、std::bind
1.5 右值引用和move
1.5.1 定义
1.5.2 右值引用的作用
1.5.3 深拷贝代码实例
1.5.4 右值引用实现转移构造函数和转移赋值操作符重载
1.5.5 std::move将不在使用的变量转换为右值引用
1.5.6 提高交换函数的性能
1.5.7 总结
1.6 std::forward参数传递的完美转发
1.6.1 std::forward作用
1.6.2 实例说明
1.6.3 std::forward原理剖析
1.6.4 总结
1 C++11新特性
1.1 关键字和新语法
1.1.1 auto关键字
自动变量推导,用auto去定义变量,会根据赋值去自动推导变量类型。不用在去根据数据类型去定义变量。
例如
auto AddTest(int a, int b)
{
return a + b;
}
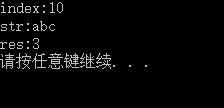
int main()
{
auto index = 10;
auto str = "abc";
auto ret = AddTest(1,2);
std::cout << "index:" << index << std::endl;
std::cout << "str:" << str << std::endl;
std::cout << "res:" << ret << std::endl;
}
输出
但是auto不能在类定义中声明函数
class Test
{
public:
auto TestWork(int a ,int b);
};
auto变量也可以作为STL容器的迭代器,放入for循环中去使用。
int main()
{
int numbers[] = { 1,2,3,4,5 };
std::cout << "numbers:" << std::endl;
for (auto number : numbers)
{
std::cout << number << std::endl;
}
}
1.1.2 空指针关键字nullptr
NULL的宏定义是0,但是0是一个整数,如果重载函数形参为int* n和int n,如果传入NULL不知道是调用哪个重载函数。nullptr就是空指针的,这样就会调用int* n。
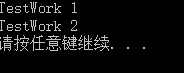
class Test
{
public:
void TestWork(int index)
{
std::cout << "TestWork 1" << std::endl;
}
void TestWork(int * index)
{
std::cout << "TestWork 2" << std::endl;
}
};
int main()
{
Test test;
test.TestWork(NULL);
test.TestWork(nullptr);
}
输出
1.2 新增STL容器
1.2.1 std::array数组
std::array和数组一样是存储在栈上,封装了一些函数,size(),Empty(),front,back(), at(),访问可以避免越界。而vector是存储在堆上,所以array的访问速度更快。std::array定义时固定长度,和数组一样,vector是变动长度。
实例代码
#include <array>
int main()
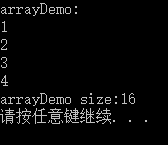
{
std::array<int, 4> arrayDemo = { 1,2,3,4 };
std::cout << "arrayDemo:" << std::endl;
for (auto itor : arrayDemo)
{
std::cout << itor << std::endl;
}
int arrayDemoSize = sizeof(arrayDemo);
std::cout << "arrayDemo size:" << arrayDemoSize << std::endl;
return 0;
}
输出结果
1.2.2 std::forward_list
内部实现是单向链表, list是双向链表,单向链表只有一个方向的指针,所以反向操作不支持,在尾部插入和删除的操作不支持,例如push_back(),back(),因为是单向,所以从头部插入和删除元素效率更高,且节省保存反向指针的空间。也不支持size()函数,这也是为了增加效率,可以通过distance(c.begin(),c.end())来得到forward_list的大小,这将消耗一个线性时间。链表相对于vector内部实现为数组,插入和删除效率更高。
示例代码:
#include <forward_list>
int main()
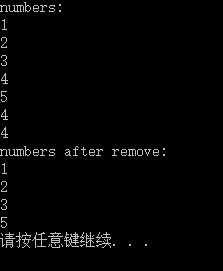
{
std::forward_list<int> numbers = {1,2,3,4,5,4,4};
std::cout << "numbers:" << std::endl;
for (auto number : numbers)
{
std::cout << number << std::endl;
}
numbers.remove(4);
std::cout << "numbers after remove:" << std::endl;
for (auto number : numbers)
{
std::cout << number << std::endl;
}
return 0;
}
输出结果
1.2.3 std::unordered_map无序哈希map
std::unordered_map与std::map用法基本差不多,但STL在内部实现上有很大不同,std::map使用的数据结构为二叉树,而std::unordered_map内部是哈希表的实现方式,哈希map理论上查找效率为O(1)。但在存储效率上,哈希map需要增加哈希表的内存开销。哈希内部实现是数组,hash算法得出键在数组中的索引值,然后直接存入数组的对应位置,取数据时也是计算索引值,然后根据索引值直接访问数组的元素。但是存在hash冲突的问题,可以通过四种方法:开发地址法:线性探测、再平方探测、伪随机探测,链式地址法,建立公共溢出区,再哈希法。参考文献:https://www.cnblogs.com/higerMan/p/11907117.html
使用实例
//webset address: http://www.cplusplus.com/reference/unordered_map/unordered_map/bucket_count/
#include <iostream>
#include <string>
#include <unordered_map>
int main()
{
std::unordered_map<std::string, std::string> mymap =
{
{ "house","maison" },
{ "apple","pomme" },
{ "tree","arbre" },
{ "book","livre" },
{ "door","porte" },
{ "grapefruit","pamplemousse" }
};
unsigned n = mymap.bucket_count();
std::cout << "mymap has " << n << " buckets.\n";
for (unsigned i = 0; i<n; ++i)
{
std::cout << "bucket #" << i << " contains: ";
for (auto it = mymap.begin(i); it != mymap.end(i); ++it)
std::cout << "[" << it->first << ":" << it->second << "] ";
std::cout << "\n";
}
return 0;
}
输出结果

1.2.4 std::unordered_set无序容器
std::unordered_set的数据存储结构也是哈希表的方式结构,std::unordered_set在插入时不会自动排序,而std::set会自动排序,内部值不会重复,内部实现是红黑树。哈希表的存储和查找性能(最好O(1),最差根据不同冲突方法而定)一般高于红黑树(log2N,N是元素的数量)。
示例程序
//示例代码1.0 http://www.cnblogs.com/feng-sc/p/5710724.html#include <iostream>
#include <string>
#include <unordered_set>
#include <set>
int main()
{
std::unordered_set<int> unorder_set;
unorder_set.insert(7);
unorder_set.insert(5);
unorder_set.insert(3);
unorder_set.insert(4);
unorder_set.insert(6);
std::cout << "unorder_set:" << std::endl;
for (auto itor : unorder_set)
{
std::cout << itor << std::endl;
}
std::set<int> set;
set.insert(7);
set.insert(5);
set.insert(3);
set.insert(4);
set.insert(6);
std::cout << "set:" << std::endl;
for (auto itor : set)
{
std::cout << itor << std::endl;
}
}
1.3 多线程
C++11中,引入了boost库中的多线程部分内容,形成C++标准
1.3.1 std::thread类
std::是一个线程类,可以传入多个参数的线程函数,不像之前创建线程参数只能是固定的。
#include <thread>
void threadfun1()
{
std::cout << "threadfun1 - 1\r\n" << std::endl;
std::this_thread::sleep_for(std::chrono::seconds(1));
std::cout << "threadfun1 - 2" << std::endl;
}
void threadfun2(int iParam, std::string sParam)
{
std::cout << "threadfun2 - 1" << std::endl;
std::this_thread::sleep_for(std::chrono::seconds(5));
std::cout << "threadfun2 - 2" << std::endl;
}
int main()
{
std::thread t1(threadfun1);
std::thread t2(threadfun2, 10, "abc");
t1.join();
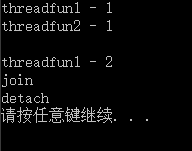
std::cout << "join" << std::endl;
t2.detach();强退线程
std::cout << "detach" << std::endl;
}
输出结果
1.3.2 自带锁的原子性变量std::atomic
以前多线程访问同一个变量时,为了避免多线程同时读写,所以要加上锁,临界区等,现在可以通过自带加锁功能的原子型变量atomic_int,
实例程序
#include <thread>
#include <atomic>
#include <stdio.h>
std::atomic_bool bIsReady = false;
std::atomic_int iCount = 100;
void threadfun1()
{
if (!bIsReady) {
std::this_thread::yield();
}
while (iCount > 0)
{
printf("iCount:%d\r\n", iCount--);
}
}
int main()
{
std::atomic_bool b;
std::list<std::thread> lstThread;
for (int i = 0; i < 10; ++i)
{
lstThread.push_back(std::thread(threadfun1));
}
for (auto& th : lstThread)
{
th.join();
}
}
1.3.3 条件等待std::condition_variable
通过等待锁unique_lock挂起线程,使线程不占用CPU的时间,当有任务时,通过notify_all()函数唤醒等待,执行任务。
// condition_variable example
#include <iostream> // std::cout
#include <thread> // std::thread
#include <mutex> // std::mutex, std::unique_lock
#include <condition_variable> // std::condition_variable
std::mutex mtx;
std::condition_variable cv;
bool ready = false;
void print_id(int id) {
std::unique_lock<std::mutex> lck(mtx);
while (!ready) cv.wait(lck);
// ...
std::cout << "thread " << id << '\n';
}
void go() {
std::unique_lock<std::mutex> lck(mtx);
ready = true;
cv.notify_all();
}
int main()
{
std::thread threads[10];
// spawn 10 threads:
for (int i = 0; i<10; ++i)
threads[i] = std::thread(print_id, i);
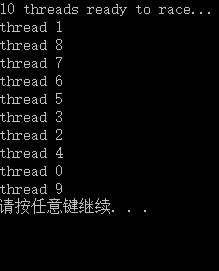
std::cout << "10 threads ready to race...\n";
go(); // go!
for (auto& th : threads) th.join();
return 0;
}
输出结果
1.4 智能指针std::shared_ptr
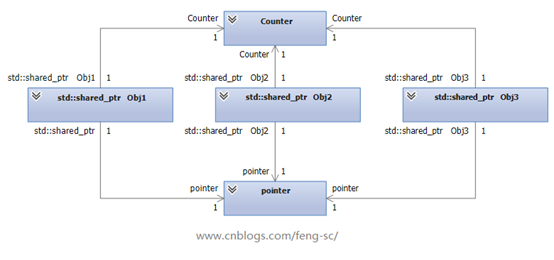
智能指针封装了内存的申请和删除,模拟了java的内存回收机制。自动删除内存,通过创建引用句柄指向内存空间,同时通过计数count统计指向内存的引用数量。当count为0时,自动删除内存。相互引用的情况下,会造成内存泄露,所以有了std::weak_ptr指针,指向内存,不会增加计数count。count降为0时,也会销毁内存。
1.4.1 std::shared_ptr
使用std::shared_ptr<Test> p1 = std::make_shared<Test>()函数来创建对像。
#include <memory>
class Test
{
public:
Test()
{
std::cout << "Test()" << std::endl;
}
~Test()
{
std::cout << "~Test()" << std::endl;
}
};
int main()
{
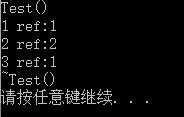
std::shared_ptr<Test> p1 = std::make_shared<Test>();//新建内存
std::cout << "1 ref:" << p1.use_count() << std::endl;//1
{
std::shared_ptr<Test> p2 = p1;//创建新的引用,count变为2
std::cout << "2 ref:" << p1.use_count() << std::endl;//2
}
// p2销毁,count变为1
std::cout << "3 ref:" << p1.use_count() << std::endl;//输出1
return 0;
}
1.4.2 std::weak_ptr
通过std::weak_ptr<classname>创建对象的弱引用,不会增加count计数值,通过弱引用的函数lock(),可以将弱引用转换为强引用。 std::shared_ptr<TestA> tmp = m_TestA_Ptr.lock();
//示例代码1.0 http://www.cnblogs.com/feng-sc/p/5710724.html#include <memory>
class TestB;
class TestA
{
public:
TestA()
{
std::cout << "TestA()" << std::endl;
}
void ReferTestB(std::shared_ptr<TestB> test_ptr)
{
m_TestB_Ptr = test_ptr;#弱引用指向,计数没有加
}
void TestWork()
{
std::cout << "~TestA::TestWork()" << std::endl;
}
~TestA()
{
std::cout << "~TestA()" << std::endl;
}
private:
std::weak_ptr<TestB> m_TestB_Ptr;
};
class TestB
{
public:
TestB()
{
std::cout << "TestB()" << std::endl;
}
void ReferTestB(std::shared_ptr<TestA> test_ptr)
{
m_TestA_Ptr = test_ptr;
}
void TestWork()
{
std::cout << "~TestB::TestWork()" << std::endl;
}
~TestB()
{//弱引用转换为强引用,对象A的count加1等于2
std::shared_ptr<TestA> tmp = m_TestA_Ptr.lock();
tmp->TestWork();
std::cout << "2 ref a:" << tmp.use_count() << std::endl;
std::cout << "~TestB()" << std::endl;
}
std::weak_ptr<TestA> m_TestA_Ptr;
};
int main()
{
std::shared_ptr<TestA> ptr_a = std::make_shared<TestA>();//创建强引用A
std::shared_ptr<TestB> ptr_b = std::make_shared<TestB>();//创建强引用B
ptr_a->ReferTestB(ptr_b);//弱引用指向B
ptr_b->ReferTestA(ptr_a);弱引用指向A
std::cout << "1 ref a:" << ptr_a.use_count() << std::endl;
std::cout << "1 ref b:" << ptr_a.use_count() << std::endl;
return 0;
}
1.4.3 std::function、std::bind
以前的方式使用函数指针的方式,将函数指针以实参的形式传给定义了函数形参的函数。std::function可以直接定义函数形参,传入函数或者lamla表达式,函数内部调用传入的函数,返回结果。如果要将类A中的函数作为实参传给类B中的函数形参, 在B中调用A中的函数,可以std::bind函数去绑定。
(1)函数指针
class Test
{
public:
typedef int(*FunType)(int, int);
void Add(FunType fun,int a,int b)
{
int sum = fun(a, b);
std::cout << "sum:" << sum << std::endl;
}
};
#include <functional>
#include <iostream>
#include "Test.h"
int add(int a,int b)
{
return a + b;
}
int main()
{
Test test;
test.Add(add, 1, 2);
return 0;
}
(2)引用其他类的函数
#定义类Test,用std::function声明函数形参
class Test
{
public:
void Add(std::function<int(int, int)> fun, int a, int b)
{
int sum = fun(a, b);
std::cout << "sum:" << sum << std::endl;
}
};
1.5 右值引用和move
参考文献:https://winsoft666.blog.csdn.net/article/details/78520237
1.5.1 定义
左值指的是变量,可以在多行语句中使用,有变量指向存储空间。右值是指临时的对象,它们只在当前的语句中有效。例如MyString a; a = MyString("Hello");a就是左值,MyString("Hello")就是右值,MyString("Hello")会调用构造函数,复制给a时,又会调用复制构造函数,语句执行完后,MyString("Hello")创建的对象就会调用析构函数销毁掉。为了避免MyString("Hello")销毁,和a对象的构造,直接将MyString("Hello")创建的对象申请的地址空间转移给a,提高程序运行的效率。就可以通过右值引用来实现。
在C++11之前,右值是不能被引用的,如:
int &a = 1; // error C2440: “初始化”: 无法从“int”转换为“int &”
我们最多只能用常量引用来绑定一个右值,如:
const int &a = 1;
在C++11中,我们可以右值引用,使用&&来实现:
int &&a = 1;
注意:这里a的类型是右值引用类型(int &&),但是如果从左值和右值的角度区分它,它实际上是个左值。因为可以对它取地址,而且它还有名字,是一个已经命名的左值。
1.5.2 右值引用的作用
是消除两个对象交互时不必要的对象拷贝,节省运算存储资源,提高效率。
1.5.3 深拷贝代码实例
class MyString {
private:
char* _data;
size_t _len;
void _init_data(const char *s) {
_data = new char[_len + 1];
memcpy(_data, s, _len);
_data[_len] = '\0';
}
public:
MyString() {
_data = NULL;
_len = 0;
}
MyString(const char* p) {
_len = strlen(p);
_init_data(p);
}
MyString(const MyString& str) {
_len = str._len;
_init_data(str._data);
std::cout << "Copy Constructor is called! source: " << str._data << std::endl;
}
MyString& operator=(const MyString& str) {
if (this != &str) {
_len = str._len;
_init_data(str._data);
}
std::cout << "Copy Assignment is called! source: " << str._data << std::endl;
return *this;
}
virtual ~MyString() {
if (_data != NULL) {
std::cout << "Destructor is called! " << std::endl;
free(_data);
}
}
};
int main() {
MyString a;
a = MyString("Hello"); //调用构造函数创建MyString("Hello"),调用赋值构造函数创建a。
// MyString("Hello")对象销毁,调用析构函数
std::vector<MyString> vec;
vec.push_back(MyString("World")); //调用构造函数创建MyString("World")
//调用复制构造函数创建变量存入vect;
}
输出结果:
Copy Assignment is called! source: Hello
Destructor is called!
Copy Constructor is called! source: World
Destructor is called!
Destructor is called!
Destructor is called!
整个过程中构造函数创建了两次,复制构造函数调用一次,赋值构造函数调用一次,一共创建了4个对象。两个临时对象MyString("Hello")和MyString("World")创建后即销毁。为了减少对象的创建,我们将复制构造函数和复制构造函数通过右值引用的方式来定义。
1.5.4 右值引用实现转移构造函数和转移赋值操作符重载
MyString(MyString&& str) {
std::cout << "Move Constructor is called! source: " << str._data << std::endl;
_len = str._len;
_data = str._data;
str._len = 0;
str._data = NULL; // ! 防止在析构函数中将内存释放掉
}
MyString& operator=(MyString&& str) {
std::cout << "Move Assignment is called! source: " << str._data << std::endl;
if (this != &str) {
_len = str._len;
_data = str._data; //转移了, 并没有重新_init_data
str._len = 0;
str._data = NULL; // ! 防止在析构函数中将内存释放掉
}
return *this;
}
输出结果:
Move Assignment is called! source: Hello
Move Constructor is called! source: World
Destructor is called!
Destructor is called!
1.5.5 std::move将不在使用的变量转换为右值引用
如果已知一个命名对象不再被使用,而想对它调用转移构造函数和转移赋值函数,使用函数 std::move将左值引用转换为右值引用。
void ProcessValue(int& i) {
std::cout << "LValue processed: " << i << std::endl;
}
void ProcessValue(int&& i) {
std::cout << "RValue processed: " << i << std::endl;
}
int main() {
int a = 0;
ProcessValue(a);
ProcessValue(std::move(a));
}
输出结果
LValue processed: 0
RValue processed: 0
1.5.6 提高交换函数的性能
std::move在提高 swap 函数的的性能上非常有帮助,互换函数的定义可以从
template <class T>
void swap(T& a, T& b)
{
T tmp(a); // copy a to tmp
a = b; // copy b to a
b = tmp; // copy tmp to b
}
变为如下方式,减少了临时对象的创建。
template <class T>
void swap(T& a, T& b)
{
T tmp(std::move(a)); // move a to tmp
a = std::move(b); // move b to a
b = std::move(tmp); // move tmp to b
}
1.5.7 总结
(1) 左值是有地址有名字的变量,右值是临时的将亡变量。int&& a=1;a也是左值。
(2) 左值引用指向变量,右值引用不能指向左值。int a=0;int&b=a;正确,int&&c=a;错误,编译不过。常量左值引用例外,可以指向右值,const int& d=1;正确。常量引用不可改变。
(3) 如果一个左值对象不再被使用,或者将要销毁,需要创建新的对象时,将即将销毁的左值对象转移给新的对象,可以用std::move实现,使用函数 std::move将左值引用转换为右值引用。
1.6 std::forward参数传递的完美转发
1.6.1 std::forward作用
std::forward会将输入的参数原封不动地传递到下一个函数中,这个“原封不动”指的是,如果输入的参数是左值,那么传递给下一个函数的参数的也是左值;如果输入的参数是右值,那么传递给下一个函数的参数的也是右值。
1.6.2 实例说明
(1)先定义一个类CData,实现左值引用构造和右值引用构造函数。当入参为
class CData
{
public:
CData(const char* ch) : data(ch)
{
std::cout << "CData(const char* ch)" << std::endl;
}
CData(const std::string& str) : data(str) //左值引用构造函数
{
std::cout << "CData(const std::string& str)" << std::endl;
}
CData(std::string&& str) : data(str)//右值引用构造函数
{
std::cout << "CData(std::string&& str)" << std::endl;
}
~CData()//析构函数
{
std::cout << "~CData()" << std::endl;
}
private:
std::string data;
};
(2)我们在定义一个模板新建函数
template<typename T>
CData* Creator(T&& t)
{
return new CData(t);
}
creator函数因为使用了模板,虽然是右值引用形参T&&,但是可以传入T&,T&&,T三种类型,因为T是模板类型,如果T是string类型,则入参可以是string,string&,string&&,模板有折叠规则:
string& &&折叠之后是string&,
string&& &&折叠之后是string&&,
string &&折叠后是string&
如果定义是CData* Creator(T& t),那么折叠之后是
string& &折叠之后是string&,
string&& &折叠之后是string&,
string &折叠后是string&
总结一下:string&& &&折叠之后是string&&,其他的都是string&;
(3)创建测试程序
int main()
{
const char* value = "hello";
std::string str1 = "hello";
std::string str2 = " world";
string& str3 = str2;
string&& str4 = str1 + str2;
printf("左值\n");
CData* p1 = Creator(str1);//CData(const std::string& str)
delete p1;
printf("右值\n");
CData* p2 = Creator(str1 + str2);//CData(const std::string& str)
delete p2;
printf("左值引用,是个左值\n");
CData* p3 = Creator(str3);//CData(const std::string& str)
delete p3;
printf("右值引用,也是个左值\n");
CData* p4 = Creator(str4);//CData(const std::string& str)
delete p4;
system("pause");
}
分别传入实参左值,右值,左值引用,右值引用,传入右值引用之后,输出结果全部是CData(const std::string& str),这就是参数的不完美传递。我们期望的是传入左值,调用左值构造函数,传入右值调用右值构造函数,就可以修改为return new CData(std::forward(t));这样就会调用CData(std::string&& str)转移构造函数。这样就会实现参数的完美传递。
template<typename T>
CData* Creator(T&& t)
{
return new CData(std::forward<T>(t));
}
测试程序输出结果:
左值
CData(const std::string& str)
右值
CData(std::string&& str)//这里调用了右值引用构造函数
左值引用,是个左值
CData(const std::string& str)
右值引用,也是个左值
CData(const std::string& str)
为什么传入右值引用实参?确调用了左值构造函数,因为形参变量t是一个左值。
1.6.3 std::forward原理剖析
(1) forward函数定义
forward的定义也是模板定义,remove_reference<_Ty>::type是去除引用的类型定义,例如_Ty是int& int&&都会转为int。最后返回(static_cast<_Ty&&>(_Arg));如果_Ty是int&,则根据叠加规则无论传入什么,都返回的是int&。如果_Ty是int或者int&&,则会返回右值引用类型。
template<class _Ty> inline
constexpr _Ty&& forward(typename remove_reference<_Ty>::type& _Arg) _NOEXCEPT
{ // forward an lvalue as either an lvalue or an rvalue
return (static_cast<_Ty&&>(_Arg));
}
template<class _Ty> inline
constexpr _Ty&& forward(
typename remove_reference<_Ty>::type&& _Arg) _NOEXCEPT
{ // forward an rvalue as an rvalue
static_assert(!is_lvalue_reference<_Ty>::value, "bad forward call");
return (static_cast<_Ty&&>(_Arg));
}
(2)remove_reference<_Ty>定义
remove_reference<_Ty>负责将模板参数类型_Ty的引用去掉,比如int、int&、int&&转换后都变成int,其实现如下
template<class _Ty>
struct remove_reference
{ // remove reference
typedef _Ty type;
};
template<class _Ty>
struct remove_reference<_Ty&>
{ // remove reference
typedef _Ty type;
};
template<class _Ty>
struct remove_reference<_Ty&&>
{ // remove rvalue reference
typedef _Ty type;
};
由源代码可知 remove_reference<_Ty>::type为模板类型去掉引用的类型。
(3)static_cast<_Ty&&>(_Arg))模板转换规则
_Ty是传递给forward函数的类型,可以是T ,T&,T&&。举例int,int&,int&&。_Ty&&也要遵循折叠原则。
模板参数为引用类型T、T&&时,返回右值引用
模板参数为引用类型T&时,返回左值引用。
推导如下:
_Ty => T
template<class T>
T&& forward(typename T& t) { return (static_cast<T&&>(t)); }
_Ty = > T&&
template<class T&&>
T&& && forward(typename T& t) { return (static_cast<T&& &&>(t)); }
==> T&& forward(typename T& t) { return (static_cast<T&& &&>(t)); }
_Ty = > T&
template<class T&>
T&& & forward(typename T& t) { return (static_cast<T& &&>(t)); }
== > T& forward(typename T& t) { return (static_cast<T& &&>(t)); }
1.6.4 总结
(1) forward用于参数传递时的保持参数的左值,右值属性,形参用T&&,传递用std::forward<T>(),例如Creator(T&& t){return new CData(std::forward<T>(t));},参数传遵循折叠原则。
(2) 引用折叠string&& &&折叠之后是string&&,其他的都是string&;
(3) forward实现原理是先是去除引用类型remove_reference<_Ty>::type& _Arg,强制转换return (static_cast<_Ty&&>(_Arg)); _Arg是去除引用后的参数类型,例如_Ty 是int,int&,int&&,_Arg都是int&类型,强制转换是折叠之后的强制转换。_Ty如果是int&,则输出是int&,如果是int或者int&&,输出是int&&。


【推荐】国内首个AI IDE,深度理解中文开发场景,立即下载体验Trae
【推荐】编程新体验,更懂你的AI,立即体验豆包MarsCode编程助手
【推荐】抖音旗下AI助手豆包,你的智能百科全书,全免费不限次数
【推荐】轻量又高性能的 SSH 工具 IShell:AI 加持,快人一步
· 开发者必知的日志记录最佳实践
· SQL Server 2025 AI相关能力初探
· Linux系列:如何用 C#调用 C方法造成内存泄露
· AI与.NET技术实操系列(二):开始使用ML.NET
· 记一次.NET内存居高不下排查解决与启示
· Manus重磅发布:全球首款通用AI代理技术深度解析与实战指南
· 被坑几百块钱后,我竟然真的恢复了删除的微信聊天记录!
· 没有Manus邀请码?试试免邀请码的MGX或者开源的OpenManus吧
· 园子的第一款AI主题卫衣上架——"HELLO! HOW CAN I ASSIST YOU TODAY
· 【自荐】一款简洁、开源的在线白板工具 Drawnix