.Net(C#)访问X509证书加密的Webservice(二)--设置VS支持WSE
如果是VS2008或者以上版本,首先要让Visual Studio 2008 和 2010支持Web Services Enhancements (WSE) 3.0
VS2008和2010默认是不支持Web Services Enhancements (WSE) 3.0,因为MS希望用WCF来代替。下面是关于让Visual Studio 2008 和 2010支持Web Services Enhancements (WSE) 3.0的一个解决方法。
1. 下载并且安装WSE 3.0。确认安装已经成功。注意:安装前关闭Visual Studio。

2. 打开文件夹 %ALLUSERSPROFILE%\Application Data\Microsoft\MSEnvShared\AddIns,如果文件夹不存在,关闭Visual Studio并手动创建。
比如:
- Windows XP: “C:\Documents and Settings\All Users\Application Data\Microsoft\MSEnvShared\AddIns”
- Windows Vista / Windows 7: “C:\ProgramData\Microsoft\MSEnvShared\AddIns”
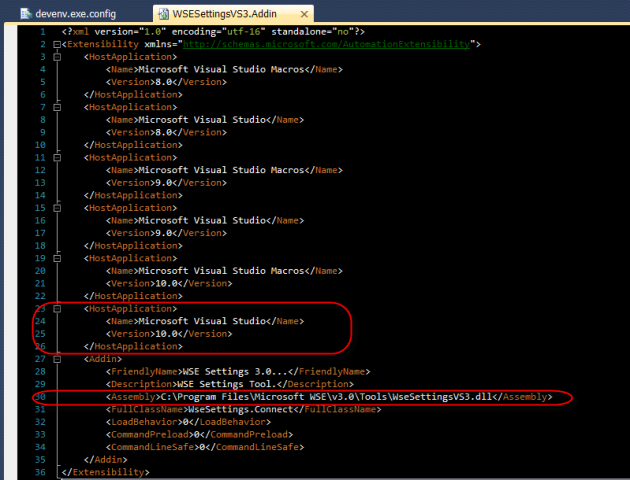
3. 在第2步的文件夹中找到WSESettingsVS3.AddIn,备份该文件。如果文件不存在,创建一个名为WSESettingsVS3.AddIn的文件,并将第4步所示的内容写入文件中。
4. 打开WSESettingsVS3.AddIn,可以看到两段配置,指向版本8.0。复制这两段配置,然后将新配置中的版本号改为9.0(VS2008)或者10.0(VS2010)。保存。

5. 打开Visual Studio的安装目录,进入Common7\IDE,打开devenv.exe.config,在修改之前备份devenv.exe.config。将下面的代码添加到结束标记之前。这样,Visual Studio就可以使用WSE生成web service proxy类了。

- <system.web>
- <webServices>
- <soapExtensionImporterTypes>
- <add type=“Microsoft.Web.Services3.Description.WseExtensionImporter,
- Microsoft.Web.Services3, Version=3.0.0.0,
- Culture=neutral, PublicKeyToken=31bf3856ad364e35“ />
- </soapExtensionImporterTypes>
- </webServices>
- </system.web>
6. 关闭所有的Visual Studio,重新启动。
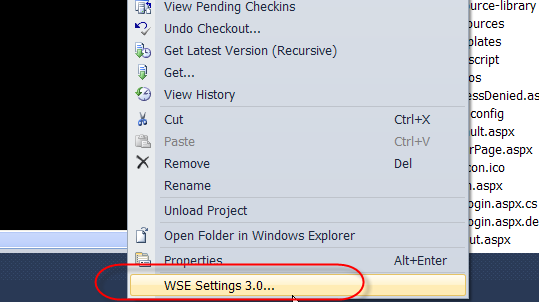
7. 在VS2010中打开项目,右键点击项目可以看到WSE Setting 3.0选项。这样就可以在VS2010中配置WSE 3.0了。


 浙公网安备 33010602011771号