
SSH整合
SSH环境整合
版本与环境
Spring 版本:spring-framework-4.3.4.RELEASE
Hibernate 版本:hibernate-release-5.2.4.Final
Struts2 版本:struts-2.3.34
Mysql 版本:Mysql 8.0
Tomcat 版本:apache-tomcat-7.0.88
导入Jar包:下载Jar包 小贴士:左侧下载链接内的Jar全部导入即可,如要添加功能,视况而定。
具体框架具体功能在实践中自然而然的就领悟到了,无须学习框架没有任何基础前死记硬背,先把流程打通,再具体分析,事半功倍。
编码修改为UTF-8.
- 配置web.xml


 1 <?xml version="1.0" encoding="UTF-8"?>
 2 <web-app xmlns:xsi="http://www.w3.org/2001/XMLSchema-instance" xmlns="http://java.sun.com/xml/ns/javaee" xsi:schemaLocation="http://java.sun.com/xml/ns/javaee http://java.sun.com/xml/ns/javaee/web-app_3_0.xsd" id="WebApp_ID" version="3.0">
 3   <display-name>CRMSystem</display-name>
 4
 5      <context-param>
 6         <param-name>contextConfigLocation</param-name>
 7         <param-value>
 8                     classpath*:applicationContext.xml
 9         </param-value>
10     </context-param>
11     <listener>
12         <listener-class>org.springframework.web.context.ContextLoaderListener</listener-class>
13     </listener>
14
15
16       <filter>
17         <filter-name>openSession</filter-name>
18         <filter-class>org.springframework.orm.hibernate5.support.OpenSessionInViewFilter</filter-class>
19         <init-param>
20             <param-name>sessionFactoryBean</param-name>
21             <param-value>sessionFactory</param-value>
22         </init-param>
23         <init-param>
24             <param-name>singleSession</param-name>
25             <param-value>true</param-value>
26         </init-param>
27         <init-param>
28             <param-name>flushMode</param-name>
29             <param-value>AUTO</param-value>
30         </init-param>
31     </filter>
32
33     <filter>
34         <filter-name>struts2</filter-name>
35         <filter-class>org.apache.struts2.dispatcher.ng.filter.StrutsPrepareAndExecuteFilter</filter-class>
36     </filter>
37
38     <filter-mapping>
39         <filter-name>openSession</filter-name>
40         <url-pattern>/*</url-pattern>
41     </filter-mapping>
42
43     <filter-mapping>
44         <filter-name>struts2</filter-name>
45         <url-pattern>/*</url-pattern>
46     </filter-mapping>
47
48       <listener>
49         <listener-class>org.springframework.web.util.IntrospectorCleanupListener</listener-class>
50     </listener>
51
52
53   <welcome-file-list>
54     <welcome-file>index.html</welcome-file>
55     <welcome-file>index.htm</welcome-file>
56     <welcome-file>index.jsp</welcome-file>
57     <welcome-file>default.html</welcome-file>
58     <welcome-file>default.htm</welcome-file>
59     <welcome-file>default.jsp</welcome-file>
60   </welcome-file-list>
61 </web-app>
web.xml具体内容简单明了讲解一下:
1      <context-param>
2         <param-name>contextConfigLocation</param-name>
3         <param-value>
4                     classpath*:applicationContext.xml
5         </param-value>
6     </context-param>
7     <listener>
8         <listener-class>org.springframework.web.context.ContextLoaderListener</listener-class>
9     </listener>
这是加载Spring配置文件的监听器,web服务一开启容器开始创建加载。classpath*:applicationContext.xml 配置文件路径
 1       <filter>
 2         <filter-name>openSession</filter-name>
 3         <filter-class>org.springframework.orm.hibernate5.support.OpenSessionInViewFilter</filter-class>
 4         <init-param>
 5             <param-name>sessionFactoryBean</param-name>
 6             <param-value>sessionFactory</param-value>
 7         </init-param>
 8         <init-param>
 9             <param-name>singleSession</param-name>
10             <param-value>true</param-value>
11         </init-param>
12         <init-param>
13             <param-name>flushMode</param-name>
14             <param-value>AUTO</param-value>
15         </init-param>
16     </filter>
OpenSessionInViewFilter过滤器:控制session的创建与销毁,涉及懒加载等知识点,与此类相似的还有OpenSessionInViewInterceptor.class(从名字可以看出是加在拦截器上的),具体用法Google或者Baidu吧。
1       <listener>
2         <listener-class>org.springframework.web.util.IntrospectorCleanupListener</listener-class>
3     </listener>
IntrospectorCleanupListener监听器:管理内存的对象,回收没用的垃圾对象,大概此意。
1     <filter-mapping>
2         <filter-name>openSession</filter-name>
3         <url-pattern>/*</url-pattern>
4     </filter-mapping>
5
6     <filter-mapping>
7         <filter-name>struts2</filter-name>
8         <url-pattern>/*</url-pattern>
9     </filter-mapping>
这个就很简单了,不做解释了。注意:struts2的过滤器要放在openSession下面!否则,自己体验一下,你就知道了。
- 配置applicationContext.xml(记得放在src下,与web.xml配置的一致即可,免得计算机没读取到文件,你气的把电脑砸了)
 1 <?xml version="1.0" encoding="UTF-8"?>
 2 <beans xmlns="http://www.springframework.org/schema/beans"
 3     xmlns:xsi="http://www.w3.org/2001/XMLSchema-instance"
 4     xmlns:aop="http://www.springframework.org/schema/aop"
 5     xmlns:context="http://www.springframework.org/schema/context"
 6     xmlns:tx="http://www.springframework.org/schema/tx"
 7     xsi:schemaLocation="http://www.springframework.org/schema/beans http://www.springframework.org/schema/beans/spring-beans.xsd
 8         http://www.springframework.org/schema/context http://www.springframework.org/schema/context/spring-context-4.2.xsd
 9         http://www.springframework.org/schema/aop http://www.springframework.org/schema/aop/spring-aop-4.2.xsd
10         http://www.springframework.org/schema/tx http://www.springframework.org/schema/tx/spring-tx-4.2.xsd">
11
12     <!-- 配置数据源[以读取外部属性文件的形式] -->
13     <context:property-placeholder
14         location="classpath:jdbc.properties" />
15     <bean id="dataSource"
16         class="com.mchange.v2.c3p0.ComboPooledDataSource">
17         <property name="driverClass" value="${driverClass}"></property>
18         <property name="jdbcUrl" value="${jdbcUrl}"></property>
19         <property name="user" value="${user}"></property>
20         <property name="password" value="${password}"></property>
21         <property name="initialPoolSize" value="${initialPoolSize}"></property>
22         <property name="minPoolSize" value="${minPoolSize}"></property>
23         <property name="maxPoolSize" value="${maxPoolSize}"></property>
24     </bean>
25
26     <!-- 配置session工厂 -->
27     <bean id="sessionFactory"
28         class="org.springframework.orm.hibernate5.LocalSessionFactoryBean">
29         <property name="dataSource" ref="dataSource"></property>
30         <property name="hibernateProperties">
31             <props>
32                 <prop key="hibernate.dialect">org.hibernate.dialect.MySQLDialect</prop>
33                 <prop key="hibernate.show_sql">true</prop>
34                 <prop key="hibernate.format_sql">true</prop>
35                 <prop key="hibernate.hbm2ddl.auto">update</prop>
36                 <!-- 需要去了解学习 -->
37                 <prop key="javax.persistence.validation.mode">none</prop>
38             </props>
39         </property>
40         <property name="mappingLocations">
41             <value>classpath:/com/zhangpn/entity/Book.hbm.xml</value>
42         </property>
43     </bean>
44
45     <!-- 配置事务管理器 -->
46     <bean id="transactionManager"
47         class="org.springframework.orm.hibernate5.HibernateTransactionManager">
48         <property name="sessionFactory" ref="sessionFactory"></property>
49     </bean>
50
51     <!-- 配置事务传播特性 -->
52     <tx:advice id="txAdvice"
53         transaction-manager="transactionManager">
54         <tx:attributes>
55             <tx:method name="create*" propagation="REQUIRED"
56                 isolation="READ_COMMITTED" />
57             <tx:method name="update*" propagation="REQUIRED"
58                 isolation="READ_COMMITTED" />
59             <tx:method name="delete*" propagation="REQUIRED"
60                 isolation="READ_COMMITTED" />
61             <tx:method name="query*" propagation="SUPPORTS"
62                 read-only="true" />
63         </tx:attributes>
64     </tx:advice>
65
66     <!-- 拦截需要被绑定事务方法 -->
67     <aop:config>
68         <aop:pointcut
69             expression="execution(* com.zhangpn.serviceImpl.*.*(..))"
70             id="txMethod" />
71         <aop:advisor advice-ref="txAdvice" pointcut-ref="txMethod" />
72     </aop:config>
73
74     <!-- SessionDaoSupport -->
75     <bean id="sessionDaoSupport"
76         class="com.zhangpn.util.SessionDaoSupport">
77         <property name="sessionFactory" ref="sessionFactory"></property>
78     </bean>
79
80     <!-- Dao -->
81     <bean id="bookDao" class="com.zhangpn.daoImpl.BookDaoImpl">
82         <property name="sessionFactory" ref="sessionFactory"></property>
83     </bean>
84
85     <!-- Service -->
86     <bean id="bookService"
87         class="com.zhangpn.serviceImpl.BookServiceImpl">
88         <property name="bookDao" ref="bookDao"></property>
89     </bean>
90
91     <!-- Action -->
92     <bean id="bookAction" class="com.zhangpn.action.BookAction"
93         scope="prototype">
94         <property name="bookService" ref="bookService"></property>
95     </bean>
96 </beans>
也是简单的讲解一下:
 1     <context:property-placeholder
 2         location="classpath:jdbc.properties" />
 3     <bean id="dataSource"
 4         class="com.mchange.v2.c3p0.ComboPooledDataSource">
 5         <property name="driverClass" value="${driverClass}"></property>
 6         <property name="jdbcUrl" value="${jdbcUrl}"></property>
 7         <property name="user" value="${user}"></property>
 8         <property name="password" value="${password}"></property>
 9         <property name="initialPoolSize" value="${initialPoolSize}"></property>
10         <property name="minPoolSize" value="${minPoolSize}"></property>
11         <property name="maxPoolSize" value="${maxPoolSize}"></property>
12     </bean>
location="classpath:jdbc.properties" 这是引用的外部属性文件,不要着急马上给你贴代码.
这是配置一个连接池的bean,用的是c3p0,你也可以用其他的,看你喜欢。
    <!-- 配置session工厂 -->
    <bean id="sessionFactory"
        class="org.springframework.orm.hibernate5.LocalSessionFactoryBean">
        <property name="dataSource" ref="dataSource"></property>
        <property name="hibernateProperties">
            <props>
                <prop key="hibernate.dialect">org.hibernate.dialect.MySQLDialect</prop>
                <prop key="hibernate.show_sql">true</prop>
                <prop key="hibernate.format_sql">true</prop>
                <prop key="hibernate.hbm2ddl.auto">update</prop>
                <!-- 需要去了解学习 -->
                <prop key="javax.persistence.validation.mode">none</prop>
            </props>
        </property>
        <property name="mappingLocations">
            <value>classpath:/com/zhangpn/entity/Book.hbm.xml</value>
        </property>
    </bean>
classpath:/com/zhangpn/entity/Book.hbm.xml这里是hibernate映射文件,先从基础的XML配置方式入门,再学习注解,会学习的更加扎实吧,个人观点。
其他的不想介绍了,先粘贴上,把代码保证正确,运行通了,再捣鼓原理。
- 配置jdbc.properties文件
driverClass=com.mysql.cj.jdbc.Driver
jdbcUrl=jdbc:mysql://localhost:3306/zhangpn?serverTimezone\=GMT&useSSL\=false
user=root
password=zhangpn
initialPoolSize=5
minPoolSize=5
maxPoolSize=10
放在src下,也不一定总之,要与你的配置相一致,还记得location="classpath:jdbc.properties这句话吗?在上面的配置里!找不到复制粘贴搜索一下,你就懂喽!
- 配置struts.xml文件
 1 <?xml version="1.0" encoding="UTF-8" ?>
 2 <!DOCTYPE struts PUBLIC
 3     "-//Apache Software Foundation//DTD Struts Configuration 2.3//EN"
 4     "http://struts.apache.org/dtds/struts-2.3.dtd">
 5
 6 <struts>
 7
 8     <constant name="struts.enable.DynamicMethodInvocation" value="false" />
 9     <constant name="struts.devMode" value="true" />
10
11     <package name="default" namespace="/" extends="struts-default">
12
13         <global-results>
14             <result name="error">/WEB-INF/jsp/error.jsp</result>
15         </global-results>
16 <!--
17         <global-exception-mappings>
18             <exception-mapping exception="java.lang.Exception" result="error"/>
19         </global-exception-mappings>
20  -->
21         <action name="createBook" class="bookAction" method="createBook">
22             <result name="success">/WEB-INF/jsp/temp.jsp</result>
23         </action>
24     </package>
25
26 </struts>
里面的代码相信你是理解的,先别急着修改,先复制粘贴
接下来就是写代码了,先别写先把结构弄出来:
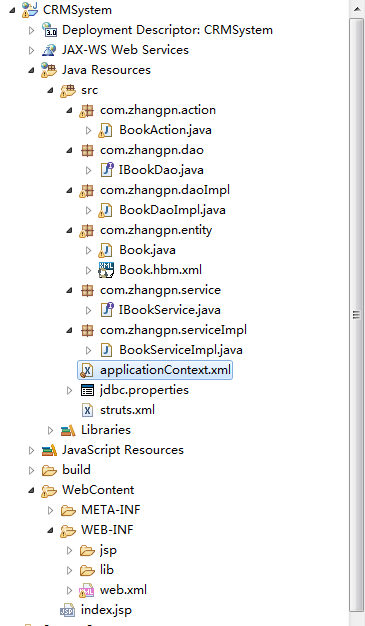
按照这个结构建立包和文件
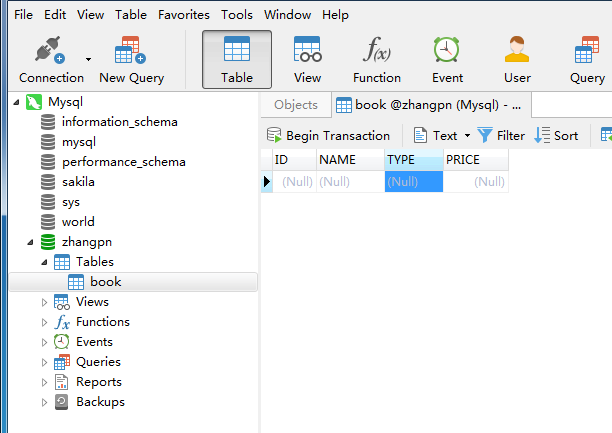
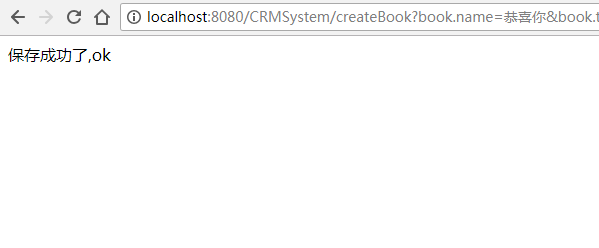
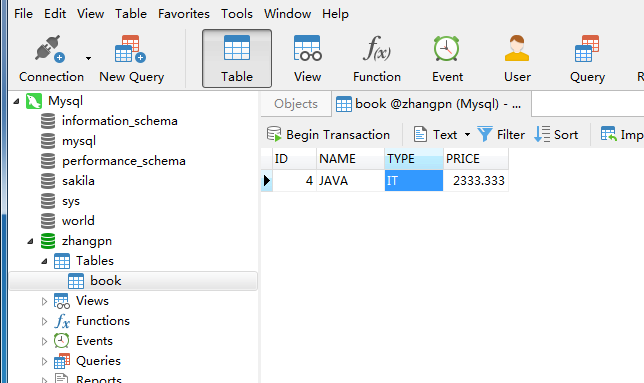
接下来就是见证奇迹的时刻了,运行部署!

输入信息
凝一眸碧水,拈一缕清风,于一怀静谧中倾听凡尘的落音。
不再奢求什么,做简单的自己,过简单的生活,心在,梦在,你在,便是光阴赐予我的最美。

 浙公网安备 33010602011771号