
glog 使用
一、准备:
1.cmake 3.29.3 (低版本可能不支持2022)
2.vs 2022/2019
下载 Visual Studio Tools - 免费安装 Windows、Mac、Linux (microsoft.com)
3.glog源码
google/glog: C++ implementation of the Google logging module (github.com)
二、编译glog
1.打开cmake 找到源码路径

2.点击configure 根据电脑当前安装的VS配置对应的环境
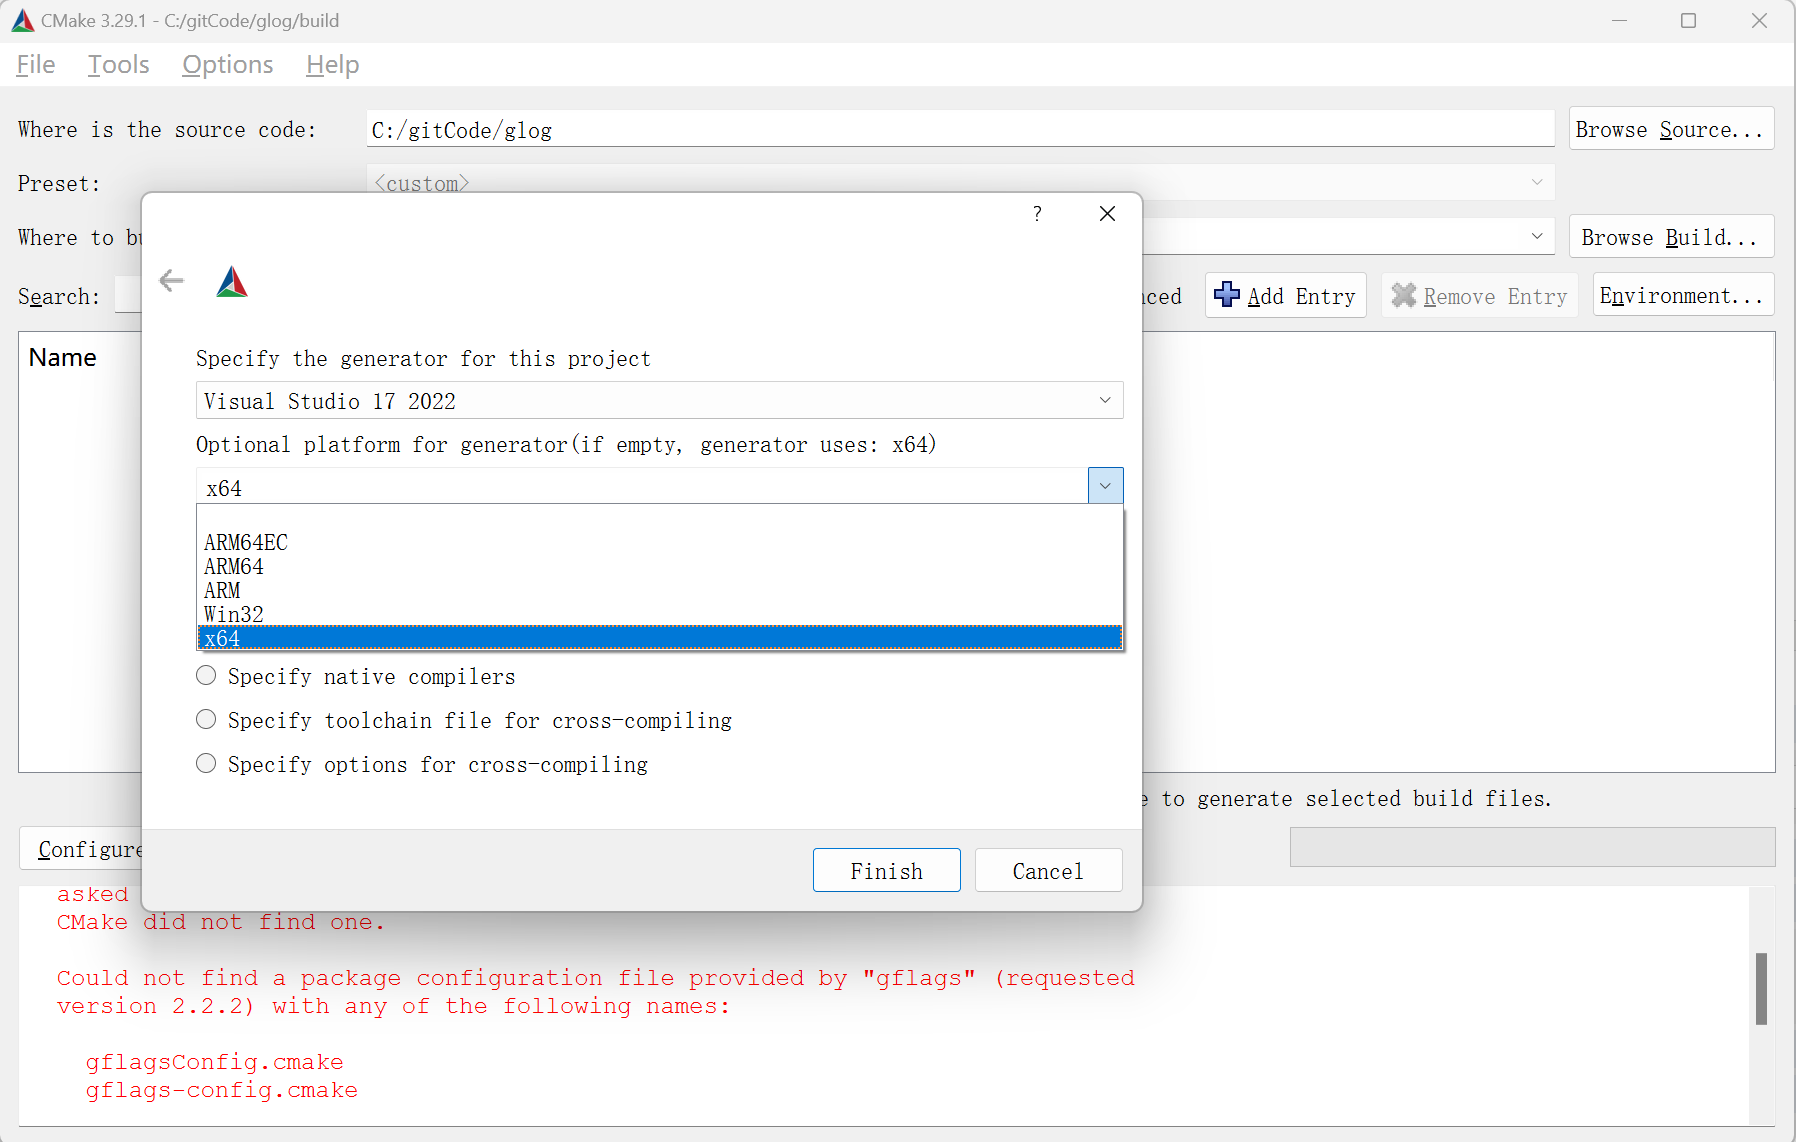
3. 修改配置参数 CMAKE_INSTALL_PREFIX 这里配置的是生成的install工程 导出glog的位置,BUILD_SHARE_LIBS参数表示生成动态库

4.点击generate 进行vs项目生成
5.用管理员方式打开VS 找到生成的项目(CMAKE_INSTALL_PREFIX)的路径没有进行修改,且环境为win10/11的情况下,向该文件夹写入文件需要管理员权限
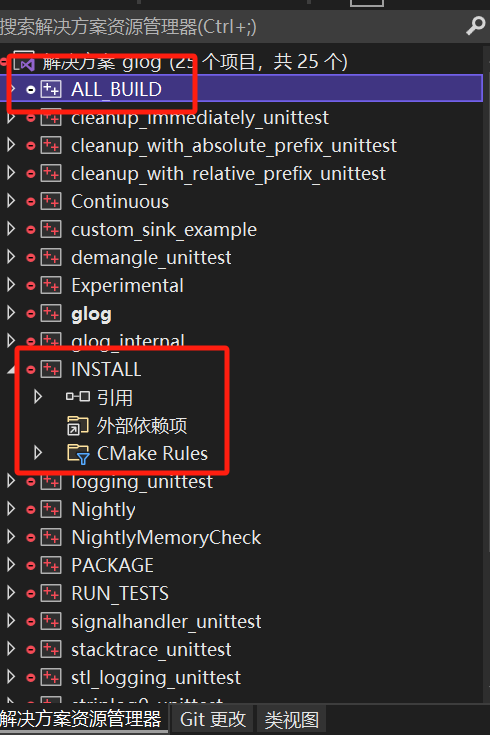
打开项目,生成ALL_BUILD 和INSTALL (会把生成的文件拷贝到上面配置的路径)两个项目

找到生成的库

glog.dll在bin中

三、demo测试
1.建立console项目
2.VS添加lib和头文件依赖
3.使用时添加 #define GLOG_USE_GLOG_EXPORT 否则会报错,如下


//指定使用的glog 是动态库
#define GLOG_USE_GLOG_EXPORT

#include <iostream>
#include<glog/logging.h>

void useglog()
{
    FLAGS_log_dir = "c:\\Logs";
    google::InitGoogleLogging("loglist");
    google::SetLogDestination(google::GLOG_INFO, "c:\\Logs\\INFO_");
    google::SetStderrLogging(google::GLOG_INFO);
    google::SetLogFilenameExtension("log_");
    FLAGS_colorlogtostderr = true;  // Set log color
    FLAGS_logbufsecs = 0;  // Set log output speed(s)
    FLAGS_max_log_size = 1024;  // Set max log file size
    FLAGS_stop_logging_if_full_disk = true;  // If disk is full
    char str[20] = "hello log!";
    LOG(INFO) << str;
    std::string cStr = "hello google!";
    LOG(INFO) << cStr;
    LOG(INFO) << "info test" << "hello log!";  //输出一个Info日志
    LOG(WARNING) << "warning test";  //输出一个Warning日志
    LOG(ERROR) << "error test";  //输出一个Error日志
    google::ShutdownGoogleLogging();


}

int main()
{
    useglog();
    std::cout << "Hello World!\n";
}
4.生成程序,拷贝动态库

5.创建对应文件夹,glog不会主动创建文件夹,需要使用代码或者手动创建文件夹,否则写入log失败
6.运行并查看log


【推荐】国内首个AI IDE,深度理解中文开发场景,立即下载体验Trae
【推荐】编程新体验,更懂你的AI,立即体验豆包MarsCode编程助手
【推荐】抖音旗下AI助手豆包,你的智能百科全书,全免费不限次数
【推荐】轻量又高性能的 SSH 工具 IShell:AI 加持,快人一步
· 分享一个免费、快速、无限量使用的满血 DeepSeek R1 模型,支持深度思考和联网搜索!
· 基于 Docker 搭建 FRP 内网穿透开源项目(很简单哒)
· ollama系列01:轻松3步本地部署deepseek,普通电脑可用
· 按钮权限的设计及实现
· 25岁的心里话