Docker+Selenium+TestNG+Maven+Jenkins环境搭建
一、Selenium环境准备
standalone-chrome Docker容器启动:
docker pull selenium/standalone-chrome
version: '3'
services:
  selenium:
    build: .
    image: selenium/standalone-chrome:latest
    ports:
      - "24444:4444"
    shm_size: '2gb'
    restart: unless-stopped
    container_name: selenium
docker-compose up -d
二、编写selenium Demo项目
porm.xml:
<?xml version="1.0" encoding="UTF-8"?>
<project xmlns="http://maven.apache.org/POM/4.0.0"
         xmlns:xsi="http://www.w3.org/2001/XMLSchema-instance"
         xsi:schemaLocation="http://maven.apache.org/POM/4.0.0 http://maven.apache.org/xsd/maven-4.0.0.xsd">
    <modelVersion>4.0.0</modelVersion>

    <groupId>org.example</groupId>
    <artifactId>AutoTestDemo</artifactId>
    <version>1.0-SNAPSHOT</version>

    <dependencies>
        <dependency>
            <groupId>org.testng</groupId>
            <artifactId>testng</artifactId>
            <version>7.1.0</version>
            <scope>test</scope>
        </dependency>
        <dependency>
            <groupId>org.seleniumhq.selenium</groupId>
            <artifactId>selenium-java</artifactId>
            <version>3.141.59</version>
        </dependency>
        <dependency>
            <groupId>org.seleniumhq.selenium</groupId>
            <artifactId>selenium-remote-driver</artifactId>
            <version>3.141.59</version>
        </dependency>
    </dependencies>

    <build>
        <plugins>
            <plugin>
                <artifactId>maven-antrun-plugin</artifactId>
                <version>1.8</version>
            </plugin>
            <plugin>
                <artifactId>maven-compiler-plugin</artifactId>
                <version>3.8.1</version>
                <configuration>
                    <source>1.8</source>
                    <target>1.8</target>
                    <showWarnings>true</showWarnings>
                </configuration>
            </plugin>
        </plugins>
    </build>
</project>
测试用例:
import org.openqa.selenium.WebDriver;
import org.openqa.selenium.chrome.ChromeOptions;
import org.openqa.selenium.remote.DesiredCapabilities;
import org.openqa.selenium.remote.RemoteWebDriver;
import org.testng.annotations.Test;
import static org.testng.Assert.*;

import java.net.URL;

public class TestDemo {
    @Test
    public void testBaidu() throws Exception {
        //修改hub地址
        WebDriver driver = new RemoteWebDriver(new URL("http://127.0.0.1:24444/wd/hub"), new ChromeOptions());
        driver.get("https://www.baidu.com");
        System.out.println(driver.getTitle());
        assertEquals(driver.getTitle(),"百度一下,你就知道");
        Thread.sleep(2000);
        driver.close();
        driver.quit();

    }

    @Test
    public void testName() {
        assertEquals("nick","davis");
    }
}
testng.xml:
<?xml version="1.0" encoding="UTF-8"?>
<!DOCTYPE suite SYSTEM "http://testng.org/testng-1.0.dtd">
<suite name="Auto Test Demo" preserve-order="true">

    <test name="自动化测试Demo">
        <classes>
            <class name="TestDemo">
                <methods>
                    <include name="testBaidu" />
                    <include name="testName" />
                </methods>
            </class>
        </classes>
    </test>
</suite>
三、jenkins安装
docker pull jenkins/jenkins:lts
version: "3"
services:
  jenkins:
    image: jenkins/jenkins:lts
    container_name: jenkins
    ports:
    - 28080:8080
    - 50000:50000
    volumes:
    - /docker/volumns/jenkins:/var/jenkins_home
    restart: unless-stopped
docker-compose up -d
四、安装配置jenkins
1.安装maven
方法一:
使用Dockerfile
FROM jenkins/jenkins:lts
RUN apt-get update && apt-get install -y maven
方法二:
进入容器运行命令
root@debian:~/#docker exec -u root -it jenkins /bin/bash
root@7ff69b78212f:/#apt-get update && apt-get install -y maven
2.安装maven jenkins插件

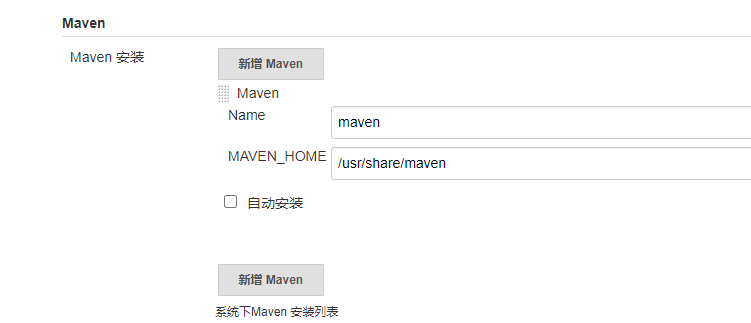
3.配置jenkins maven
4.安装TestNG插件

五、项目配置
1.创建ssh key
ssh-keygen -t rsa
2.复制公钥到git仓库

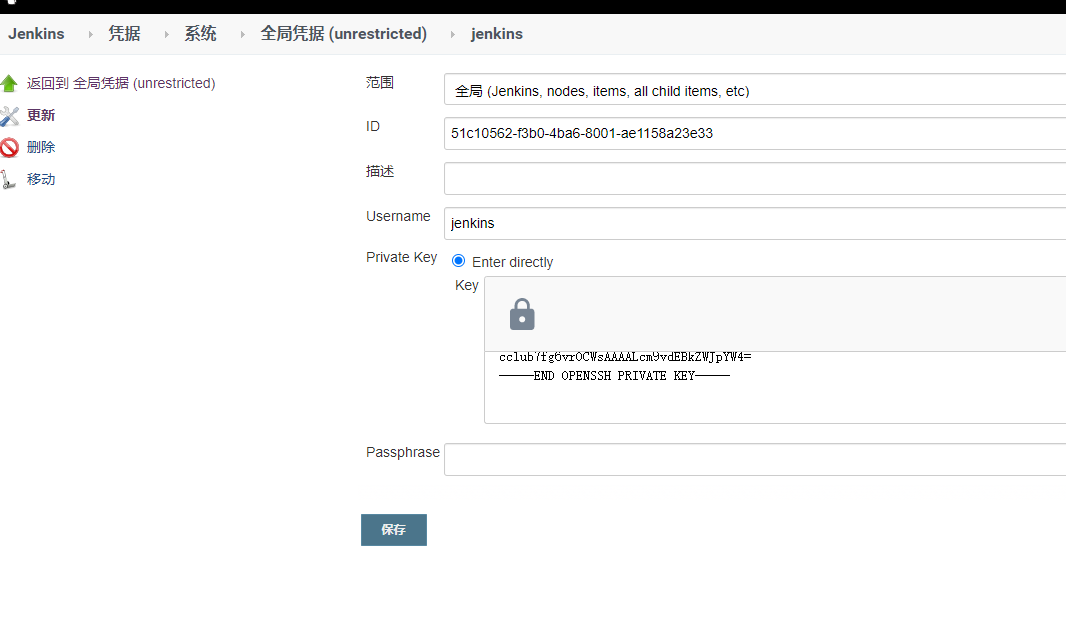
3.jenkins中配置私钥
4.添加项目
1)新建maven项目

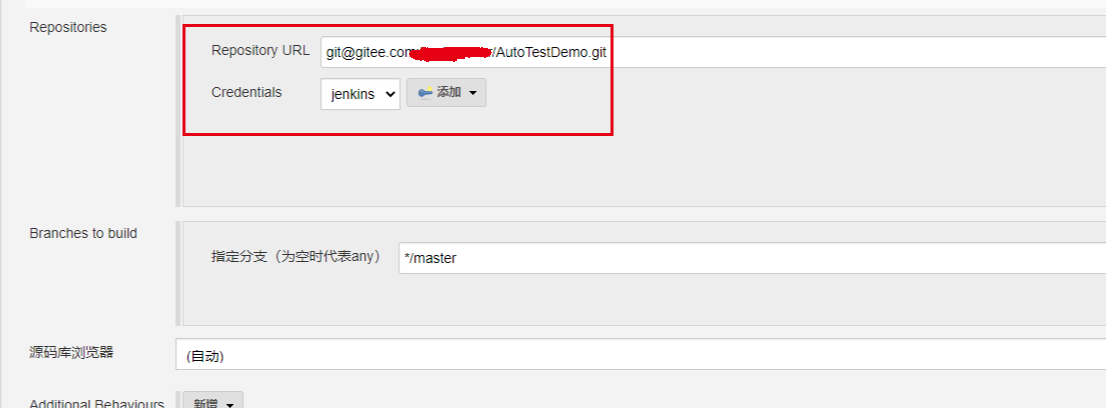
2) 输入git仓库地址,选择密钥
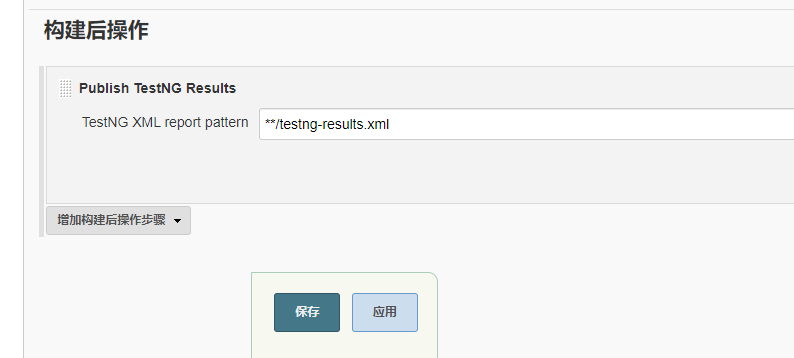
3) 构建后操作
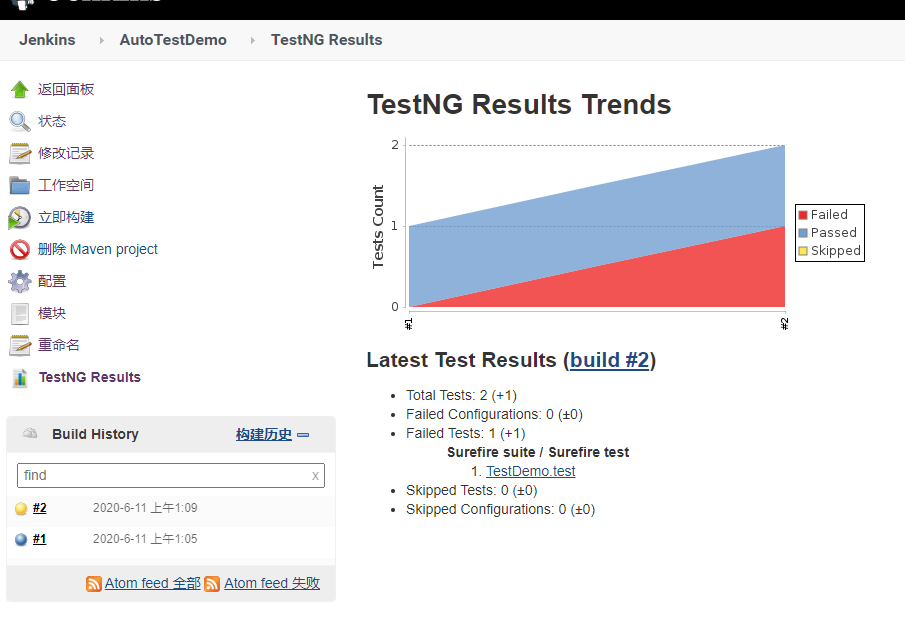
六、效果图

posted on 2020-06-12 14:59 backtracker 阅读(575) 评论(0) 收藏 举报


 浙公网安备 33010602011771号