vs2015对revit2018二次开发之helloworld
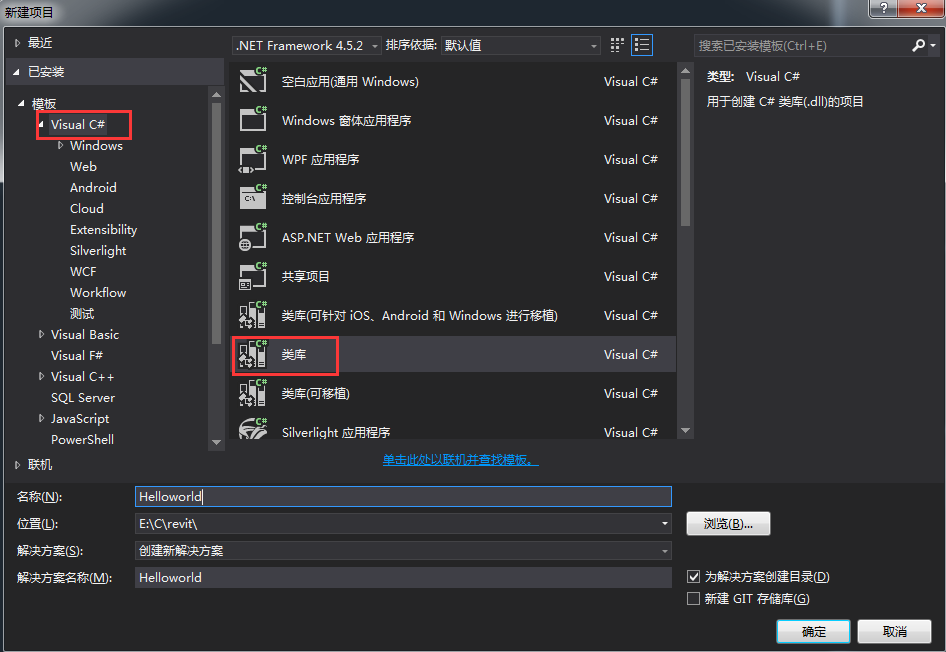
1.新建
【新建项目】→【Visual C#】→【类库】
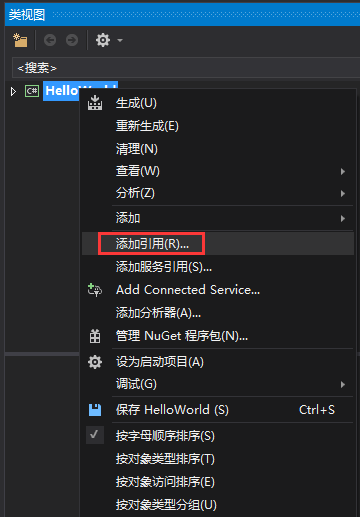
2.添加引用
【项目】→【添加引用】→【浏览】
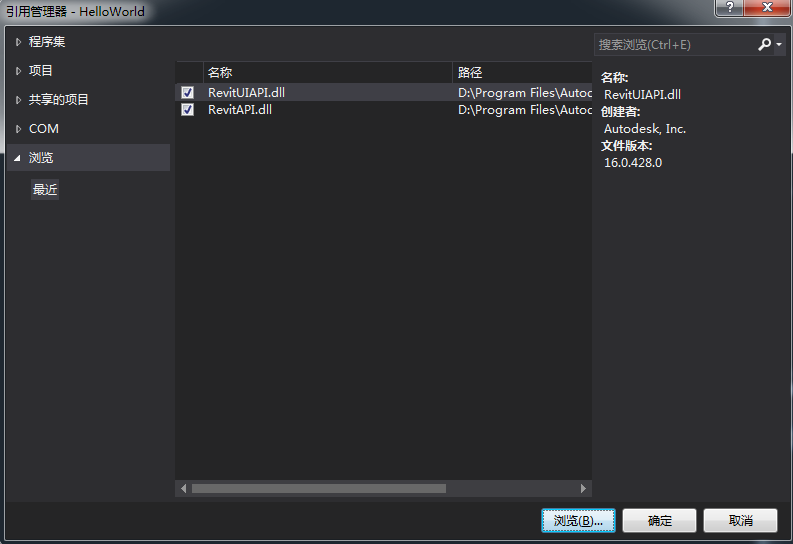
在Revit安装目录下找到【RevitAPI.dll】和【RevitAPIUI.dll】并添加
3.设置
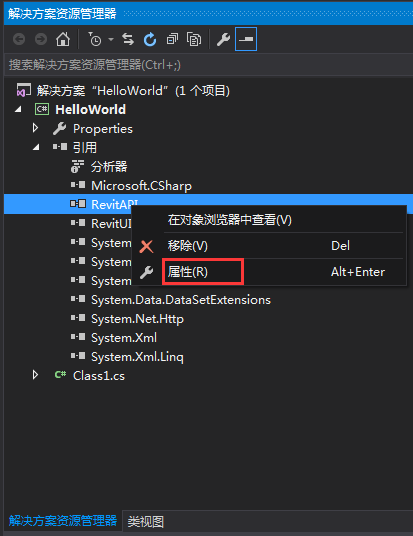
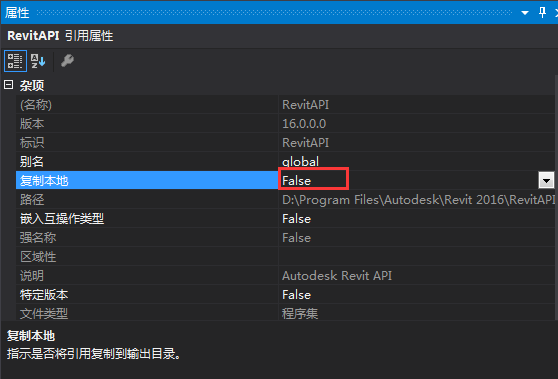
(1)右键【RevitAPI】和【RevitAPIUI】,点击【属性】,将属性【复制本地】改False
(2)修改类名
Class1改为Test
using System;
using System.Collections.Generic;
using System.Linq;
using System.Text;
using System.Threading.Tasks;

using Autodesk.Revit.DB;
using Autodesk.Revit.UI;
using Autodesk.Revit.Attributes;

namespace HelloWorld
{
    [Transaction(TransactionMode.Manual)]
    public class Test:IExternalCommand
    {
        public Result Execute(ExternalCommandData commandData, ref string message, ElementSet elements)
        {
            try
            {
                TaskDialog.Show("Hello", "First Revit Program.");
            }
            catch (Exception e)
            {
                message = e.Message;
                return Result.Failed;
            }
            return Result.Succeeded;
        }
    }
}
4.生成
(1)【项目】→【属性】→【调试】→【启动外部程序】,找到Revit安装目录,选择Revit.exe
(2)生成
Debug目录下会生成HelloWorld.dll
5.部署
在C:\Users\Administrator\AppData\Roaming\Autodesk\Revit\Addins\2018添加
HelloWorld.addin
内容为
<?xml version="1.0" encoding="utf-8"?>
<RevitAddIns>
    <AddIn Type="Command">
    <VendorId>abc</VendorId>
    <Text>Hello Workd</Text>
    <Description>This is Hello World for revit.</Description>
    <FullClassName>HelloWorld.Test</FullClassName>
    <Assembly>E:/C/revit/HelloWorld/HelloWorld/bin/Debug/helloworld.dll</Assembly>
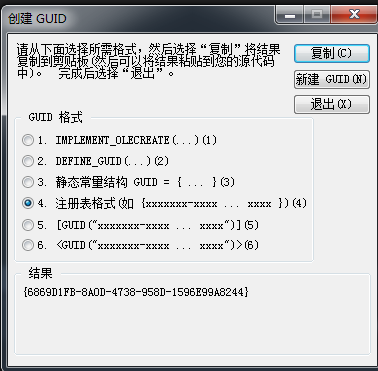
    <AddInId>6869D1FB-8A0D-4738-958D-1596E99A8244</AddInId>
    </AddIn>
</RevitAddIns>
说明:
VendorId:开发商Id
Text:插件的名称
Description:插件的描述信息
FullClassName:命名空间.类名
Assembly:刚刚生成的dll路径
AddIn:在VS的【工具】→【创建GUID】,选择注册表格式,复制,去掉括号
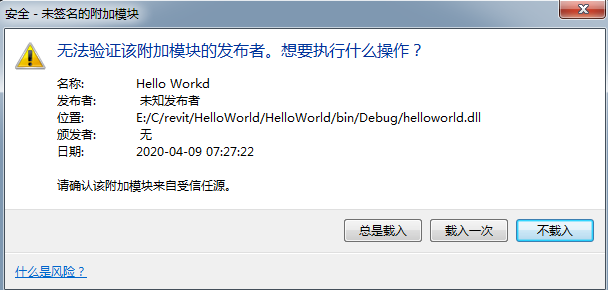
载入
就可以看到插件了

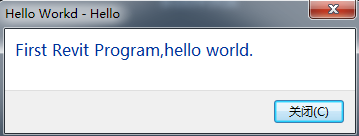
点击


【推荐】国内首个AI IDE,深度理解中文开发场景,立即下载体验Trae
【推荐】编程新体验,更懂你的AI,立即体验豆包MarsCode编程助手
【推荐】抖音旗下AI助手豆包,你的智能百科全书,全免费不限次数
【推荐】轻量又高性能的 SSH 工具 IShell:AI 加持,快人一步
· Linux系列:如何用heaptrack跟踪.NET程序的非托管内存泄露
· 开发者必知的日志记录最佳实践
· SQL Server 2025 AI相关能力初探
· Linux系列:如何用 C#调用 C方法造成内存泄露
· AI与.NET技术实操系列(二):开始使用ML.NET
· 无需6万激活码!GitHub神秘组织3小时极速复刻Manus,手把手教你使用OpenManus搭建本
· C#/.NET/.NET Core优秀项目和框架2025年2月简报
· Manus爆火,是硬核还是营销?
· 终于写完轮子一部分:tcp代理 了,记录一下
· 【杭电多校比赛记录】2025“钉耙编程”中国大学生算法设计春季联赛(1)