

Spring Boot Admin
Spring Boot Admin 是一个管理和监控 Spring Boot 应用程序的开源软件,每个应用都认为是一个客户端,通过 HTTP 或者使用 Eureka 注册到 admin server 中进行展示,Spring Boot Admin UI 部分使用 Vue.js 将数据展示在前端。
一、Spring Boot Admin 分为:
服务端是一个监控后台用来汇总展示所有的监控信息
客户端就是具体的应用
1.server和client的模式
(1)server端
添加依赖

<dependency>
    <groupId>org.springframework.boot</groupId>
    <artifactId>spring-boot-starter-web</artifactId>
</dependency>

<dependency>
      <groupId>de.codecentric</groupId>
      <artifactId>spring-boot-admin-starter-server</artifactId>
      <version>2.1.6</version>
</dependency>
配置
server.port=8000
spring.application.name=Admin Server
启动类
package com.example.management;

import de.codecentric.boot.admin.server.config.EnableAdminServer;
import org.springframework.boot.SpringApplication;
import org.springframework.boot.autoconfigure.SpringBootApplication;

@SpringBootApplication
@EnableAdminServer
public class ManagementApplication {

    public static void main(String[] args) {
        SpringApplication.run(ManagementApplication.class, args);
    }
}
(2)client端
添加依赖
<dependency>
    <groupId>org.springframework.boot</groupId>
    <artifactId>spring-boot-starter-web</artifactId>
</dependency>

<dependency>
    <groupId>de.codecentric</groupId>
    <artifactId>spring-boot-admin-starter-client</artifactId>
    <version>2.1.6</version>
</dependency>
配置
server.port=8001
spring.application.name=Admin Client

spring.boot.admin.client.url=http://localhost:8000
management.endpoints.web.exposure.include=*
management.endpoint.health.show-details=always
启动类
package com.example.client;

import org.springframework.boot.SpringApplication;
import org.springframework.boot.autoconfigure.SpringBootApplication;

@SpringBootApplication
public class ClientApplication {

    public static void main(String[] args) {
        SpringApplication.run(ClientApplication.class, args);
    }
}
注:
使用时需要先启动服务端,在启动客户端的时候打开 Actuator 的接口,并指向服务端的地址

2.基于springcloud的模式
在server端加入@EnableDiscoveryClient注解,spring boot admin就会主动去拉取注册中心的注册服务列表,从而获取他们的服务动态信息
注册中心使用Eureka
(1)注册中心Center
添加依赖
<dependency>
      <groupId>org.springframework.cloud</groupId>
      <artifactId>spring-cloud-starter-netflix-eureka-server</artifactId>
      <version>2.1.3.RELEASE</version>
</dependency>
配置
server.port=8761
spring.application.name=Center

eureka.client.register-with-eureka=false
eureka.client.fetch-registry=false
eureka.client.service-url.default-zone=http://localhost:8761/eureka/

management.endpoints.web.exposure.include=*
management.endpoint.health.show-details=always
启动类,添加@EnableEurekaServer注解,开启Eureka Server
package com.example.center;

import org.springframework.boot.SpringApplication;
import org.springframework.boot.autoconfigure.SpringBootApplication;
import org.springframework.cloud.netflix.eureka.server.EnableEurekaServer;

@EnableEurekaServer
@SpringBootApplication
public class CenterApplication {

    public static void main(String[] args) {
        SpringApplication.run(CenterApplication.class, args);
    }
}
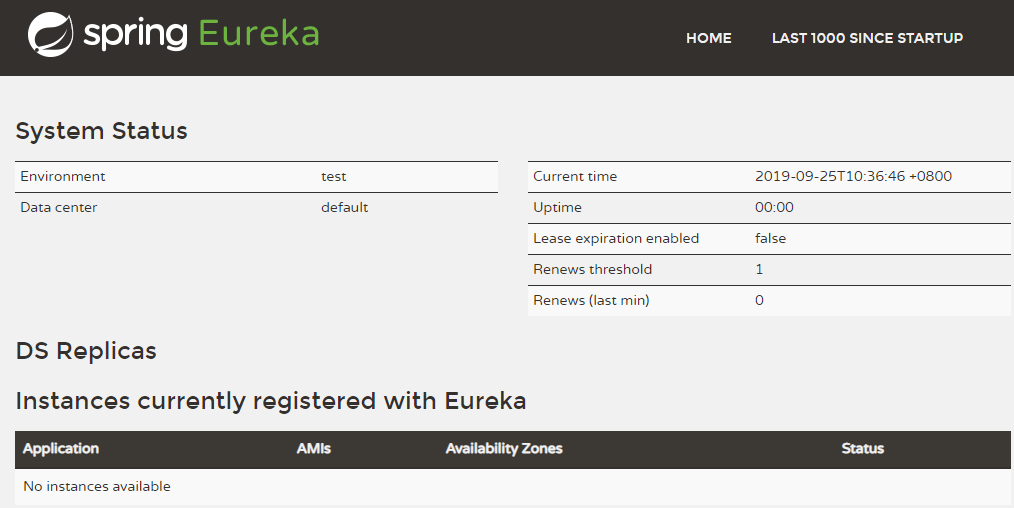
启动,访问http://localhost:8761/
还没有服务向注册中心注册服务
(2)Admin server
依赖
<dependency>
    <groupId>org.springframework.boot</groupId>
    <artifactId>spring-boot-starter-web</artifactId>
    <exclusions>
        <exclusion>
             <groupId>org.springframework.boot</groupId>
             <artifactId>spring-boot-starter-tomcat</artifactId>
        </exclusion>
    </exclusions>
</dependency>

<dependency>
     <groupId>de.codecentric</groupId>
     <artifactId>spring-boot-admin-starter-server</artifactId>
     <version>2.1.6</version>
</dependency>

<dependency>
     <groupId>org.springframework.cloud</groupId>
     <artifactId>spring-cloud-starter-netflix-eureka-client</artifactId>
     <version>2.1.3.RELEASE</version>
</dependency>

<dependency>
    <groupId>org.springframework.boot</groupId>
    <artifactId>spring-boot-starter-jetty</artifactId>
</dependency>
配置
server.port=8000
spring.application.name=Admin Server

eureka.instance.lease-renewal-interval-in-seconds=10
eureka.instance.health-check-url-path=/actuator/health
eureka.client.registry-fetch-interval-seconds=5
eureka.client.service-url.default-zone=${EUREKA_SERVICE_URL:http://localhost:8761}/eureka/

spring.thymeleaf.check-template-location=false
启动类,添加@EnableDiscoveryClient注解,开启DiscoveryClient的功能
package com.example.management;

import de.codecentric.boot.admin.server.config.EnableAdminServer;
import org.springframework.boot.SpringApplication;
import org.springframework.boot.autoconfigure.SpringBootApplication;
import org.springframework.cloud.client.discovery.EnableDiscoveryClient;

@SpringBootApplication
@EnableAdminServer
@EnableDiscoveryClient
public class ManagementApplication {

    public static void main(String[] args) {
        SpringApplication.run(ManagementApplication.class, args);
    }
}
(2)Admin Client
依赖
<dependency>
    <groupId>org.springframework.boot</groupId>
    <artifactId>spring-boot-starter-web</artifactId>
</dependency>

<dependency>
    <groupId>de.codecentric</groupId>
    <artifactId>spring-boot-admin-starter-client</artifactId>
    <version>2.1.6</version>
</dependency>

<dependency>
    <groupId>org.springframework.cloud</groupId>
    <artifactId>spring-cloud-starter-netflix-eureka-client</artifactId>
    <version>2.1.3.RELEASE</version>
</dependency>
配置
server.port=8001
spring.application.name=Admin Client

eureka.instance.lease-renewal-interval-in-seconds=10
eureka.instance.health-check-url-path=/actuator/health
eureka.client.registry-fetch-interval-seconds=5
eureka.client.service-url.default-zone=${EUREKA_SERVICE_URL:http://localhost:8761}/eureka/

management.endpoints.web.exposure.include=*
management.endpoint.health.show-details=always
启动类
package com.example.client;

import org.springframework.boot.SpringApplication;
import org.springframework.boot.autoconfigure.SpringBootApplication;
import org.springframework.cloud.client.discovery.EnableDiscoveryClient;

@SpringBootApplication
@EnableDiscoveryClient
public class ClientApplication {

    public static void main(String[] args) {
        SpringApplication.run(ClientApplication.class, args);
    }
}
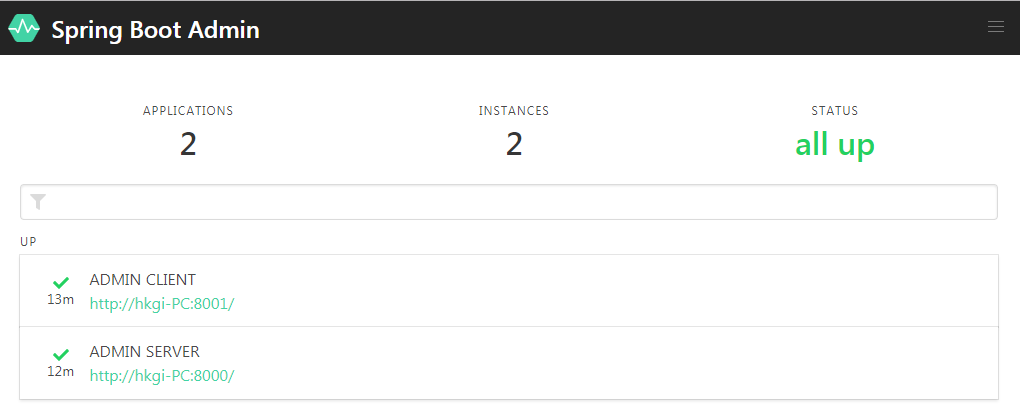
依次启动服务Center,Admin Client,Admin Server
http://localhost:8761/

http://localhost:8000/
注册到注册中心的服务都会被监控
二、集成了登录模块
登录界面默认集成到了spring security模块
在Admin server里
添加依赖
<dependency>
     <groupId>org.springframework.boot</groupId>
     <artifactId>spring-boot-starter-security</artifactId>
     <version>2.1.8.RELEASE</version>
</dependency>
添加配置
spring.security.user.name=abc
spring.security.user.password=abc123
添加配置类
package com.example.management.configure;

import de.codecentric.boot.admin.server.config.AdminServerProperties;
import org.springframework.context.annotation.Configuration;
import org.springframework.security.config.annotation.web.builders.HttpSecurity;
import org.springframework.security.config.annotation.web.configuration.WebSecurityConfigurerAdapter;
import org.springframework.security.web.authentication.SavedRequestAwareAuthenticationSuccessHandler;

@Configuration
public class SecuritySecureConfig extends WebSecurityConfigurerAdapter {
    private final String adminContextPath;

    public SecuritySecureConfig(AdminServerProperties adminServerProperties) {
        this.adminContextPath = adminServerProperties.getContextPath();
    }

    @Override
    protected void configure(HttpSecurity http) throws Exception {
        SavedRequestAwareAuthenticationSuccessHandler successHandler = new SavedRequestAwareAuthenticationSuccessHandler();
        successHandler.setTargetUrlParameter("redirectTo");
        http.authorizeRequests()
                .antMatchers(adminContextPath + "/assets/**").permitAll()
                .antMatchers(adminContextPath + "/login").permitAll()
                .anyRequest().authenticated()
                .and()
                .formLogin().loginPage(adminContextPath + "/login").successHandler(successHandler).and()
                .logout().logoutUrl(adminContextPath + "/logout").and()
                .httpBasic().and()
                .csrf().disable();
    }
}
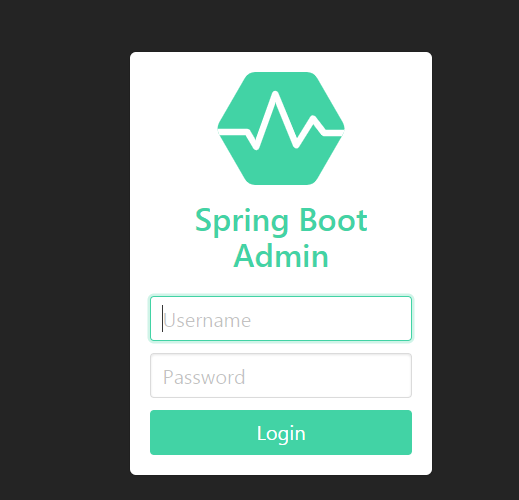
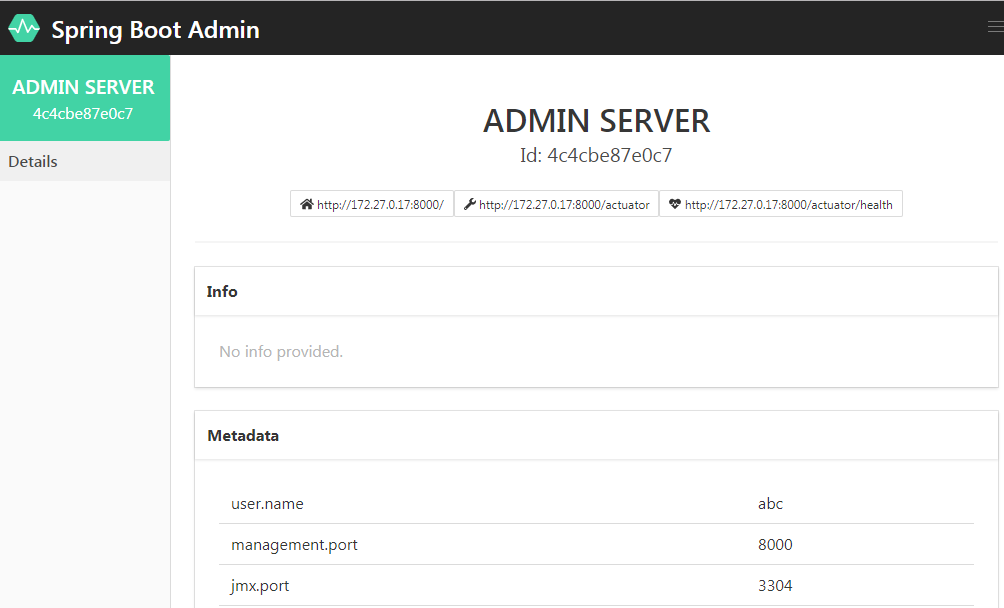
重新启动,http://localhost:8000,显示登录页面,输入配置的用户名密码
三、监控邮件通知
添加依赖
<dependency>
     <groupId>org.springframework.boot</groupId>
     <artifactId>spring-boot-starter-mail</artifactId>
     <version>2.1.8.RELEASE</version>
</dependency>
添加配置
spring.mail.host=smtp.126.com
spring.mail.username=YYYYYYY@126.com
spring.mail.password=abcabc
spring.mail.properties.mail.smtp.auth=true
spring.mail.properties.mail.smtp.starttls.enable=true
spring.mail.properties.mail.smtp.starttls.required=true
# 发送给谁
spring.boot.admin.notify.mail.to=XXXXXXX@qq.com
# 是谁发送出去的
spring.boot.admin.notify.mail.from=YYYYYYY@126.com
spring.boot.admin.notify.mail.enabled=true
配置完成后,重新启动,当服务上线下线的时候,指定的邮箱就可以收到邮件了
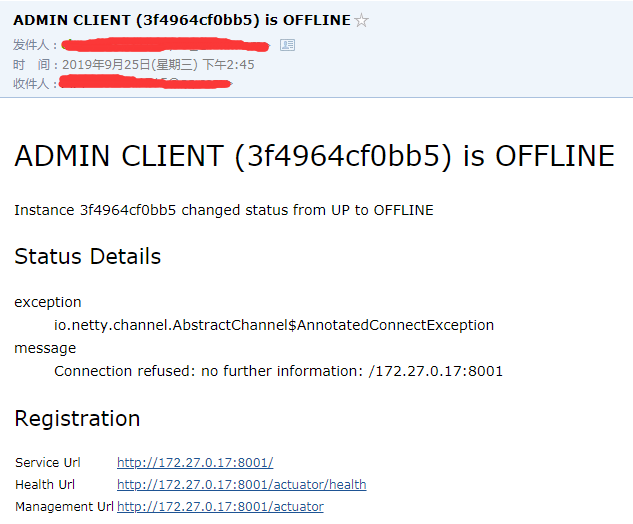
说明:
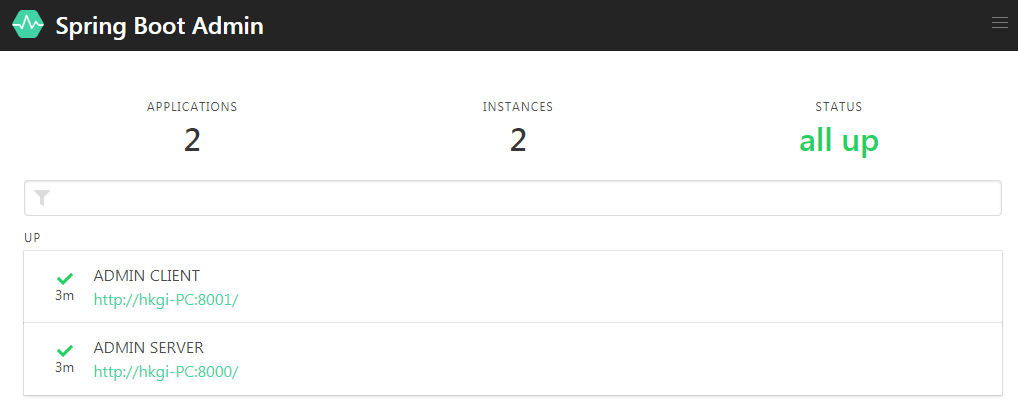
如果是下图,请添加配置
management.endpoints.web.exposure.include=*
management.endpoint.health.show-details=always
监控的endpoint会都打开


【推荐】国内首个AI IDE,深度理解中文开发场景,立即下载体验Trae
【推荐】编程新体验,更懂你的AI,立即体验豆包MarsCode编程助手
【推荐】抖音旗下AI助手豆包,你的智能百科全书,全免费不限次数
【推荐】轻量又高性能的 SSH 工具 IShell:AI 加持,快人一步
· Linux系列:如何用heaptrack跟踪.NET程序的非托管内存泄露
· 开发者必知的日志记录最佳实践
· SQL Server 2025 AI相关能力初探
· Linux系列:如何用 C#调用 C方法造成内存泄露
· AI与.NET技术实操系列(二):开始使用ML.NET
· 无需6万激活码!GitHub神秘组织3小时极速复刻Manus,手把手教你使用OpenManus搭建本
· C#/.NET/.NET Core优秀项目和框架2025年2月简报
· Manus爆火,是硬核还是营销?
· 终于写完轮子一部分:tcp代理 了,记录一下
· 【杭电多校比赛记录】2025“钉耙编程”中国大学生算法设计春季联赛(1)
2015-09-24 yii2图片上传
2015-09-24 Yii2结合webuploader实现图片上传
2015-09-24 Yii2修改默认布局
2015-09-24 Yii2的view需要链接跳转
2015-09-24 判断数据是否存在
2015-09-24 Yii2请求,报400错误