VMware Pro15虚拟机中安装centos8并且安装Gitlab服务器的解决方法
好多开发人员一般都是用Windows10开发系统,那么在windows10下如何安装Git服务器呢,那么要借用虚拟机中安装CentOS8版的Linux系统
具体步骤如下:
第一、windows10安装Workstation 15 Pro ,然后在Workstation 15 Pro 安装CentOS8
在windows10的虚拟机软件中安装CentOS8版的Linux系统,具体如何Workstation 15 Pro 安装CentOS8 请看博文:https://blog.csdn.net/chenzhf_0122/article/details/102964037
第二、CentOS8安装好之后用root身份登录linux系统分别执行以下命令,(安装和启用policycoreutils、openssh-server和openssh-clients组件,并将它们开放防火墙(不要忘了reload防火墙))
# dnf install -y curl policycoreutils openssh-server openssh-clients
# systemctl enable sshd
# systemctl start sshd
# firewall-cmd --permanent --add-service=http
# firewall-cmd --permanent --add-service=https
# systemctl reload firewalld
与邮件通知相关的Postfix组件其实可以暂时不用安装和配置,这个可以放到后面再来配置一个外部的SMTP服务器:
# dnf install postfix
# systemctl enable postfix
# systemctl start postfix
第三步、使用curl工具下载并配置Gitlab CE版RPM安装包的仓库配置脚本(请确认你的虚拟机能联接网络,注意这只是RPM安装包的仓库配置脚本,并不是真正的安装包)
[root@localhost ~]#curl -sS https://packages.gitlab.com/install/repositories/gitlab/gitlab-ce/script.rpm.sh | bash
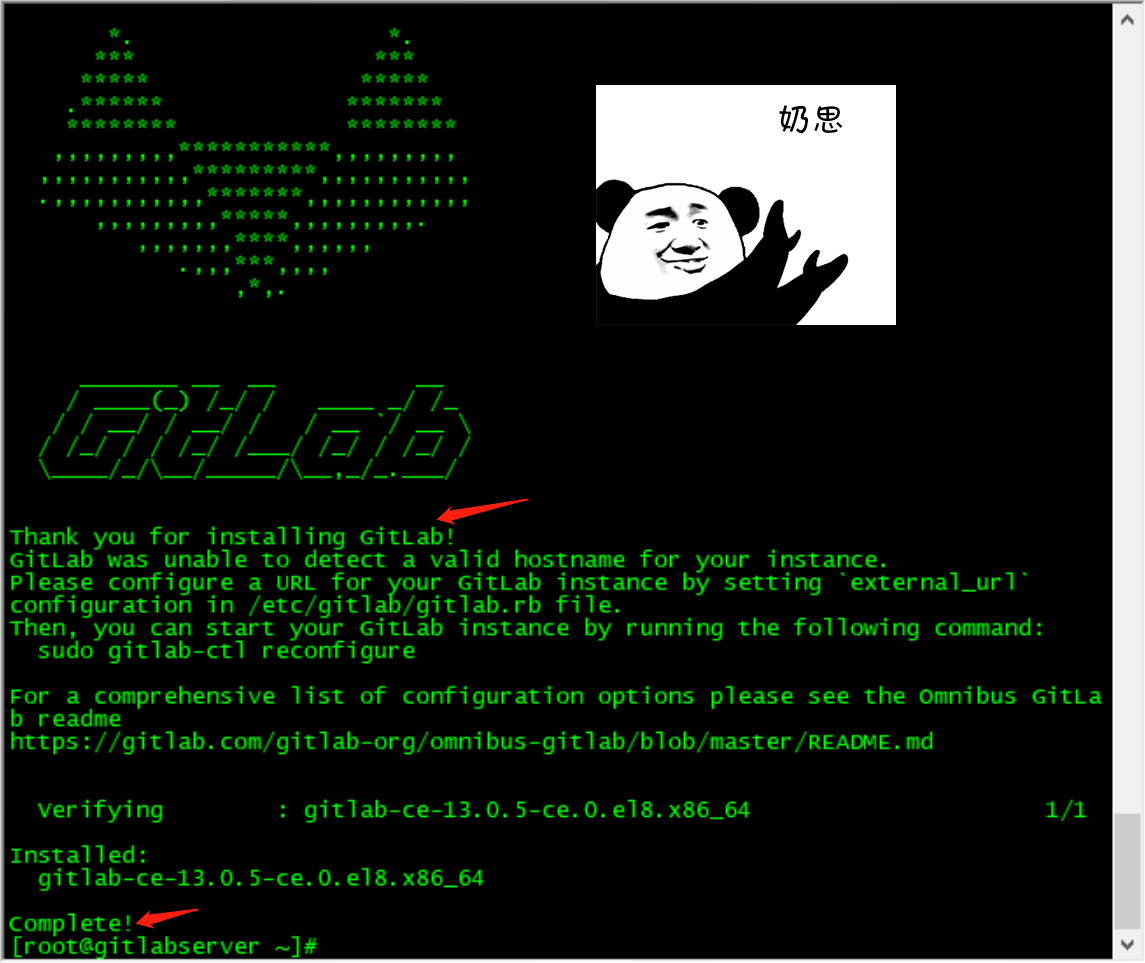
第四、安装Gitlab客户端,这个域名一定是要自己可以访问到的
[root@localhost ~]#EXTERNAL_URL="http://www.axinno1.com" dnf install -y gitlab-ce
第五、编辑 /etc/gitlab/gitlab.rb 如果没有要编辑的就 在dos控制台中按Esc 在按:wq! 指令
[root@localhost ~]#vim /etc/gitlab/gitlab.rb
第六、编辑了的话就要重新配置下Gitlab
[root@localhost ~]# gitlab-ctl reconfigure
第七:测试邮箱设置是否生效
1、在终端运行gitlab-rails console命令进入Gitlab console命令行,输入以下命令向测试邮箱发送邮件
irb(main):001:0> Notify.test_email('XXXXXX@gmail.com','test Gitlab Email','Test').deliver_now
2、若能看到以下输出信息,则说明发送邮件成功
Delivered mail 610835daa71d5_21d35a645978a@sage.novalocal.mail (40062.2ms)
=> #<Mail::Message:173540, Multipart: false, Headers: <Date: Mon, 02 Aug 2021 18:13:46 +0000>, <From: GitLab <xxxxxx@qq.com>>, <Reply-To: GitLab <noreply@xx.xx.4.62>>, <To: xxxxxxx@gmail.com>, <Message-ID: <610835daa71d5_21d35a645978a@sage.novalocal.mail>>, <Subject: test Gitlab Email>, <Mime-Version: 1.0>, <Content-Type: text/html; charset=UTF-8>, <Content-Transfer-Encoding: 7bit>, <Auto-Submitted: auto-generated>, <X-Auto-Response-Suppress: All>>

gitlab-ctl 客户端命令:
[root@localhost ~]# gitlab-ctl  reconfigure  #重读配置
[root@localhost ~]# gitlab-ctl  start      #启动
[root@localhost ~]# gitlab-ctl  restart    #重启
[root@localhost ~]# gitlab-ctl  status    #查看服务状态
[root@localhost ~]# gitlab-ctl  stop   #停止
[root@localhost ~]# gitlab-ctl  stop nginx #单独停止nginx
[root@localhost ~]# gitlab-ctl  tail          #查看日志

/opt/gitlab/        #gitlab程序安装目录
/var/opt/gitlab/  #gitlab数据目录
/var/opt/gitlab/git-data/   #仓库目录
参照资料:
https://www.cnblogs.com/forlive/p/12469187.html
https://blog.csdn.net/chenzhf_0122/article/details/102964037

