Centos7 安装nginx和配置https
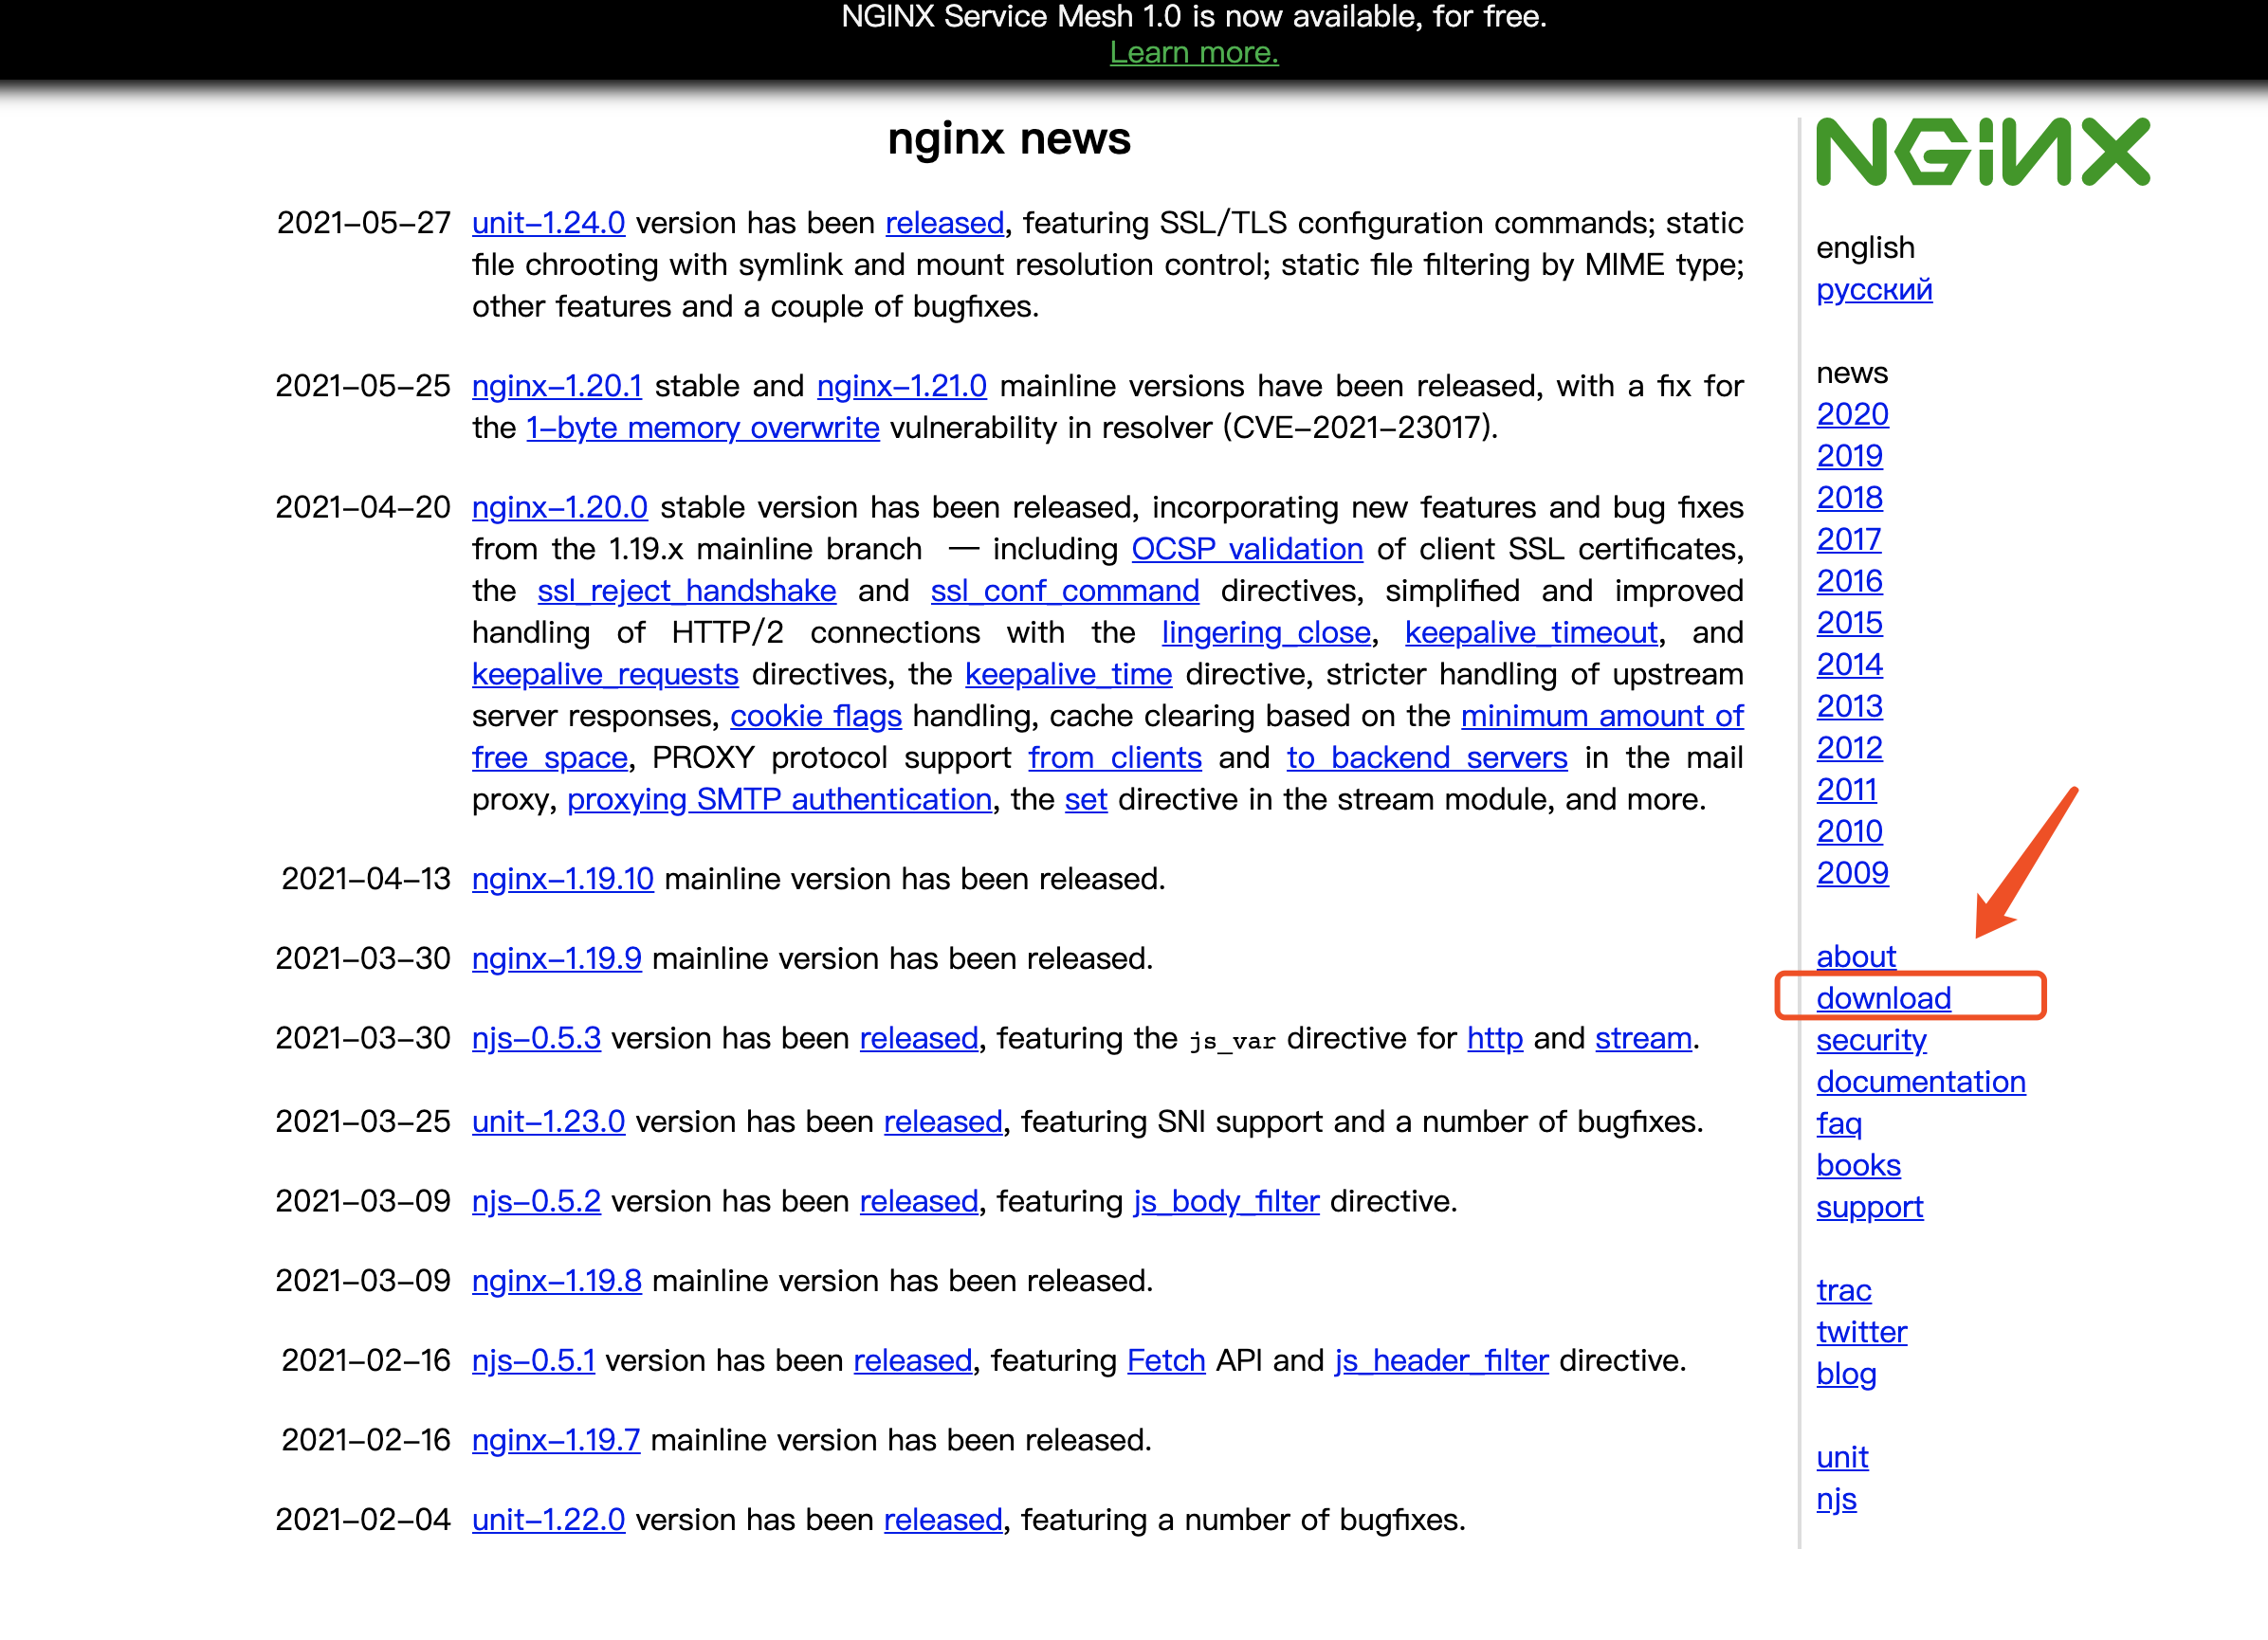
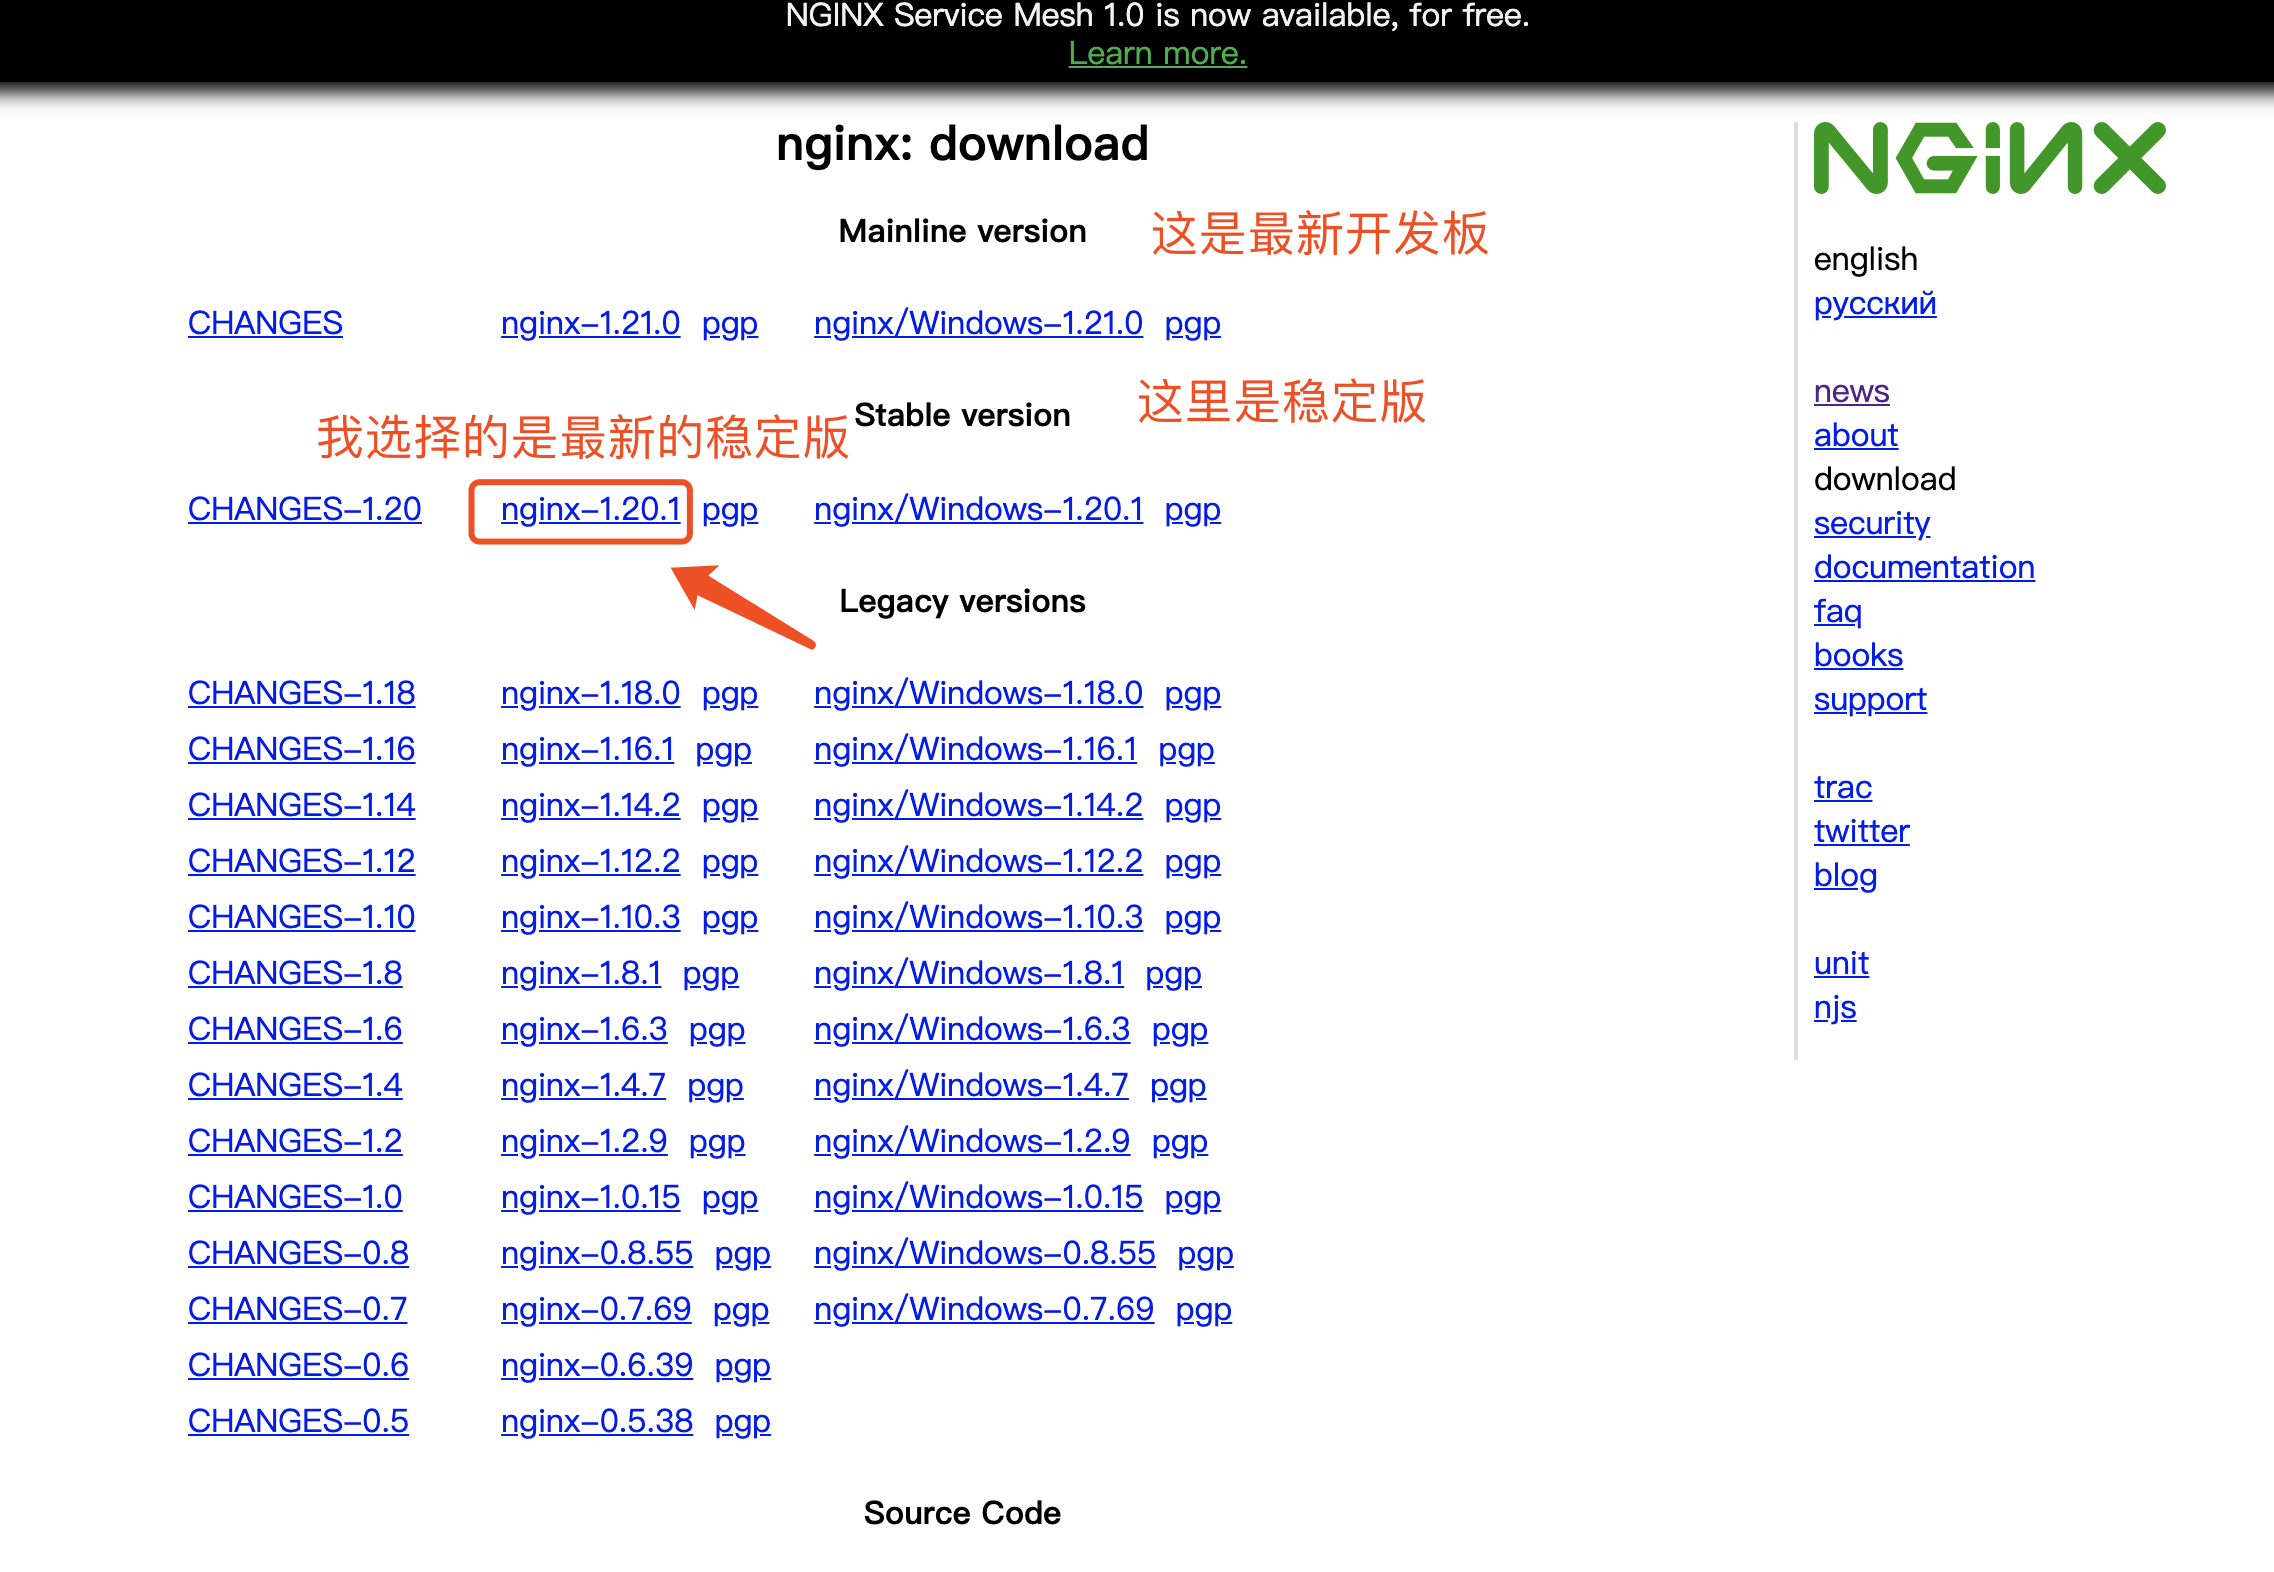
一、nginx下载
nginx官网地址
二、上传文件到服务器
可以用ftp工具将文件上传到服务器,这里我上传到/home/software目录
$ ll
drwxr-xr-x. 9 1001 1001       186 6月  14 00:17 nginx-1.20.1.tar.gz
三、安装依赖
安装gcc环境
$ yum install gcc-c++ -y
安装PCRE库,用于解析正则表达式
$ yum install pcre pcre-devel -y
安装zlib,压缩和解压缩依赖
$ yum install zlib zlib-devel -y
安装SSL,安全的加密的套接字协议层,用于HTTP安全传输,也就是https
$ yum install openssl openssl-devel -y
四、解压文件
$ tar -zxvf nginx-1.20.1.tar.gz
创建nginx临时目录,防止安装出错
$ mkdir /var/temp/nginx -p
五、make 编译
进入到解压好的nginx文件夹
$ cd nginx-1.20.1/
自定义配置
$ ./configure \
--prefix=/usr/local/nginx \
--conf-path=/usr/local/nginx/conf/nginx.conf \
--pid-path=/var/run/nginx/nginx.pid \
--lock-path=/var/lock/nginx.lock \
--error-log-path=/var/log/nginx/error.log \
--http-log-path=/var/log/nginx/access.log \
--with-http_gzip_static_module \
--http-client-body-temp-path=/var/temp/nginx/client \
--http-proxy-temp-path=/var/temp/nginx/proxy \
--http-fastcgi-temp-path=/var/temp/nginx/fastcgi \
--http-uwsgi-temp-path=/var/temp/nginx/uwsgi \
--http-scgi-temp-path=/var/temp/nginx/scgi \
--with-http_stub_status_module \
--with-http_ssl_module
参数说明
| 命令 | 解释 |
|---|---|
| –prefix | 指定nginx安装目录 |
| –pid-path | 指向nginx的pid |
| –lock-path | 锁定安装文件,防止被恶意篡改或误操作 |
| –error-log | 错误日志 |
| –http-log-path | http日志 |
| –with-http_gzip_static_module | 启用gzip模块,在线实时压缩输出数据流 |
| –http-client-body-temp-path | 设定客户端请求的临时目录 |
| –http-proxy-temp-path | 设定http代理临时目录 |
| –http-fastcgi-temp-path | 设定fastcgi临时目录 |
| –http-uwsgi-temp-path | 设定uwsgi临时目录 |
| –http-scgi-temp-path | 设定scgi临时目录 |
| --with-http_stub_status_module | 激活监视模块 |
| --with-http_ssl_module | 激活ssl加密模块 |
make 编译
$ make
make 安装
$ make install
六、运行命令
查看nginx文件
$ whereis nginx
nginx: /usr/local/nginx
去到执行文件夹
$ cd /usr/local/nginx
nginx: /usr/local/nginx
$ ll
drwxr-xr-x. 2 root root 4096 6月  14 00:18 conf
drwxr-xr-x. 2 root root   40 6月  14 00:18 html
drwxr-xr-x. 2 root root   19 6月  14 00:18 sbin
$ cd sbin
$ pwd
/usr/local/nginx/sbin
执行命令
启动
$ ./nginx
停止
$ ./nginx -s stop
优雅停止
$ ./nginx -s quit
刷新
$ ./nginx -s reload
配置https
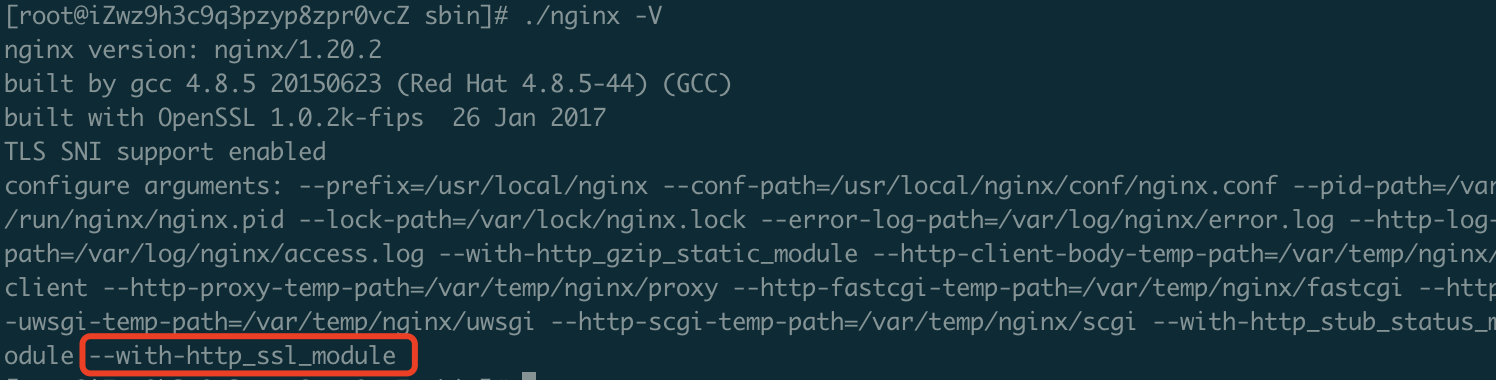
1、sbin目录下,输入
$ ./nginx -V
确保出现 (configure arguments: --with-http_ssl_module)
2、配置ssl证书
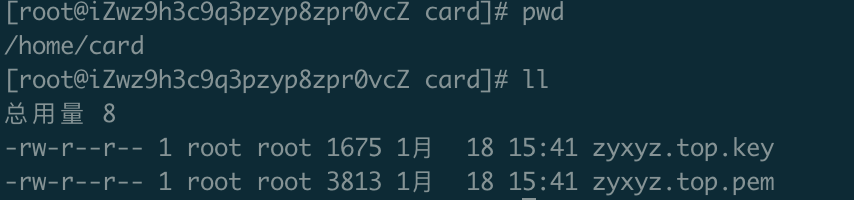
解压缩下载好的证书(证书一般是pem文件和key文件,这里名字可以随便改)
将下载好的证书上上传到服务器,我将证书放在了home目录下的card文件夹
#在home目录下创建card文件夹
$ cd /home
$ mkdir card
3、进行nginx.conf配置
进入nginx.conf文件下
$ cd /usr/local/nginx/conf
#修改nginx.conf文件
$ vim nginx.conf
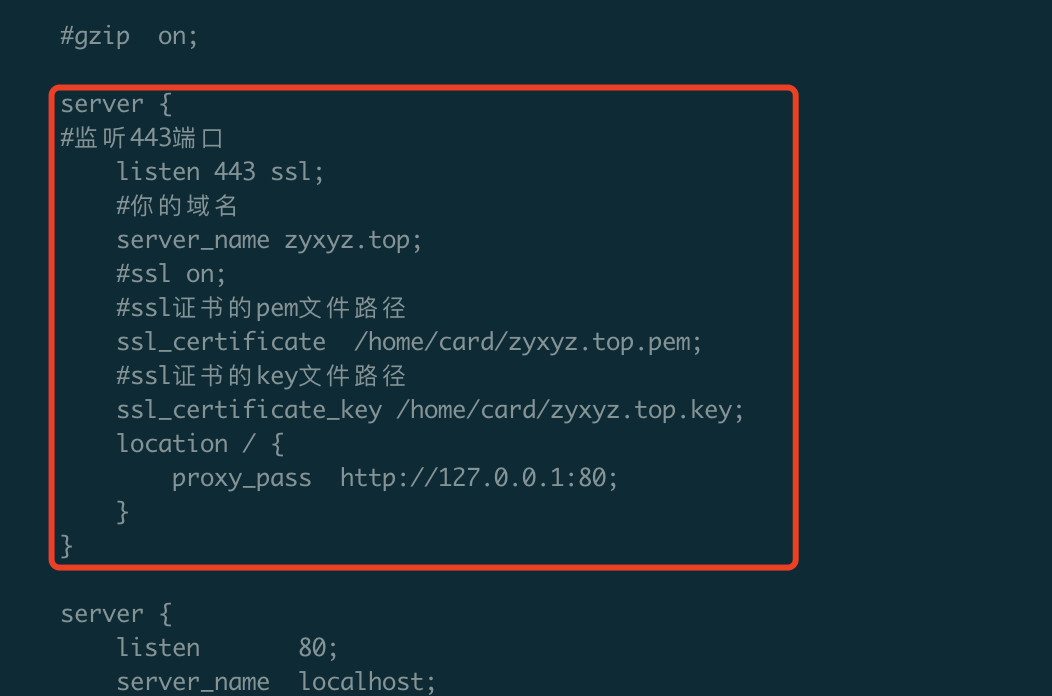
配置如下:
server {
    #监听443端口
        listen 443 ssl;
        #你的域名
        server_name zyxyz.top;
        #ssl on;
        #ssl证书的pem文件路径
        ssl_certificate  /home/card/xxx.com.pem;
        #ssl证书的key文件路径
        ssl_certificate_key /home/card/xxx.com.key;
        location / {
            proxy_pass  http://127.0.0.1:80;
        }
    }
4、重启nginx
进入sbin目录下,输入
$ ./nginx -s reload
#or
$ ./nginx -s stop && ./nginx

 浙公网安备 33010602011771号