SpringBoot构建电商秒杀项目(上篇)
一、项目功能概述
电商秒杀需要完成的3个功能:
1.展示一个商品列表页面,我们可以从中看到可秒杀的商品列表
2.点击进入商品详情页,获取该商品的详细信息
3.秒杀时间开始后,点击进入下单确认页面,并支付成功
二、基于SpringBoot进行项目环境搭建
步骤1:创建一个maven工程,使用quickStart骨架。
步骤2:在pom.xml导入SpringBoot相关依赖。


 1 <?xml version="1.0" encoding="UTF-8"?>
 2
 3 <project xmlns="http://maven.apache.org/POM/4.0.0" xmlns:xsi="http://www.w3.org/2001/XMLSchema-instance"
 4   xsi:schemaLocation="http://maven.apache.org/POM/4.0.0 http://maven.apache.org/xsd/maven-4.0.0.xsd">
 5   <modelVersion>4.0.0</modelVersion>
 6
 7   <groupId>org.example</groupId>
 8   <artifactId>Spike</artifactId>
 9   <version>1.0-SNAPSHOT</version>
10
11   <name>Spike</name>
12   <!-- FIXME change it to the project's website -->
13   <url>http://www.example.com</url>
14
15  <parent>
16    <groupId>org.springframework.boot</groupId>
17    <artifactId>spring-boot-starter-parent</artifactId>
18    <version>2.0.5.RELEASE</version>
19  </parent>
20
21   <properties>
22     <project.build.sourceEncoding>UTF-8</project.build.sourceEncoding>
23     <maven.compiler.source>1.8</maven.compiler.source>
24     <maven.compiler.target>1.8</maven.compiler.target>
25   </properties>
26
27   <dependencies>
28     <dependency>
29       <groupId>org.springframework.boot</groupId>
30       <artifactId>spring-boot-starter-web</artifactId>
31     </dependency>
32     <dependency>
33       <groupId>junit</groupId>
34       <artifactId>junit</artifactId>
35       <version>4.11</version>
36       <scope>test</scope>
37     </dependency>
38   </dependencies>
39
40   <build>
41     <pluginManagement><!-- lock down plugins versions to avoid using Maven defaults (may be moved to parent pom) -->
42       <plugins>
43         <!-- clean lifecycle, see https://maven.apache.org/ref/current/maven-core/lifecycles.html#clean_Lifecycle -->
44         <plugin>
45           <artifactId>maven-clean-plugin</artifactId>
46           <version>3.1.0</version>
47         </plugin>
48         <!-- default lifecycle, jar packaging: see https://maven.apache.org/ref/current/maven-core/default-bindings.html#Plugin_bindings_for_jar_packaging -->
49         <plugin>
50           <artifactId>maven-resources-plugin</artifactId>
51           <version>3.0.2</version>
52         </plugin>
53         <plugin>
54           <artifactId>maven-compiler-plugin</artifactId>
55           <version>3.8.0</version>
56         </plugin>
57         <plugin>
58           <artifactId>maven-surefire-plugin</artifactId>
59           <version>2.22.1</version>
60         </plugin>
61         <plugin>
62           <artifactId>maven-jar-plugin</artifactId>
63           <version>3.0.2</version>
64         </plugin>
65         <plugin>
66           <artifactId>maven-install-plugin</artifactId>
67           <version>2.5.2</version>
68         </plugin>
69         <plugin>
70           <artifactId>maven-deploy-plugin</artifactId>
71           <version>2.8.2</version>
72         </plugin>
73         <!-- site lifecycle, see https://maven.apache.org/ref/current/maven-core/lifecycles.html#site_Lifecycle -->
74         <plugin>
75           <artifactId>maven-site-plugin</artifactId>
76           <version>3.7.1</version>
77         </plugin>
78         <plugin>
79           <artifactId>maven-project-info-reports-plugin</artifactId>
80           <version>3.0.0</version>
81         </plugin>
82       </plugins>
83     </pluginManagement>
84   </build>
85 </project>
步骤3:在main/java/app中,我们对SpringBoot和SpringMVC进行简单的配置工作。掌握这几个注解的作用。
 1 package org.example;
 2
 3 import org.springframework.boot.SpringApplication;
 4 import org.springframework.boot.autoconfigure.EnableAutoConfiguration;
 5 import org.springframework.web.bind.annotation.RequestMapping;
 6 import org.springframework.web.bind.annotation.RestController;
 7
 8 //SpringBoot会帮我们启动tomcat,并加载默认配置
 9 @EnableAutoConfiguration
10 //SpringMVC相关配置
11 @RestController
12 public class App {
13     @RequestMapping("/")
14     public String home(){
15         //网页中输出
16         return "Hello World!";
17     }
18     public static void main( String[] args ){
19         //控制台输出
20         System.out.println( "Hello World!" );
21         SpringApplication.run(App.class,args);
22     }
23 }
运行结果:
用浏览器打开http://localhost:8080/,我们可以看到页面上输出:Hello World!
同时,控制台也输出了Hello World!,以及一些Spring相关的信息。
SpringBoot小技巧:可以在resource目录下创建一个application.propeties配置文件,在其中写:server.port = 端口号来设置端口号。
步骤4:接入mybatis,首先在pom.xml添加需要的依赖(mysql,druid连接池,mybatis)
写一个plugin标签,引入对应的mybatis自动生成文件的插件 {
添加对应的依赖:mybatis generator的core(第一次使用要单独在前面导入依赖,不可直接放在plugin中),mysql数据库的解析
写一个excution标签:设置允许移动生成的文件,允许自动覆盖文件(实际工作中不可以)
写一个configuration标签:指定mybatis generator 配置文件的路径 }
  1 <?xml version="1.0" encoding="UTF-8"?>
  2
  3 <project xmlns="http://maven.apache.org/POM/4.0.0" xmlns:xsi="http://www.w3.org/2001/XMLSchema-instance"
  4   xsi:schemaLocation="http://maven.apache.org/POM/4.0.0 http://maven.apache.org/xsd/maven-4.0.0.xsd">
  5   <modelVersion>4.0.0</modelVersion>
  6
  7   <groupId>org.example</groupId>
  8   <artifactId>Spike</artifactId>
  9   <version>1.0-SNAPSHOT</version>
 10
 11   <name>Spike</name>
 12   <!-- FIXME change it to the project's website -->
 13   <url>http://www.example.com</url>
 14
 15  <parent>
 16    <groupId>org.springframework.boot</groupId>
 17    <artifactId>spring-boot-starter-parent</artifactId>
 18    <version>2.0.5.RELEASE</version>
 19  </parent>
 20
 21   <properties>
 22     <project.build.sourceEncoding>UTF-8</project.build.sourceEncoding>
 23     <maven.compiler.source>1.8</maven.compiler.source>
 24     <maven.compiler.target>1.8</maven.compiler.target>
 25   </properties>
 26
 27   <dependencies>
 28     <dependency>
 29       <groupId>org.springframework.boot</groupId>
 30       <artifactId>spring-boot-starter-web</artifactId>
 31     </dependency>
 32     <dependency>
 33       <groupId>mysql</groupId>
 34       <artifactId>mysql-connector-java</artifactId>
 35       <version>5.1.6</version>
 36     </dependency>
 37     <dependency>
 38       <groupId>com.alibaba</groupId>
 39       <artifactId>druid</artifactId>
 40       <version>1.1.3</version>
 41     </dependency>
 42     <dependency>
 43       <groupId>org.mybatis.spring.boot</groupId>
 44       <artifactId>mybatis-spring-boot-starter</artifactId>
 45       <version>1.3.1</version>
 46     </dependency>
 47     <dependency>
 48       <groupId>junit</groupId>
 49       <artifactId>junit</artifactId>
 50       <version>4.11</version>
 51       <scope>test</scope>
 52     </dependency>
 53     <dependency>
 54       <groupId>org.mybatis.generator</groupId>
 55       <artifactId>mybatis-generator-core</artifactId>
 56       <version>1.3.5</version>
 57     </dependency>
 58   </dependencies>
 59
 60   <build>
 61     <pluginManagement><!-- lock down plugins versions to avoid using Maven defaults (may be moved to parent pom) -->
 62       <plugins>
 63         <!-- clean lifecycle, see https://maven.apache.org/ref/current/maven-core/lifecycles.html#clean_Lifecycle -->
 64         <plugin>
 65           <artifactId>maven-clean-plugin</artifactId>
 66           <version>3.1.0</version>
 67         </plugin>
 68         <!-- default lifecycle, jar packaging: see https://maven.apache.org/ref/current/maven-core/default-bindings.html#Plugin_bindings_for_jar_packaging -->
 69         <plugin>
 70           <artifactId>maven-resources-plugin</artifactId>
 71           <version>3.0.2</version>
 72         </plugin>
 73         <plugin>
 74           <artifactId>maven-compiler-plugin</artifactId>
 75           <version>3.8.0</version>
 76         </plugin>
 77         <plugin>
 78           <artifactId>maven-surefire-plugin</artifactId>
 79           <version>2.22.1</version>
 80         </plugin>
 81         <plugin>
 82           <artifactId>maven-jar-plugin</artifactId>
 83           <version>3.0.2</version>
 84         </plugin>
 85         <plugin>
 86           <artifactId>maven-install-plugin</artifactId>
 87           <version>2.5.2</version>
 88         </plugin>
 89         <plugin>
 90           <artifactId>maven-deploy-plugin</artifactId>
 91           <version>2.8.2</version>
 92         </plugin>
 93
 94         <!-- site lifecycle, see https://maven.apache.org/ref/current/maven-core/lifecycles.html#site_Lifecycle -->
 95         <plugin>
 96           <artifactId>maven-site-plugin</artifactId>
 97           <version>3.7.1</version>
 98         </plugin>
 99         <plugin>
100           <artifactId>maven-project-info-reports-plugin</artifactId>
101           <version>3.0.0</version>
102         </plugin>
103
104         <plugin>
105           <groupId>org.mybatis.generator</groupId>
106           <artifactId>mybatis-generator-maven-plugin</artifactId>
107           <version>1.3.5</version>
108           <dependencies>
109             <dependency>
110               <groupId>org.mybatis.generator</groupId>
111               <artifactId>mybatis-generator-core</artifactId>
112               <version>1.3.5</version>
113             </dependency>
114             <dependency>
115               <groupId>mysql</groupId>
116               <artifactId>mysql-connector-java</artifactId>
117               <version>5.1.6</version>
118             </dependency>
119           </dependencies>
120           <executions>
121             <execution>
122               <id>mybatis generator</id>
123               <phase>package</phase>
124               <goals>
125                 <goal>generate</goal>
126               </goals>
127             </execution>
128           </executions>
129           <configuration>
130             <!--允许移动生成的文件-->
131             <verbose>true</verbose>
132             <!--允许自动覆盖文件-->
133             <overwrite>true</overwrite>
134             <!--mybatis generator 配置文件的路径-->
135             <configurationFile>
136               src/main/resource/mybatis-generator.xml
137             </configurationFile>
138           </configuration>
139         </plugin>
140
141       </plugins>
142     </pluginManagement>
143   </build>
144 </project>
步骤5:创建mysql底层的数据库与相关表格
1.创建数据库spike
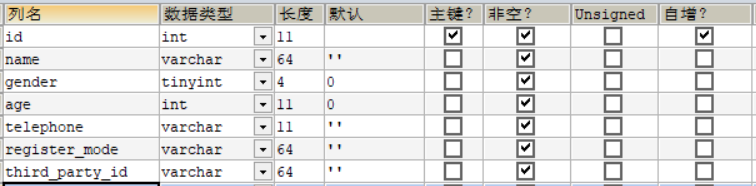
2.创建一个user_info表格
![]()
3.创建一个user_password表格,并设置user_id为外键关联user_info的id
![]()
步骤6:在步骤4中,我们最后指定了mybatis generator 配置文件的路径,于是我们在指定路径(resource目录下)创建一个mybatis generator.xml,并进行如下配置:
 1 <?xml version="1.0" encoding="UTF-8"?>
 2 <!DOCTYPE generatorConfiguration
 3         PUBLIC "-//mybatis.org//DTD MyBatis Generator Configuration 1.0//EN"
 4         "http://mybatis.org/dtd/mybatis-generator-config_1_0.dtd">
 5 <generatorConfiguration>
 6     <context id="mysql"  targetRuntime="MyBatis3" >
 7         <!--数据库连接地址账号密码-->
 8         <jdbcConnection driverClass="com.mysql.jdbc.Driver" connectionURL="jdbc:mysql://127.0.0.1:3306/spike" userId="root" password="0322">
 9         </jdbcConnection>
10         <!--生成Data Object类存放位置-->
11         <javaModelGenerator targetPackage="org.example.dataobject" targetProject="src/main/java">
12             <property name="enableSubPackages" value="true"/>
13             <property name="trimStrings" value="true"/>
14         </javaModelGenerator>
15         <!--生成映射文件存放位置-->
16         <sqlMapGenerator targetPackage="mapping" targetProject="src/main/resources">
17             <property name="enableSubPackages" value="true"/>
18         </sqlMapGenerator>
19         <!--生成dao类存放位置-->
20         <javaClientGenerator targetPackage="org.example.dao" type="XMLMAPPER" targetProject="src/main/java">
21             <property name="enableSubPackages" value="true"/>
22         </javaClientGenerator>
23         <!--生成对应表及类名-->
24         <table tableName="user_info" domainObjectName="UserDo" enableCountByExample="false"
25                enableUpdateByExample="false" enableDeleteByExample="false"
26                enableSelectByExample="false" selectByExampleQueryId="false"
27         ></table>
28         <table tableName="user_password" domainObjectName="UserPasswordDO" enableCountByExample="false"
29                enableUpdateByExample="false" enableDeleteByExample="false"
30                enableSelectByExample="false" selectByExampleQueryId="false"
31         ></table>
32     </context>
33 </generatorConfiguration>
步骤7:根据步骤6中指定的位置,我们在org.example目录下新建一个dataobject的包,一个dao包。并测试是否能够成功生成相应的文件:
run——edit configurations——+maven——command line:mybatis-generator:generate——apply
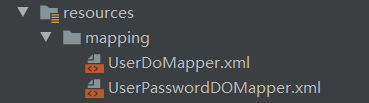
然后我们运行这个新建的命令,可以看到resources/mapping下多了两个文件:
dataobject包与dao包下生成了如下文件:
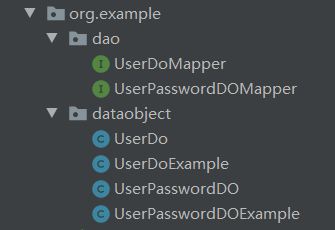
手动删除两个Example文件。
步骤8:为了接入mybatis对应mysql的数据源,我们继续编写application.properties文件
 1 server.port = 8090
 2 mybatis.mapperLocations = classpath:mapping/*.xml
 3
 4 spring.datasource.name = Spike
 5 spring.datasource.url = jdbc:mysql://127.0.0.1:3306/Spike
 6 spring.datasource.username = root
 7 spring.datasource.password = 0322
 8
 9 #使用druid数据源
10 spring.datasource.type = com.alibaba.druid.pool.DruidDataSource
11 spring.datasource.driverClassName = com.mysql.jdbc.Driver
步骤9:回到app.java
将@EnableAutoConfiguration注解改为@SpringBootApplication(scanBasePackages = "org.example"),作用是将app交给spring托管,并且指定为主启动类。
添加注解@MapperScan("org.example.dao"),把dao存放的地方设置在对应注解下面。
最后,写一个方法来测试我们的搭建工作是否完成,(事先在表格中添加一条数据)
 1 package org.example;
 2
 3 import org.example.dao.UserDoMapper;
 4 import org.example.dataobject.UserDo;
 5 import org.mybatis.spring.annotation.MapperScan;
 6 import org.springframework.beans.factory.annotation.Autowired;
 7 import org.springframework.boot.SpringApplication;
 8 import org.springframework.boot.autoconfigure.SpringBootApplication;
 9 import org.springframework.web.bind.annotation.RequestMapping;
10 import org.springframework.web.bind.annotation.RestController;
11
12 //SpringBoot会帮我们启动tomcat,并加载默认配置
13 @SpringBootApplication(scanBasePackages = {"org.example"})
14
15 //SpringMVC相关配置
16 @RestController
17 @MapperScan("org.example.dao")
18 public class App {
19     @Autowired
20     private UserDoMapper userDoMapper;
21
22     @RequestMapping("/")
23     public String home(){
24         UserDo userDo = userDoMapper.selectByPrimaryKey(1);
25         if(userDo == null){
26             return "用户对象不存在";
27         }else{
28             return userDo.getName();
29         }
30
31     }
32     public static void main( String[] args ){
33         //控制台输出
34         System.out.println( "Hello World!" );
35         SpringApplication.run(App.class,args);
36     }
37 }
打开http://localhost:8090/,我们可以看到页面上显示了我们添加的数据中name字段的内容。
三、用户模块开发
1.使用SpingMVC模式开发用户信息
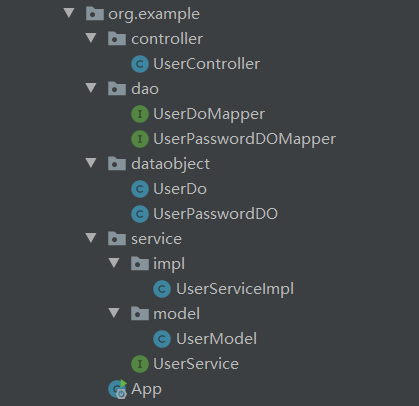
步骤1:补全框架结构:
步骤2:service层的编写:
UserService接口:
1 package org.example.service;
2
3 import org.example.service.model.UserModel;
4
5 public interface UserService {
6     UserModel getUserById(Integer id);
7 }
UserService实现类:
 1 @Service
 2 public class UserServiceImpl implements UserService {
 3     @Autowired
 4     private UserDoMapper userDoMapper;
 5
 6     @Autowired
 7     private UserPasswordDOMapper userPasswordDOMapper;
 8
 9     @Override
10     public UserModel getUserById(Integer id) {
11         UserDo userDo = userDoMapper.selectByPrimaryKey(id);
12         if(userDo == null){
13             return null;
14         }
15         //通过用户id获取对应的用户加密密码信息
16         UserPasswordDO userPasswordDO = userPasswordDOMapper.selectByUserId(userDo.getId());
17         return convertFromDataObject(userDo,userPasswordDO);
18     }
19
20     public UserModel convertFromDataObject(UserDo userDo, UserPasswordDO userPasswordDO) {
21         if(userDo == null){
22             return null;
23         }
24         UserModel userModel = new UserModel();
25         BeanUtils.copyProperties(userDo,userModel);
26         if(userPasswordDO != null){
27             userModel.setEncriptPassword(userPasswordDO.getEncriptPassword());
28         }
29         return userModel;
30     }
31 }
UserModel类:存放数据库的所有对应字段与getters&setters,用于service层与数据库数据的解耦,使service层无法直接接触数据库
 1 package org.example.service.model;
 2
 3 public class UserModel {
 4     private Integer id;
 5     private String name;
 6     private Byte gender;
 7     private Integer age;
 8     private String telephone;
 9     private String registerMode;
10     private String thirdPartyId;
11     private String encriptPassword;
12
13     public Integer getId() {
14         return id;
15     }
16
17     public void setId(Integer id) {
18         this.id = id;
19     }
20
21     public String getName() {
22         return name;
23     }
24
25     public void setName(String name) {
26         this.name = name;
27     }
28
29     public Byte getGender() {
30         return gender;
31     }
32
33     public void setGender(Byte gender) {
34         this.gender = gender;
35     }
36
37     public Integer getAge() {
38         return age;
39     }
40
41     public void setAge(Integer age) {
42         this.age = age;
43     }
44
45     public String getTelephone() {
46         return telephone;
47     }
48
49     public void setTelephone(String telephone) {
50         this.telephone = telephone;
51     }
52
53     public String getRegisterMode() {
54         return registerMode;
55     }
56
57     public void setRegisterMode(String registerMode) {
58         this.registerMode = registerMode;
59     }
60
61     public String getThirdPartyId() {
62         return thirdPartyId;
63     }
64
65     public void setThirdPartyId(String thirdPartyId) {
66         this.thirdPartyId = thirdPartyId;
67     }
68
69     public String getEncriptPassword() {
70         return encriptPassword;
71     }
72
73     public void setEncriptPassword(String encriptPassword) {
74         this.encriptPassword = encriptPassword;
75     }
76 }
步骤3:修改UserPasswordDOMapper.xml,添加一个selectByUserId操作的配置
1 <select id="selectByUserId" parameterType="java.lang.Integer" resultMap="BaseResultMap">
2     select
3     <include refid="Base_Column_List" />
4     from user_password
5     where user_id = #{userId,jdbcType=INTEGER}
6   </select>
同步修改UserPasswordDOMapper.java,添加一行代码:
UserPasswordDO selectByUserId(Integer userId);
步骤4:编写Controller包中的UserController.java
 1 @Controller("user")
 2 @RequestMapping("/user")
 3 public class UserController {
 4     @Autowired
 5     private UserService userService;
 6     @RequestMapping("/get")
 7     @ResponseBody
 8     public UserModel getUser(@RequestParam(name="id") Integer id) {
 9         //调用service服务获取对应id的用户对象并返回给前端
10         UserModel userModel = userService.getUserById(id);
11         return userModel;
12     }
13 }
运行后,访问http://localhost:8090/user/get?id=1(需要事先添加好一条完整的数据),可以看到页面上输出了这条数据的完整信息。
步骤5:发现问题:在UserController中,我们把userModel模型直接返回给前端,导致密码直接输出在页面中,这是非常不专业的。
因此,我们在controller层(包)中需要新建一个模型对象。在controller层中新建一个viewobject包,并在其中写一个viewobject类,里面只写需要展示在前端的字段与getters&setters。
 1 package org.example.controller.viewobject;
 2
 3 public class UserVO {
 4     //只写前端用户所需要的信息
 5     private Integer id;
 6     private String name;
 7     private Byte gender;
 8     private Integer age;
 9     private String telephone;
10
11     public Integer getId() {
12         return id;
13     }
14
15     public void setId(Integer id) {
16         this.id = id;
17     }
18
19     public String getName() {
20         return name;
21     }
22
23     public void setName(String name) {
24         this.name = name;
25     }
26
27     public Byte getGender() {
28         return gender;
29     }
30
31     public void setGender(Byte gender) {
32         this.gender = gender;
33     }
34
35     public Integer getAge() {
36         return age;
37     }
38
39     public void setAge(Integer age) {
40         this.age = age;
41     }
42
43     public String getTelephone() {
44         return telephone;
45     }
46
47     public void setTelephone(String telephone) {
48         this.telephone = telephone;
49     }
50 }
同时,我们修改UserController类,将UserModel转化为viewobject后,再返回给前端。
 1 @Controller("user")
 2 @RequestMapping("/user")
 3 public class UserController {
 4     @Autowired
 5     private UserService userService;
 6     @RequestMapping("/get")
 7     @ResponseBody
 8     public UserVO getUser(@RequestParam(name="id") Integer id) {
 9         //调用service服务获取对应id的用户对象并返回给前端
10         UserModel userModel = userService.getUserById(id);
11         //将核心领域模型对象转化为可供UI使用的viewobject
12         return convertFromModel(userModel);
13     }
14     private UserVO convertFromModel(UserModel userModel){
15         if(userModel == null){
16             return null;
17         }
18         UserVO userVO = new UserVO();
19         BeanUtils.copyProperties(userModel,userVO);
20         return userVO;
21     }
22 }
这一步中,我们做了一个完整的从数据库中读取数据,展示在前端页面上的操作。
controller层——>service层——>dao层
dataobject层负责数据存储到service的传输,并且在用户的service的服务中组装了对应的核心领域模型。
controller层做了到用户viewobject之间的传递,保证密码等信息不会输出到前端。
2.定义通用的返回对象
步骤1:自主管理前端页面的返回——返回正确信息
org.example包下创建一个response包,在其中创建一个CommonReturnType.java文件。
在该文件中,设置两个属性:status,data,并生成对应的getters&setters。然后写两个构造方法,包含了两个属性的设置。
 1 package org.example.response;
 2
 3 public class CommonReturnType {
 4     //表名对应请求的返回处理结果,success/fail
 5     private String status;
 6     //若status返回success,则data内返回前端需要的json数据
 7     //若status返回success,则data内使用通用的错误码格式
 8     private Object data;
 9
10     //定义一个通用的创建方法
11     public static CommonReturnType create(Object result){
12         return CommonReturnType.create(result,"success");
13     }
14
15     public static CommonReturnType create(Object result,String status){
16         CommonReturnType type = new CommonReturnType();
17         type.setStatus(status);
18         type.setData(result);
19         return type;
20     }
21
22     public String getStatus() {
23         return status;
24     }
25
26     public void setStatus(String status) {
27         this.status = status;
28     }
29
30     public Object getData() {
31         return data;
32     }
33
34     public void setData(Object data) {
35         this.data = data;
36     }
37 }
修改我们的UserController.java,将返回值改为CommonReturnType,由CommonReturnType调用create方法来引用UserVO中的信息。以下代码为需要修改的部分:
1 public CommonReturnType getUser(@RequestParam(name="id") Integer id) {
2         //调用service服务获取对应id的用户对象并返回给前端
3         UserModel userModel = userService.getUserById(id);
4         //将核心领域模型对象转化为可供UI使用的viewobject
5         UserVO userVO =  convertFromModel(userModel);
6         //返回通用对象
7         return CommonReturnType.create(userVO);
8     }
运行后,我们仍然访问http://localhost:8090/user/get?id=1,可以看到页面上输出了:
![]()
步骤2:自主管理前端页面的返回——返回错误信息
org.example包下创建一个error包,在其中创建一个CommonError接口,写3个方法:获取错误码,获取错误信息,设置错误信息
1 public interface CommonError {
2     public int getErrCode();
3     public String getErrMsg();
4     public CommonError setErrMsg(String errMsg);
5 }
error包下写一个枚举类型的EmBusinessError,实现CommonError接口。
 1 package org.example.error;
 2
 3 public enum EmBusinessError implements CommonError{
 4     //通用错误类型10001
 5     PARAMETER_VALIDATION_ERROR(10001,"参数不合法"),
 6     //未知错误10002
 7     UNKNOWN_ERROR(10002,"未知错误"),
 8
 9     //20000开头相关为用户信息相关错误定义
10     USER_NOT_EXIST(20001,"用户不存在"),
11     ;
12
13     private EmBusinessError(int errCode,String errMsg){
14         this.errCode = errCode;
15         this.errMsg = errMsg;
16     }
17
18     private int errCode;
19     private String errMsg;
20
21     @Override
22     public int getErrCode() {
23         return this.errCode;
24     }
25
26     @Override
27     public String getErrMsg() {
28         return this.errMsg;
29     }
30
31     @Override
32     public CommonError setErrMsg(String errMsg) {
33         this.errMsg = errMsg;
34         return this;
35     }
36 }
error包下写一个BusinessException,实现CommonError接口,并继承Exception类。
 1 public class BusinessException extends Exception implements CommonError{
 2     private CommonError commonError;
 3
 4     //直接接收EmBusinessError的传参用于构造业务异常
 5     public BusinessException(CommonError commonError) {
 6         super();
 7         this.commonError = commonError;
 8     }
 9
10     public BusinessException(CommonError commonError,String errMsg) {
11         super();
12         this.commonError = commonError;
13         this.commonError.setErrMsg(errMsg);
14     }
15
16     @Override
17     public int getErrCode() {
18         return this.commonError.getErrCode();
19     }
20
21     @Override
22     public String getErrMsg() {
23         return this.commonError.getErrMsg();
24     }
25
26     @Override
27     public CommonError setErrMsg(String errMsg) {
28         this.commonError.setErrMsg(errMsg);
29         return this;
30     }
31 }
UserController中添加如下代码:
1      //若获取的对应用户信息不存在
2         if(userModel==null){
3             throw new BusinessException(EmBusinessError.USER_NOT_EXIST);
4         }
步骤3:异常处理
在controller目录下单独写一个BaseController类,定义exceptionhandler解决未被controller层吸收的exception。
 1 import java.util.Map;
 2
 3 public class BaseController {
 4     //定义exceptionhandler解决未被controller层吸收的exception
 5     @ExceptionHandler(Exception.class)
 6     @ResponseStatus(HttpStatus.OK)
 7     @ResponseBody
 8     public Object handlerException(HttpServletRequest request, Exception ex){
 9         Map<String,Object> responseData = new HashMap<>();
10         if(ex instanceof BusinessException){
11             BusinessException businessException = (BusinessException)ex;
12             responseData.put("errCode",businessException.getErrCode());
13             responseData.put("errMsg",businessException.getErrMsg());
14         }else{
15             responseData.put("errCode", EmBusinessError.UNKNOWN_ERROR.getErrCode());
16             responseData.put("errMsg",EmBusinessError.UNKNOWN_ERROR.getErrMsg());
17
18         }
19         return CommonReturnType.create(responseData,"fail");
20     }
21 }
然后,UserController类需要继承BaseController类。
运行后,我们访问http://localhost:8090/user/get?id=2,(id=2的数据是不存在的),可以看到页面为:
![]()
为了程序的健壮性,我们在BaseController中添加了一个unknown error。我们可以手动地来测试一下这段代码是否起了作用:
修改UserController部分代码如下:
1         if(userModel==null){
2             userModel.setEncriptPassword("123");
3             //throw new BusinessException(EmBusinessError.USER_NOT_EXIST);
4         }
运行后,我们再次访问http://localhost:8090/user/get?id=2,可以看到页面为:
![]()
总结:
在这一环节中,首先我们定义了一个CommonReturnType,能够用对应的status+objectdata的方式返回所有json序列化方式的固定对象,供前端解析使用。
然后,我们定义了EmBusinessError,统一管理我们所需要的错误码。
接着,我们在BaseController中定义了一个通用的ExceptionHandler的类来解决未被controller层吸收的exception(采用errorCode+errorMsg的统一定义方式),处理了所有不可预知的异常。
3.用户模型管理
步骤1:otp验证码获取
我们在userController类中编写如下代码,用于随机生成一个验证码,并与手机号关联。发送短信的过程我们暂时用控制台打印来替代。
 1     @Autowired
 2     private HttpServletRequest httpServletRequest;
 3
 4     //用户获取otp短信接口
 5     @RequestMapping("/getotp")
 6     @ResponseBody
 7     public CommonReturnType getOtp(@RequestParam(name="telephone")String telephone){
 8         //按照一定的规则生成otp验证码
 9         Random random = new Random();
10         int randomInt = random.nextInt(99999);
11         randomInt += 10000;
12         String otpCode = String.valueOf(randomInt);
13         //将otp验证码桶对应用户的手机号关联,使用httpsession的方式绑定他的手机号与OTPCODE
14         httpServletRequest.getSession().setAttribute(telephone,otpCode);
15         //将otp验证码通过短信通道发送给用户,这里简化打印至控制台查看
16         System.out.println("telephone = " + telephone + " & otpCode = "+otpCode);
17         return CommonReturnType.create(null);
18     }
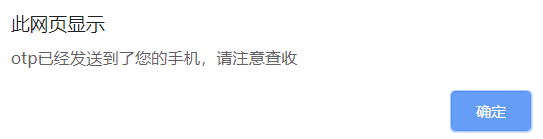
登录http://localhost:8090/user/getotp?telephone=13565656565(手机号任意),页面显示:
![]()
控制台中看到输出:
![]()
步骤2:用前后端分离的设计模式制作用户登录的界面
用Metronic模板写一个用于用户注册的html,与static文件夹放在一起,代码如下:
 1 <html>
 2 <head>
 3     <meta charset="UTF-8">
 4     <script src="static/assets/global/plugins/jquery-1.11.0.min.js" type="text/javascript"></script>
 5     <title>Title</title>
 6 </head>
 7 <body>
 8     <div>
 9         <h3>获取otp信息</h3>
10         <div>
11             <label>手机号</label>
12             <div>
13                 <input type="text" placeholder="手机号" name="telephone" id="telephone"/>
14             </div>
15         </div>
16         <div>
17             <button id="getotp" type="submit">
18                 获取otp短信
19             </button>
20         </div>
21     </div>
22
23 </body>
24
25 <script>
26     jQuery(document).ready(function () {
27
28         //绑定otp的click事件用于向后端发送获取手机验证码的请求
29         $("#getotp").on("click",function () {
30
31             var telephone=$("#telephone").val();
32             if (telephone==null || telephone=="") {
33                 alert("手机号不能为空");
34                 return false;
35             }
36
37
38             //映射到后端@RequestMapping(value = "/getotp", method = {RequestMethod.POST}, consumes = {CONTENT_TYPE_FORMED})
39             $.ajax({
40                 type:"POST",
41                 contentType:"application/x-www-form-urlencoded",
42                 url:"http://localhost:8090/user/getotp",
43                 data:{
44                     "telephone":$("#telephone").val(),
45                 },
46                 success:function (data) {
47                     if (data.status=="success") {
48                         alert("otp已经发送到了您的手机,请注意查收");
49                     }else {
50                         alert("otp发送失败,原因为" + data.data.errMsg);
51                     }
52                 },
53                 error:function (data) {
54                     alert("otp发送失败,原因为"+data.responseText);
55                 }
56             });
57         });
58     });
59 </script>
60 </html>
在BaseController中定义一个常量如下:
public static final String CONTENT_TYPE_FORMED ="application/x-www-form-urlencoded";
在UserController中,我们修改RequestMapping注解为:
@RequestMapping(value = "/getotp", method = {RequestMethod.POST}, consumes = {CONTENT_TYPE_FORMED})
最后为了实现跨域请求,我们在UserController类上面添加一个@CrossOrigin注解。
运行project后,我们用google浏览器(千万不要用IE,会提示undefined错误!)打开getotp.html,界面如下:
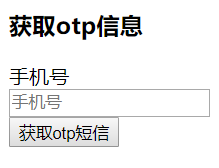
输入任意手机号,点击按钮,浏览器提示:
控制台输出了手机号与otpcode。
html页面可以通过引入样式来美化,美化后代码如下:
 1 <html>
 2 <head>
 3     <meta charset="UTF-8">
 4     <script src = "static/assets/global/plugins/jquery-1.11.0.min.js" type="text/javascript"></script>
 5     <link href="static/assets/global/plugins/bootstrap/css/bootstrap.min.css" rel="stylesheet" type="text/css"/>
 6     <link href="static/assets/global/plugins/css/component.css" rel="stylesheet" type="text/css"/>
 7     <link href="static/assets/admin/pages/css/login.css" rel="stylesheet" type="text/css"/>
 8 </head>
 9 <body class="login">
10 <div class="content">
11     <h3 class="form-title">获取otp信息</h3>
12     <div class="form-group">
13         <label class="control-label">手机号</label>
14         <div>
15             <input class="form-control" type="text" placeholder="手机号" name="telephone" id="telephone"/>
16         </div>
17     </div>
18     <div class="form-actions">
19         <button class="btn blue" id="getotp" type="submit">
20             获取otp短信
21         </button>
22     </div>
23 </div>
24
25 </body>
26
27
28 <script>
29     jQuery(document).ready(function () {
30
31         //绑定otp的click事件用于向后端发送获取手机验证码的请求
32         $("#getotp").on("click",function () {
33
34             var telephone=$("#telephone").val();
35             if (telephone==null || telephone=="") {
36                 alert("手机号不能为空");
37                 return false;
38             }
39
40
41             //映射到后端@RequestMapping(value = "/getotp", method = {RequestMethod.POST}, consumes = {CONTENT_TYPE_FORMED})
42             $.ajax({
43                 type:"POST",
44                 contentType:"application/x-www-form-urlencoded",
45                 url:"http://localhost:8090/user/getotp",
46                 data:{
47                     "telephone":$("#telephone").val(),
48                 },
49                 success:function (data) {
50                     if (data.status=="success") {
51                         alert("otp已经发送到了您的手机,请注意查收");
52                     }else {
53                         alert("otp发送失败,原因为" + data.data.errMsg);
54                     }
55                 },
56                 error:function (data) {
57                     alert("otp发送失败,原因为"+data.responseText);
58                 }
59             });
60         });
61     });
62 </script>
63 </html>
步骤3:用户注册功能的实现
UserController写一个用户注册的接口,用来接收前端写入的数据。
 1 //用户注册接口
 2     @RequestMapping(value = "/register", method = {RequestMethod.POST}, consumes = {CONTENT_TYPE_FORMED})
 3     @ResponseBody
 4     public CommonReturnType register(@RequestParam(name = "telephone") String telephone,
 5                                      @RequestParam(name = "otpCode") String otpCode,
 6                                      @RequestParam(name = "name") String name,
 7                                      @RequestParam(name = "gender") String gender,
 8                                      @RequestParam(name = "age") String age,
 9                                      @RequestParam(name = "password") String password) throws BusinessException, UnsupportedEncodingException, NoSuchAlgorithmException {
10
11         //验证手机号和对应的otpCode相符合
12         String inSessionOtpCode = (String) this.httpServletRequest.getSession().getAttribute(telephone);
13         if (!com.alibaba.druid.util.StringUtils.equals(otpCode, inSessionOtpCode)) {
14             throw new BusinessException(EmBusinessError.PARAMETER_VALIDATION_ERROR, "短信验证码不符合");
15         }
16         //用户的注册流程
17         UserModel userModel = new UserModel();
18         userModel.setName(name);
19         userModel.setAge(Integer.valueOf(age));
20         userModel.setGender(Byte.valueOf(gender));
21         userModel.setTelephone(telephone);
22         userModel.setRegisterMode("byphone");
23
24         //密码加密
25         userModel.setEncriptPassword(this.EncodeByMd5(password));
26         userService.register(userModel);
27         return CommonReturnType.create(null);
28     }
29
30     //密码加密
31     public String EncodeByMd5(String str) throws NoSuchAlgorithmException, UnsupportedEncodingException {
32         //确定计算方法
33         MessageDigest md5 = MessageDigest.getInstance("MD5");
34         Base64Encoder base64en = new Base64Encoder();
35
36         //加密字符串
37         String newstr = base64en.encode(md5.digest(str.getBytes("utf-8")));
38         return newstr;
39     }
在pom中引入做校验的依赖:
1     <dependency>
2       <groupId>org.apache.commons</groupId>
3       <artifactId>commons-lang3</artifactId>
4       <version>3.7</version>
5     </dependency>
在UserServiceImpl中写register方法,将controller层传过来的数据与数据库做交互,并修改跨域注解为:
@CrossOrigin(allowCredentials = "true",allowedHeaders = "*")
 1     @Override
 2     @Transactional//声明事务
 3     public void register(UserModel userModel) throws BusinessException {
 4         //校验
 5         if (userModel == null) {
 6             throw new BusinessException(EmBusinessError.PARAMETER_VALIDATION_ERROR);
 7         }
 8         if (StringUtils.isEmpty(userModel.getName())
 9                 || userModel.getGender() == null
10                 || userModel.getAge() == null
11                 || StringUtils.isEmpty(userModel.getTelephone())) {
12             throw new BusinessException(EmBusinessError.PARAMETER_VALIDATION_ERROR);
13         }
14
15         //实现model->dataobject方法
16
17         UserDo userDO = convertFromModel(userModel);
18         //insertSelective相对于insert方法,不会覆盖掉数据库的默认值
19         userDoMapper.insertSelective(userDO);
20
21         userModel.setId(userDO.getId());
22
23         UserPasswordDO userPasswordDO = convertPasswordFromModel(userModel);
24         userPasswordDOMapper.insertSelective(userPasswordDO);
25
26         return;
27     }
28
29     private UserPasswordDO convertPasswordFromModel(UserModel userModel) {
30         if (userModel == null) {
31             return null;
32         }
33         UserPasswordDO userPasswordDO = new UserPasswordDO();
34         userPasswordDO.setEncriptPassword(userModel.getEncriptPassword());
35         userPasswordDO.setUserId(userModel.getId());
36
37         return userPasswordDO;
38     }
39
40     private UserDo convertFromModel(UserModel userModel) {
41         if (userModel == null) {
42             return null;
43         }
44         UserDo userDo = new UserDo();
45         BeanUtils.copyProperties(userModel,userDo);
46         return userDo;
47     }
制作前端界面:
修改getotp.html,验证码发送成功后写一个跳转,转到register.html(window是小写!),最后再添加一句允许跨域:
 1                xhrFields:{withCredentials:true},
 2                 success:function (data) {
 3                     if (data.status=="success") {
 4                         alert("otp已经发送到了您的手机,请注意查收");
 5                         window.location.href="register.html";
 6                     }else {
 7                         alert("otp发送失败,原因为" + data.data.errMsg);
 8                     }
 9                 },
10                 error:function (data) {
11                     alert("otp发送失败,原因为"+data.responseText);
12                 }
写一个register.html页面,用于输入用户信息:
  1 <html>
  2 <head>
  3     <meta charset="UTF-8">
  4     <script src = "static/assets/global/plugins/jquery-1.11.0.min.js" type="text/javascript"></script>
  5     <link href="static/assets/global/plugins/bootstrap/css/bootstrap.min.css" rel="stylesheet" type="text/css"/>
  6     <link href="static/assets/global/plugins/css/component.css" rel="stylesheet" type="text/css"/>
  7     <link href="static/assets/admin/pages/css/login.css" rel="stylesheet" type="text/css"/>
  8 </head>
  9 <body class="login">
 10     <div class="content">
 11         <h3 class="form-title">用户注册</h3>
 12         <div class="form-group">
 13             <label class="control-label">手机号</label>
 14             <div>
 15                 <input class="form-control" type="text" placeholder="手机号" name="telephone" id="telephone"/>
 16             </div>
 17         </div>
 18         <div class="form-group">
 19             <label class="control-label">验证码</label>
 20             <div>
 21                 <input class="form-control" type="text" placeholder="验证码" name="otpCode" id="otpCode"/>
 22             </div>
 23         </div>
 24         <div class="form-group">
 25             <label class="control-label">用户昵称</label>
 26             <div>
 27                 <input class="form-control" type="text" placeholder="用户昵称" name="name" id="name"/>
 28             </div>
 29         </div>
 30         <div class="form-group">
 31             <label class="control-label">性别</label>
 32             <div>
 33                 <input class="form-control" type="text" placeholder="性别" name="gender" id="gender"/>
 34             </div>
 35         </div>
 36         <div class="form-group">
 37             <label class="control-label">年龄</label>
 38             <div>
 39                 <input class="form-control" type="text" placeholder="年龄" name="age" id="age"/>
 40             </div>
 41         </div>
 42         <div class="form-group">
 43             <label class="control-label">密码</label>
 44             <div>
 45                 <input class="form-control" type="password" placeholder="密码" name="password" id="password"/>
 46             </div>
 47         </div>
 48         <div class="form-actions">
 49             <button class="btn blue" id="register" type="submit">
 50                 提交注册
 51             </button>
 52         </div>
 53     </div>
 54
 55 </body>
 56
 57 <script>
 58     jQuery(document).ready(function () {
 59
 60         //绑定otp的click事件用于向后端发送获取手机验证码的请求
 61         $("#register").on("click",function () {
 62
 63             var telephone=$("#telephone").val();
 64             var otpCode=$("#otpCode").val();
 65             var password=$("#password").val();
 66             var age=$("#age").val();
 67             var gender=$("#gender").val();
 68             var name=$("#name").val();
 69             if (telephone==null || telephone=="") {
 70                 alert("手机号不能为空");
 71                 return false;
 72             }
 73             if (otpCode==null || otpCode=="") {
 74                 alert("验证码不能为空");
 75                 return false;
 76             }
 77             if (name==null || name=="") {
 78                 alert("用户名不能为空");
 79                 return false;
 80             }
 81             if (gender==null || gender=="") {
 82                 alert("性别不能为空");
 83                 return false;
 84             }
 85             if (age==null || age=="") {
 86                 alert("年龄不能为空");
 87                 return false;
 88             }
 89             if (password==null || password=="") {
 90                 alert("密码不能为空");
 91                 return false;
 92             }
 93
 94             //映射到后端@RequestMapping(value = "/register", method = {RequestMethod.POST}, consumes = {CONTENT_TYPE_FORMED})
 95             $.ajax({
 96                 type:"POST",
 97                 contentType:"application/x-www-form-urlencoded",
 98                 url:"http://localhost:8090/user/register",
 99                 data:{
100                     "telephone":telephone,
101                     "otpCode":otpCode,
102                     "password":password,
103                     "age":age,
104                     "gender":gender,
105                     "name":name
106                 },
107                 //允许跨域请求
108                 xhrFields:{withCredentials:true},
109                 success:function (data) {
110                     if (data.status=="success") {
111                         alert("注册成功");
112                     }else {
113                         alert("注册失败,原因为" + data.data.errMsg);
114                     }
115                 },
116                 error:function (data) {
117                     alert("注册失败,原因为"+data.responseText);
118                 }
119             });
120             return false;
121         });
122     });
123 </script>
124
125 </html>
修改UserDoMapper.xml与UserPasswordMapper.xml的insertSelective操作,修改insert标签头,使id自增
keyProperty="id" useGeneratedKeys="true"
踩雷:一定要保证数据库中的两张表格的约束正确,否则会出错(血泪史TAT)

要会debug:添加断点,然后点击右上角的小甲虫运行,在前端操作之后观察调试台的参数是否正确!
运行结果:输入手机号,页面跳转至输入信息页面,输入个人信息以及对应的手机号,otp验证码,页面提示注册成功,数据库中会增加一条刚刚输入的用户的数据。
步骤4:登录功能实现
UserController中写一个登录接口:
 1 //用户登录接口
 2     @RequestMapping(value = "/login", method = {RequestMethod.POST}, consumes = {CONTENT_TYPE_FORMED})
 3     @ResponseBody
 4     public CommonReturnType login(@RequestParam(name = "telephone") String telephone,
 5                                   @RequestParam(name = "password") String password) throws BusinessException, UnsupportedEncodingException, NoSuchAlgorithmException {
 6         //入参校验
 7         if (StringUtils.isEmpty(telephone) || StringUtils.isEmpty(password)) {
 8             throw new BusinessException(EmBusinessError.PARAMETER_VALIDATION_ERROR);
 9         }
10
11         //用户登录服务,用来校验用户登录是否合法
12         //用户加密后的密码
13         UserModel userModel = userService.validateLogin(telephone, this.EncodeByMd5(password));
14
15         //将登陆凭证加入到用户登录成功的session内
16         this.httpServletRequest.getSession().setAttribute("IS_LOGIN", true);
17         this.httpServletRequest.getSession().setAttribute("LOGIN_USER", userModel);
18         return CommonReturnType.create(null);
19     }
UserDoMapper接口中增加一个方法:
UserDo selectByTelephone(String telephone);
UserDoMapper.xml中进行配置:
1   <select id="selectByTelephone" resultMap="BaseResultMap">
2     select
3     <include refid="Base_Column_List"/>
4     from user_info
5     where telephone = #{telephone,jdbcType=VARCHAR}
6   </select>
UserSeivice接口中添加一个方法:
UserModel validateLogin(String telephone, String encriptPassword) throws BusinessException;
然后我们就可以在UserServiceImpl中实现这个方法:
 1 @Override
 2     public UserModel validateLogin(String telephone, String encriptPassword) throws BusinessException {
 3             //通过用户手机获取用户信息
 4             UserDo userDo = userDoMapper.selectByTelephone(telephone);
 5             if (userDo == null) {
 6                 throw new BusinessException(EmBusinessError.USER_LOGIN_FAIL);
 7             }
 8             UserPasswordDO userPasswordDO = userPasswordDOMapper.selectByUserId(userDo.getId());
 9             UserModel userModel = convertFromDataObject(userDo, userPasswordDO);
10
11             //比对用户信息内加密的密码是否和传输进来的密码相匹配
12             if (StringUtils.equals(encriptPassword, userModel.getEncriptPassword())) {
13                 throw new BusinessException(EmBusinessError.USER_LOGIN_FAIL);
14             }
15             return userModel;
16         }
建立前端页面:login.html
 1 <html>
 2 <head>
 3     <meta charset="UTF-8">
 4     <script src = "static/assets/global/plugins/jquery-1.11.0.min.js" type="text/javascript"></script>
 5     <link href="static/assets/global/plugins/bootstrap/css/bootstrap.min.css" rel="stylesheet" type="text/css"/>
 6     <link href="static/assets/global/plugins/css/component.css" rel="stylesheet" type="text/css"/>
 7     <link href="static/assets/admin/pages/css/login.css" rel="stylesheet" type="text/css"/>
 8 </head>
 9 <body class="login">
10     <div class="content">
11         <h3 class="form-title">用户登录</h3>
12         <div class="form-group">
13             <label class="control-label">手机号</label>
14             <div>
15                 <input class="form-control" type="text" placeholder="手机号" name="telephone" id="telephone"/>
16             </div>
17         </div>
18         <div class="form-group">
19             <label class="control-label">密码</label>
20             <div>
21                 <input class="form-control" type="password" placeholder="密码" name="password" id="password"/>
22             </div>
23         </div>
24         <div class="form-actions">
25             <button class="btn blue" id="login" type="submit">
26                 登录
27             </button>
28             <button class="btn green" id="register" type="submit">
29                 注册
30             </button>
31         </div>
32     </div>
33
34 </body>
35
36 <script>
37     jQuery(document).ready(function () {
38
39         //绑定注册按钮的click事件用于跳转到注册页面
40         $("#register").on("click",function () {
41             window.location.href = "getotp.html";
42         });
43
44         //绑定登录按钮的click事件用于登录
45         $("#login").on("click",function () {
46
47             var telephone=$("#telephone").val();
48             var password=$("#password").val();
49             if (telephone==null || telephone=="") {
50                 alert("手机号不能为空");
51                 return false;
52             }
53             if (password==null || password=="") {
54                 alert("密码不能为空");
55                 return false;
56             }
57
58             //映射到后端@RequestMapping(value = "/login", method = {RequestMethod.POST}, consumes = {CONTENT_TYPE_FORMED})
59             $.ajax({
60                 type:"POST",
61                 contentType:"application/x-www-form-urlencoded",
62                 url:"http://localhost:8090/user/login",
63                 data:{
64                     "telephone":telephone,
65                     "password":password
66                 },
67                 //允许跨域请求
68                 xhrFields:{withCredentials:true},
69                 success:function (data) {
70                     if (data.status=="success") {
71                         alert("登录成功");
72                     }else {
73                         alert("登录失败,原因为" + data.data.errMsg);
74                     }
75                 },
76                 error:function (data) {
77                     alert("登录失败,原因为"+data.responseText);
78                 }
79             });
80             return false;
81         });
82     });
83     </script>
84 </html>
运行project,我们进入login页面,输入已注册的手机号与密码,就会收到登录成功的提示。

步骤5:优化校验逻辑
引入validator依赖
1     <dependency>
2       <groupId>org.hibernate</groupId>
3       <artifactId>hibernate-validator</artifactId>
4       <version>5.2.4.Final</version>
5     </dependency>
org.example下新建一个validator包:
写一个validationResult类:
 1 package org.example.validator;
 2
 3 import org.apache.commons.lang3.StringUtils;
 4
 5 import java.util.HashMap;
 6 import java.util.Map;
 7
 8 public class ValidationResult {
 9     //校验结果是否有错
10     private boolean hasErrors = false;
11
12     //存放错误信息的map
13     private Map<String, String> errorMsgMap = new HashMap<>();
14
15     public boolean isHasErrors() {
16         return hasErrors;
17     }
18
19     public void setHasErrors(boolean hasErrors) {
20         this.hasErrors = hasErrors;
21     }
22
23     public Map<String, String> getErrorMsgMap() {
24         return errorMsgMap;
25     }
26
27     public void setErrorMsgMap(Map<String, String> errorMsgMap) {
28         this.errorMsgMap = errorMsgMap;
29     }
30
31     //实现通用的通过格式化字符串信息获取错误结果的msg方法
32     public String getErrMsg() {
33         return StringUtils.join(errorMsgMap.values().toArray(), ",");
34     }
35 }
写一个validatorImpl类:
 1 @Component
 2 public class ValidatorImpl implements InitializingBean {
 3
 4     private Validator validator;
 5
 6     //实现校验方法并返回校验结果
 7     public ValidationResult validate(Object bean) {
 8         final ValidationResult result = new ValidationResult();
 9         Set<ConstraintViolation<Object>> constraintViolationSet = validator.validate(bean);
10         if (constraintViolationSet.size() > 0) {
11             //有错误
12             result.setHasErrors(true);
13             constraintViolationSet.forEach(constraintViolation ->{
14                 String errMsg = constraintViolation.getMessage();
15                 String propertyName = constraintViolation.getPropertyPath().toString();
16                 result.getErrorMsgMap().put(propertyName, errMsg);
17             });
18         }
19         return result;
20     }
21
22     @Override
23     public void afterPropertiesSet() throws Exception {
24         //将hibernate validator通过工厂的初始化方式使其实例化
25         this.validator = Validation.buildDefaultValidatorFactory().getValidator();
26     }
27 }
修改UserModel,加入校验相关的注解:
 1     private Integer id;
 2     @NotBlank(message = "用户名不能为空")
 3     private String name;
 4     @NotNull(message = "性别不能不填")
 5     private Byte gender;
 6     @NotNull(message = "年龄不能不填")
 7     @Min(value = 0,message="年龄必须大于0岁")
 8     @Max(value = 150,message = "年龄必须小于150岁")
 9     private Integer age;
10     @NotNull(message = "手机号不能为空")
11     private String telephone;
12     private String registerMode;
13     private String thirdPartyId;
14     @NotNull(message = "密码不能为空")
15     private String encriptPassword;
在UserServiceImpl中引入并使用使用validator(先把原来的非空校验注释掉):
@Autowired
private ValidatorImpl validator;
 1         /*
 2         if (StringUtils.isEmpty(userModel.getName())
 3                 || userModel.getGender() == null
 4                 || userModel.getAge() == null
 5                 || StringUtils.isEmpty(userModel.getTelephone())) {
 6             throw new BusinessException(EmBusinessError.PARAMETER_VALIDATION_ERROR);
 7         }
 8         */
 9         ValidationResult result = validator.validate(userModel);
10         if (result.isHasErrors()) {
11             throw new BusinessException(EmBusinessError.PARAMETER_VALIDATION_ERROR, result.getErrMsg());
12         }
运行project,我们在注册时,可尝试输入一个大于150的年龄,提交后系统会报错:
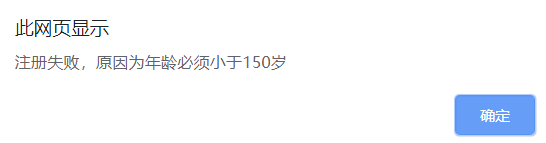
项目上篇完结~
