vue
一 . vue的下载安装
官方网站:
    中文: https://cn.vuejs.org/
    英文: https://vuejs.org/
官方文档:
    https://cn.vuejs.org/v2/guide/

vue.js目前有1.x、2.x和3.x 版本,我用的是2.x版本的.
二 . vue.js库的基本使用
在github下载:https://github.com/vuejs/vue/releases
在官网下载地址: <https://cn.vuejs.org/v2/guide/installation.html>
vue的引入类似于jQuery,开发中可以使用开发版本vue.js,产品上线要换成vue.min.js
三 . vue的简单引用
1. 学习vue
<!DOCTYPE html>
<html lang="en">
<head>
    <meta charset="UTF-8">
    <title>learnVue</title>
    <script src="js/vue.js"></script>   <!--导入js包下面的vue文件-->
</head>
<body>
    <div id="app">    <!--id名随便起,div只是一个容器,把需要加上vue的数据放到这个容器里面-->
        <h1>{{message}}</h1>
    </div>
    <script>
        let vm = new Vue({    // 声明vue的方法
            el:'#app',      // 只能叫el 后面写的是容器的id
            data:{        // 只能叫data, 里面是容器中需要的数据
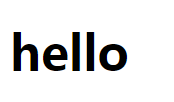
                message:'hello'
            }
        })
    </script>
</body>
</html>
案例样式

2. MVVM(Model-View-ViewModel)
`Model` 指代的就是vue对象的data属性里面的数据。这里的数据要显示到页面中。

`View`  指代的就是vue中数据要显示的HTML页面,在vue中,也称之为“视图模板” 。

`ViewModel ` 指代的是vue.js中我们编写代码时的vm对象了,它是vue.js的核心,负责连接 View 和 Model,保证视图和数据的一致性,
  所以前面代码中,data里面的数据被显示中p标签中就是vm对象自动完成的。
下面的html代码我只复制body里面的内容,head和上一个都一样
<body>
    <div id="box">
        <!--在双标签中显示数据需要用{{ }}来完成,双标签就是像<p></p>这种的-->
        {{message}}
        <!--这种单标签要想在输入框中显示vue的数据,需要用v-model,这个是固定写法-->
        <input type="text" v-model="message">
        <p></p>
    </div>
    <script>
        let vm = new Vue({
            el:'#box',
            data:{
                message:'hello Vue'
            }
        })
    </script>
</body>
案例样式

<body>
    <div class="app">
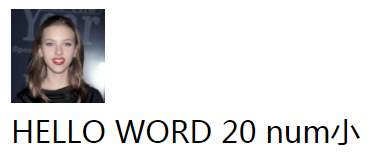
        <span v-html="img"></span>  <!--输出html代码,识别标签,如果不写,会按照字符串输出-->
        <br>
        <!--双括号中支持使用js代码,但不建议写复杂代码-->
        {{message.toUpperCase()}}  <!--变成大写-->
        {{num+10}}
        {{num < num2 ? 'num小':'num2大'}}  <!--三元运算-->
    </div>
    <script>
        let vm = new Vue({
            el:'.app',
            data:{
                img:'<img src="images/sjl.jpg" style="width: 50px;height: 50px;">',
                message:'hello word',
                num:10,
                num2:15,
            }
        })
    </script>
</body>
案例样式

4. 冒号修改属性,@绑定事件
<body>
    <div id="app">
        <p>{{p1}}</p>
        <img v-bind:src="img" width="100">  <!--也可以简写,直接冒号-->
        <img :src="img" width="100">  <!--冒号是修改属性值,这里是给img添加100宽度-->
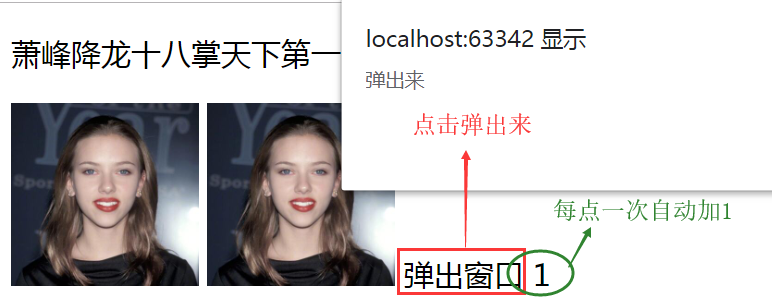
        <span v-on:click="func">弹出窗口</span>
        <span @click="func2">{{num}}</span>  <!--@符号绑定事件-->
    </div>
    <script>
        let vm = new Vue({
            el:'#app',
            data:{
                p1:'萧峰降龙十八掌天下第一',
                img:'images/sjl.jpg',
                num:0
            },
            methods:{
                func:function () {
                    alert('弹出来')  //点击上边'弹出窗口'执行这个事件
                },
                func2:function () {
                    // this指的是vm,每当点击num的时候,都加1
                    this.num+=1;
                }
            }
        })
    </script>
</body>
案例样式

5. 指令事件绑定
<body>
    <div id="box">
        <button @click="num+=1">+</button>
        <input type="text" v-model="num">
        <!--三元运算,问号前边是条件,符合条件返回冒号前面的值,括号是为了方便看-->
        <button @click="(num<=0) ? (num=1):(num-=1)">-</button>
    <script>
        var vm = new Vue({
            el:'#box',
            data:{
                num:0
            }
        })
    </script>
</body>
案例样式

6. 控制标签class

<!DOCTYPE html>
<html lang="en">
<head>
    <meta charset="UTF-8">
    <title>控制标签class名</title>
    <script src="js/vue.js"></script>
    <style>
        .box1 {color: red;border: 1px solid black;}
        .box2 {background-color: orange;font-size: 32px;}
    </style>
</head>
<body>
<div id="box">
    <!--添加一个类名,值是一个对象
    {类名:布尔值}
    -->
    <p :class="{box1:myclass}">降龙十八掌</p>
    <p @click='func' :class="{box1:myclass2,box2:myclass3}">降龙十八掌</p>
</div>
<script>
    var vm = new Vue({
        el: '#box',
        data: {
            myclass: true,
            myclass2: false,  // 如果为false,则不会添加对象属性作为样式
            myclass3: true,
        },
        methods: {
            func: function () {  // 要注意点击事件函数的格式
                this.myclass3 = !this.myclass3;
            }
        }
    })
</script>
<style>
    .box4 {background-color: saddlebrown;}
    .box5 {color: green;}
</style>
<div id="app">
    <button @click="mycls.box4=!mycls.box4 ">改变背景</button>
    <button @click="mycls.box5=!mycls.box5 ">改变字体颜色</button>
    <p :class="mycls">凌波微步</p>
</div>
<script>
    let vm2 = new Vue({
        el: '#app',
        data: {
            mycls: {
                box4: true,
                box5: true
            },
        }
    })
</script>

<!--批量给元素增加class样式类-->
<style>
    .box6 {background-color: saddlebrown;}
    .box7 {color: green;}
    .box8 {border: 1px solid black;}
</style>
<div id="app2">
    <p :class="[mycls1,mycls2]">北冥神功</p>
</div>

<script>
    let vm3 = new Vue({
        el:'#app2',
        data:{
            mycls1:{
                box6:true,
                box7:true,
            },
            mycls2:{
                box8:true,
            }
        }
    })

</script>
</body>
</html>
7. 控制标签的style

<body>
<div id="box">
    <!--控制行内样式
    :style='{color:样式值1,fontSize:样式值2}' # 样式值就是一个data里面保存的变量,vue里面需要写驼峰体,不能写成font-size
    -->
    <p :style="{color:mycolor,backgroundColor:mybg}">降龙十八掌</p>
</div>
<script>
    let vm = new Vue({
        el: '#box',
        data: {
            mycolor:'red',
            mybg:'yellow'
        }
    })
</script>

<div id="box2">
    <p :style="mystyle">凌波微步</p>
</div>
<script>
    let vm1 = new Vue({
        el: '#box2',
        data: {
            mystyle:{
                color:'red',
                border:'1px solid black'
            }
        }
    })
</script>
</body>
8. 选项卡

<!DOCTYPE html>
<html lang="en">
<head>
    <meta charset="UTF-8">
    <title>选项卡</title>
    <script src="js/vue.js"></script>
    <style>
        #card{
            width: 500px;
            height: 350px;
        }
        .title{
            height: 50px;
        }
        .title span{
            width: 100px;
            height: 50px;
            background-color: #ccc;
            display: inline-block;
            line-height: 50px;  /* 使文本内容上下居中 */
            text-align: center;
        }
        .content .list{
            width: 500px;
            height: 300px;
            background-color: yellow;
            display: none;
        }
        .content .active{
            display: block;
        }
        .title .current{
            background-color: yellow;
        }
    </style>
</head>
<body>
    <div id="card">
        <div class='title'>
            <span @click="num=0" :class="num==0?'current':''">斯嘉丽</span>
            <span @click="num=1" :class="num==1?'current':''">奥尔森</span>
            <span @click="num=2" :class="num==2?'current':''">古力娜扎</span>
        </div>
        <div class="content">
            <div class="list" :class="num==0?'active':''">黑寡妇</div>
            <div class="list" :class="num==1?'active':''">绯红女巫</div>
            <div class="list" :class="num==2?'active':''">轩辕剑</div>
        </div>
    </div>
    <script>
        // 当用户点击标题的时候,显示标题对应索引下标的内容
        let vm = new Vue({
            el:'#card',
            data:{
                num:0,  //默认值
            }
        })
    </script>
</body>
</html>
9. 判断渲染指令
 vue里的if判断与show方法
10.列表渲染指令

<body>
<div id="box">
    <ul>
        <!-- v-for='自定义成员变量 in 数据变量数组' ,跟python的for循环似的-->
        <li v-for="item in students">{{item}}</li>
    </ul>

    <ul>
        <!-- v-for='(成员变量,下标) in 数据变量数组'  写括号是为了方便看 -->
        <li v-for="(item,index) in students">编号:{{index+1}},姓名:{{item}}</li>
    </ul>

    <ul>
        <!-- v-for='(成员变量,下标) in 数据变量数组' object类型可以直接打点调用 -->
        <li v-for="item in goods">书名:{{item.name}},价格:{{item.price}}</li>
    </ul>
</div>

<script>
    let vm = new Vue({
        el: '#box',
        data: {
            students: ['萧峰', '虚竹', '段誉'],
            goods: [
                {'name': 'python', 'price': 80},
                {'name': 'go', 'price': 40},
                {'name': 'c', 'price': 70},
            ]
        }
    })
</script>
</body>


