Windows中 PyQt开发环境配置指南(含Pycharm下QtDesigner和pyuic详细配置)
【原创链接】:http://www.cnblogs.com/atsats/p/6545547.html
1. 安装Python3.4
运行python-3.4.4.msi,安装提示完成安装
网盘:http://pan.baidu.com/s/1pLFGTOB
2. 安装PyQt库
运行PyQt5-5.5-gpl-Py3.4-Qt5.5.0-x32.exe (适用Win XP)
网盘:http://pan.baidu.com/s/1gfqUI5t
运行PyQt5-5.4-gpl-Py3.4-Qt5.4.0-x64.exe (适用Win7及以上)
网盘:http://pan.baidu.com/s/1dFpCSr3
3. 安装Python IDE PyCharm
3.1 运行pycharm-community-2016.3.exe
网盘:http://pan.baidu.com/s/1i48lvs5
3.2 运行PyCharm 软件,进行扩展工具配置,便于PyQt界面设计
3.4.5 PyCharm界面字体配置
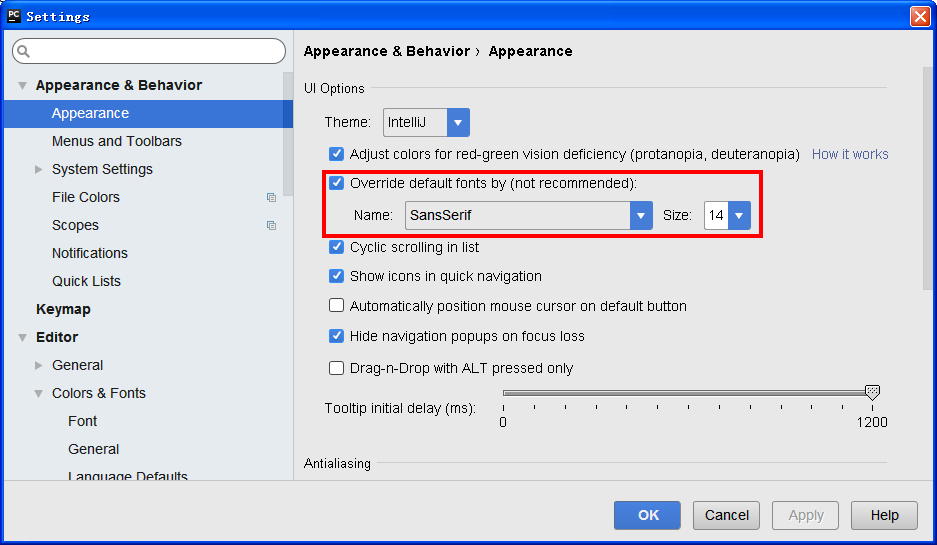
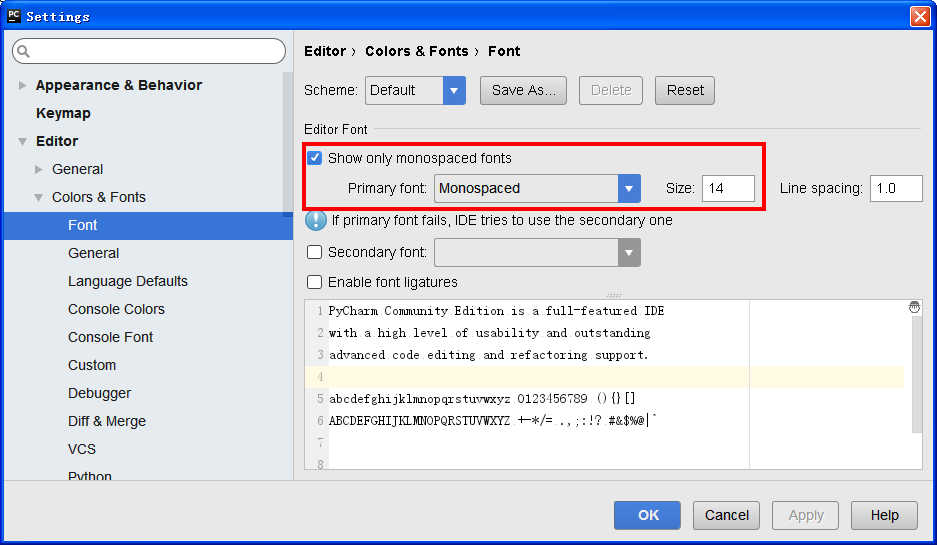
3.2.2. 主菜单File -> Settings,打开配置窗口Settings

3.3.3.扩展工具QtDesigner配置
针对.ui 文件打开QtDesigner用于设计界面布局
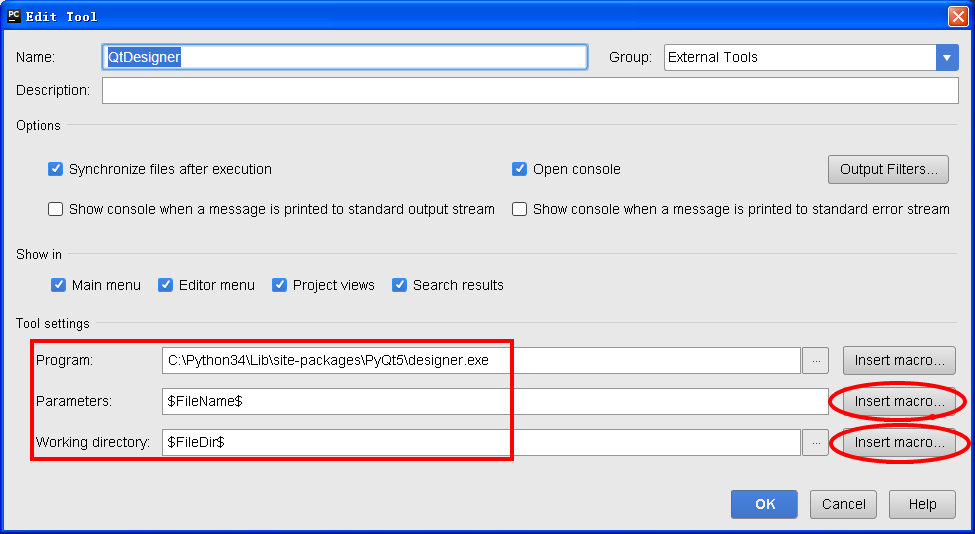
Tool settings
Program: C:\Python34\Lib\site-packages\PyQt5\designer.exe (在自己Python安装目录下找一下)
Parameters: $FileName$ (可以拷贝,或者点击按钮“Insert macro...” 选择合适的macros)
Working directory: $FileDir$ (可以拷贝,或者点击按钮“Insert macro...” 选择合适的macros)
3.3.4.扩展工具PyUID配置
用于将.ui 文件转换成.py文件
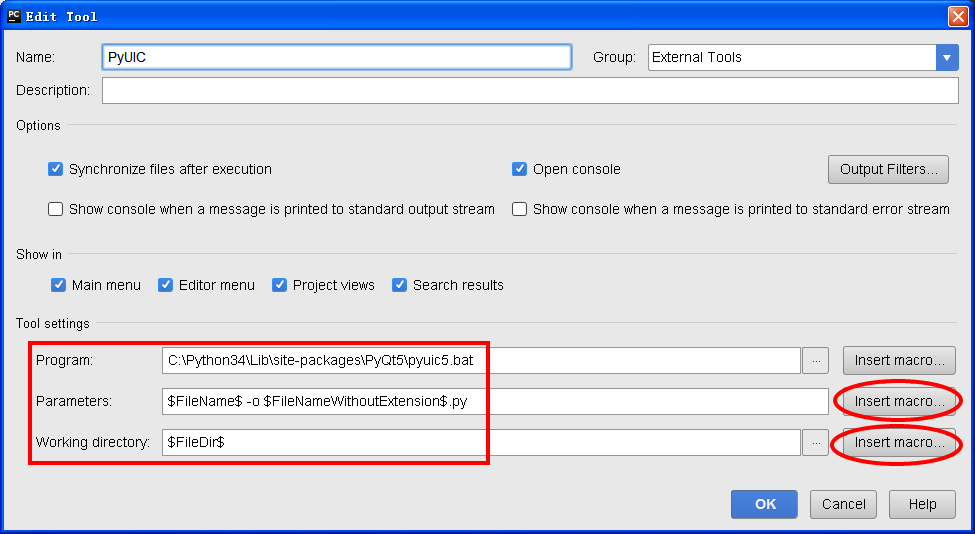
Tool setting
Program: C:\Python34\Lib\site-packages\PyQt5\pyuic5.bat (在自己Python安装目录下找一下)
Parameters: $FileName$ -o $FileNameWithoutExtension$.py (可以拷贝,或者点击按钮“Insert macro...” 选择合适的macros)
Working directory: $FileDir$ (可以拷贝,或者点击按钮“Insert macro...” 选择合适的macros)
3.3.5 使用方法
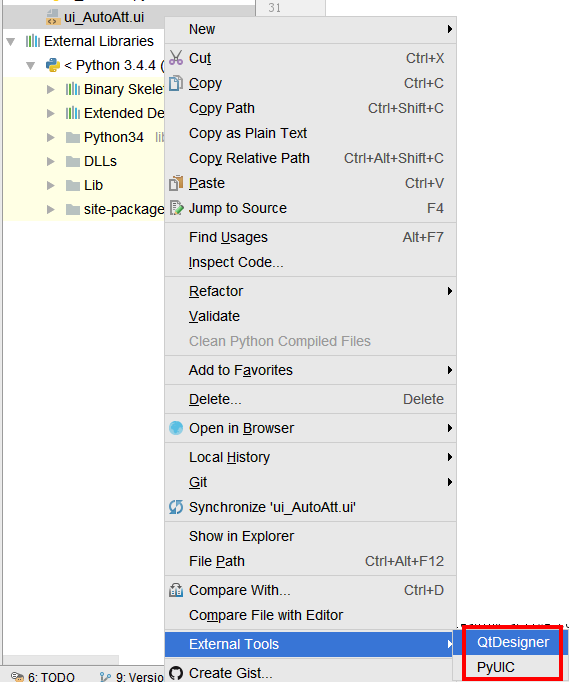
选中QtDesginer的 .ui文件,右键选中相应扩展工具。
