基于SpringBoot从零构建博客网站 - 分页显示文章列表功能
显示文章列表一般都是采用分页显示,比如每页10篇文章显示。这样就不用每次就将所有的文章查询出来,而且当文章数量特别多的时候,如果一次性查询出来很容易出现OOM异常。
后台的分页插件采用的是mybatis-plus自带的,前端显示时利用boostrap的风格显示。
1、开启分页插件
对于mybatis-plus框架,开启分页插件是很简单的,只需要加一个配置类,即:
/**
 * Mybatis Plus分页配置类
 *
 * @author lzj
 * @since 1.0
 * @date [2019-08-11]
 */
@EnableTransactionManagement
@Configuration
@MapperScan("com.swnote.*.dao.*")
public class MybatisPlusConfig {

    /**
     * 分页插件
     */
    @Bean
    public PaginationInterceptor paginationInterceptor() {
        PaginationInterceptor paginationInterceptor = new PaginationInterceptor();
        return paginationInterceptor;
    }
}
这样就将分页插件配置好了。
2、文章分页后台逻辑
mybatis-plus框架很友好的提供好分页查询的功能,为此在后台可以直接调用,核心的逻辑为:
/**
 * 分页加载出文章列表页面
 *
 * @param code
 * @param pageIndex
 * @param model
 * @param session
 * @return
 */
@RequestMapping(value = "/u/{code}/article/{pageIndex}", method = RequestMethod.GET)
public String list(@PathVariable("code") String code, @PathVariable("pageIndex") int pageIndex, Model model, HttpSession session) throws Exception {
    // 根据code获取用户信息
    User user = userService.getByCode(code);
    if (user == null) {
        log.error("code:" + code + ",不存在的用户");
        throw new Exception("不存在的用户");
    }
    String userId = user.getUserId();

    // 获取登录信息
    User tempUser = (User) session.getAttribute(Const.SESSION_USER);

    // 判断是否是该用户的笔记集
    boolean flag = false;
    if (tempUser != null && userId.equals(tempUser.getUserId())) {
        flag = true;
    }

    // 构建查询条件
    Map<String, Object> params = new HashMap<String, Object>();
    params.put("userId", userId);
    if (!flag) {
        params.put("status", Article.STATUS_SUCCESS);
    }

    // 分页查询
    IPage<Article> articles = articleService.page(new Page<Article>(pageIndex, 10), new QueryWrapper<Article>().allEq(params).orderByDesc("publishTime"));

    // 获取文章相关的信息
    List<Article> list = articles.getRecords();
    if (list != null && !list.isEmpty()) {
        list.stream().forEach(article -> {
            // 作者用户ID,获取用户信息
            User articleUser = userService.getById(article.getUserId());
            if (StringUtils.isEmpty(articleUser.getRealName())) {
                article.setUserName(articleUser.getLoginName());
            } else {
                article.setUserName(articleUser.getRealName());
            }

            // 根据专栏ID,获取专栏信息
            if (!StringUtils.isEmpty(article.getGroupId())) {
                Group articleGroup = groupService.getById(article.getGroupId());
                article.setGroupName(articleGroup.getName());
            }
        });
    }

    model.addAttribute("user", user);
    model.addAttribute("articles", articles);
    return Const.BASE_INDEX_PAGE + "blog/article/list";
}
里面最主要的分页查询代码为:
// 分页查询
IPage<Article> articles = articleService.page(new Page<Article>(pageIndex, 10), new QueryWrapper<Article>().allEq(params).orderByDesc("publishTime"));
3、文章分页前台逻辑
其实分页前台逻辑主要是将分页的页码生成好,在此罗列出生成分页页码的核心代码如下:
<#assign articlePages = (articles.total / articles.size)?ceiling>
<#if articlePages gt 1>
    <div class="col-md-12" align="center">
        <span class="pages-total">${articles.total}条 共${articlePages}页</span>
        <ul class="pagination">
            <#if articles.current == 1>
                <li class="disabled"><a href="javascript:void(0);">上一页</a></li>
            <#else>
                <#assign pre = articles.current - 1>
                <li><a href="${rc.contextPath}/u/${user.code}/article/${pre}">上一页</a></li>
            </#if>

            <#if articles.current == articlePages>
                <li class="disabled"><a href="javascript:void(0);">下一页</a></li>
            <#else>
                <#assign next = articles.current + 1>
                <li><a href="${rc.contextPath}/u/${user.code}/article/${next}">下一页</a></li>
            </#if>
        </ul>
    </div>
</#if>
这个mybatis-plus框架生成分页数据好像生成的总页数没有传过来,所以在前台将总页数计算出来,即:
<#assign articlePages = (articles.total / articles.size)?ceiling>
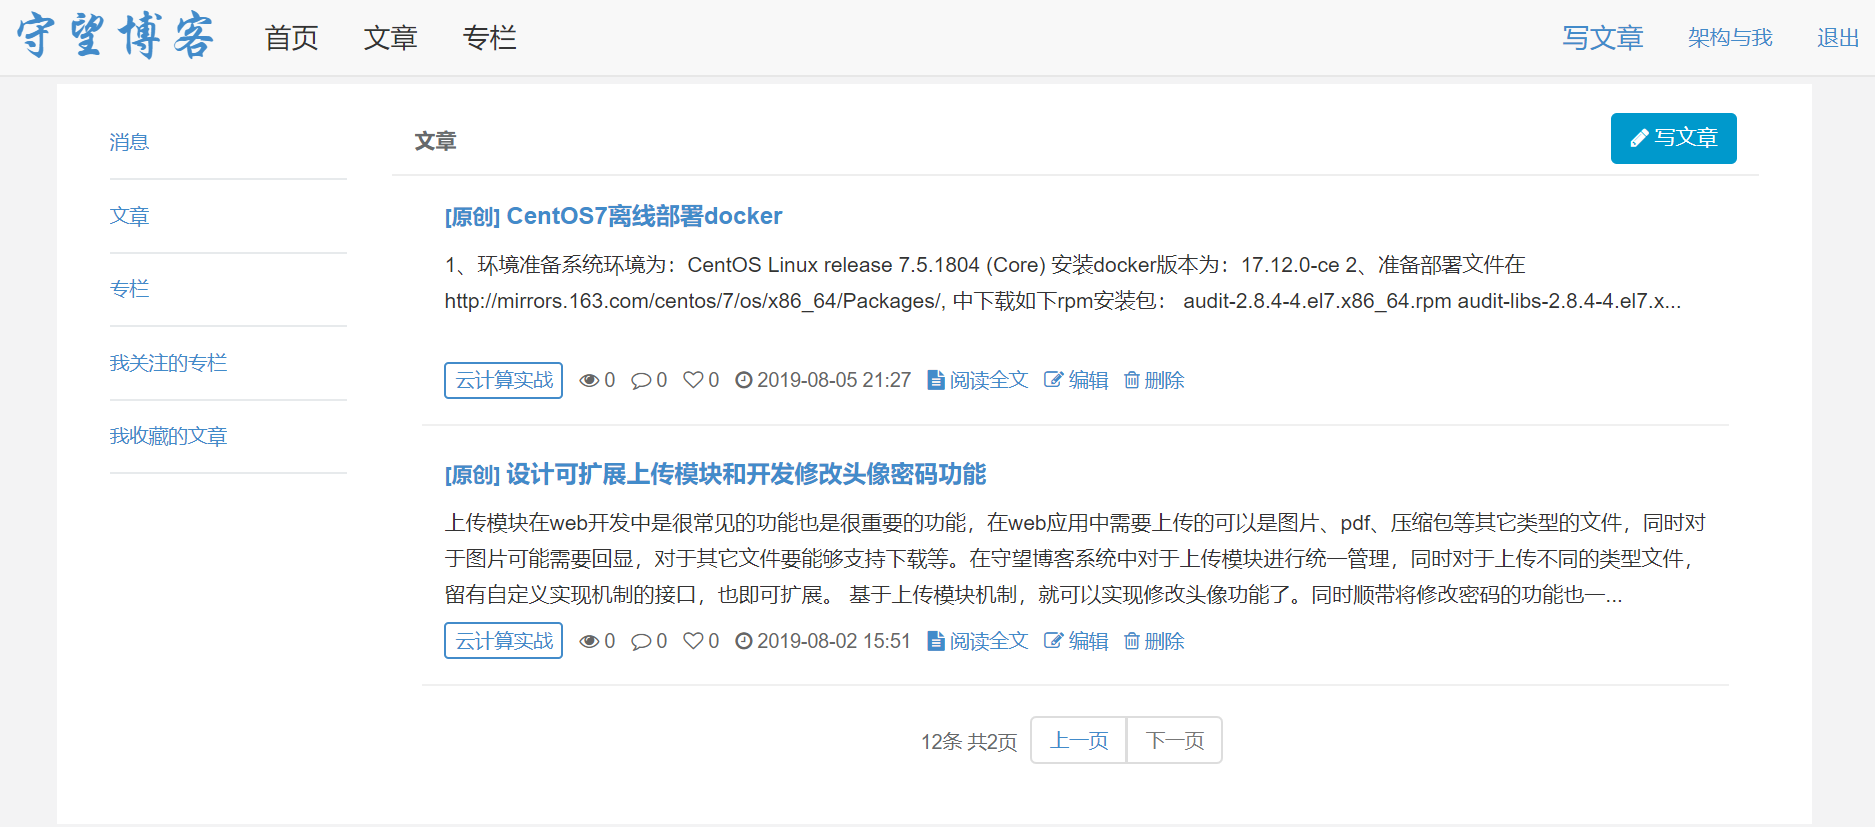
前台文章列表展示风格如下:

关注我
以你最方便的方式关注我:
微信公众号:


