
Spark与Iceberg整合写操作-没有测试
1.9 Flink1.13.5与Iceberg0.12.1整合
目前Flink支持使用DataStream API 和SQL API 方式实时读取和写入Iceberg表,建议大家使用SQL API 方式实时读取和写入Iceberg表。
Iceberg 支持的Flink版本为1.11.x版本以上,目前经过测试Iceberg版本与Flink的版本对应关系如下:
- Flink1.11.x版本与Iceberg0.11.1版本匹配。
- Flink1.12.x~Flink1.13.x 版本与Iceberg0.12.1版本匹配,SQL API有一些bug。
- Flink1.14.x版本与Iceberg0.12.1版本能整合但是有一些小bug,例如实时读取Iceberg中的数据有bug。
以下Flink与Iceberg整合使用的Flink版本为1.13.5,Iceberg版本为0.12.1版本。后期使用SQL API 操作时使用的Flink版本为1.11.6,Iceberg版本为0.11.1版本。
1.9.1 DataStream API 操作Iceberg
1.9.1.1 DataStream API 实时写入Iceberg表
DataStream Api方式操作Iceberg方式目前仅支持Java Api。使用DataStream API 实时写入Iceberg表具体操作如下:
- 首先在Maven中导入以下依赖:
<properties>
  <project.build.sourceEncoding>UTF-8</project.build.sourceEncoding>
  <maven.compiler.source>1.8</maven.compiler.source>
  <maven.compiler.target>1.8</maven.compiler.target>
  <!-- flink 1.12.x -1.13.x  版本与Iceberg 0.12.1 版本兼容 ,不能与Flink 1.14 兼容-->
  <flink.version>1.13.5</flink.version>
  <!--<flink.version>1.12.1</flink.version>-->
  <!--<flink.version>1.14.2</flink.version>-->
  <!-- flink 1.11.x 与Iceberg 0.11.1 合适-->
  <!--<flink.version>1.11.6</flink.version>-->
  <hadoop.version>3.2.2</hadoop.version>
</properties>

<dependencies>
    <dependency>
        <groupId>com.alibaba.ververica</groupId>
        <artifactId>ververica-connector-iceberg</artifactId>
        <version>1.13-vvr-4.0.7</version>
    </dependency>
    <!-- Flink 操作Iceberg 需要的Iceberg依赖 -->
  <dependency>
    <groupId>org.apache.iceberg</groupId>
    <artifactId>iceberg-flink-runtime</artifactId>
    <version>0.12.1</version>
    <!--<version>0.11.1</version>-->
  </dependency>

  <!-- java 开发Flink 所需依赖 -->
  <dependency>
    <groupId>org.apache.flink</groupId>
    <artifactId>flink-java</artifactId>
    <version>${flink.version}</version>
  </dependency>
  <dependency>
    <groupId>org.apache.flink</groupId>
    <artifactId>flink-streaming-java_2.11</artifactId>
    <version>${flink.version}</version>
  </dependency>

  <dependency>
    <groupId>org.apache.flink</groupId>
    <artifactId>flink-clients_2.11</artifactId>
    <version>${flink.version}</version>
  </dependency>

  <dependency>
    <groupId>org.apache.flink</groupId>
    <artifactId>flink-streaming-scala_2.11</artifactId>
    <version>${flink.version}</version>
  </dependency>

  <!-- Flink Kafka连接器的依赖 -->
  <dependency>
    <groupId>org.apache.flink</groupId>
    <artifactId>flink-connector-kafka_2.11</artifactId>
    <version>${flink.version}</version>
  </dependency>
  <dependency>
    <groupId>org.apache.flink</groupId>
    <artifactId>flink-connector-base</artifactId>
    <version>${flink.version}</version>
  </dependency>

  <!-- 读取hdfs文件需要jar包-->
  <dependency>
    <groupId>org.apache.hadoop</groupId>
    <artifactId>hadoop-client</artifactId>
    <version>${hadoop.version}</version>
  </dependency>

  <!-- Flink SQL & Table-->
  <dependency>
    <groupId>org.apache.flink</groupId>
    <artifactId>flink-table-runtime-blink_2.11</artifactId>
    <version>${flink.version}</version>
  </dependency>

  <dependency>
    <groupId>org.apache.flink</groupId>
    <artifactId>flink-table</artifactId>
    <version>${flink.version}</version>
  </dependency>

  <dependency>
    <groupId>org.apache.flink</groupId>
    <artifactId>flink-table-common</artifactId>
    <version>${flink.version}</version>
  </dependency>

  <dependency>
    <groupId>org.apache.flink</groupId>
    <artifactId>flink-table-api-java</artifactId>
    <version>${flink.version}</version>
  </dependency>
  <dependency>
    <groupId>org.apache.flink</groupId>
    <artifactId>flink-table-api-java-bridge_2.11</artifactId>
    <version>${flink.version}</version>
  </dependency>

  <dependency>
    <groupId>org.apache.flink</groupId>
    <artifactId>flink-table-planner_2.11</artifactId>
    <version>${flink.version}</version>
  </dependency>

  <dependency>
    <groupId>org.apache.flink</groupId>
    <artifactId>flink-table-planner-blink_2.11</artifactId>
    <version>${flink.version}</version>
  </dependency>

  <dependency>
    <groupId>junit</groupId>
    <artifactId>junit</artifactId>
    <version>4.11</version>
    <scope>test</scope>
   </dependency>

  <!-- log4j 和slf4j 包,如果在控制台不想看到日志,可以将下面的包注释掉-->
  <dependency>
  <groupId>org.slf4j</groupId>
  <artifactId>slf4j-log4j12</artifactId>
  <version>1.7.25</version>
  <scope>test</scope>
  </dependency>
  <dependency>
  <groupId>log4j</groupId>
  <artifactId>log4j</artifactId>
  <version>1.2.17</version>
  </dependency>
  <dependency>
  <groupId>org.slf4j</groupId>
  <artifactId>slf4j-api</artifactId>
  <version>1.7.25</version>
  </dependency>
  <dependency>
  <groupId>org.slf4j</groupId>
  <artifactId>slf4j-nop</artifactId>
  <version>1.7.25</version>
  <scope>test</scope>
  </dependency>
  <dependency>
  <groupId>org.slf4j</groupId>
  <artifactId>slf4j-simple</artifactId>
  <version>1.7.5</version>
  </dependency>
</dependencies>
- 编写代码使用DataStream API将Kafka数据写入到Iceberg表
import com.google.common.collect.ImmutableMap;
import org.apache.flink.api.common.eventtime.WatermarkStrategy;
import org.apache.flink.api.common.functions.MapFunction;
import org.apache.flink.api.common.serialization.SimpleStringSchema;
import org.apache.flink.connector.kafka.source.KafkaSource;
import org.apache.flink.connector.kafka.source.enumerator.initializer.OffsetsInitializer;
import org.apache.flink.streaming.api.datastream.DataStreamSource;
import org.apache.flink.streaming.api.datastream.SingleOutputStreamOperator;
import org.apache.flink.streaming.api.environment.StreamExecutionEnvironment;
import org.apache.flink.table.data.GenericRowData;
import org.apache.flink.table.data.RowData;
import org.apache.hadoop.conf.Configuration;
import org.apache.iceberg.*;
import org.apache.iceberg.catalog.Catalog;
import org.apache.iceberg.catalog.TableIdentifier;
import org.apache.iceberg.flink.TableLoader;
import org.apache.flink.table.data.StringData;
import org.apache.iceberg.flink.sink.FlinkSink;
import org.apache.iceberg.hadoop.HadoopCatalog;
import org.apache.iceberg.types.Types;
import java.util.Map;

/**
 * 使用DataStream Api 向Iceberg 表写入数据
 */
public class StreamAPIWriteIceberg {
    public static void main(String[] args) throws Exception {
        StreamExecutionEnvironment env = StreamExecutionEnvironment.getExecutionEnvironment();
        //1.必须设置checkpoint ,Flink向Iceberg中写入数据时当checkpoint发生后,才会commit数据。
        env.enableCheckpointing(5000);

        //2.读取Kafka 中的topic 数据
        KafkaSource<String> source = KafkaSource.<String>builder()
                .setBootstrapServers("node1:9092,node2:9092,node3:9092")
                .setTopics("flink-iceberg-topic")
                .setGroupId("my-group-id")
                .setStartingOffsets(OffsetsInitializer.latest())
                .setValueOnlyDeserializer(new SimpleStringSchema())
                .build();
        DataStreamSource<String> kafkaSource = env.fromSource(source, WatermarkStrategy.noWatermarks(), "Kafka Source");

        //3.对数据进行处理,包装成RowData 对象,方便保存到Iceberg表中。
        SingleOutputStreamOperator<RowData> dataStream = kafkaSource.map(new MapFunction<String, RowData>() {
            @Override
            public RowData map(String s) throws Exception {
                System.out.println("s = "+s);
                String[] split = s.split(",");
                GenericRowData row = new GenericRowData(4);
                row.setField(0, Integer.valueOf(split[0]));
                row.setField(1, StringData.fromString(split[1]));
                row.setField(2, Integer.valueOf(split[2]));
                row.setField(3, StringData.fromString(split[3]));
                return row;
            }
        });

        //4.创建Hadoop配置、Catalog配置和表的Schema,方便后续向路径写数据时可以找到对应的表
        Configuration hadoopConf = new Configuration();
        Catalog catalog = new HadoopCatalog(hadoopConf,"hdfs://mycluster/flink_iceberg/");

        //配置iceberg 库名和表名
        TableIdentifier name =
                TableIdentifier.of("icebergdb", "flink_iceberg_tbl");

        //创建Icebeng表Schema
        Schema schema = new Schema(
                Types.NestedField.required(1, "id", Types.IntegerType.get()),
                Types.NestedField.required(2, "nane", Types.StringType.get()),
                Types.NestedField.required(3, "age", Types.IntegerType.get()),
                Types.NestedField.required(4, "loc", Types.StringType.get()));

        //如果有分区指定对应分区,这里“loc”列为分区列,可以指定unpartitioned 方法不设置表分区
//        PartitionSpec spec = PartitionSpec.unpartitioned();
        PartitionSpec spec = PartitionSpec.builderFor(schema).identity("loc").build();

        //指定Iceberg表数据格式化为Parquet存储
        Map<String, String> props =
                ImmutableMap.of(TableProperties.DEFAULT_FILE_FORMAT, FileFormat.PARQUET.name());
        Table table = null;

        // 通过catalog判断表是否存在,不存在就创建,存在就加载
        if (!catalog.tableExists(name)) {
            table = catalog.createTable(name, schema, spec, props);
        }else {
            table = catalog.loadTable(name);
        }

        TableLoader tableLoader = TableLoader.fromHadoopTable("hdfs://mycluster/flink_iceberg/icebergdb/flink_iceberg_tbl", hadoopConf);

        //5.通过DataStream Api 向Iceberg中写入数据
        FlinkSink.forRowData(dataStream)
                //这个 .table 也可以不写,指定tableLoader 对应的路径就可以。
                .table(table)
                .tableLoader(tableLoader)
                //默认为false,追加数据。如果设置为true 就是覆盖数据
                .overwrite(false)
                .build();

        env.execute("DataStream Api Write Data To Iceberg");
    }
}
以上代码有如下几个注意点:
- 需要设置Checkpoint,Flink向Iceberg中写入Commit数据时,只有Checkpoint成功之后才会Commit数据,否则后期在Hive中查询不到数据。
- 读取Kafka数据后需要包装成RowData或者Row对象,才能向Iceberg表中写出数据。写出数据时默认是追加数据,如果指定overwrite就是全部覆盖数据。
- 在向Iceberg表中写数据之前需要创建对应的Catalog、表Schema,否则写出时只指定对应的路径会报错找不到对应的Iceberg表。
- 不建议使用DataStream API 向Iceberg中写数据,建议使用SQL API。
- 在Kafka 中创建代码中指定的“flink-iceberg-topic”并启动代码生产数据
# 在Kafka 中创建 flink-iceberg-topic topic
[root@node1 bin]# ./kafka-topics.sh  --zookeeper node3:2181,node4:2181,node5:2181  --create  --topic flink-iceberg-topic  --partitions 3 --replication-factor 3
创建好以上topic之后,启动代码,然后向topic中生产以下数据:
[root@node1 bin]#./kafka-console-producer.sh  --topic flink-iceberg-topic --broker-list node1:9092,node2:9092,node3:9092
1,zs,18,beijing
2,ls,19,shanghai
3,ww,20,beijing
4,ml,21,shanghai
可以看到在HDFS 对应的路径中保存了对应的数据:

- 通过Hive查看保存到Iceberg中的数据
启动Hive、Hive Metastore 在Hive中创建映射Iceberg的外表:
CREATE TABLE flink_iceberg_tbl  (
  id int,
  name string,
  age int,
  loc string
)
STORED BY 'org.apache.iceberg.mr.hive.HiveIcebergStorageHandler'
LOCATION 'hdfs://mycluster/flink_iceberg/icebergdb/flink_iceberg_tbl'
TBLPROPERTIES ('iceberg.catalog'='location_based_table');
注意:虽然loc是分区列,创建时忽略分区列就可以,此外映射表的路径要保持与保存Iceberg数据路径一致。
通过Hive查询对应的Iceberg表中的数据,结果如下:
hive> select * from flink_iceberg_tbl;
OK
2	ls	19	shanghai
3	ww	20	beijing
1	zs	18	beijing
4	ml	21	shanghai
1.9.1.2 DataStream API 批量/实时读取Iceberg表
DataStream API 读取Iceberg表又分为批量读取和实时读取。通过方法“streaming(true/false)”来控制。
- 批量/全量读取:
import org.apache.flink.api.common.functions.MapFunction;
import org.apache.flink.streaming.api.datastream.DataStream;
import org.apache.flink.streaming.api.environment.StreamExecutionEnvironment;
import org.apache.flink.table.data.RowData;
import org.apache.hadoop.conf.Configuration;
import org.apache.iceberg.flink.TableLoader;
import org.apache.iceberg.flink.source.FlinkSource;

/**
 * 使用DataStream Api 批量/实时 读取Iceberg 数据
 */
public class StreamAPIReadIceberg {
    public static void main(String[] args) throws Exception {
        StreamExecutionEnvironment env = StreamExecutionEnvironment.getExecutionEnvironment();

        //1.配置TableLoader
        Configuration hadoopConf = new Configuration();
        TableLoader tableLoader = TableLoader.fromHadoopTable("hdfs://mycluster/flink_iceberg/icebergdb/flink_iceberg_tbl", hadoopConf);

        //2.从Iceberg中读取全量/增量读取数据
        DataStream<RowData> batchData = FlinkSource.forRowData().env(env)
                .tableLoader(tableLoader)
                //默认为false,整批次读取,设置为true 为流式读取
                .streaming(false)
                .build();

        batchData.map(new MapFunction<RowData, String>() {
            @Override
            public String map(RowData rowData) throws Exception {
                int id = rowData.getInt(0);
                String name = rowData.getString(1).toString();
                int age = rowData.getInt(2);
                String loc = rowData.getString(3).toString();
                return id+","+name+","+age+","+loc;
            }
        }).print();

        env.execute("DataStream Api Read Data From Iceberg");

    }
}
结果如下:
- 实时读取
//当配置 streaming参数为true时就是实时读取
DataStream<RowData> batchData = FlinkSource.forRowData().env(env)
        .tableLoader(tableLoader)
        //默认为false,整批次读取,设置为true 为流式读取
        .streaming(true)
        .build();
修改以上代码并启动,向Hive 对应的Iceberg表“flink_iceberg_tbl”中插入2条数据:
#在向Hive的Iceberg表中插入数据之前需要加入以下两个包:
add jar /software/hive-3.1.2/lib/iceberg-hive-runtime-0.12.1.jar;
add jar /software/hive-3.1.2/lib/libfb303-0.9.3.jar;

#向Hive 中Iceberg 表插入两条数据
hive> insert into flink_iceberg_tbl values (5,'s1',30,'guangzhou'),(6,'s2',31,'tianjin');
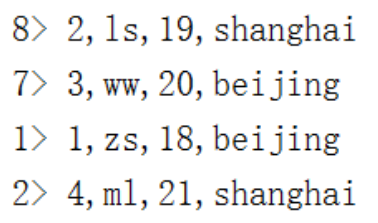
插入完成之后,可以看到Flink 控制台实时读取到对应数据
1.9.1.3 指定基于快照实时增量读取数据
以上案例我们发现Flink将表中所有数据都读取出来,我们也可以指定对应的snapshot-id 决定基于哪些数据增量读取数据。
DataStream<RowData> batchData = FlinkSource.forRowData().env(env)
        .tableLoader(tableLoader)
        //基于某个快照实时增量读取数据,快照需要从元数据中获取
        .startSnapshotId(4226332606322964975L)
        //默认为false,整批次读取,设置为true 为流式读取
        .streaming(true)
        .build();
结果只读取到指定快照往后的数据,如下:

1.9.1.4 合并data files
Iceberg提供Api将小文件合并成大文件,可以通过Flink 批任务来执行。Flink中合并小文件与Spark中小文件合并完全一样。
代码如下:
import org.apache.flink.api.java.ExecutionEnvironment;
import org.apache.hadoop.conf.Configuration;
import org.apache.iceberg.Table;
import org.apache.iceberg.actions.RewriteDataFilesActionResult;
import org.apache.iceberg.catalog.Catalog;
import org.apache.iceberg.catalog.TableIdentifier;
import org.apache.iceberg.flink.TableLoader;
import org.apache.iceberg.flink.actions.Actions;
import org.apache.iceberg.hadoop.HadoopCatalog;

/**
 *  可以通过提交Flink批量任务来合并Data Files 文件。
 */
public class RewrietDataFiles {
    public static void main(String[] args) {

        ExecutionEnvironment env = ExecutionEnvironment.getExecutionEnvironment();

        //1.配置TableLoader
        Configuration hadoopConf = new Configuration();

        //2.创建Hadoop配置、Catalog配置和表的Schema,方便后续向路径写数据时可以找到对应的表
        Catalog catalog = new HadoopCatalog(hadoopConf,"hdfs://mycluster/flink_iceberg/");

        //3.配置iceberg 库名和表名并加载表
        TableIdentifier name =
                TableIdentifier.of("icebergdb", "flink_iceberg_tbl");
        Table table = catalog.loadTable(name);

        //4..合并 data files 小文件
        RewriteDataFilesActionResult result = Actions.forTable(table)
                .rewriteDataFiles()
                //默认 512M ,可以手动通过以下指定合并文件大小,与Spark中一样。
                .targetSizeInBytes(536870912L)
                .execute();
    }
}
1.9.2 SQL API操作Iceberg
Flink SQL 在操作Iceberg时,对应的版本为Flink 1.11.x 与Iceberg0.11.1版本,目前,Flink1.14.2版本与Iceberg0.12.1版本对于SQL API 来说兼容有问题,所以这里使用Flink1.11.6版本与Iceberg0.11.1版本来演示Flink SQL API 操作Iceberg。
1.9.2.1 SQL API 创建Iceberg表并写入数据
- 创建新项目,导入如下maven依赖包
<properties>
  <project.build.sourceEncoding>UTF-8</project.build.sourceEncoding>
  <maven.compiler.source>1.8</maven.compiler.source>
  <maven.compiler.target>1.8</maven.compiler.target>
  <!-- flink 1.11.x 与Iceberg 0.11.1 合适-->
  <flink.version>1.11.6</flink.version>
  <hadoop.version>3.2.2</hadoop.version>
</properties>

<dependencies>
  <!-- Flink 操作Iceberg 需要的Iceberg依赖 -->
  <dependency>
    <groupId>org.apache.iceberg</groupId>
    <artifactId>iceberg-flink-runtime</artifactId>
    <version>0.11.1</version>
  </dependency>

  <!-- java 开发Flink 所需依赖 -->
  <dependency>
    <groupId>org.apache.flink</groupId>
    <artifactId>flink-java</artifactId>
    <version>${flink.version}</version>
  </dependency>
  <dependency>
    <groupId>org.apache.flink</groupId>
    <artifactId>flink-streaming-java_2.11</artifactId>
    <version>${flink.version}</version>
  </dependency>

  <dependency>
    <groupId>org.apache.flink</groupId>
    <artifactId>flink-clients_2.11</artifactId>
    <version>${flink.version}</version>
  </dependency>

  <dependency>
    <groupId>org.apache.flink</groupId>
    <artifactId>flink-streaming-scala_2.11</artifactId>
    <version>${flink.version}</version>
  </dependency>

  <!-- Flink Kafka连接器的依赖 -->
  <dependency>
    <groupId>org.apache.flink</groupId>
    <artifactId>flink-connector-kafka_2.11</artifactId>
    <version>${flink.version}</version>
  </dependency>
  <dependency>
    <groupId>org.apache.flink</groupId>
    <artifactId>flink-csv</artifactId>
    <version>${flink.version}</version>
  </dependency>

  <!-- 读取hdfs文件需要jar包-->
  <dependency>
    <groupId>org.apache.hadoop</groupId>
    <artifactId>hadoop-client</artifactId>
    <version>${hadoop.version}</version>
  </dependency>

  <!-- Flink SQL & Table-->
  <dependency>
    <groupId>org.apache.flink</groupId>
    <artifactId>flink-table-runtime-blink_2.11</artifactId>
    <version>${flink.version}</version>
  </dependency>

  <dependency>
    <groupId>org.apache.flink</groupId>
    <artifactId>flink-table</artifactId>
    <version>${flink.version}</version>
  </dependency>

  <dependency>
    <groupId>org.apache.flink</groupId>
    <artifactId>flink-table-common</artifactId>
    <version>${flink.version}</version>
  </dependency>

  <dependency>
    <groupId>org.apache.flink</groupId>
    <artifactId>flink-table-api-java</artifactId>
    <version>${flink.version}</version>
  </dependency>
  <dependency>
    <groupId>org.apache.flink</groupId>
    <artifactId>flink-table-api-java-bridge_2.11</artifactId>
    <version>${flink.version}</version>
  </dependency>

  <dependency>
    <groupId>org.apache.flink</groupId>
    <artifactId>flink-table-planner_2.11</artifactId>
    <version>${flink.version}</version>
  </dependency>

  <dependency>
    <groupId>org.apache.flink</groupId>
    <artifactId>flink-table-planner-blink_2.11</artifactId>
    <version>${flink.version}</version>
  </dependency>


  <dependency>
    <groupId>junit</groupId>
    <artifactId>junit</artifactId>
    <version>4.11</version>
    <scope>test</scope>
  </dependency>

  <!-- log4j 和slf4j 包,如果在控制台不想看到日志,可以将下面的包注释掉-->
  <dependency>
    <groupId>org.slf4j</groupId>
    <artifactId>slf4j-log4j12</artifactId>
    <version>1.7.25</version>
    <scope>test</scope>
  </dependency>
  <dependency>
    <groupId>log4j</groupId>
    <artifactId>log4j</artifactId>
    <version>1.2.17</version>
  </dependency>
  <dependency>
    <groupId>org.slf4j</groupId>
    <artifactId>slf4j-api</artifactId>
    <version>1.7.25</version>
  </dependency>
  <dependency>
    <groupId>org.slf4j</groupId>
    <artifactId>slf4j-nop</artifactId>
    <version>1.7.25</version>
    <scope>test</scope>
  </dependency>
  <dependency>
    <groupId>org.slf4j</groupId>
    <artifactId>slf4j-simple</artifactId>
    <version>1.7.5</version>
  </dependency>
</dependencies>
- 编写Flink SQL 创建Iceberg表并写入数据
StreamExecutionEnvironment env = StreamExecutionEnvironment.getExecutionEnvironment();
        StreamTableEnvironment tblEnv = StreamTableEnvironment.create(env);

        env.enableCheckpointing(1000);

        //1.创建Catalog
        tblEnv.executeSql("CREATE CATALOG hadoop_iceberg WITH (" +
                "'type'='iceberg'," +
                "'catalog-type'='hadoop'," +
                "'warehouse'='hdfs://mycluster/flink_iceberg')");

        //2.使用当前Catalog
        tblEnv.useCatalog("hadoop_iceberg");

        //3.创建数据库
        tblEnv.executeSql("create database iceberg_db");

        //4.使用数据库
        tblEnv.useDatabase("iceberg_db");

        //5.创建iceberg表 flink_iceberg_tbl
        tblEnv.executeSql("create table hadoop_iceberg.iceberg_db.flink_iceberg_tbl2(id int,name string,age int,loc string) partitioned by (loc)");

        //6.写入数据到表 flink_iceberg_tbl
        tblEnv.executeSql("insert into hadoop_iceberg.iceberg_db.flink_iceberg_tbl2 values (1,'zs',18,'beijing'),(2,'ls',19,'shanghai'),(3,'ww',20,'guangzhou')");
- 在Hive中映射Iceberg表并查询
在Hive中执行如下命令创建对应的Iceberg表:
#在Hive中创建Iceberg表
CREATE TABLE flink_iceberg_tbl2 (
id int,
name string,
age int,
loc string
)
STORED BY 'org.apache.iceberg.mr.hive.HiveIcebergStorageHandler'
LOCATION 'hdfs://mycluster/flink_iceberg/iceberg_db/flink_iceberg_tbl2'
TBLPROPERTIES ('iceberg.catalog'='location_based_table');
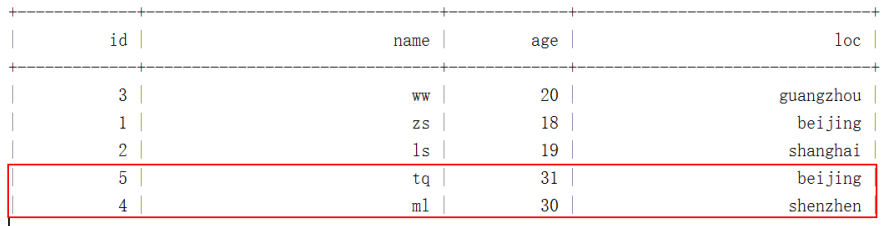
#在Hive中查询Iceberg表中的数据
hive> select * from flink_iceberg_tbl2;
OK
3 ww 20 guangzhou
1 zs 18 beijing
2 ls 19 shanghai
1.9.2.2 SQL API 批量查询Iceberg表数据
Flink SQL API 批量查询Iceberg表数据,直接查询显示即可。代码如下:
StreamExecutionEnvironment env = StreamExecutionEnvironment.getExecutionEnvironment();
StreamTableEnvironment tblEnv = StreamTableEnvironment.create(env);

env.enableCheckpointing(1000);

//1.创建Catalog
tblEnv.executeSql("CREATE CATALOG hadoop_iceberg WITH (" +
    "'type'='iceberg'," +
    "'catalog-type'='hadoop'," +
    "'warehouse'='hdfs://mycluster/flink_iceberg')");
//2.批量读取表数据
TableResult tableResult = tblEnv.executeSql("select * from hadoop_iceberg.iceberg_db.flink_iceberg_tbl2 ");

tableResult.print();
结果如下:

1.9.2.3 SQL API 实时查询Iceberg表数据
Flink SQL API 实时查询Iceberg表数据时需要设置参数“table.dynamic-table-options.enabled”为true,以支持SQL语法中的“OPTIONS”选项,代码如下:
StreamExecutionEnvironment env = StreamExecutionEnvironment.getExecutionEnvironment();
StreamTableEnvironment tblEnv = StreamTableEnvironment.create(env);

env.enableCheckpointing(1000);

Configuration configuration = tblEnv.getConfig().getConfiguration();
// 支持SQL语法中的 OPTIONS 选项
configuration.setBoolean("table.dynamic-table-options.enabled", true);

//1.创建Catalog
tblEnv.executeSql("CREATE CATALOG hadoop_iceberg WITH (" +
        "'type'='iceberg'," +
        "'catalog-type'='hadoop'," +
        "'warehouse'='hdfs://mycluster/flink_iceberg')");

//2.从Iceberg表当前快照读取所有数据,并继续增量读取数据
// streaming指定为true支持实时读取数据,monitor_interval 监控数据的间隔,默认1s
TableResult tableResult = tblEnv.executeSql("select * from hadoop_iceberg.iceberg_db.flink_iceberg_tbl2 /*+ OPTIONS('streaming'='true', 'monitor-interval'='1s')*/");

tableResult.print();StreamExecutionEnvironment env = StreamExecutionEnvironment.getExecutionEnvironment();
StreamTableEnvironment tblEnv = StreamTableEnvironment.create(env);

env.enableCheckpointing(1000);

//1.创建Catalog
tblEnv.executeSql("CREATE CATALOG hadoop_iceberg WITH (" +
    "'type'='iceberg'," +
    "'catalog-type'='hadoop'," +
    "'warehouse'='hdfs://mycluster/flink_iceberg')");
//2.批量读取表数据
TableResult tableResult = tblEnv.executeSql("select * from hadoop_iceberg.iceberg_db.flink_iceberg_tbl2 ");

tableResult.print();
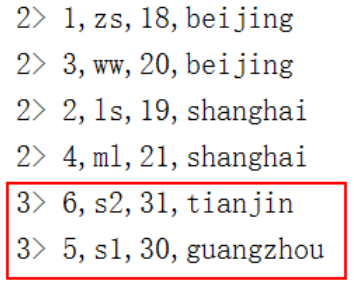
启动以上代码后,可以看到会将目前存在于Iceberg表中的数据读取出来,向Hive中对应的Iceberg表中插入数据,可以看到控制台实时获取数据。
#在向Hive的Iceberg表中插入数据之前需要加入以下两个包:
add jar /software/hive-3.1.2/lib/iceberg-hive-runtime-0.12.1.jar;
add jar /software/hive-3.1.2/lib/libfb303-0.9.3.jar;

#向Hive 中Iceberg 表插入两条数据
hive> insert into flink_iceberg_tbl2 values (4,'ml',30,'shenzhen'),(5,'tq',31,'beijing');
#在控制台可以看到实时新增数据
1.9.2.4 SQL API指定基于快照实时增量读取数据
Flink SQL API 还支持基于某个snapshot-id来继续实时获取数据,代码如下:
StreamExecutionEnvironment env = StreamExecutionEnvironment.getExecutionEnvironment();
StreamTableEnvironment tblEnv = StreamTableEnvironment.create(env);
env.enableCheckpointing(1000);

Configuration configuration = tblEnv.getConfig().getConfiguration();
// 支持SQL语法中的 OPTIONS 选项
configuration.setBoolean("table.dynamic-table-options.enabled", true);

//1.创建Catalog
tblEnv.executeSql("CREATE CATALOG hadoop_iceberg WITH (" +
      "'type'='iceberg'," +
      "'catalog-type'='hadoop'," +
      "'warehouse'='hdfs://mycluster/flink_iceberg')");

//2.从Iceberg 指定的快照继续实时读取数据,快照ID从对应的元数据中获取
//start-snapshot-id :快照ID
TableResult tableResult2 = tblEnv.executeSql("SELECT * FROM hadoop_iceberg.iceberg_db.flink_iceberg_tbl2 /*+ OPTIONS('streaming'='true', 'monitor-interval'='1s', 'start-snapshot-id'='3821550127947089987')*/");
tableResult2.print();
1.9.3 SQL API 读取Kafka数据实时写入Iceberg表
从Kafka中实时读取数据写入到Iceberg表中,操作步骤如下:
- 首先需要创建对应的Iceberg表
StreamExecutionEnvironment env = StreamExecutionEnvironment.getExecutionEnvironment();
StreamTableEnvironment tblEnv = StreamTableEnvironment.create(env);
env.enableCheckpointing(1000);
//1.创建Catalog
tblEnv.executeSql("CREATE CATALOG hadoop_iceberg WITH (" +
        "'type'='iceberg'," +
        "'catalog-type'='hadoop'," +
        "'warehouse'='hdfs://mycluster/flink_iceberg')");
//2.创建iceberg表 flink_iceberg_tbl
tblEnv.executeSql("create table hadoop_iceberg.iceberg_db.flink_iceberg_tbl3(id int,name string,age int,loc string) partitioned by (loc)");
- 编写代码读取Kafka数据实时写入Iceberg
public class ReadKafkaToIceberg {
    public static void main(String[] args) throws Exception {
        StreamExecutionEnvironment env = StreamExecutionEnvironment.getExecutionEnvironment();
        StreamTableEnvironment tblEnv = StreamTableEnvironment.create(env);
        env.enableCheckpointing(1000);

        /**
         * 1.需要预先创建 Catalog 及Iceberg表
         */
        //1.创建Catalog
        tblEnv.executeSql("CREATE CATALOG hadoop_iceberg WITH (" +
                "'type'='iceberg'," +
                "'catalog-type'='hadoop'," +
                "'warehouse'='hdfs://mycluster/flink_iceberg')");

        //2.创建iceberg表 flink_iceberg_tbl
//        tblEnv.executeSql("create table hadoop_iceberg.iceberg_db.flink_iceberg_tbl3(id int,name string,age int,loc string) partitioned by (loc)");

        //3.创建 Kafka Connector,连接消费Kafka中数据
        tblEnv.executeSql("create table kafka_input_table(" +
                " id int," +
                " name varchar," +
                " age int," +
                " loc varchar" +
                ") with (" +
                " 'connector' = 'kafka'," +
                " 'topic' = 'flink-iceberg-topic'," +
                " 'properties.bootstrap.servers'='node1:9092,node2:9092,node3:9092'," +
                " 'scan.startup.mode'='latest-offset'," +
                " 'properties.group.id' = 'my-group-id'," +
                " 'format' = 'csv'" +
                ")");

        //4.配置 table.dynamic-table-options.enabled
        Configuration configuration = tblEnv.getConfig().getConfiguration();
        // 支持SQL语法中的 OPTIONS 选项
        configuration.setBoolean("table.dynamic-table-options.enabled", true);

        //5.写入数据到表 flink_iceberg_tbl3
        tblEnv.executeSql("insert into hadoop_iceberg.iceberg_db.flink_iceberg_tbl3 select id,name,age,loc from kafka_input_table");

        //6.查询表数据
        TableResult tableResult = tblEnv.executeSql("select * from hadoop_iceberg.iceberg_db.flink_iceberg_tbl3 /*+ OPTIONS('streaming'='true', 'monitor-interval'='1s')*/");
        tableResult.print();
    }
}
启动以上代码,向Kafka topic中生产如下数据:
1,zs,18,beijing
2,ls,19,shanghai
3,ww,20,beijing
4,ml,21,shanghai
我们可以看到控制台上有对应实时数据输出,查看对应的Icberg HDFS目录,数据写入成功。

1.9.4 Flink兼容Iceberg目前不足
- Iceberg目前不支持Flink SQL 查询表的元数据信息,需要使用Java API 实现。
- Flink不支持创建带有隐藏分区的Iceberg表
- Flink不支持带有WaterMark的Iceberg表
- Flink不支持添加列、删除列、重命名列操作。
- Flink对Iceberg Connector支持并不完善。
1.10 Iceberg与Hudi对比
Iceberg和Hudi都是数据湖技术,从社区活跃度上来看,Iceberg有超越Hudi的趋势。他们有以下共同点:
- 都是构建于存储格式之上的数据组织方式
- 提供ACID能力,提供一定的事务、并行执行能力
- 提供行级别数据修改能力。
- 提供一定的Schema扩展能力,例如:新增、修改、删除列操作。
- 支持数据合并,处理小文件。
- 支持Time travel 查询快照数据。
- 支持批量和实时数据读写
Iceberg与Hudi之间不同点在于以下几点:
- Iceberg支持Parquet、avro、orc数据格式,Hudi支持Parquet和Avro格式。
- 两者数据存储和查询机制不同
Iceberg只支持一种表存储模式,就是有metadata file、manifest file和data file组成存储结构,查询时首先查找Metadata元数据进而过滤找到对应的 SnapShot对应的manifest files ,再找到对应的数据文件。Hudi支持两种表存储模式:Copy On Write(写时合并) 和Merge On Read(读时合并),查询时直接读取对应的快照数据。
- 对于处理小文件合并时,Iceberg只支持API方式手动处理合并小文件,Hudi对于小文件合并处理可以根据配置自动的执行。
- Spark与Iceberg和Hudi整合时,Iceberg对SparkSQL的支持目前来看更好。Spark与Hudi整合更多的是Spark DataFrame API 操作。
- 关于Schema方面,Iceberg Schema与计算引擎是解耦的,不依赖任何的计算引擎,而Hudi的Schema依赖于计算引擎Schema。


【推荐】国内首个AI IDE,深度理解中文开发场景,立即下载体验Trae
【推荐】编程新体验,更懂你的AI,立即体验豆包MarsCode编程助手
【推荐】抖音旗下AI助手豆包,你的智能百科全书,全免费不限次数
【推荐】轻量又高性能的 SSH 工具 IShell:AI 加持,快人一步
· 震惊!C++程序真的从main开始吗?99%的程序员都答错了
· 【硬核科普】Trae如何「偷看」你的代码?零基础破解AI编程运行原理
· 单元测试从入门到精通
· 上周热点回顾(3.3-3.9)
· winform 绘制太阳,地球,月球 运作规律